
1. Introduction
Thank you for choosing the Surakey Android 14 Car Radio. This manual provides detailed instructions for the installation, operation, and maintenance of your new car stereo system. This unit is designed for seamless integration with VW Sharan models from 2010 to 2022, offering advanced features such as wireless CarPlay, Android Auto, GPS navigation, Bluetooth connectivity, and more.
Please read this manual thoroughly before installation and use to ensure proper functionality and to prevent damage.
2. Safety Information
- Professional Installation Recommended: Due to the complexity of car electrical systems, professional installation is highly recommended to avoid damage to the unit or your vehicle.
- Power Supply: Ensure the unit is connected to a 12V DC power supply with negative grounding.
- Wiring: Do not short-circuit any wires. Incorrect wiring can cause fire or damage.
- Driving Safety: Do not operate the unit in a way that distracts you from driving. Always prioritize road safety.
- Temperature: Avoid exposing the unit to extreme temperatures or direct sunlight for prolonged periods.
- Cleaning: Use a soft, dry cloth for cleaning. Do not use abrasive cleaners or solvents.
3. Package Contents
Please check the contents of your package against the list below:
- 1 x Surakey Android 14 Car Radio Unit
- 1 x Windshield Mount Support (if applicable, check actual contents)
- 1 x GPS Antenna
- 1 x External Microphone
- 1 x Reverse Camera (if included in your specific package)
- Power and Wiring Harnesses
- USB Cables

Figure 3.1: Front view of the car radio unit with included microphone and reverse camera. This image displays the front of the 9-inch car radio unit, along with an external microphone and a reverse camera, which are typically included accessories.
4. Setup and Installation
4.1 Vehicle Compatibility
This car radio is specifically designed for VW Sharan models manufactured between 2010 and 2022. Please verify your vehicle's model year before proceeding with installation.
4.2 Wiring Connections
Before starting, disconnect the vehicle's battery to prevent electrical shorts. Refer to the wiring diagram provided with your unit for specific connections. The main harness connects to the vehicle's power, speaker, and accessory wires. Connect the GPS antenna, external microphone, and reverse camera (if applicable) to their designated ports.

Figure 4.1: Rear view of the car radio unit showing various wiring harnesses. This image provides a view of the back of the car radio, detailing the multiple wiring harnesses and connectors for power, audio, video, GPS antenna, and other peripherals.
4.3 Physical Installation
Carefully remove your existing car radio. Mount the new Surakey unit into the dashboard opening, ensuring all connections are secure and wires are neatly tucked away. Secure the unit using the provided mounting brackets. Reconnect the vehicle's battery once installation is complete.

Figure 4.2: Car radio installed in a VW Sharan dashboard. This image shows the 9-inch car radio unit seamlessly integrated into the dashboard of a VW Sharan, displaying a navigation map on its screen.
5. Operating Instructions
5.1 Basic Operation
- Power On/Off: Press the power button (usually located on the front panel) to turn the unit on or off.
- Volume Control: Adjust the volume using the physical knob or on-screen controls.
- Touchscreen: Navigate through menus and applications by tapping and swiping on the 9-inch capacitive touchscreen.
5.2 Wireless CarPlay and Android Auto
This unit supports both wireless and wired CarPlay and Android Auto. Connect your compatible smartphone to access navigation, music, calls, and messages directly from the car radio's screen. Voice commands are supported for hands-free operation.
- Wireless Connection: Enable Bluetooth and Wi-Fi on your smartphone. Follow the on-screen prompts on the car radio to pair your device.
- Wired Connection: Connect your smartphone to the unit's USB port using a certified USB cable.
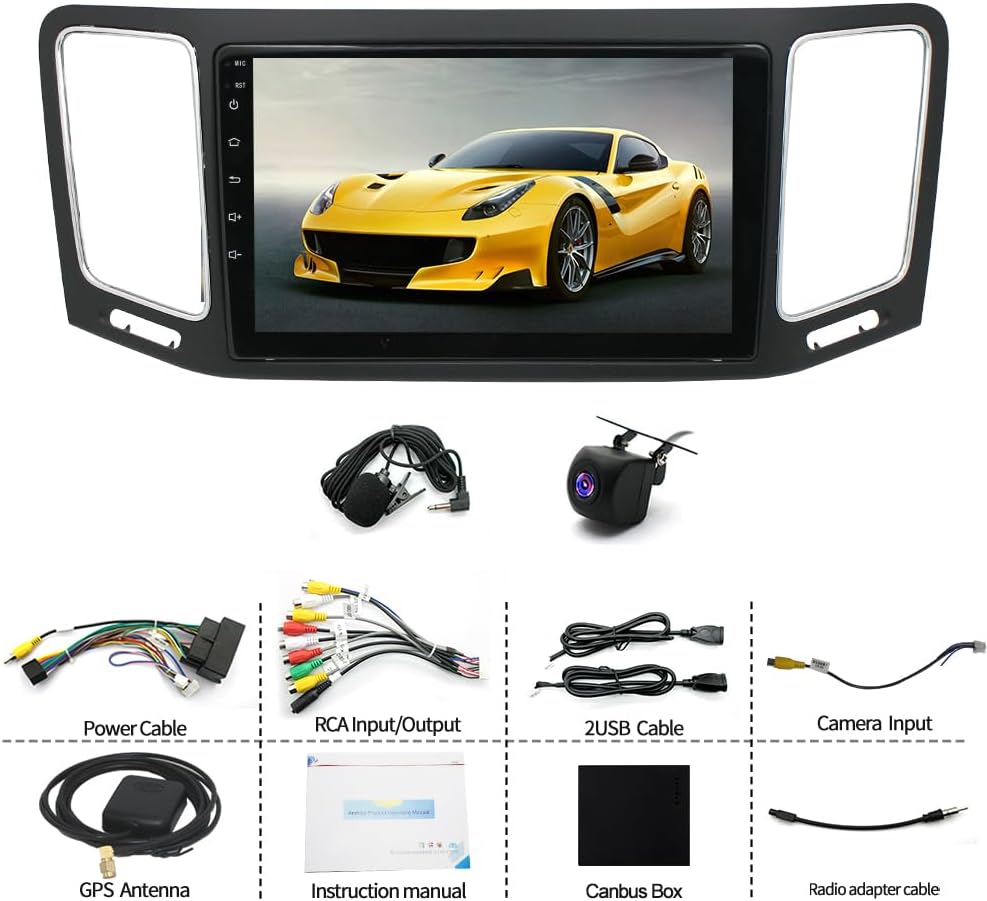
Figure 5.1: CarPlay and Android Auto interface. This image displays the user interface for CarPlay and Android Auto, showing various app icons and voice command prompts. It illustrates both wired and wireless connection options for Apple CarPlay and Android Auto.
5.3 GPS Navigation and Wi-Fi
The car radio features integrated GPS and Wi-Fi. You can use pre-installed navigation apps or download additional offline maps from the Play Store. With Wi-Fi enabled, you can use online navigation services like Google Maps and browse the internet.
- GPS: The unit comes with a GPS antenna for accurate positioning.
- Wi-Fi: Connect to a Wi-Fi hotspot (e.g., from your smartphone) to access online features and download apps. The unit also supports screen mirroring for iOS and Android devices via Wi-Fi.
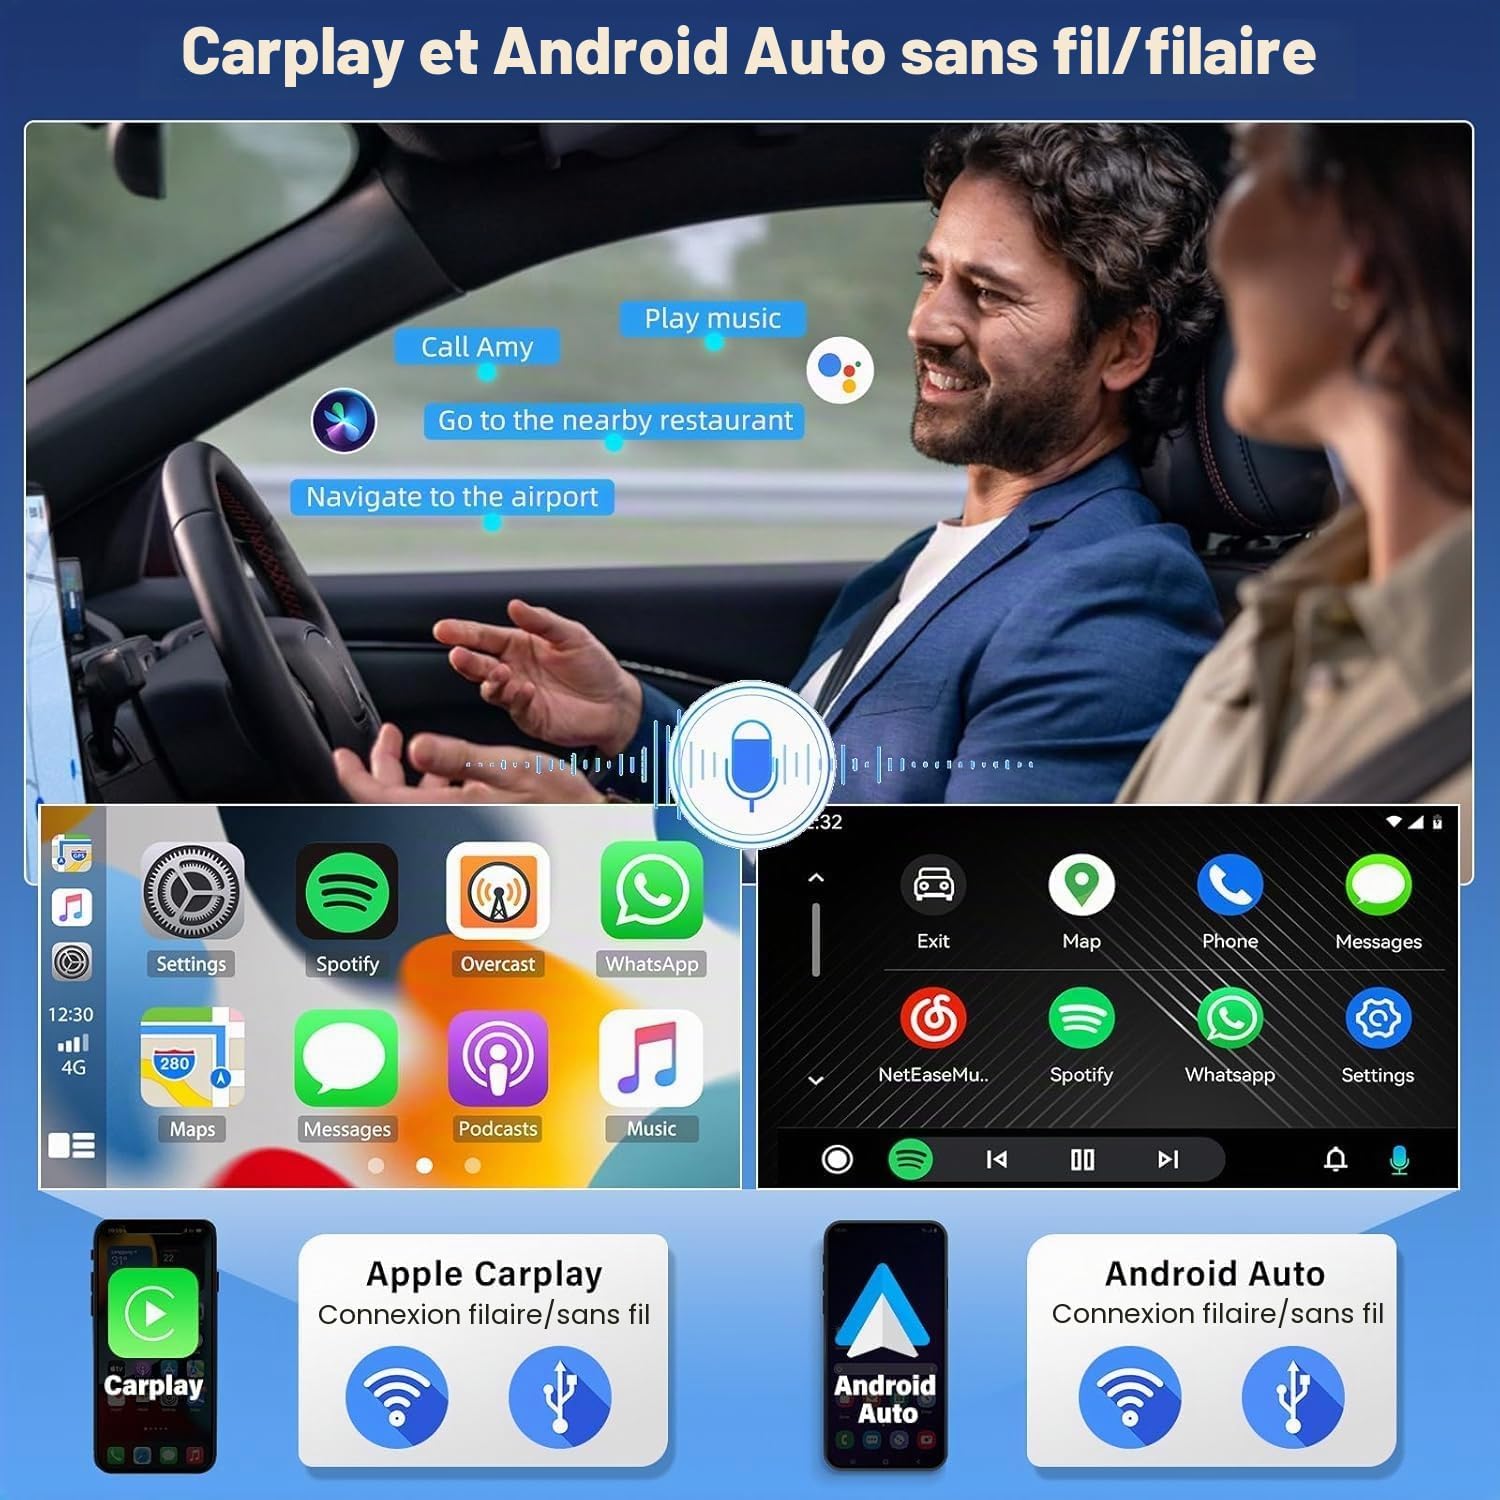
Figure 5.2: GPS navigation and Wi-Fi connection. The image shows the GPS navigation system displaying a map, along with icons representing satellite connectivity and various online services. It also highlights the Wi-Fi connection feature for online maps and app downloads.
5.4 Bluetooth Connectivity
The integrated Bluetooth module allows for hands-free calling and audio streaming. Pair your phone to make and receive calls, and play music directly from your device.
- Pairing: Go to the Bluetooth settings on the car radio and your phone. Select the car radio from your phone's available devices to pair.
- Hands-Free Calls: Use the external microphone for clear communication during calls.
- Music Streaming: Play audio from your phone through the car's speakers.
5.5 AM/FM/RDS Radio
Tune into your favorite AM/FM radio stations. The RDS (Radio Data System) function provides real-time information such as station name, traffic updates, and emergency broadcasts.
- Scanning: Use the on-screen controls to scan for available stations.
- Presets: Save your preferred stations for quick access.

Figure 5.3: Bluetooth and Radio interface. This image illustrates the Bluetooth interface for hands-free calls and music streaming, showing a phone dialer and music playback controls. Below, the FM/AM radio interface is displayed with frequency tuning and RDS information.
5.6 Rear View Camera Function
When the vehicle is shifted into reverse gear, the unit automatically displays the image from the connected rear view camera, assisting with parking and maneuvering.
5.7 Steering Wheel Controls (SWC)
The car radio is compatible with your vehicle's original steering wheel controls. This allows you to manage audio playback, volume, and other functions without taking your hands off the steering wheel. Configuration may be required in the unit's settings menu.

Figure 5.4: Rear view camera display and steering wheel control settings. The top part of the image shows a simulated rear view camera display with parking guidelines. The bottom part illustrates the car radio's interface for configuring steering wheel controls, allowing integration with the vehicle's existing buttons.
6. Specifications
| Feature | Specification |
|---|---|
| System | Android 14 |
| Screen | 9-inch Capacitive Touchscreen, 1280 x 720 resolution |
| Processor | Cortex A53 1.3 GHz x4 |
| Memory (RAM + ROM) | 4GB RAM + 64GB ROM |
| Radio Band | FM/AM |
| FM Frequency | 87.5 M-108 M |
| Radio Data System (RDS) | RT, AF, TA supported |
| Output Power | 4 x 45 W |
| Bluetooth Version | 4.1 |
| Size | 2 DIN |
| Audio Formats | MP3, FLAC, APE, WMA, WAV, AAC, AMR |
| Video Formats | AVI, ASF, MP4, MOV, MPG, MPEG1/2/4, VOB, MKV, FLV, TS, WMV, RMVB, 3GP |
| OSD Languages | English, German, French, Italian, Spanish, Portuguese, Russian, Turkish, Polish |
| Operating Voltage | 12 V |
| Vehicle Compatibility | VW Sharan (2010-2022) |
7. Maintenance
- Screen Cleaning: Use a soft, lint-free cloth to gently wipe the touchscreen. For stubborn smudges, slightly dampen the cloth with water or a screen-safe cleaner. Avoid spraying liquids directly onto the screen.
- Software Updates: Periodically check for software updates to ensure optimal performance and access to new features. Updates can usually be found in the system settings or on the manufacturer's website.
- General Care: Keep the unit free from dust and debris. Avoid placing heavy objects on the unit or exposing it to excessive moisture.
8. Troubleshooting
8.1 Common Issues and Solutions
- Unit does not power on:
- Check all power connections and fuses.
- Ensure the vehicle's battery is properly connected and charged.
- No sound:
- Verify speaker connections.
- Check volume levels and mute settings.
- Ensure the correct audio source is selected.
- GPS signal lost or inaccurate:
- Ensure the GPS antenna is properly installed and has a clear view of the sky.
- Check GPS settings in the unit.
- Bluetooth connection issues:
- Ensure Bluetooth is enabled on both the unit and your phone.
- Delete previous pairings and try reconnecting.
- Restart both devices.
- CarPlay/Android Auto not connecting:
- For wired connection, use a high-quality, certified USB cable.
- For wireless, ensure Wi-Fi and Bluetooth are active on your phone.
- Check your phone's settings for CarPlay/Android Auto permissions.
8.2 Factory Reset
If you encounter persistent issues, a factory reset may resolve them. Be aware that a factory reset will erase all user data and settings. Consult the unit's system settings for the factory reset option.
9. Warranty and Support
For warranty information, please refer to the documentation provided at the time of purchase or contact your retailer. If you require technical assistance or have questions not covered in this manual, please contact Surakey customer support through the seller's platform or their official website.