
Introduction
This manual provides detailed instructions for the setup, operation, and maintenance of your AIRAIN TECH 14-in-1 Wireless Weather Station with Dual Display (Model A8D). This advanced weather station is designed to provide comprehensive, real-time weather data for both indoor and outdoor environments, including temperature, humidity, wind speed, wind direction, rainfall, barometric pressure, and more. Please read this manual thoroughly before installation and use to ensure optimal performance and longevity of your device.
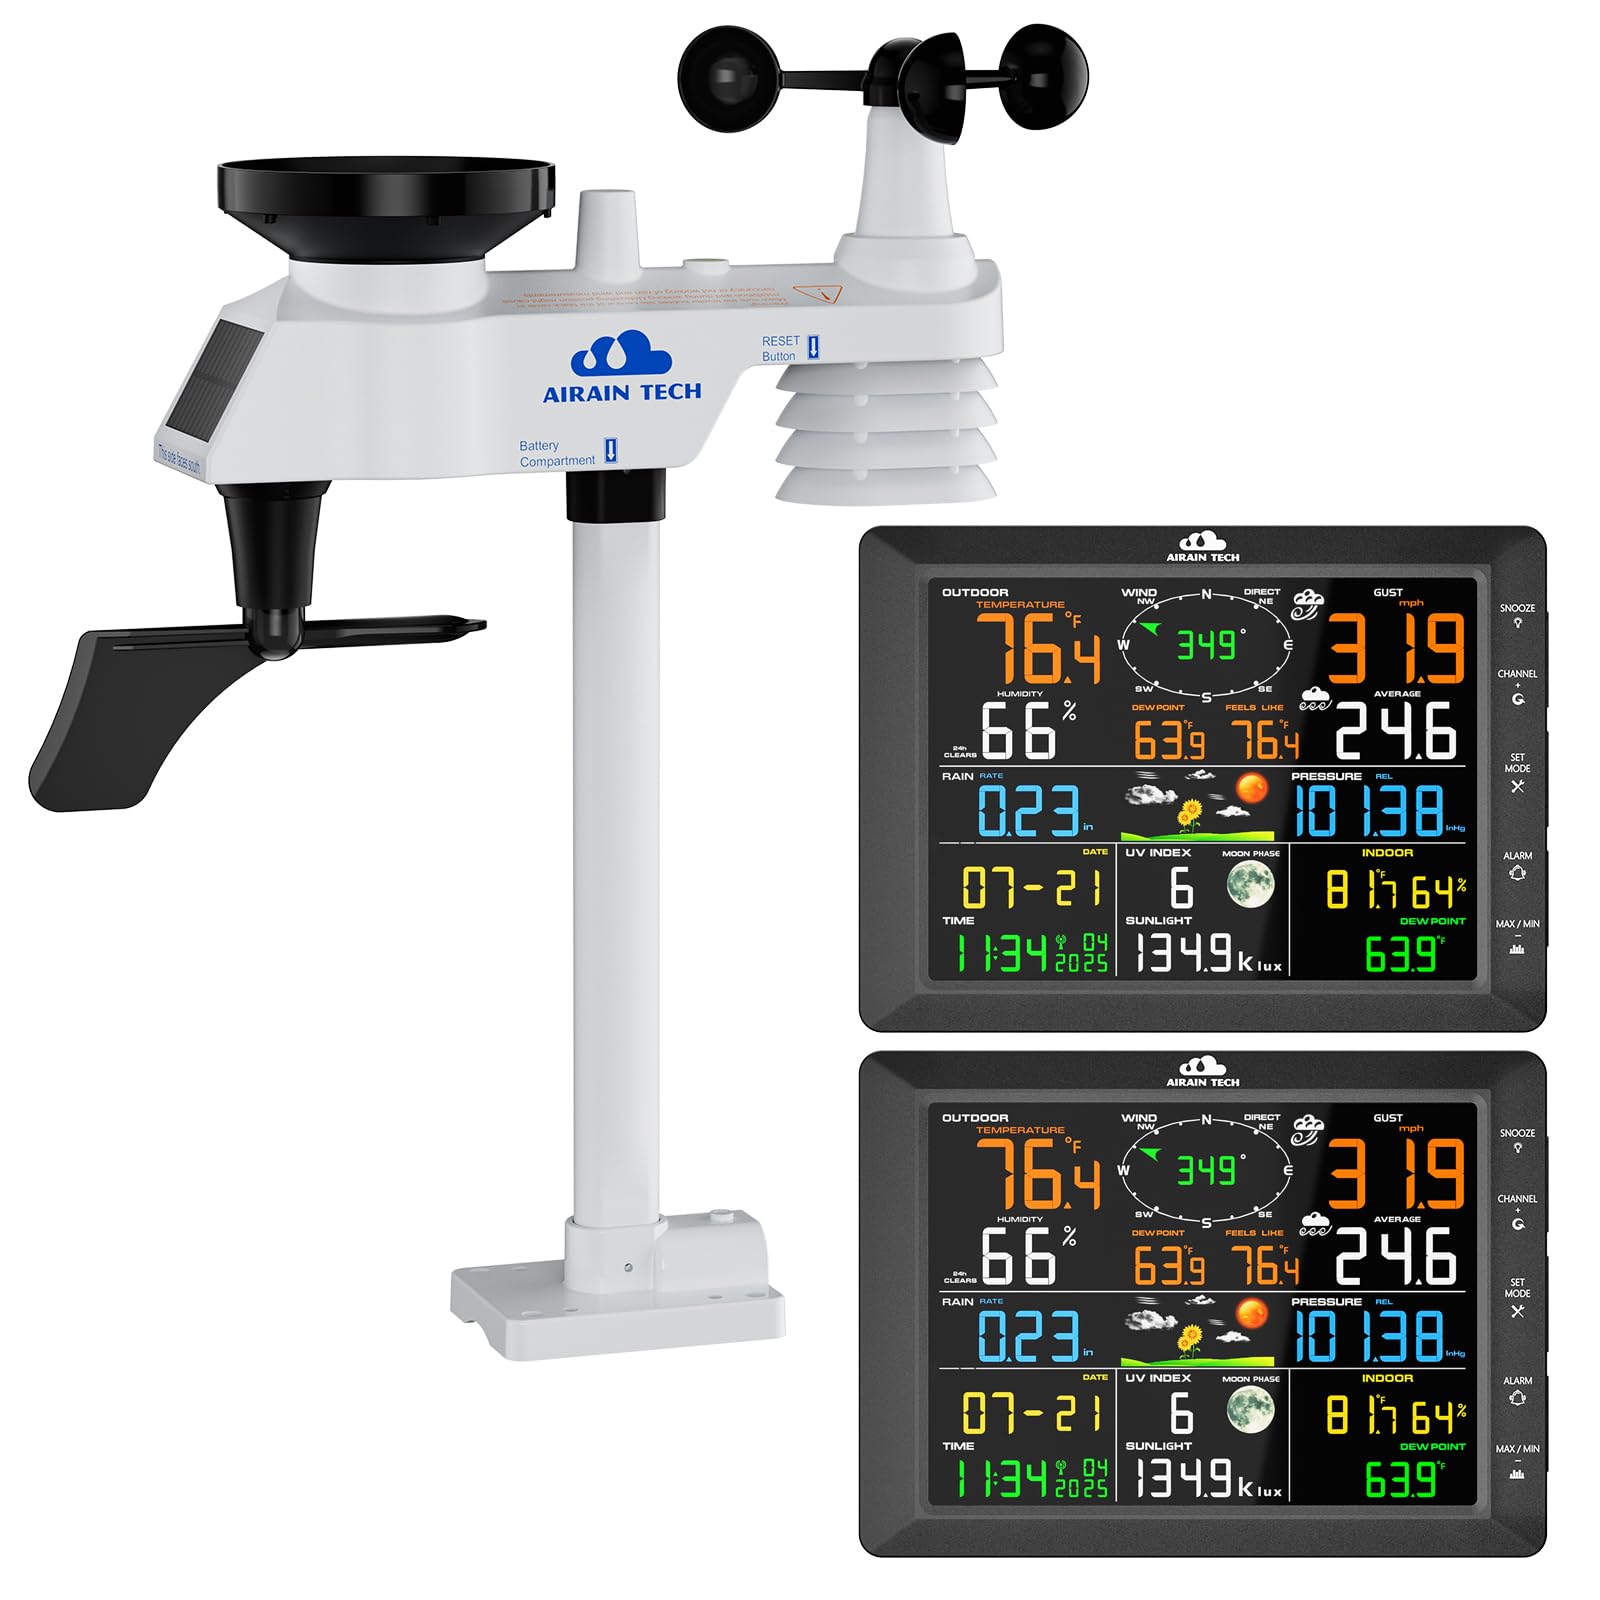
Image: The AIRAIN TECH 14-in-1 Wireless Weather Station, showing the main display console and the integrated outdoor sensor.
Package Contents
Verify that all components listed below are present in your package. If any items are missing or damaged, please contact customer support.
- Display Console ×2
- Outdoor Sensor ×1
- User Manual ×1
- Power Adapter ×2
- Feet ×1
- Mounting Bracket Backplate ×1
- Mounting Pole ×1
- Nuts (M3/M5) / Bolts (M3/M5)
- Screws

Image: Diagram illustrating all components included in the package, including the outdoor sensor array, indoor console, power adapters, batteries, mounting pole, and various screws and brackets. Dimensions are also indicated.
Product Features
The AIRAIN TECH 14-in-1 Wireless Weather Station offers a comprehensive suite of features for detailed weather monitoring:
- High-Precision Swiss Sensor: Measures real-time temperature (-40°F to 140°F, ±2°F/1°C accuracy) and humidity (10% to 99%, ±5% accuracy).
- Dual Display: Two 8.5-inch color LCD displays with adjustable brightness for viewing in different rooms.
- Comprehensive Data: Provides indoor/outdoor temperature and humidity, rainfall, wind speed, wind direction, moon phase, barometric pressure, wind chill index, and dew point.
- Atomic Clock: Automatic time/date synchronization via WWVB radio signal.
- Wireless Transmission: Outdoor sensor transmits data up to 328 ft (100 meters) to the indoor consoles.
- Solar Powered Outdoor Unit: The outdoor sensor is primarily solar-powered with AA battery backup.
- Easy Installation: Designed for straightforward setup with an adjustable bracket.

Image: An infographic highlighting the 14 distinct weather parameters measured by the station, including indoor/outdoor temperature and humidity, air pressure, wind speed/direction, feels like temperature, dew point, rainfall, UV index, alarm clock, moon phase, calendar, heat index, and WWVB atomic clock function.
Setup
1. Outdoor Sensor Installation
The integrated outdoor sensor measures wind, rain, temperature, and humidity. Proper placement is crucial for accurate readings.
- Unpack: Carefully remove the outdoor sensor from its packaging.
- Battery Installation: The outdoor sensor is primarily solar-powered but requires 3 AA batteries (included) for backup and initial power. Open the battery compartment, insert the batteries according to polarity, and close the compartment securely.
- Mounting Location: Choose an open location free from obstructions (trees, buildings) that could interfere with wind, rain, or sunlight. Ideally, mount the sensor at least 4 times the distance of the nearest obstruction's height. Ensure the solar panel faces south for optimal charging.
- Assembly: Attach the mounting pole to the outdoor sensor. Use the provided mounting bracket backplate, nuts, bolts, and screws to secure the sensor to a stable surface such as a wooden post, railing, or dedicated pole.
- Orientation: Ensure the wind vane and wind cups can rotate freely. The "This side faces south" label on the solar panel should point directly south.

Image: Various mounting options for the outdoor sensor, including top-mount, pole-mount, and side-mount configurations, demonstrating flexibility for installation.

Image: Detailed diagram of the outdoor sensor array, labeling its components such as the rainwater collector, UV/light sensor, liquid level indicator, solar panel, wind cup, wind vane, and thermo-hygrometer radiation shield.
2. Indoor Console Setup
The indoor display consoles receive data wirelessly from the outdoor sensor.
- Power On: Connect the provided power adapters to both display consoles and plug them into a standard electrical outlet.
- Sensor Pairing: The consoles will automatically search for and connect to the outdoor sensor. This process may take a few minutes. Ensure the outdoor sensor is powered on and within the 328 ft (100 meter) transmission range.
- Placement: Place the display consoles in desired indoor locations. The dual-screen design allows for monitoring in multiple rooms.
- Atomic Clock Synchronization: The console will attempt to synchronize with the WWVB atomic clock signal. This may take several hours, especially during initial setup. Ensure the console is placed away from large metal objects or electronic devices that could interfere with the signal.

Image: Illustration showing the outdoor sensor mounted on a pole outside a house, with an indoor display console visible inside. A line indicates the maximum 328 feet (100 meters) wireless transmission distance between the units.

Image: A display console showing the WWVB icon, indicating successful synchronization with the atomic clock for automatic time and date updates.
Operation
1. Display Overview
The 8.5-inch color LCD display provides a wealth of information at a glance. Familiarize yourself with the layout to quickly interpret weather data.

Image: A detailed diagram of the display console, labeling all key information sections including outdoor temperature, outdoor humidity, precipitation, weather forecast, UV index, time/date, sunshine intensity, moon phase, wind direction, wind speed, average wind speed, air pressure, indoor temperature and humidity, and indoor dew point. The back of the console is also shown, indicating the DC power jack, desktop stand, ventilation holes, and hanging hole.
2. Basic Settings
Refer to the full user manual for detailed instructions on setting time, date, measurement units (e.g., °F/°C, mph/km/h), and other preferences. Most settings are accessible via buttons on the console.
3. Backlight Adjustment
The display backlight has three adjustable levels. Press and hold the SNOOZE button for 3 seconds to turn the backlight on or off. Once on, press the SNOOZE button repeatedly to cycle through different brightness levels (High, Middle, Low).

Image: Visual representation of the three backlight adjustment levels (High, Middle, Low) for the display console, with an inset showing the location of the SNOOZE button.
4. Weather Data Interpretation
- Weather Forecast: The station provides a forecast for the next 24-48 hours based on barometric pressure changes. Icons represent sunny, partly cloudy, cloudy, and rainy conditions.
- Wind Chill & Dew Point: The display calculates and shows wind chill and dew point data, which can be useful for planning outdoor activities and understanding perceived temperature.
- Barometric Pressure Trend: Monitor historical barometric pressure trends to anticipate developing storms or changes in weather patterns.

Image: The display console showing weather forecast icons for sunny, partly cloudy, cloudy, and rainy conditions, based on barometric pressure changes.

Image: The display console showing wind chill and dew point readings, providing alerts when the weather feels colder than the actual temperature.

Image: A graph illustrating historical barometric pressure changes over time, enabling users to predict developing storms. The display console is shown alongside.
5. Alerts
The weather station supports various warning alerts for critical weather conditions, such as high/low temperature, frost, or strong winds. Consult the full user manual for instructions on setting and customizing these alerts to suit your needs.

Image: The display console showing an alert icon (bell) for a specific weather condition, demonstrating the warning alert feature.
Maintenance
1. Battery Replacement
The outdoor sensor uses 3 AA batteries as a backup power source for the solar panel. Replace these batteries annually or when the low battery indicator appears on the display console. To replace, open the battery compartment on the underside of the outdoor sensor, remove old batteries, insert new ones with correct polarity, and secure the cover.

Image: Close-up view of the bottom of the outdoor sensor, highlighting the battery compartment and the LED indicator/reset button.
2. Cleaning
- Outdoor Sensor: Periodically check the rainwater collector for debris (leaves, insects) and clean as necessary to ensure accurate rainfall measurements. Wipe the solar panel with a soft, damp cloth to maintain charging efficiency.
- Display Console: Clean the display screen and casing with a soft, dry cloth. Avoid abrasive cleaners or solvents.
3. Sensor Placement Review
Regularly inspect the outdoor sensor's mounting to ensure it remains secure and free from new obstructions that could affect readings. Verify that the wind vane and cups rotate freely.
Troubleshooting
| Problem | Possible Cause | Solution |
|---|---|---|
| No outdoor data displayed. |
|
|
| Incorrect time/date. |
|
|
| Inaccurate readings (wind, rain, temp). |
|
|
For more detailed troubleshooting steps, please consult the comprehensive user manual or contact customer support.
Specifications
| Feature | Detail |
|---|---|
| Model | A8D |
| Brand | AIRAIN TECH |
| Display Type | 8.5-inch Color LCD (Dual Screen) |
| Outdoor Temperature Range | -40°F to 140°F (-40°C to 60°C) |
| Temperature Accuracy | ±2°F / ±1°C |
| Humidity Range | 10% to 99% RH |
| Humidity Accuracy | ±5% |
| Wireless Transmission Range | Up to 328 ft (100 meters) in open air |
| Outdoor Sensor Power | Solar Powered with 3 x AA Batteries (included) |
| Indoor Console Power | Power Adapter (included) |
| Connectivity Technology | Radio Frequency |
| Material | Acrylonitrile Butadiene Styrene (ABS) |
Warranty and Support
AIRAIN TECH provides up to two years of high-quality customer support for this product. Our dedicated after-sales center is located in Florida, USA, to assist with any technical issues or inquiries.
Contact Information:
- Phone: 904-652-2795 (Monday to Friday, 9:00 a.m. to 6:00 p.m. Eastern Time)
- Email: Refer to the email address provided on the front of the product packaging. Responses typically within 24 hours on weekdays.

Image: A customer service representative wearing a headset, working at a computer, symbolizing the available support.