
1. Introduction
Thank you for choosing the ELYKEN Expandable Shoe Rack. This 2-tier metal shoe organizer is designed to provide a versatile and durable storage solution for your footwear. Its expandable and stackable features allow for customization to fit various spaces and storage needs. Constructed from heavy-duty metal with a coated finish, it offers stability and longevity.
This manual provides detailed instructions for assembly, operation, and maintenance to ensure optimal use of your shoe rack.
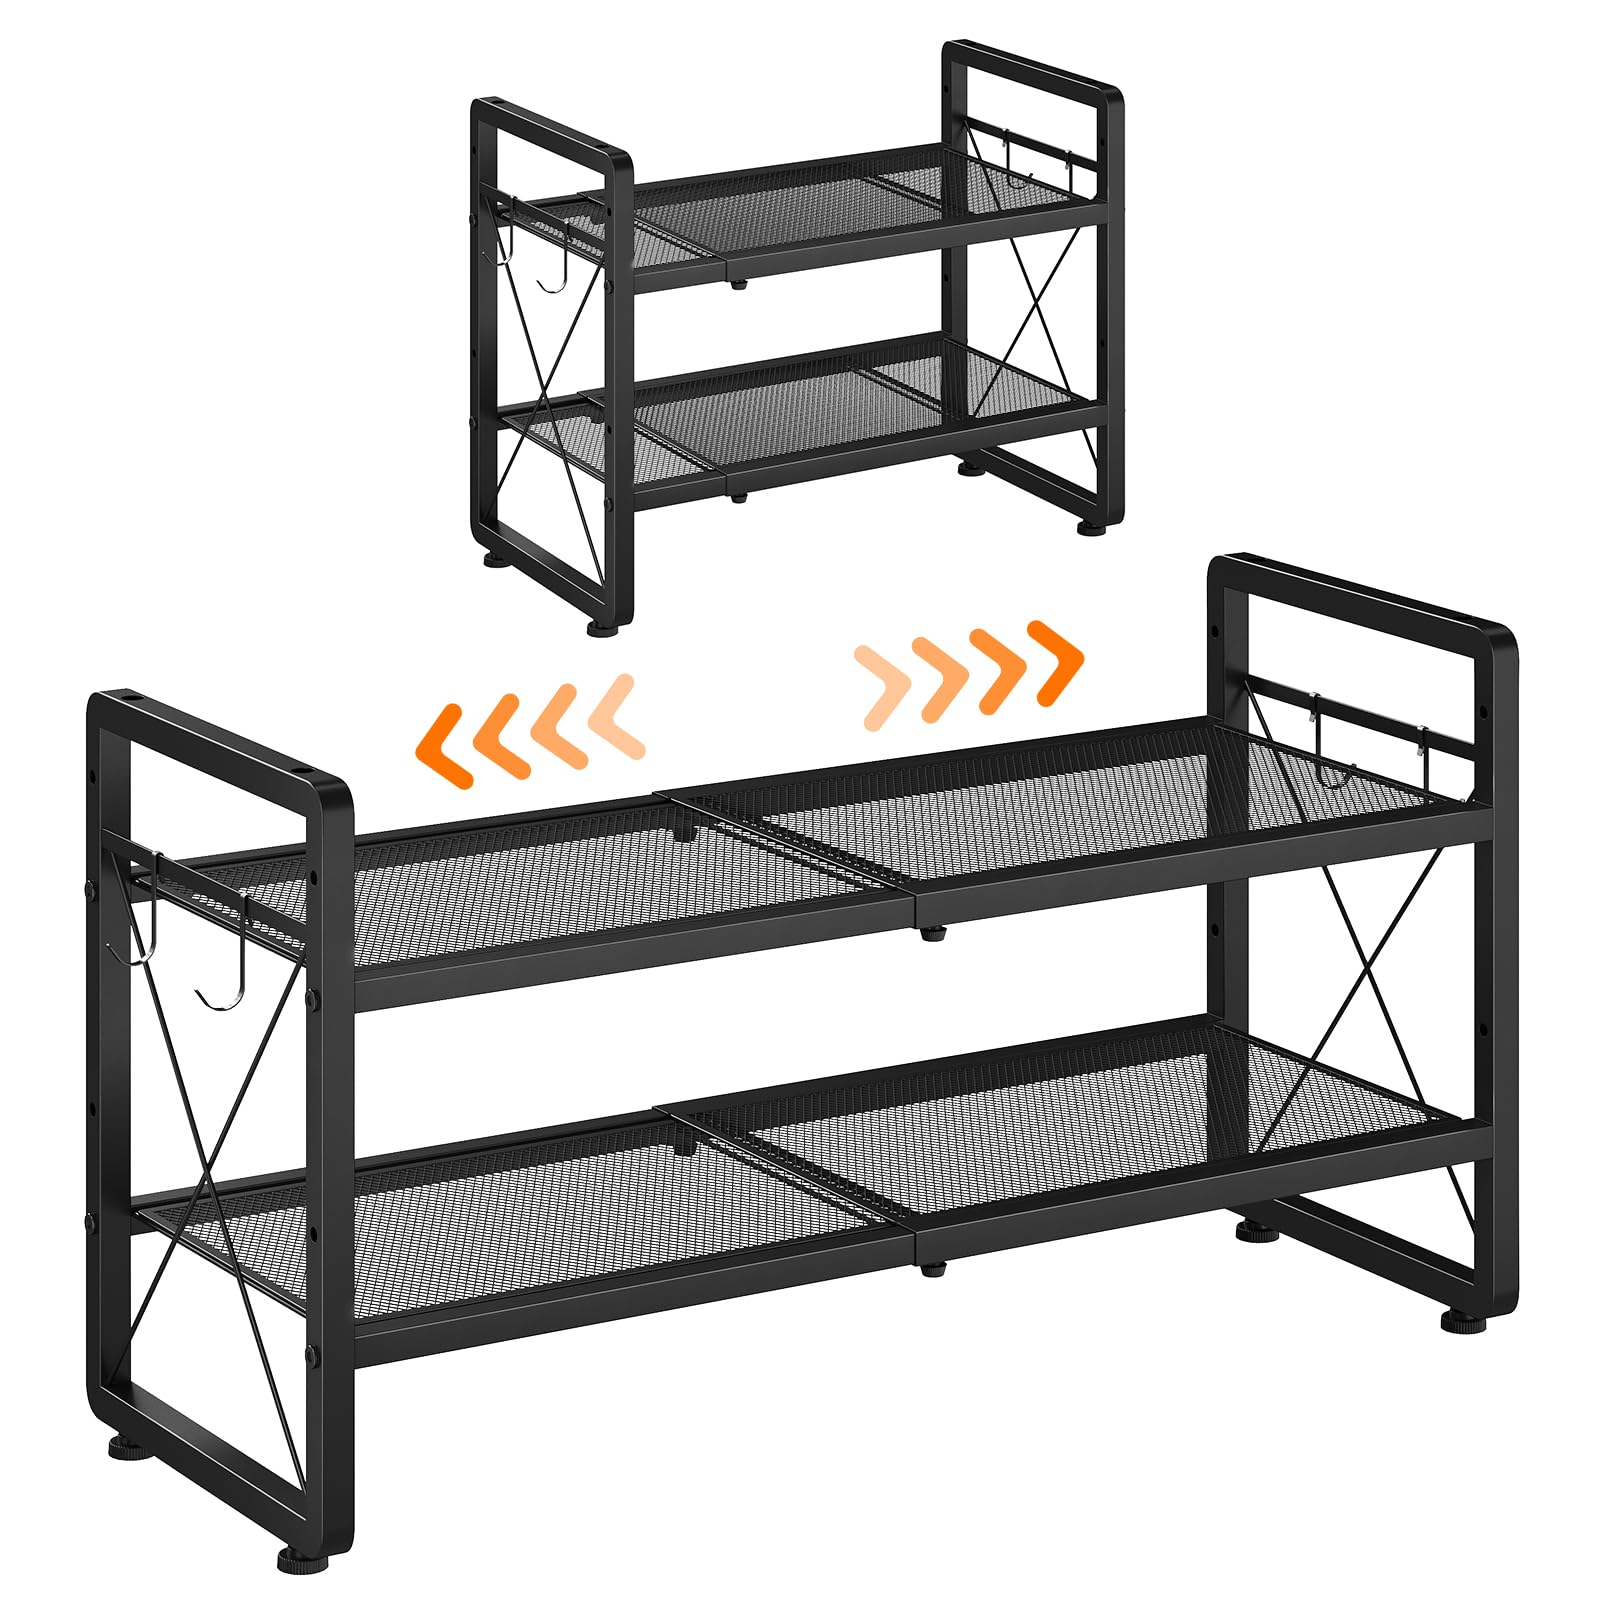
Image 1.1: ELYKEN 2-Tier Expandable Shoe Rack, fully assembled and ready for use.
2. Package Contents
Before beginning assembly, please verify that all components are present and undamaged. If any parts are missing or damaged, please contact customer support.
| Part | Description | Quantity |
|---|---|---|
| Side Frames | Metal frames forming the sides of the rack. | 2 |
| Mesh Shelves | Expandable metal mesh shelves. | 2 |
| Adjustable Feet | Feet for leveling the rack. | 4 |
| Side Hooks | Hooks for hanging small items. | 4 |
| Screws & Hex Key | Hardware for assembly. | Assorted |
3. Assembly Instructions
Follow these steps to assemble your ELYKEN Expandable Shoe Rack. A hex key is included for your convenience.
- Attach Adjustable Feet: Screw the four adjustable feet into the bottom of the two side frames. Ensure they are securely tightened.
- Connect Side Frames to Shelves: Align the mesh shelves with the pre-drilled holes on the side frames. Insert the provided screws and tighten them using the hex key. Ensure the X-shaped reinforcement bars are facing outwards for stability.
- Install Telescopic Adjustment Screws: For the expandable feature, install the telescopic adjustment screws into the designated holes on the shelves. These screws allow you to lock the shelves at your desired length.
- Attach Side Hooks: Clip the four side hooks onto the top bars of the side frames as desired. These are for hanging small items like keys or umbrellas.
For a visual guide, please refer to the assembly video below:
Video 3.1: Official ELYKEN "Expandable Shoe Rack Assembly Guide" demonstrating the assembly process.

Image 3.1: Illustration of the expandable design, allowing length adjustment from 18.5 to 31.7 inches.

Image 3.2: Detail showing the X-shaped reinforcement for stability, side hooks for accessories, and adjustable feet for leveling.
4. Operation
4.1 Expanding the Shoe Rack
To expand the shoe rack, loosen the telescopic adjustment screws on the mesh shelves. Gently pull the shelves outwards to achieve your desired length (between 18.5 and 31.7 inches). Once the desired length is reached, tighten the adjustment screws to secure the shelves in place.
4.2 Adjusting Shelf Height
The shelves can be adjusted to accommodate different shoe heights, including boots. To adjust, unscrew the shelf from the side frames, reposition it to a higher or lower set of holes, and re-secure with screws. This allows for flexible storage of various footwear types.

Image 4.1: Example of adjustable shelf height to accommodate taller footwear like boots.
4.3 Stacking Multiple Units
Multiple ELYKEN shoe racks can be stacked vertically to maximize storage space. To stack, align the top of one unit with the bottom of another. Secure them together using the provided connectors or by aligning the feet of the upper unit into the top frame of the lower unit. Ensure stability before loading with shoes.

Image 4.2: Illustration of the stackable design, allowing multiple units to be combined for increased storage capacity.
4.4 Using Side Hooks
The included side hooks can be used to hang small items such as keys, umbrellas, shoehorns, or small bags, keeping them easily accessible and organized.

Image 4.3: Detail of the side hooks, useful for hanging small accessories.
5. Maintenance
- Cleaning: Wipe the metal surfaces with a soft, damp cloth. Avoid abrasive cleaners or harsh chemicals that could damage the coated finish.
- Inspection: Periodically check all screws and connections to ensure they remain tight. Retighten if necessary to maintain stability.
- Placement: While the rack is designed for various environments, avoid prolonged exposure to extreme moisture or direct sunlight to preserve its finish and structural integrity.
6. Troubleshooting
- Rack is unstable/wobbly:
- Ensure all screws are fully tightened.
- Adjust the leveling feet at the bottom of the rack to compensate for uneven floor surfaces.
- Verify that the X-shaped reinforcement bars are correctly installed.
- Shelves do not expand smoothly:
- Loosen the telescopic adjustment screws completely before attempting to expand or retract the shelves.
- Check for any obstructions in the sliding mechanism.
- Screws do not tighten properly:
- Ensure you are using the correct screws for each part as indicated in the assembly instructions.
- Do not overtighten, as this can strip the threads. If a screw feels loose, try backing it out and re-inserting it carefully.
7. Specifications
| Feature | Detail |
|---|---|
| Model Number | HSR012B1 |
| Material | Iron |
| Color | Black |
| Dimensions (D x W x H) | 11.8"D x 31.7"W x 17.3"H (fully extended) |
| Expandable Width | 18.5" to 31.7" |
| Number of Tiers | 2 |
| Special Features | Expandable, Stackable, Adjustable Height, Side Hooks, Adjustable Feet |
| Mounting Type | Floor Mount (Freestanding) |
| Item Weight | 7.7 pounds |
8. Warranty and Support
ELYKEN products are manufactured with quality and durability in mind. For specific warranty information, please refer to the product packaging or contact ELYKEN customer support directly.
If you encounter any issues or have questions regarding your ELYKEN Expandable Shoe Rack, please reach out to our customer support team. Contact information can typically be found on the product packaging or the official ELYKEN website.
We are committed to providing assistance and ensuring your satisfaction with our products.