
1. Introduction
Thank you for choosing the MZK 12-Inch 10.5 Amp Corded Electric Tiller/Cultivator. This manual provides essential information for the safe operation, assembly, maintenance, and troubleshooting of your new garden tool. Please read these instructions carefully before use and retain them for future reference.
1.1 Safety Information
WARNING: To reduce the risk of injury, always wear appropriate protective gear, including gloves and safety glasses. Keep hands and feet away from moving parts. Be cautious of debris thrown by the tines. Ensure the power cord is clear of the tilling area to prevent damage or entanglement. Always disconnect the power supply before performing any maintenance or adjustments.
2. Product Overview
The MZK 12-Inch 10.5 Amp Corded Electric Tiller/Cultivator is designed for efficient soil preparation in gardens, lawns, and yards. Its powerful motor and durable blades make it suitable for various tilling tasks.

Figure 2.1: MZK 12-Inch 10.5 Amp Corded Electric Tiller/Cultivator.
2.1 Key Features
- Efficient Digging Power: 12-inch cutting width and 8-inch digging depth for effective soil breaking and garden bed preparation.
- Powerful Motor: 10.5 Amp pure copper motor with 430 RPM for smooth and fast performance.
- Durable Blades: Equipped with 4 rust-resistant steel blades for efficient soil tilling.
- Low Maintenance: Electric operation eliminates the need for gas or oil, simplifying upkeep.
- Multi-Scene Use: Versatile for vegetable beds, fruit orchards, and general lawn maintenance.
- Adjustable Wheels: Three height settings for customizable tilling depth and easy transport.

Figure 2.2: Tilling dimensions: 12 inches wide and 8 inches deep.

Figure 2.3: High-performance cultivating with 430 RPM and 120V power.
3. Setup and Assembly
The MZK Electric Tiller requires minimal assembly. Follow the steps below to prepare your tiller for use.
3.1 Assembly Steps
- Unpack Components: Carefully remove all parts from the packaging. Verify that all components listed in the packing list are present.
- Attach Handles: Connect the upper and lower handle sections using the provided hardware. Ensure the cables are routed correctly and not pinched.
- Secure Control Box: Attach the control box to the handle, ensuring the safety switch and trigger are easily accessible.
- Adjust Wheels: Set the adjustable wheels to the desired height for transport or tilling depth. Refer to Section 4.2 for details on wheel positions.
- Inspect Blades: Ensure the tines are securely attached and free from damage.
Video 3.1: This video demonstrates the assembly and key features of the MZK 12-Inch Corded Electric Tiller, including its one-click start, rust-resistant steel blades, tilling depth, adjustable wheels, and powerful motor.
4. Operating Instructions
Before operating, ensure you have read and understood all safety warnings. Always wear appropriate personal protective equipment.
4.1 Starting the Tiller
- Connect Power: Plug the tiller into a suitable outdoor-rated extension cord, ensuring the cord is in good condition and rated for the tiller's power requirements.
- Engage Safety Switch: Press and hold the safety button located on the handle.
- Activate Trigger: While holding the safety button, squeeze the trigger to start the motor. Release the safety button once the motor starts.
- Stop: Release the trigger to stop the motor.
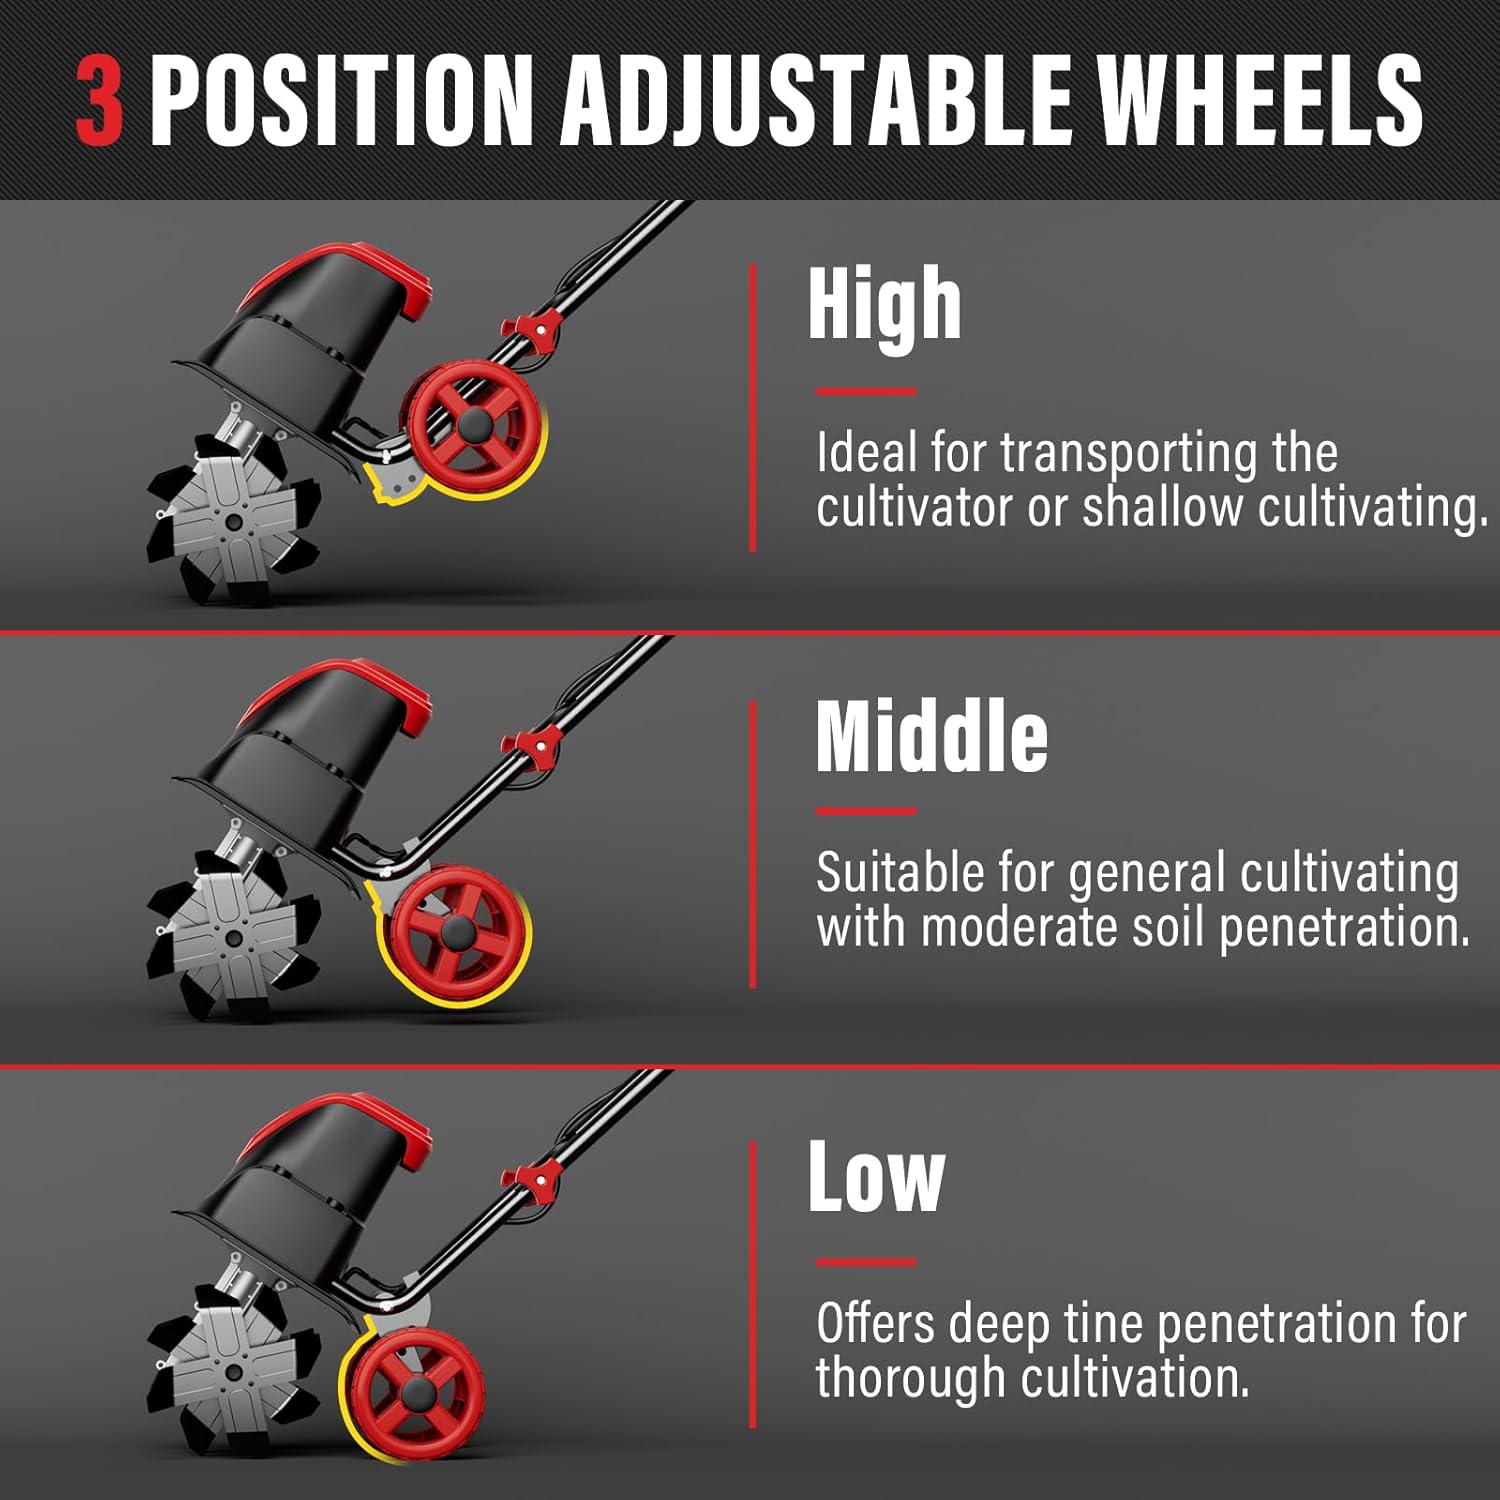
Figure 4.1: Easy 2-step start mechanism.
4.2 Adjusting Tilling Depth (Adjustable Wheels)
The tiller features 3-position adjustable wheels to control tilling depth or for transport.
- High Position: Ideal for transporting the cultivator or for very shallow cultivating.
- Middle Position: Suitable for general cultivating with moderate soil penetration.
- Low Position: Offers deep tine penetration for thorough cultivation.
To adjust the wheels, lift the tiller slightly and reposition the wheel axles into the desired slots. Ensure both wheels are set to the same height.
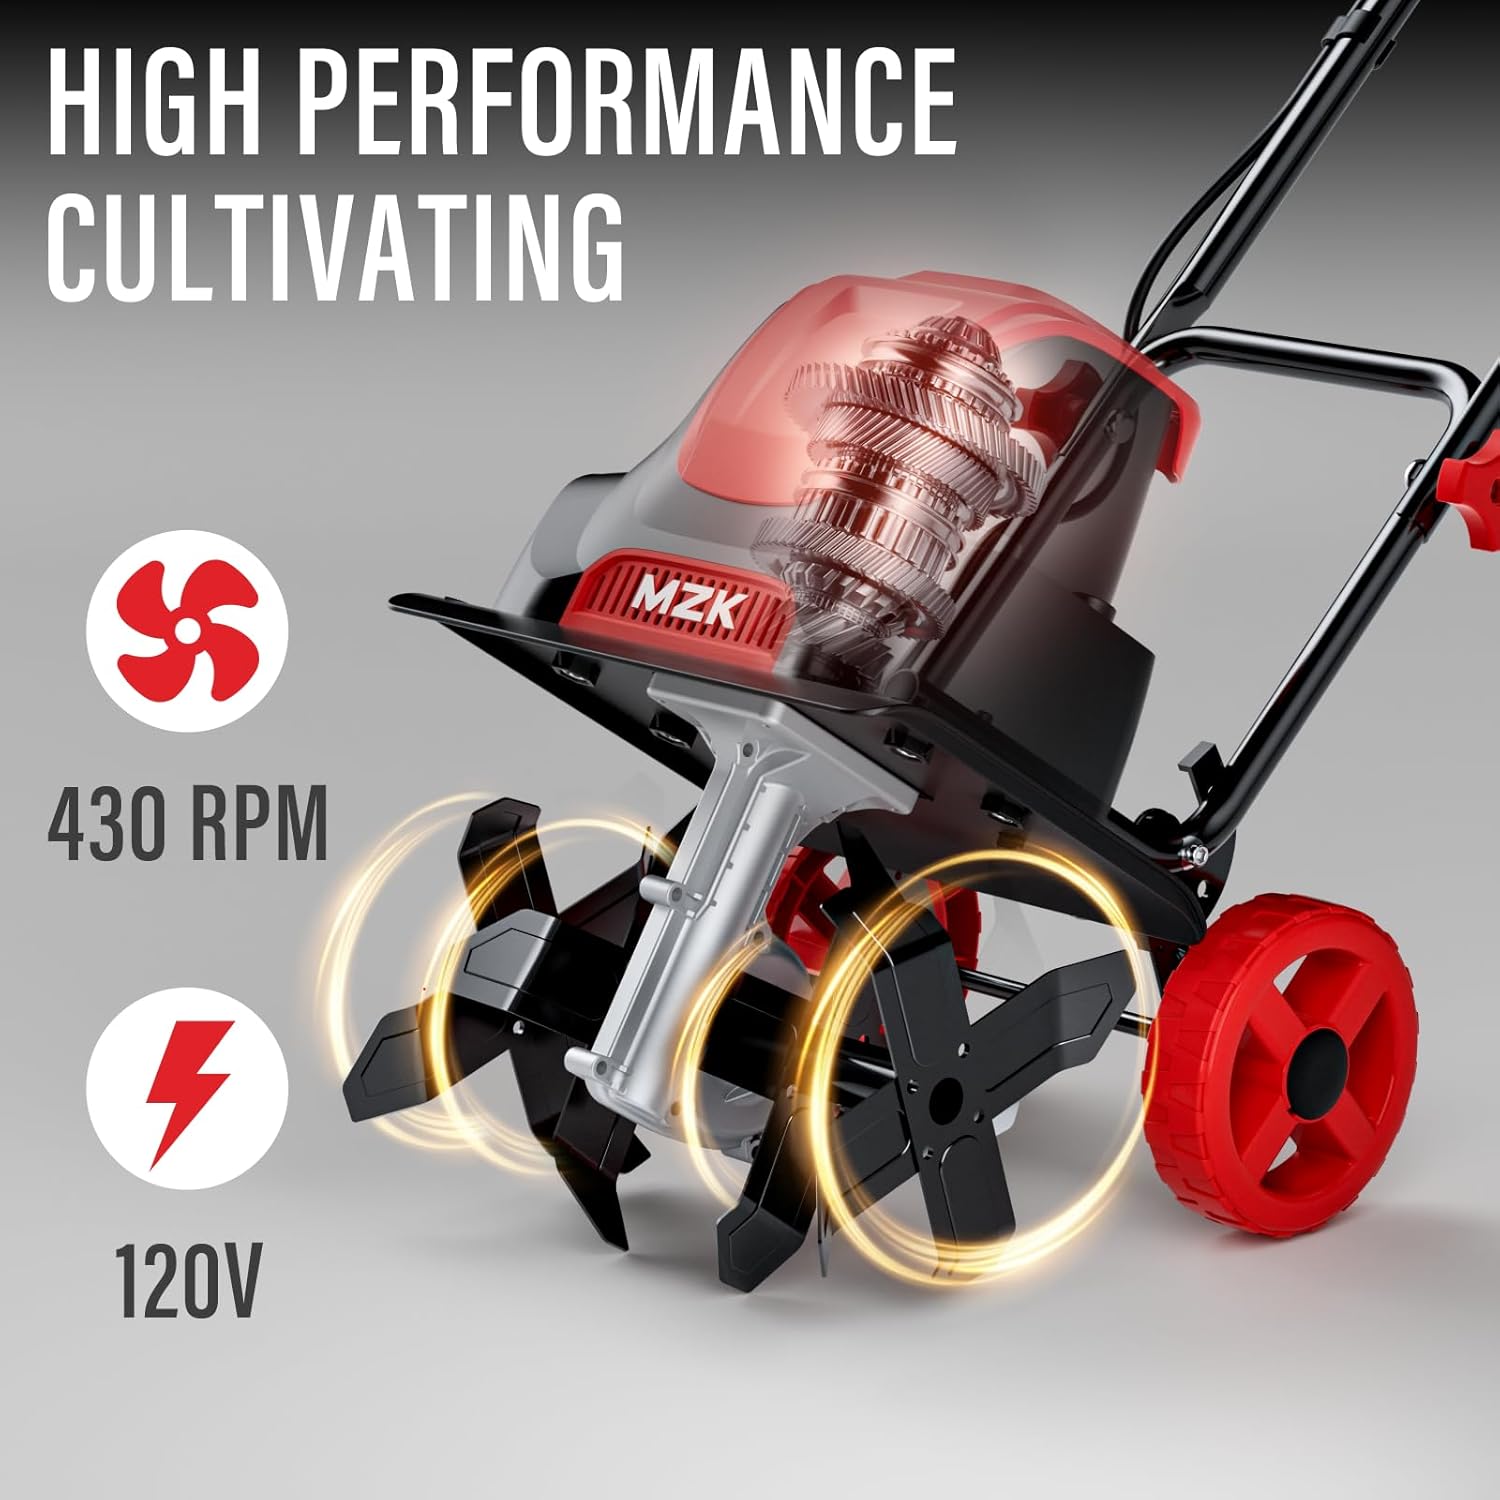
Figure 4.2: Three-position adjustable wheels for varying tilling depths.
4.3 Tilling Techniques
- Initial Pass: For compacted soil, make a shallow first pass to break up the surface.
- Deeper Tilling: For subsequent passes, adjust the wheels to a lower position to achieve the desired depth.
- Overlap: Overlap each pass slightly to ensure complete coverage of the tilling area.
- Control: Maintain a firm grip on the handles and guide the tiller steadily. Do not force the tiller; allow the blades to do the work.
5. Maintenance
Regular maintenance ensures the longevity and optimal performance of your tiller.
5.1 Cleaning
- Disconnect Power: Always unplug the tiller before cleaning.
- Remove Debris: After each use, remove soil, weeds, and debris from the tines and housing. Use a stiff brush or a wooden stick.
- Wipe Down: Wipe all external surfaces with a damp cloth. Do not use harsh chemicals or abrasive cleaners.
5.2 Storage
- Clean Thoroughly: Ensure the tiller is clean and dry before storing.
- Lubricate: Lightly oil the tines to prevent rust, especially during long storage periods.
- Store Safely: Store the tiller in a dry, secure location, out of reach of children and pets.
6. Troubleshooting
If you encounter issues with your tiller, refer to the following common problems and solutions.
| Problem | Possible Cause | Solution |
|---|---|---|
| Tiller does not start | No power supply; Safety switch not engaged; Damaged power cord. | Check power connection; Ensure safety button is pressed before trigger; Inspect power cord for damage. |
| Tiller stops during operation | Overload; Debris tangled in tines; Loose power connection. | Reduce load; Disconnect power and clear tines; Check power cord connection. |
| Ineffective tilling | Incorrect wheel height; Worn blades; Soil too hard. | Adjust wheel height to a lower setting; Inspect and replace worn blades; Moisten hard soil before tilling. |
| Excessive vibration | Bent or damaged tines; Loose components. | Inspect tines for damage and replace if necessary; Check all fasteners for tightness. |
If the problem persists after attempting these solutions, please contact MZK customer service.
7. Specifications
| Feature | Detail |
|---|---|
| Brand | MZK |
| Model Number | TC12A03 (Item model number: G-AC2404) |
| Power Source | AC Corded Electric |
| Motor | 10.5 Amp |
| Tilling Width | 12 inches |
| Tilling Depth | 8 inches |
| RPM | 430 RPM |
| Material | Steel |
| Product Dimensions | 8"D x 12"W x 8"H |
| Color | Red |
8. Warranty and Support
MZK is committed to providing a positive shopping experience. For any questions or problems with your MZK tool, please feel free to contact our customer service team.
8.1 Customer Service
Our dedicated customer service team is available to assist you with product inquiries, troubleshooting, or warranty claims. Please refer to your purchase documentation or the MZK official website for contact information.
Note: Specific warranty details may vary by region and retailer. Please retain your proof of purchase for warranty purposes.