1. Introduction
Thank you for choosing the Garvee 67 Inch Acrylic Freestanding Bathtub. This manual provides essential information for the safe installation, operation, and maintenance of your new bathtub. Please read these instructions carefully before installation and retain them for future reference.
2. Safety Information
WARNING: Failure to follow these safety instructions could result in injury or property damage.
- Ensure installation is performed by a qualified professional to prevent leaks or structural issues.
- Do not use abrasive cleaners or harsh chemicals on the bathtub surface, as this may cause damage.
- Always test water temperature before entering the bathtub to avoid scalding.
- Keep children and pets away from the bathtub during installation and unsupervised use.
- Do not stand on the edge of the bathtub.
- Ensure the floor can support the weight of the bathtub when filled with water and a person.
3. Package Contents
Verify that all components are present before beginning installation:
- Garvee 67 Inch Acrylic Freestanding Bathtub
- Chrome Overflow Assembly
- Chrome Drain Assembly (Pop-Up Drain)
- Installation Guide (this document)

Image 1: The Garvee 67 Inch Acrylic Freestanding Bathtub, showcasing its modern design and Harp White-C finish within a bathroom environment.
4. Setup and Installation
The Garvee Freestanding Bathtub is designed for straightforward installation. However, due to its size and the need for proper plumbing connections, professional installation is highly recommended.
4.1 Pre-Installation Checks
- Location: Ensure the chosen location has adequate space and a level floor capable of supporting the bathtub's weight when filled.
- Plumbing: Verify that hot and cold water supply lines and a drain pipe are correctly positioned for a freestanding tub.
- Floor Preparation: The floor surface should be clean, dry, and structurally sound.
4.2 Installation Steps (Professional Recommended)
- Positioning: Carefully move the bathtub to its desired location.
- Leveling: Adjust the bathtub's feet (if applicable) to ensure it is perfectly level.
- Drain Connection: Connect the bathtub's drain assembly to the floor drain. Ensure all connections are watertight using appropriate sealants.
- Overflow Connection: Connect the overflow pipe to the drain assembly.
- Water Supply: Connect the faucet (not included) to the hot and cold water supply lines according to the faucet manufacturer's instructions.
- Leak Test: Fill the bathtub with water and inspect all connections for leaks. Allow the water to sit for a period to ensure no slow leaks are present.
- Final Placement: Once leak-free, secure the bathtub to the floor if required by local codes or for added stability.

Image 2: Product dimensions of the Garvee bathtub, indicating a length of 67 inches, a width of 31.3 inches, and a height of 22.8 inches.
5. Operating Instructions
The Garvee Freestanding Bathtub is designed for a comfortable and relaxing soaking experience.
- Filling the Bathtub: Ensure the drain is closed. Turn on the faucet to fill the tub with water to your desired level and temperature.
- Soaking: The ergonomic design with gently sloping streamlines provides optimal comfort for extended soaking.
- Draining the Bathtub: To drain, activate the pop-up drain mechanism. The chrome overflow prevents accidental overfilling.

Image 3: An individual enjoying a bath in the Garvee tub, illustrating the ergonomic design that conforms to the body's natural curves for a comfortable soaking experience.

Image 4: Visual representation of the double-walled insulation feature, which helps maintain water temperature for a longer, more relaxing bath.
6. Maintenance and Care
Proper care will ensure the longevity and appearance of your Garvee bathtub.
- Regular Cleaning: Clean the bathtub regularly with a soft cloth or sponge and a mild, non-abrasive bathroom cleaner.
- Avoid Harsh Chemicals: Do not use abrasive powders, scouring pads, or cleaners containing ammonia, bleach, or strong acids, as these can damage the acrylic surface and chrome finish.
- Stain Prevention: Wipe down the tub after each use to prevent water spots and soap scum buildup. The acrylic material is designed to be anti-stain and anti-yellowing.
- Drain Maintenance: Periodically check and clean the pop-up drain and overflow assembly to ensure proper function and prevent blockages.
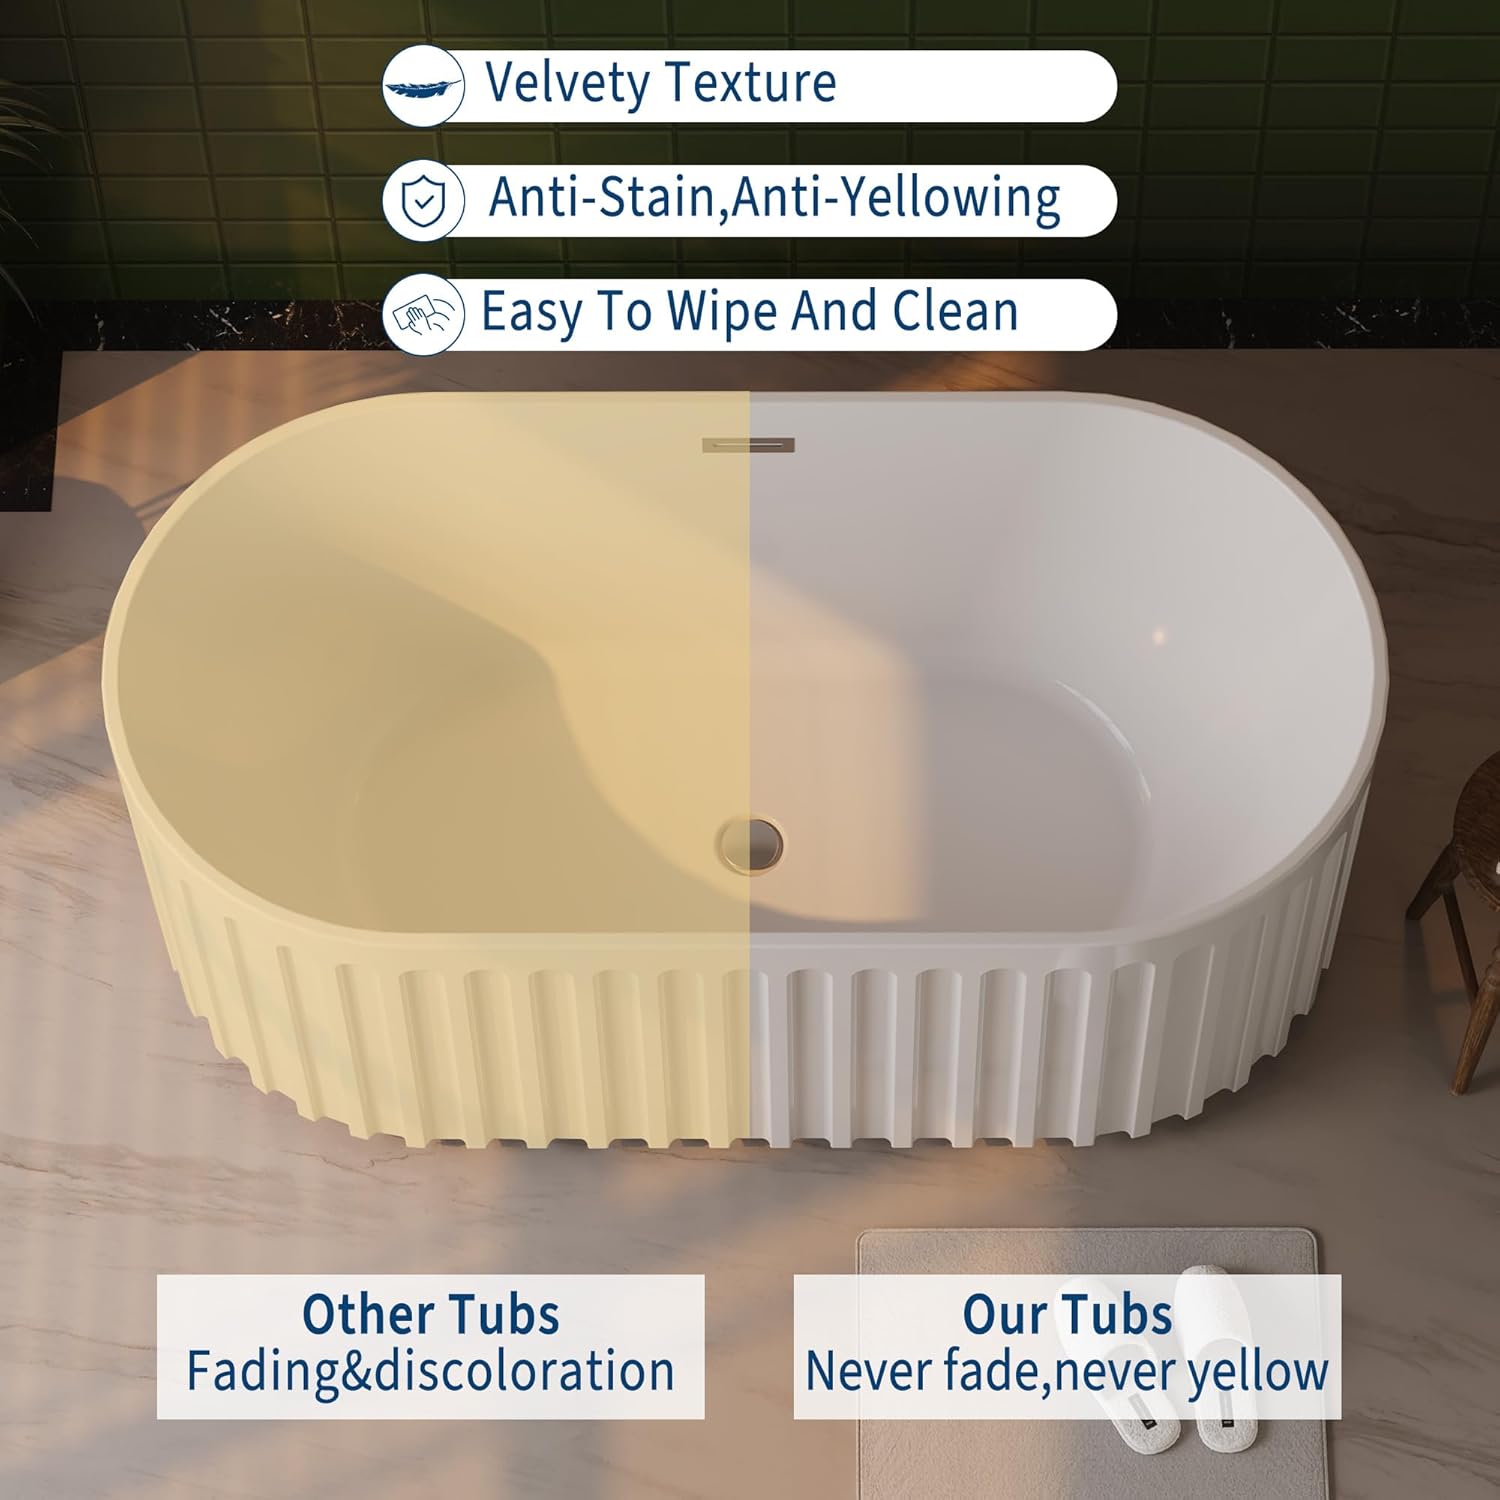
Image 5: A comparative image illustrating the Garvee bathtub's "Velvety Texture," "Anti-Stain, Anti-Yellowing," and "Easy To Wipe And Clean" properties, contrasting its long-lasting finish with other tubs that may fade and discolor.

Image 6: A detailed view of the integrated pop-up drain, highlighting its chrome finish and functionality for easy water release.
7. Troubleshooting
If you encounter issues with your Garvee bathtub, refer to the following common problems and solutions:
| Problem | Possible Cause | Solution |
|---|---|---|
| Slow Draining | Hair or debris in drain; partially closed drain. | Remove and clean the pop-up drain mechanism. Ensure the drain is fully open. |
| Leaks around drain/overflow | Loose connections; improper sealant application. | Tighten connections. Reapply plumber's putty or silicone sealant as needed. Consult a professional plumber. |
| Water temperature not maintained | External factors; extreme room temperature. | While the tub has double-walled insulation, extreme conditions can affect water temperature. Ensure bathroom is adequately heated. |
| Surface scratches | Abrasive cleaning; sharp objects. | Use only soft cloths and non-abrasive cleaners. Minor scratches may be buffed out with a specialized acrylic repair kit. |
If the problem persists after attempting these solutions, please contact Garvee customer support.
8. Specifications
| Feature | Detail |
|---|---|
| Brand | Garvee |
| Model Number | CWPHO_158UTY1W3s |
| Type | Freestanding Bathtub |
| Material | Acrylic |
| Color | Harp White-C |
| Dimensions (L x W x H) | 67 x 31 x 23.2 inches (approx.) |
| Item Weight | 105.2 pounds (approx.) |
| Drain Type | Chrome Pop-Up Drain |
| Overflow | Chrome Overflow Included |
| Insulation | Double-walled |
9. Warranty and Support
Garvee is committed to providing high-quality products. For warranty information, product support, or to report any issues, please contact Garvee customer service through the retailer where the product was purchased or visit the official Garvee website.
Please have your model number (CWPHO_158UTY1W3s) and purchase date available when contacting support.


