
1. Introduction
This manual provides detailed instructions for the setup, operation, maintenance, and troubleshooting of your ASHATA Business IP Phone. Designed for small to medium-sized businesses, this 2-line VoIP phone offers advanced features such as a 2.4-inch color display, dual 1000M Ethernet ports, Bluetooth 5.0 connectivity, noise cancellation, and integrated Power over Ethernet (PoE) for a streamlined communication experience.
2. Product Overview
2.1 Key Features
- Dual Service Lines: Supports two service lines, ideal for managing multiple calls efficiently.
- 2.4-inch Color Display: A clear, backlit graphical LCD for easy call management and information display.
- Integrated PoE: Power over Ethernet support simplifies installation by delivering power and data through a single cable.
- Bluetooth 5.0: Enables wireless connectivity for compatible headsets, offering greater mobility.
- Noise Cancellation: Minimizes background noise to ensure clear and uninterrupted conversations.
- Versatile Connectivity: Includes USB A, RJ9, and EHS ports for various headset options.
- Ergonomic Design: Features an adjustable stand for optimal viewing angles and user comfort.
2.2 Package Contents
Verify that all items are present in your package:
- ASHATA Business IP Phone Unit
- Handset
- Handset Cord
- Ethernet Cable
- Desk Stand
- Quick Start Guide (if applicable)
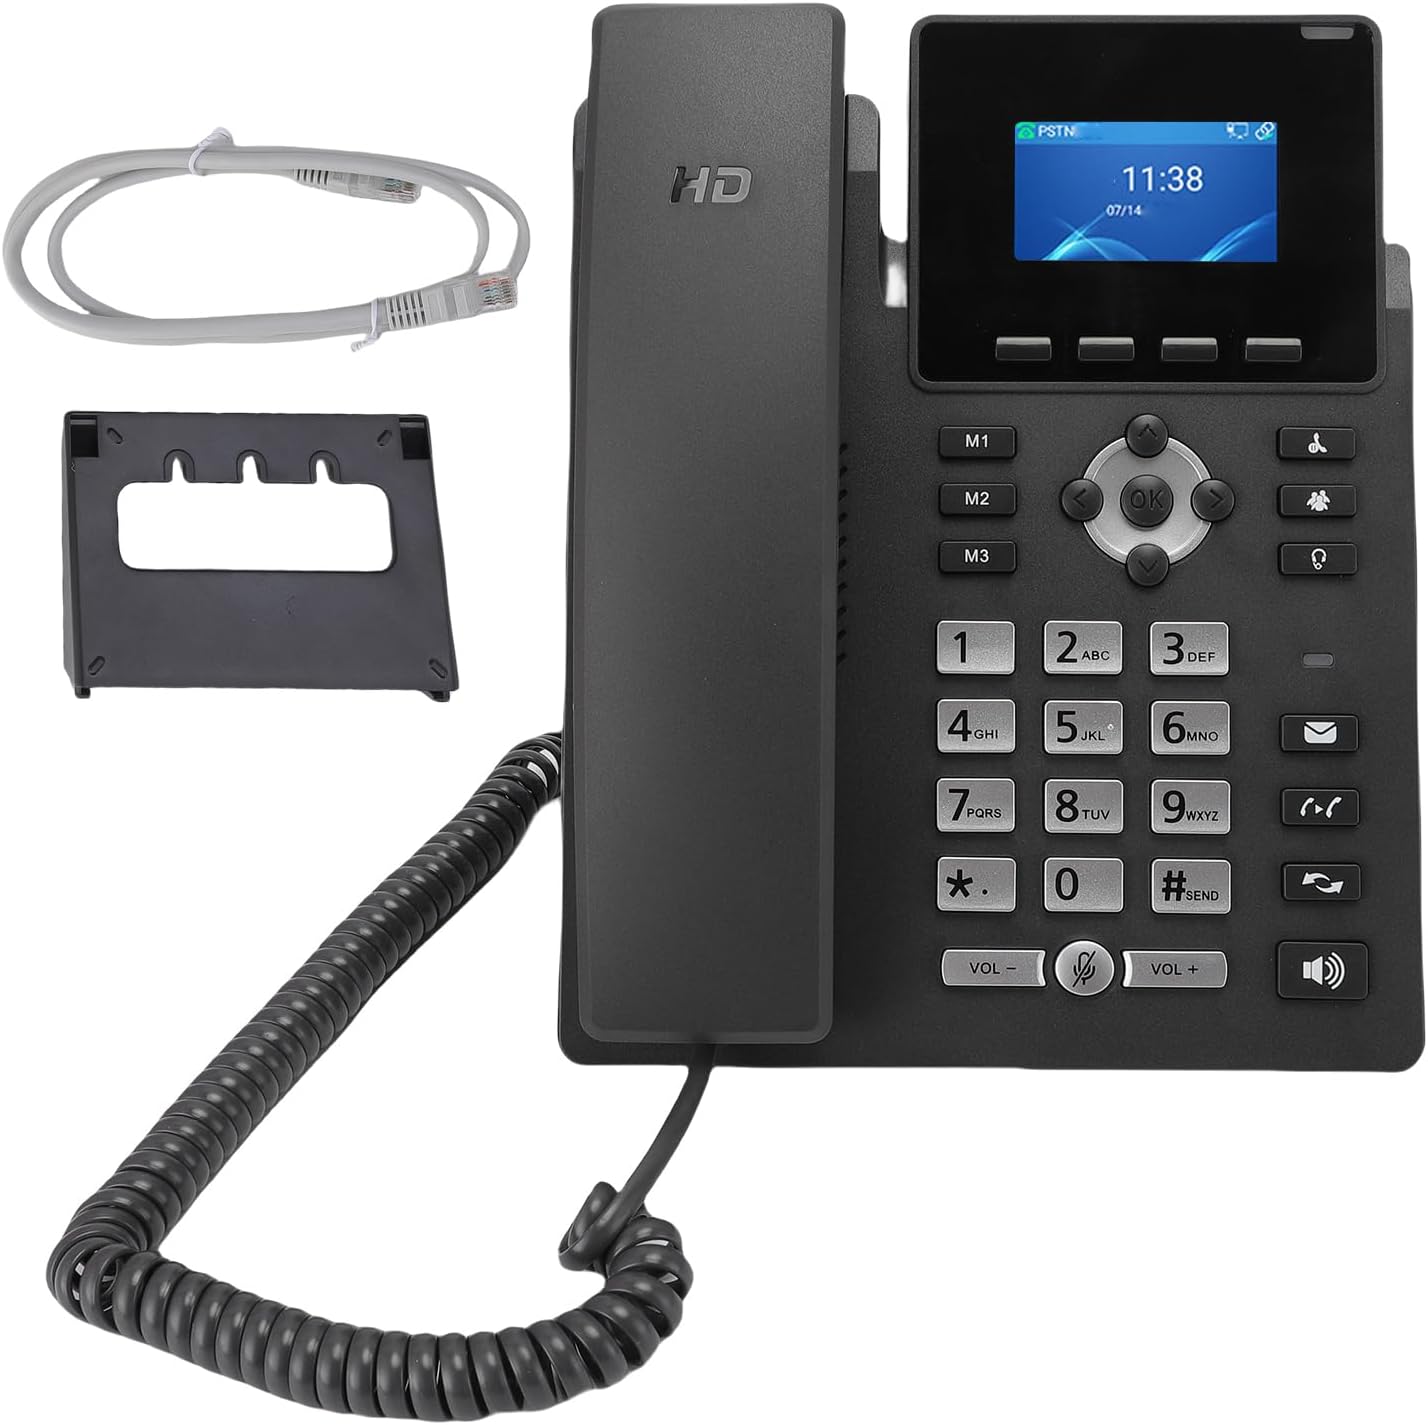
Image: The ASHATA Business IP Phone, showing the main unit, handset, coiled cord, desk stand, and an Ethernet cable, indicating the complete package contents.
3. Setup
3.1 Physical Connections
- Connect the Handset: Plug one end of the coiled handset cord into the handset and the other end into the handset port on the phone unit.
- Connect to Network (PoE): If using Power over Ethernet, connect one end of the Ethernet cable to the LAN port on the back of the phone and the other end to a PoE-enabled network switch or router. The phone will power on automatically.
- Connect to Network (Non-PoE): If PoE is not available, connect one end of the Ethernet cable to the LAN port on the back of the phone and the other end to your network. Then, connect a compatible 5V DC power adapter (not included) to the DC 5V power port on the phone.
- Connect PC (Optional): If you wish to connect a computer through the phone, use another Ethernet cable to connect the PC port on the phone to your computer's Ethernet port.
- Attach Desk Stand: Securely attach the included desk stand to the bottom of the phone unit. The stand allows for adjustable viewing angles.

Image: Rear view of the ASHATA Business IP Phone, highlighting the LAN, PC, headset, and DC 5V power input ports for various connections.

Image: Side view of the ASHATA Business IP Phone, demonstrating the adjustable desk stand that allows for different viewing angles.
3.2 Initial Configuration
Upon first power-up, the phone will initiate its boot sequence. The 2.4-inch color display will show the boot progress. Once fully booted, the phone will attempt to obtain network settings via DHCP. If your network requires static IP configuration or specific VoIP server settings, these can be configured via the phone's menu system or a web interface (refer to your network administrator for details).
4. Operating Instructions
4.1 Making and Receiving Calls
- To Make a Call: Pick up the handset or press the Speaker button. Dial the desired number using the keypad. Press the 'Send' or 'Dial' button (if available) or wait for the call to connect automatically.
- To Receive a Call: When the phone rings, pick up the handset or press the Speaker button. The display will show caller ID information if available.
- Using the Display: The 2.4-inch color display provides information such as caller ID, call duration, and menu options. Use the navigation buttons (up, down, left, right, OK) to navigate through menus.
- Voicemail Transfer: During an active call, you can transfer the call to voicemail by following the on-screen prompts or using a dedicated 'Voicemail' or 'Transfer' button, then selecting the voicemail option.
4.2 Bluetooth 5.0 Connectivity
The ASHATA Business IP Phone supports Bluetooth 5.0 for connecting wireless headsets.
- Enable Bluetooth: Navigate to the phone's menu, find the Bluetooth settings, and enable it.
- Pair Headset: Put your Bluetooth headset into pairing mode. On the phone, select 'Scan for Devices' and choose your headset from the list. Follow any on-screen prompts to complete pairing.
- Use Headset: Once paired, you can typically answer/end calls using the headset's controls or by selecting the headset option on the phone.
4.3 Headset Compatibility
In addition to Bluetooth, the phone supports wired headsets via USB A, RJ9, and EHS ports. Connect your compatible headset to the appropriate port for hands-free communication.
4.4 Noise Cancellation
The integrated noise cancellation technology actively reduces background noise during calls, ensuring that your voice is transmitted clearly and that you can hear the other party without distraction. This feature is always active to provide optimal audio quality.

Image: Top-down view of the ASHATA Business IP Phone, showing the 2.4-inch color display, numerical keypad, and various function buttons for call management.
5. Maintenance
5.1 Cleaning
- Use a soft, dry, lint-free cloth to clean the phone's surface and display.
- For stubborn marks, slightly dampen the cloth with water or a mild, non-abrasive cleaner.
- Avoid using harsh chemicals, abrasive cleaners, or aerosol sprays directly on the phone.
- Ensure the phone is powered off and unplugged before cleaning.
5.2 General Care
- Keep the phone away from direct sunlight, heat sources, and excessive moisture.
- Avoid dropping the phone or subjecting it to strong impacts.
- Do not attempt to disassemble the phone; this will void the warranty.
6. Troubleshooting
If you encounter issues with your ASHATA Business IP Phone, refer to the following common problems and solutions:
| Problem | Possible Cause | Solution |
|---|---|---|
| No dial tone | Network cable loose or disconnected; Phone not powered; VoIP registration failed. | Check Ethernet cable connection. Ensure power adapter (if not PoE) is connected. Verify network connectivity and VoIP account registration status on the display. |
| Cannot make/receive calls | VoIP account not registered; Incorrect network settings; Firewall blocking VoIP traffic. | Check VoIP account status on the display. Verify network settings (IP address, gateway, DNS). Consult your network administrator regarding firewall settings. |
| Poor audio quality (echo, static) | Network congestion; Faulty handset/headset; Environmental noise. | Check network bandwidth. Try a different handset or headset. Ensure noise cancellation is active (it is by default). |
| Bluetooth headset not connecting | Headset not in pairing mode; Bluetooth disabled on phone; Interference. | Ensure headset is in pairing mode. Verify Bluetooth is enabled on the phone. Move closer to the phone and away from other wireless devices. |
7. Specifications
| Feature | Detail |
|---|---|
| Brand | ASHATA |
| Model | Business IP Phone |
| Color | Black |
| Phone Type | Corded |
| Display | 2.4-inch Color Graphical LCD (Backlit) |
| VoIP Lines | 2 Service Lines |
| Ethernet Ports | Dual 1000M (Gigabit) Ethernet Ports (LAN, PC) |
| Power | Power over Ethernet (PoE) or DC 5V Power Adapter (not included) |
| Bluetooth | Bluetooth 5.0 |
| Headset Ports | USB A, RJ9, EHS |
| Noise Cancellation | Integrated |
| Conference Function | Basic |
| Caller ID | No (as per specifications, though display shows it if provided by service) |
| Multiple Simultaneous Calls | Multi-line operation |
| Country of Origin | China |
| ASIN | B0FX1R3R15 |
8. Warranty and Support
For warranty information and technical support, please refer to the documentation provided with your purchase or contact your vendor. Keep your purchase receipt as proof of purchase for any warranty claims.