1. Important Safety Information
Please read all instructions carefully before assembling and using this product. Retain this manual for future reference.
- Assembly: Follow the provided instructions for the assembly of this narrow side table. Ensure all parts are correctly installed and tightened before use.
- Weight Limit: Do not place items exceeding the maximum weight recommendation of 44 pounds (20 kg) per shelf. Overloading can cause instability and damage.
- Electrical Safety: The side table includes a power outlet. Place and use it away from water, fire, and high-temperature environments. Do not expose the charging station to liquids. Ensure the power cord is not pinched or damaged.
- Placement: Use this product on a flat, stable surface to prevent tipping.
- Indoor Use Only: This product is designed for indoor use. Do not use outdoors.
2. Package Contents
Verify that all components are present and undamaged before beginning assembly. If any parts are missing or damaged, please contact customer support.
- 1 x 3-Tier Side Table (unassembled components)
- 1 x Accessory Kit (hardware)
- 1 x Instructions Manual
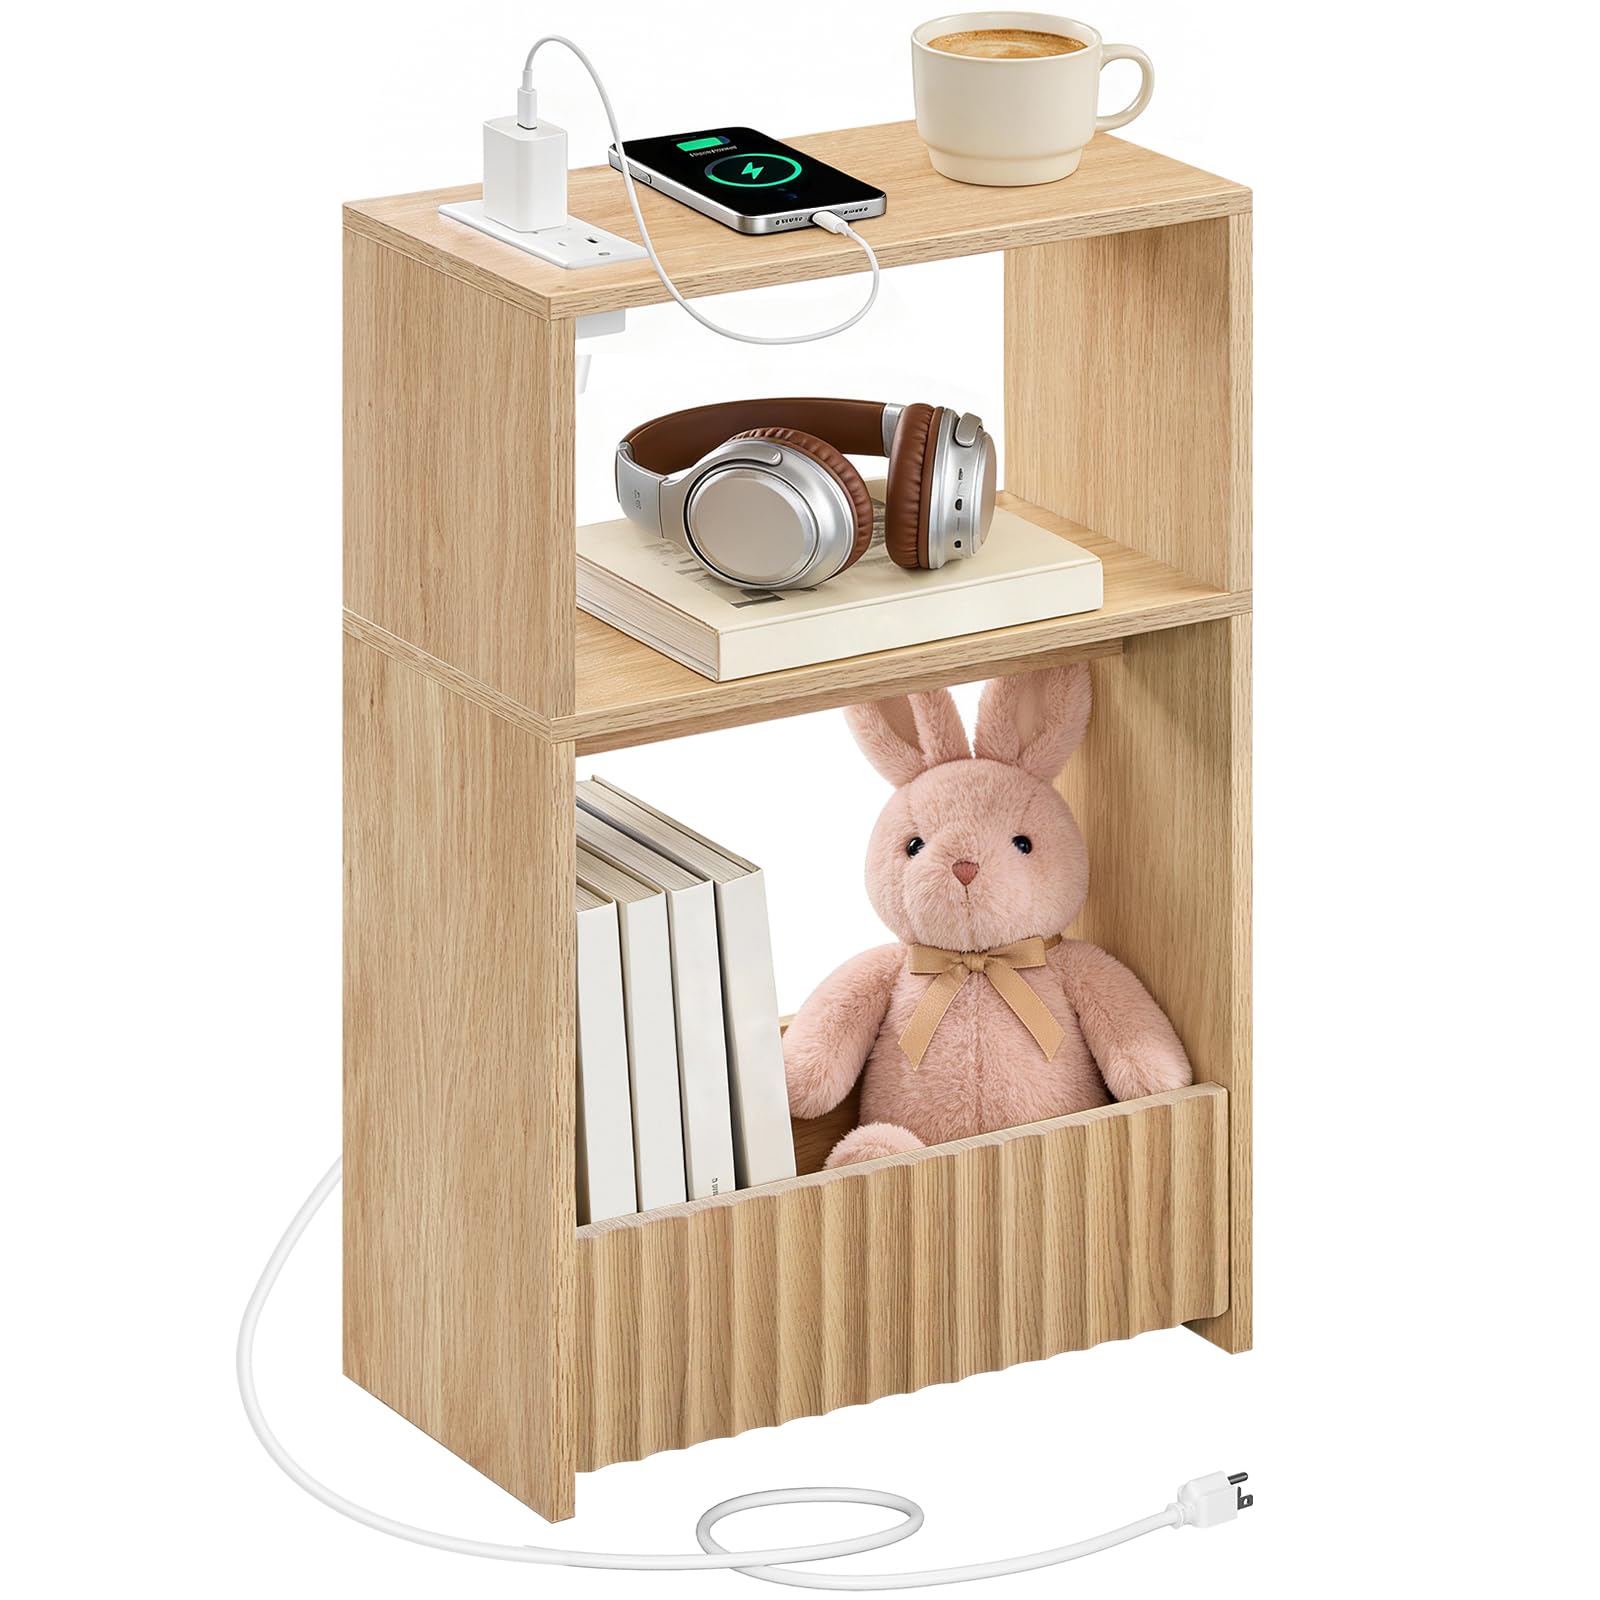
Image: Overview of the MAHANCRIS Small Narrow Side Table with Charging Station.
3. Assembly Instructions
Assembly is required. Please follow the included illustrated guide and use the numbered parts for a smooth setup. Recommended tools are an Allen Key and a screwdriver (not included).
3.1 Tools Required
- Allen Key (often included in accessory kit)
- Screwdriver (Phillips head recommended)
3.2 Step-by-Step Assembly
- Unpack: Carefully remove all components from the packaging and lay them out on a clean, soft surface to prevent scratches.
- Identify Parts: Refer to the parts list in the included instruction manual to identify each component and hardware piece.
- Assemble Frame: Follow the diagrams in the manual to connect the side panels and shelves using the provided hardware. Ensure all screws are finger-tightened initially.
- Install Charging Station: Secure the charging station into its designated slot on the top panel, ensuring the power cord is routed correctly.
- Final Tightening: Once all parts are in place, fully tighten all screws with the screwdriver and Allen key. Do not overtighten.
- Placement: Position the assembled table in your desired location, ensuring the power cord can reach an outlet safely.

Image: Product dimensions, useful for assembly and placement planning.

Image: The fully assembled side table, showcasing the integrated power outlet.
Video: A general product overview or assembly guide for the side table.
4. Operating Instructions
This side table features a built-in charging station for convenient power access.
4.1 Using the Charging Station
- Connect to Power: Plug the side table's power cord into a standard wall outlet.
- AC Outlets: Use the two standard AC outlets to power lamps, laptops, or other small appliances.
- USB Ports: Use the 1 USB-A port and 1 Type-C port to charge your mobile devices such as phones, tablets, or smartwatches.
- Safety: Always ensure devices are compatible with the charging station's output. Avoid overloading the outlets.

Image: Detailed view of the charging station, highlighting the AC outlets and USB ports.
5. Maintenance
Proper care will ensure the longevity and appearance of your side table.
- Cleaning: The laminated panel features a smooth, easy-clean surface. Wipe with a soft, damp cloth. Avoid abrasive cleaners or harsh chemicals that may damage the finish.
- Spills: Immediately wipe up any spills to prevent moisture damage to the engineered wood.
- Heat: Do not place hot items directly on the surface. Use coasters or protective pads.
- Sunlight: Avoid prolonged exposure to direct sunlight to prevent fading or discoloration.
- Electrical Components: Keep the charging station clean and free of dust. Do not attempt to disassemble or repair the electrical components yourself.

Image: The smooth surface of the side table, demonstrating its easy-clean characteristic.
6. Troubleshooting
If you encounter issues with your side table, refer to the following common problems and solutions.
- Charging Station Not Working:
- Ensure the table's power cord is securely plugged into a functional wall outlet.
- Check if the wall outlet itself is working by plugging in another device.
- Verify that the devices you are trying to charge are properly connected to the USB or AC ports.
- Avoid overloading the charging station with too many high-power devices simultaneously.
- Table is Unstable/Wobbly:
- Ensure all assembly screws are fully tightened. Do not overtighten.
- Check that the table is placed on a flat, even surface.
- Verify that all components were assembled according to the instructions.
- Damage During Assembly:
- If any parts were damaged during assembly, stop and contact customer support for assistance.
7. Specifications
| Brand | MAHANCRIS |
| Model Number | ETNA751E01 |
| Product Dimensions (D x W x H) | 7.9" x 15" x 23.6" (20cm x 38cm x 60cm) |
| Item Weight | 9.9 Pounds (4.5 kg) |
| Maximum Weight Recommendation | 44 Pounds (20 kg) per shelf |
| Frame Material | Engineered Wood |
| Top Material Type | Engineered Wood |
| Color | Natural |
| Power Outlet | 2 AC Outlets, 1 USB-A Port, 1 Type-C Port |
| Required Assembly | Yes |
| Indoor/Outdoor Usage | Indoor |
8. Warranty and Support
MAHANCRIS products are manufactured with quality and care. For information regarding warranty coverage or if you require assistance with your product, please contact MAHANCRIS customer support.
Please have your model number (ETNA751E01) and purchase information ready when contacting support.
For further assistance, visit the official MAHANCRIS store or contact their customer service channels.
MAHANCRIS Store: Visit MAHANCRIS on Amazon


