
Devo G10
DEVO G10 Smart Lock User Manual
Model: G10
Brand: Devo
This manual provides detailed instructions for the installation, setup, operation, and maintenance of your DEVO G10 Smart Lock. Please read thoroughly before use.
1. Product Overview
The DEVO G10 Smart Lock offers advanced security and convenience with multiple access methods. It features a 6-in-1 unlocking system including fingerprint, Tuya App, IC cards, passcode, eKey sharing, and mechanical key. With built-in Wi-Fi, it allows for remote control and real-time notifications, and is compatible with Alexa and Google Home for voice control.
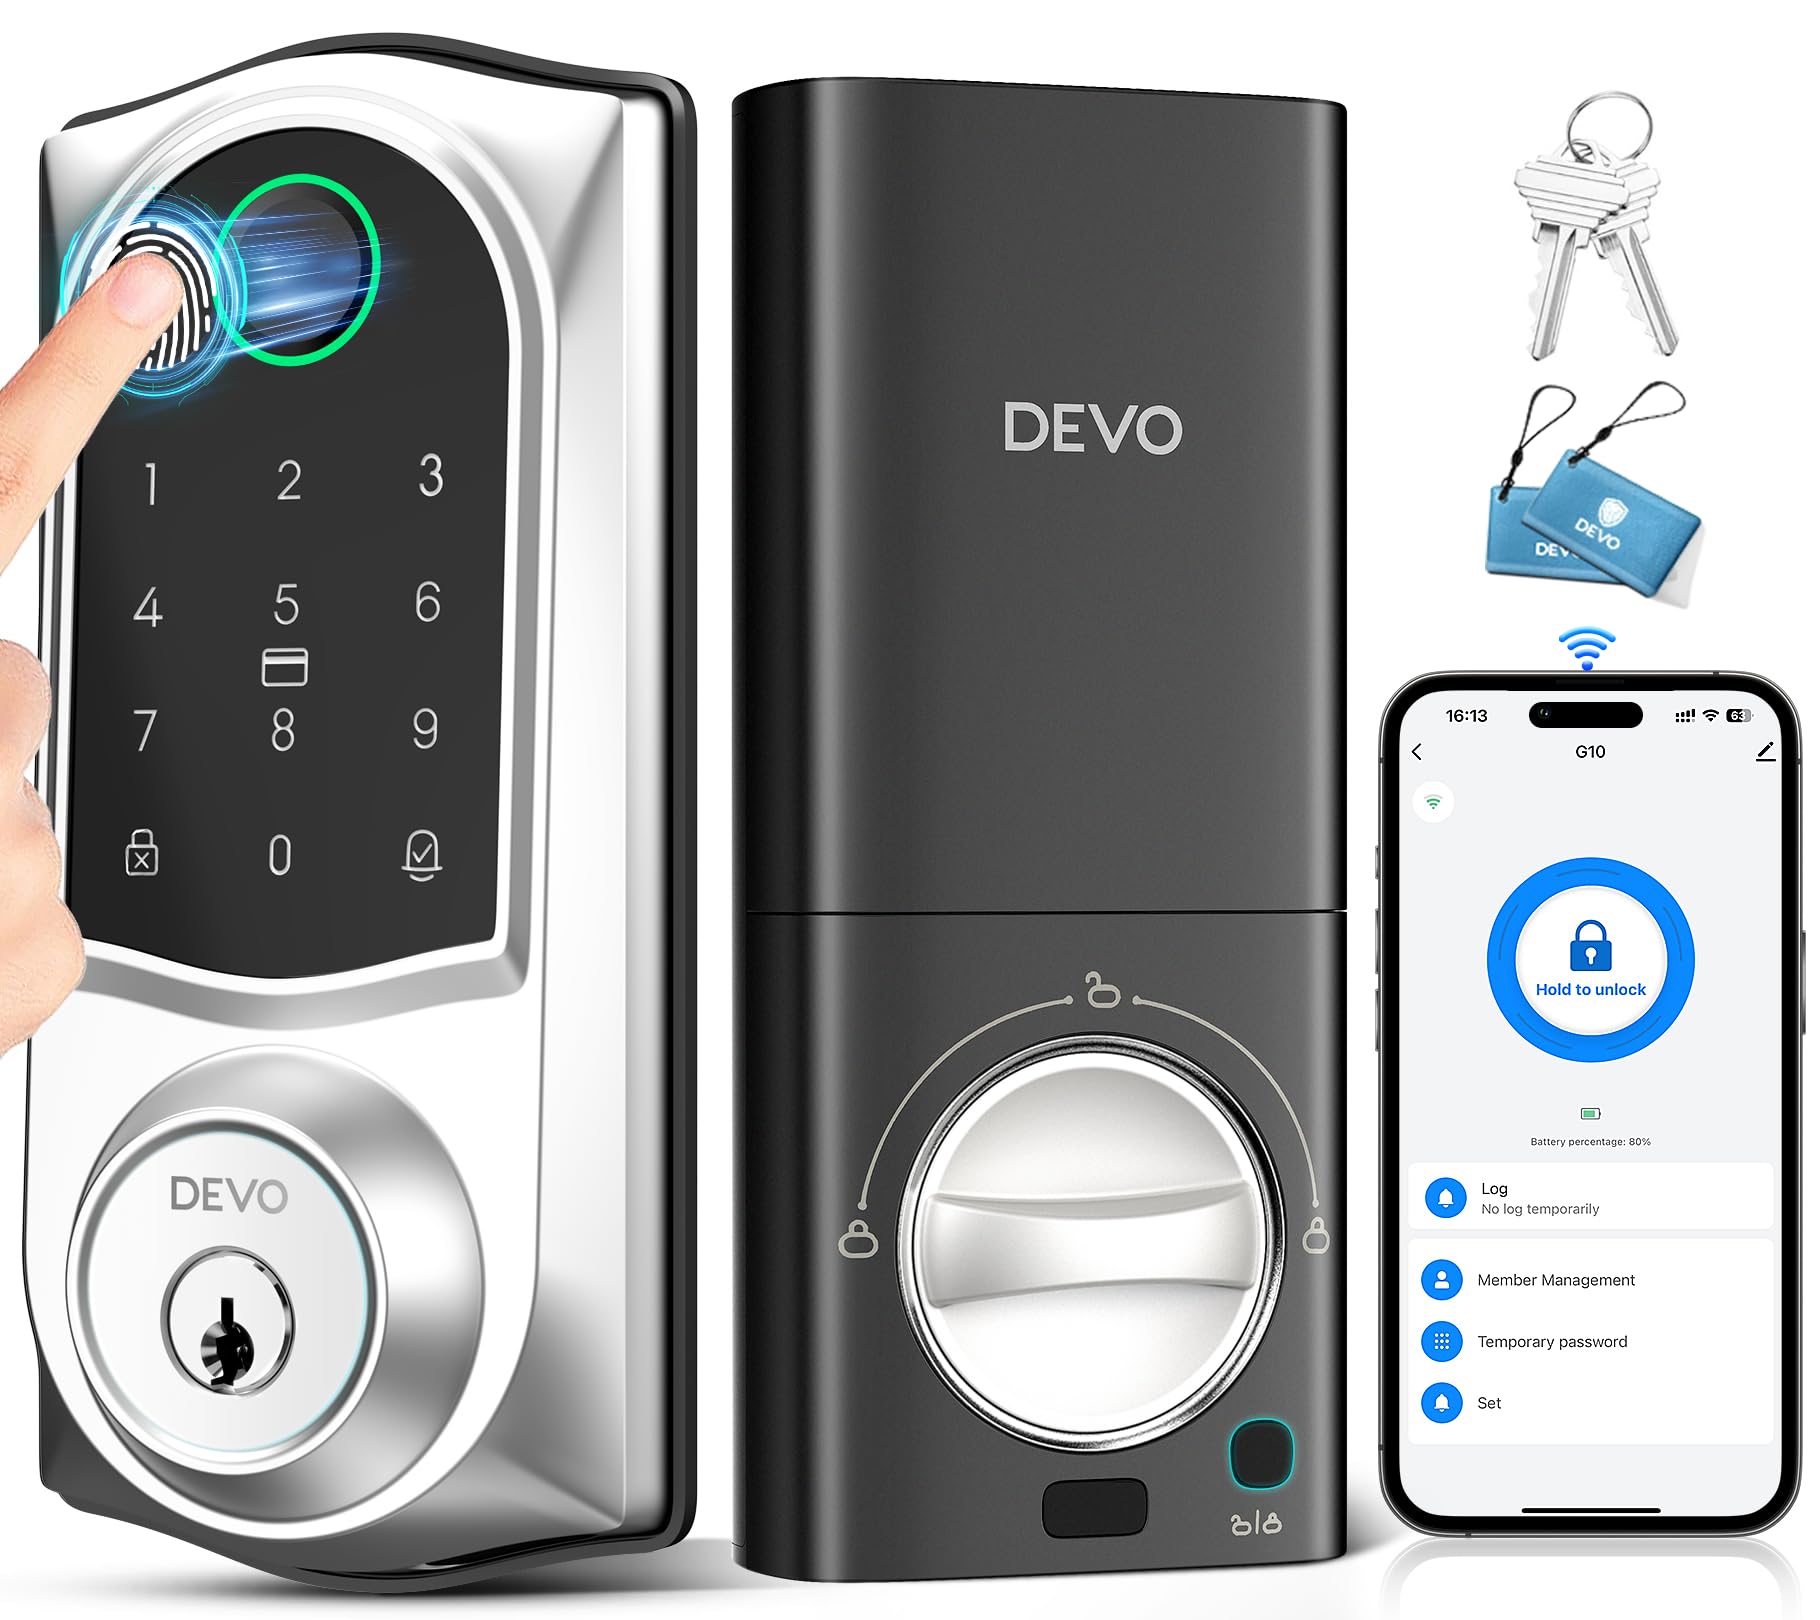
Image: The DEVO G10 Smart Lock, showcasing its sleek design and smart features.
2. What's Included
Verify that all components are present in your package before beginning installation:
- Smart Lock Exterior Assembly x 1
- Smart Lock Interior Assembly x 1
- Mounting Plate x 1
- Deadbolt x 1
- Strike Plate & Box x 1
- Keys x 2
- IC Cards x 2
- User Manual x 1
- Measuring Cardboard x 1
- All Necessary Screws (A, B, C, D, E)

Image: A visual representation of all parts included in the DEVO G10 Smart Lock package.
3. Installation Guide
Follow these steps to install your DEVO G10 Smart Lock. For a visual guide, please refer to the installation video below.
Video: Detailed installation guide for the DEVO G10 Smart Lock.
3.1: Measure Door Dimensions
Use the provided measuring cardboard to confirm your door's compatibility. Ensure the cross bore diameter is 1.5"/2.1" (38/54 mm), backset is 2.4"/2.8" (60/70 mm), and door hole diameter is 1" (25 mm). The door thickness should be between 1.4"-2.2" (35-55 mm).

Image: Measuring door dimensions to ensure proper fit for the smart lock.
3.2: Install Deadbolt
Insert the deadbolt into the door frame. Ensure the word "UP" on the deadbolt faces upwards. Check the backset depth; if 2.8" (70mm), turn the faceplate 180° to extend the latch. If 2.4" (60mm), install as is. The latch must be in the retracted (unlocked) position prior to installation. Secure with screws.
3.3: Install Exterior Assembly
Keeping the torque blade vertical, align it with the hole on the latch and pass it through. Ensure the cable goes underneath the deadbolt. Carefully feed the cable through the door hole.
3.4: Install Mounting Plate
Place the mounting plate over the cable and torque blade. Secure it to the door using the appropriate screws (refer to the video for screw types based on door thickness). Hand-tighten first, then use a screwdriver to secure.
3.5: Install Interior Assembly
Adjust the rear lock knob on the interior assembly to the vertical position. Attach the cable from the exterior assembly to the corresponding port on the back of the interior assembly. Remove the double-sided tape sticker, tuck the remaining cable into the back of the internal assembly, and pass the tailpiece through the latch hole. Align the interior assembly with the mounting plate and secure it with screw C at the bottom. Install the plug E and then insert 8 AA batteries, ensuring correct polarity. Replace the battery cover.
4. Connecting to Wi-Fi and App Setup
The DEVO G10 Smart Lock connects directly to your home's 2.4GHz Wi-Fi network (5GHz Wi-Fi is not supported). Follow these steps to connect your lock to the Tuya App for remote control and notifications.
Video: Tutorial on connecting the DEVO G10 Smart Lock to Wi-Fi and the Tuya App.
4.1: Prepare the Lock for Pairing
- Open the battery cover and press the reset button on the interior assembly.
- Enter the administrator password (initial password is 123456, or your customized password) and press the unlock button.
- Enter the administrator password again and press the unlock button.
- Press "5" to enter Wi-Fi network configuration mode, then press the unlock button. The lock will indicate it's ready for pairing.
4.2: Connect via Tuya App
- Ensure your smartphone's Wi-Fi and Bluetooth are enabled.
- Open the Tuya App (download from app store if not already installed).
- Click "Add Device" or the '+' icon.
- Select the 2.4GHz Wi-Fi network and enter your Wi-Fi password.
- Follow the on-screen prompts to complete the device addition. Once successful, click "Done".

Image: The Tuya Smart App interface for managing your smart lock.
5. Operating the Smart Lock
The DEVO G10 Smart Lock offers multiple convenient ways to unlock your door. For a demonstration of all unlocking methods, please watch the video below.
Video: Demonstration of all unlocking methods for the DEVO G10 Smart Lock.
5.1 Fingerprint Unlock
Place your registered fingerprint on the sensor. The lock will unlock instantly. The self-learning AI improves recognition accuracy with each use. The lock supports up to 100 fingerprints.

Image: A hand using the fingerprint sensor on the DEVO G10 Smart Lock.
5.2 Smart App Unlock (Tuya App)
Using the Tuya App on your smartphone, you can remotely unlock the door from anywhere. Simply open the app, select your lock, and tap the unlock icon. You can also generate one-time passcodes for guests or service providers.
5.3 IC Card Unlock
Present a registered IC card to the card reader area on the lock. The lock will verify the card and unlock. Two IC cards are included with your lock.
5.4 Passcode Unlock
Enter your registered passcode on the keypad and press the unlock button. The lock supports up to 50 user passwords. Utilize the anti-peeping feature by entering random digits before or after your actual passcode to prevent onlookers from identifying your true code.
5.5 Mechanical Key Unlock
In case of power failure or other issues, you can always use the provided mechanical keys to unlock the door manually. Two keys are included.
5.6 Voice Control (Alexa/Google Home)
Integrate your DEVO G10 Smart Lock with Amazon Alexa or Google Home for convenient voice-activated unlocking. Ensure your smart assistant is linked to your Tuya App account. You may be prompted for a voice code for security.

Image: A family interacting with a smart speaker to unlock the DEVO G10 Smart Lock via voice command.
6. Key Features and Functions
6.1 Auto-Lock Function
The auto-lock feature automatically relocks your door after a set period (5-900 seconds), providing added security and peace of mind. This setting can be customized or disabled via the Tuya App.

Image: The auto-lock feature of the DEVO G10 Smart Lock, showing a door automatically locking.
6.2 Anti-Peeping Password
To enhance security when using passcodes, you can enter any random digits before or after your actual password. The lock will still recognize the correct sequence within the longer string of numbers, preventing onlookers from identifying your true code.
6.3 Battery Management and Emergency Power
The lock is powered by 8 AA batteries. It features a low battery alarm to notify you when batteries need replacement. In case of complete battery depletion, an external Type-C emergency power port is available for temporary power to unlock the door.

Image: Internal view of the DEVO G10 Smart Lock showing battery installation and the Type-C emergency charging port.
7. Maintenance
To ensure optimal performance and longevity of your DEVO G10 Smart Lock, follow these maintenance guidelines:
- Cleaning: Wipe the exterior surfaces with a soft, damp cloth. Avoid abrasive cleaners, solvents, or harsh chemicals that could damage the finish or electronic components.
- Battery Replacement: Replace all 8 AA batteries when the low battery alarm is triggered. Always use new, high-quality alkaline batteries. Do not mix old and new batteries or different battery types.
- Fingerprint Sensor: Keep the fingerprint sensor clean and dry for accurate recognition.
- Keypad: Ensure the keypad is free from dirt or debris.
- Mechanical Key: Store the mechanical keys in a safe, accessible location outside your home for emergency access.
8. Troubleshooting
If you encounter issues with your DEVO G10 Smart Lock, refer to the common problems and solutions below:
| Problem | Possible Cause | Solution |
|---|---|---|
| Lock not responding | Dead batteries | Replace all 8 AA batteries. Use the Type-C emergency power port if completely drained. |
| Fingerprint not recognized | Dirty sensor, unregistered fingerprint, improper placement | Clean the sensor. Ensure your fingerprint is registered. Place your finger flat on the sensor. Try re-registering your fingerprint. |
| Cannot connect to Wi-Fi | Incorrect Wi-Fi band (5GHz), wrong password, weak signal | Ensure you are connecting to a 2.4GHz Wi-Fi network. Double-check your Wi-Fi password. Move the lock closer to your router or consider a Wi-Fi extender. Follow app pairing steps carefully. |
| Auto-lock not working as expected | Incorrect settings in Tuya App | Check the auto-lock delay settings in the Tuya App. Ensure it is enabled and the desired delay time is set. |
| Keypad unresponsive | Low battery, keypad malfunction | Replace batteries. If the issue persists, contact customer support. |
9. Product Specifications
| Feature | Detail |
|---|---|
| Brand | Devo |
| Model | G10 |
| Lock Type | Biometric, Combination Lock, Deadbolt, Keypad |
| Material | Aluminum |
| Connectivity Protocol | Wi-Fi (2.4GHz only) |
| Control Method | App, Touch, Voice |
| Controller Type | Amazon Alexa, Google Assistant |
| Door Thickness Compatibility | 1.4 - 2.2 inches (35-55 mm) |
| Power Source | 8 x AA Batteries |
| Emergency Power | Type-C USB Port |
| Waterproof Rating | IP54 |
| Certifications | BHMA Certified |
10. Warranty and Customer Support
The DEVO G10 Smart Lock is BHMA Certified, ensuring high standards of security and durability. It also features an IP54 waterproof rating, providing protection against dust and splashing water.
For any questions, technical assistance, or warranty inquiries, please contact DEVO customer support. Refer to the product packaging or the official Devo website for contact information.
Ask a question about this manual
Ask about setup, troubleshooting, compatibility, parts, safety, or missing instructions. Manuals+ will review the question and use this page’s manual context to help answer it.