
Introduction
This manual provides essential instructions for the safe and effective use of your Psisuvry 2.6 Cubic Feet Fireproof Safe Box. Please read all instructions carefully before installation and operation. Retain this manual for future reference.
Important Safety Information
- Do not store keys inside the safe. Always keep spare keys in a secure location away from the safe.
- Ensure the safe is securely mounted to prevent unauthorized removal.
- Keep the safe away from excessive moisture to prevent damage to contents, as the safe is not water resistant. Consider using a desiccant packet inside.
- This safe is designed to protect documents and valuables from fire for a limited duration.
Package Contents
Verify that all components are present in the package:
- 1 x Safe Box
- 1 x Floor Mat
- 3 x Emergency Keys
- 4 x Expansion Bolts
- 1 x User Manual (this document)

Figure 1: Included components and safe dimensions.
Product Features
- Heavy-Duty Steel Construction: Constructed from rugged steel for enhanced anti-pry and anti-drill protection.
- Key Lock Security: Features a reliable key lock mechanism with duplicate keys for access. No batteries or complex codes are required.
- Removable Shelf: An adjustable interior shelf allows for custom storage configurations.
- Anti-Pry Hinges & Reinforced Edges: Concealed hinges and reinforced door edges prevent crowbar insertion and prying attempts.

Figure 2: Security features of the safe box.

Figure 3: Construction details highlighting reinforced steel and anti-theft design.
Setup and Installation
The safe can be mounted to a wall or floor for enhanced security. Choose a stable, dry, and secure location for installation.
Mounting Instructions:
- Step 1: Mark Mounting Holes. Place the safe in the desired location and use a pencil to mark the positions of the mounting holes on the wall or floor.
- Step 2: Drill Holes. Move the safe away. Drill 2.4-inch (approximately 60 mm) deep holes using a 10mm drill bit at the marked locations.
- Step 3: Insert Expansion Bolts. Insert the expansion bolts into the drilled holes. Turn the clamping screw counter-clockwise to separate the bolt components slightly.
- Step 4: Secure the Safe. Align the safe's mounting holes with the expansion bolts. Secure the safe in place by tightening the clamping screws.

Figure 4: Step-by-step guide for wall or floor mounting.

Figure 5: Example of wall-mounted installation.
Operating Instructions
Using the Key Lock:
- Insert one of the provided keys into the keyhole on the safe door.
- Turn the key clockwise to unlock the safe.
- Pull the door open.
- To lock, close the door and turn the key counter-clockwise. Remove the key.
The safe comes with three emergency keys. Keep them in a secure, separate location from the safe.

Figure 6: Operating the key lock mechanism.
Internal Organization (Removable Shelf):
The safe includes a removable shelf to customize the interior storage space. To adjust or remove the shelf:
- Open the safe door.
- Carefully lift the shelf from its supports to remove it.
- To re-install, align the shelf with the desired supports and lower it into place.
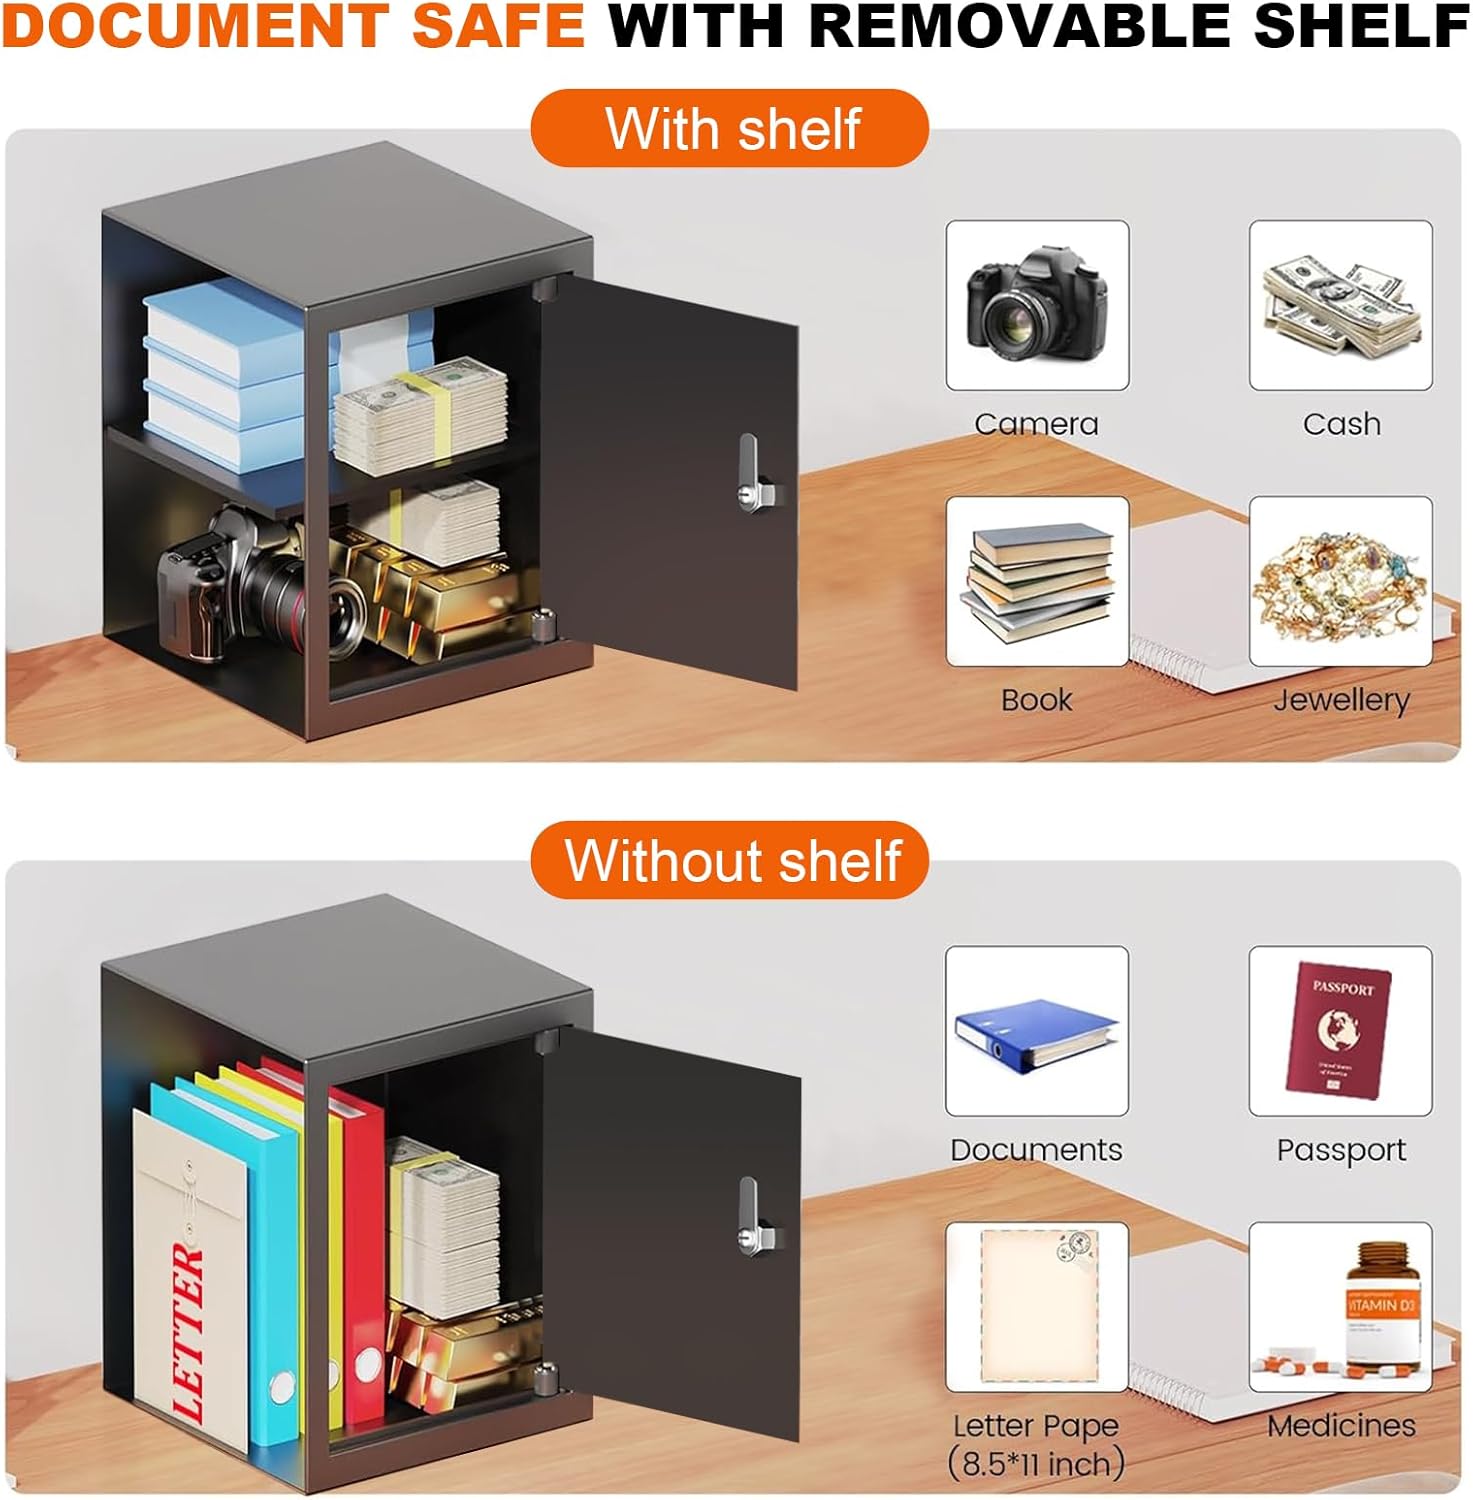
Figure 7: Customizing interior storage with the removable shelf.
Maintenance
- Cleaning: Wipe the exterior with a soft, damp cloth. Avoid abrasive cleaners.
- Key Care: Keep keys clean and dry. Do not force keys into the lock.
- Interior: Periodically check for moisture. If storing sensitive items, consider using a small desiccant packet to absorb humidity.
Troubleshooting
| Problem | Possible Cause | Solution |
|---|---|---|
| Key does not turn or is difficult to insert. | Incorrect key, debris in keyhole, or key is bent. | Ensure you are using the correct key. Check for and remove any debris. Do not force the key. If bent, use a spare key. |
| Safe door does not open after unlocking. | Door may be stuck due to pressure or minor misalignment. | Gently push on the door while turning the key to unlock, then pull. Ensure the safe is level. |
| Safe feels unstable after mounting. | Mounting bolts not fully tightened or improper installation surface. | Re-tighten all expansion bolts. Ensure the mounting surface (wall stud or solid floor) is adequate. Consult a professional if unsure. |
Specifications
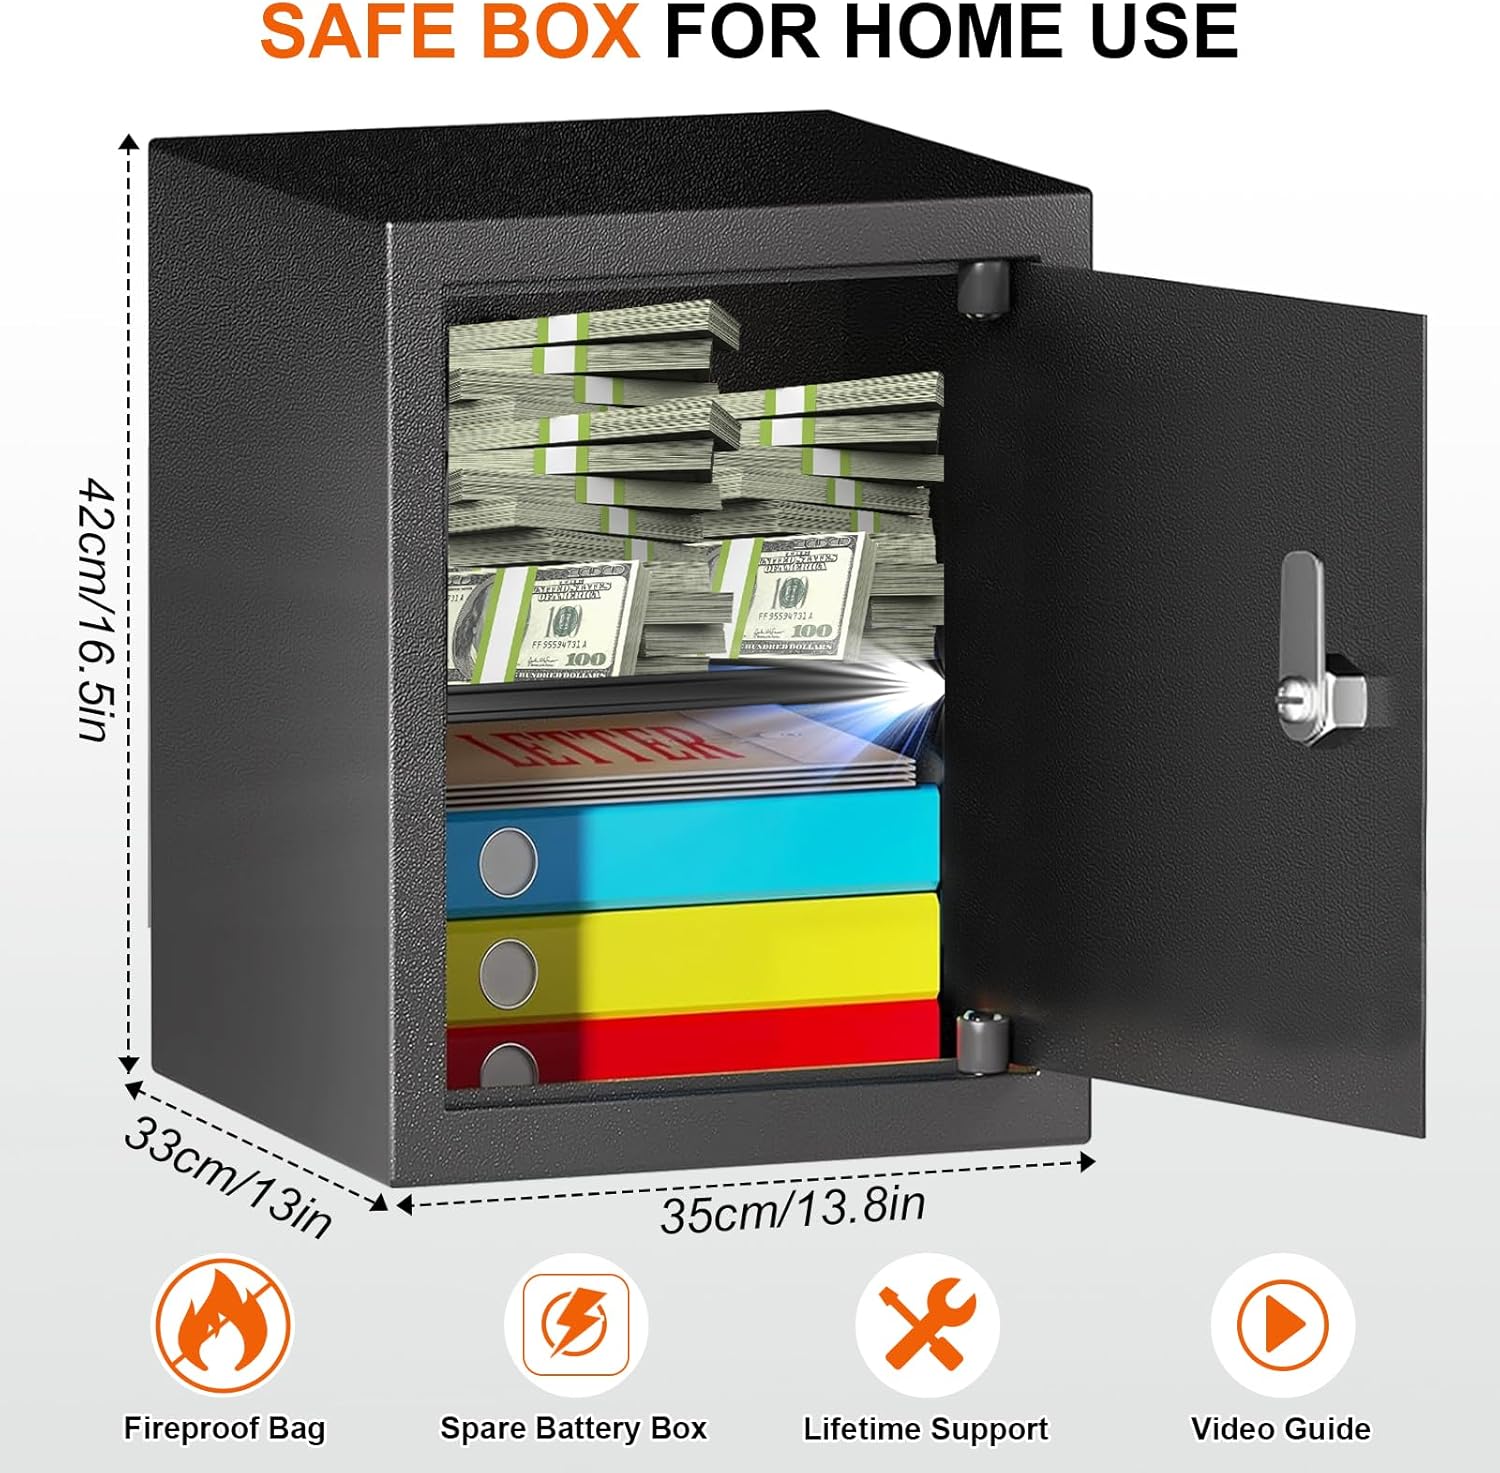
Figure 8: External dimensions of the safe box.
| Feature | Detail |
|---|---|
| Brand | Psisuvry |
| Model Number | B2 |
| Product Dimensions (D x W x H) | 12.99" x 13.78" x 16.54" (33cm x 35cm x 42cm) |
| Capacity | 2.6 Cubic Feet |
| Lock Type | Key |
| Color | Black |
| Material | Metal (Reinforced SPCC Steel) |
| Mounting Type | Floor or Wall Mount |
| Item Weight | 24 Pounds |
| Water Resistance Level | Not Water Resistant |
Warranty and Support
Psisuvry provides the following support for your safe box:
- Warranty: 10-year replacement policy.
- Technical Support: Lifetime technical support.
- Parts: Free replacement parts service.
For any inquiries or support needs, please contact Psisuvry customer service. Refer to your purchase documentation for contact details.