
1. Introduction
Thank you for choosing the IDIMEX Rack Ripado 180 cm TV Stand. This manual provides essential information for the safe assembly, operation, and maintenance of your new furniture. Please read these instructions carefully before beginning assembly and retain them for future reference.
This TV stand is designed to accommodate televisions up to 75 inches, featuring a contemporary design with slatted sliding doors and integrated storage.

Figure 1.1: Front view of the IDIMEX Rack Ripado 180 cm TV Stand. This image shows the overall design with slatted sliding doors and a drawer on the right.
2. Safety Instructions
- Always assemble the product on a soft, clean surface to prevent scratches.
- Ensure all components are present and undamaged before assembly. Do not proceed with assembly if any parts are missing or damaged.
- Assembly should ideally be performed by two adults to ensure safety and ease of handling.
- Do not overtighten screws, as this may damage the wood.
- Place the TV stand on a level, stable surface to prevent tipping.
- Distribute weight evenly across the top surface and shelves. Do not exceed the recommended weight capacity for the top surface or internal compartments.
- Keep small parts and hardware out of reach of children during assembly.
3. Package Contents
Before starting assembly, verify that all parts listed below are included in your package. If any parts are missing or damaged, please contact customer support.
- Main wooden panels (top, bottom, sides, back)
- Slatted sliding doors
- Drawer components
- Legs and support beams
- Hardware Kit (Kit ferragens): Includes screws, dowels, cam locks, drawer slides, and other necessary fasteners.
- Assembly instructions (this manual)
4. Setup and Assembly
Follow these steps carefully to assemble your IDIMEX Rack Ripado TV Stand. It is recommended to have a second person assist with assembly.
4.1. Preparation
- Unpack all components and lay them out on a clean, soft surface.
- Identify each part by comparing it with the parts list in the hardware kit.
- Gather necessary tools (e.g., screwdriver, hammer - not included).
4.2. Frame Assembly
- Attach the side panels to the bottom panel using the provided screws and dowels from the hardware kit. Ensure proper alignment.
- Secure the back panel to the assembled sides and bottom.
- Attach the top panel, ensuring all connections are firm but not overtightened.
- Install the support legs and beams to the base of the rack.

Figure 4.1: Detail of the sturdy wooden legs and base structure, illustrating the assembly points for the support beams.
4.3. Drawer Assembly
- Assemble the drawer box according to the specific instructions provided with the hardware kit.
- Install the drawer slides onto the drawer box and into the designated compartment within the TV stand.
- Insert the assembled drawer into its compartment.

Figure 4.2: An open drawer revealing the internal storage capacity, suitable for media accessories or small items.
4.4. Sliding Door Installation
- Carefully insert the slatted sliding doors into their respective tracks on the top and bottom panels of the rack.
- Test the sliding mechanism to ensure smooth operation. The doors feature a touch-to-open/close system (fecho-toque).

Figure 4.3: Close-up view of the slatted sliding door, highlighting the vertical wooden slats and the track mechanism.
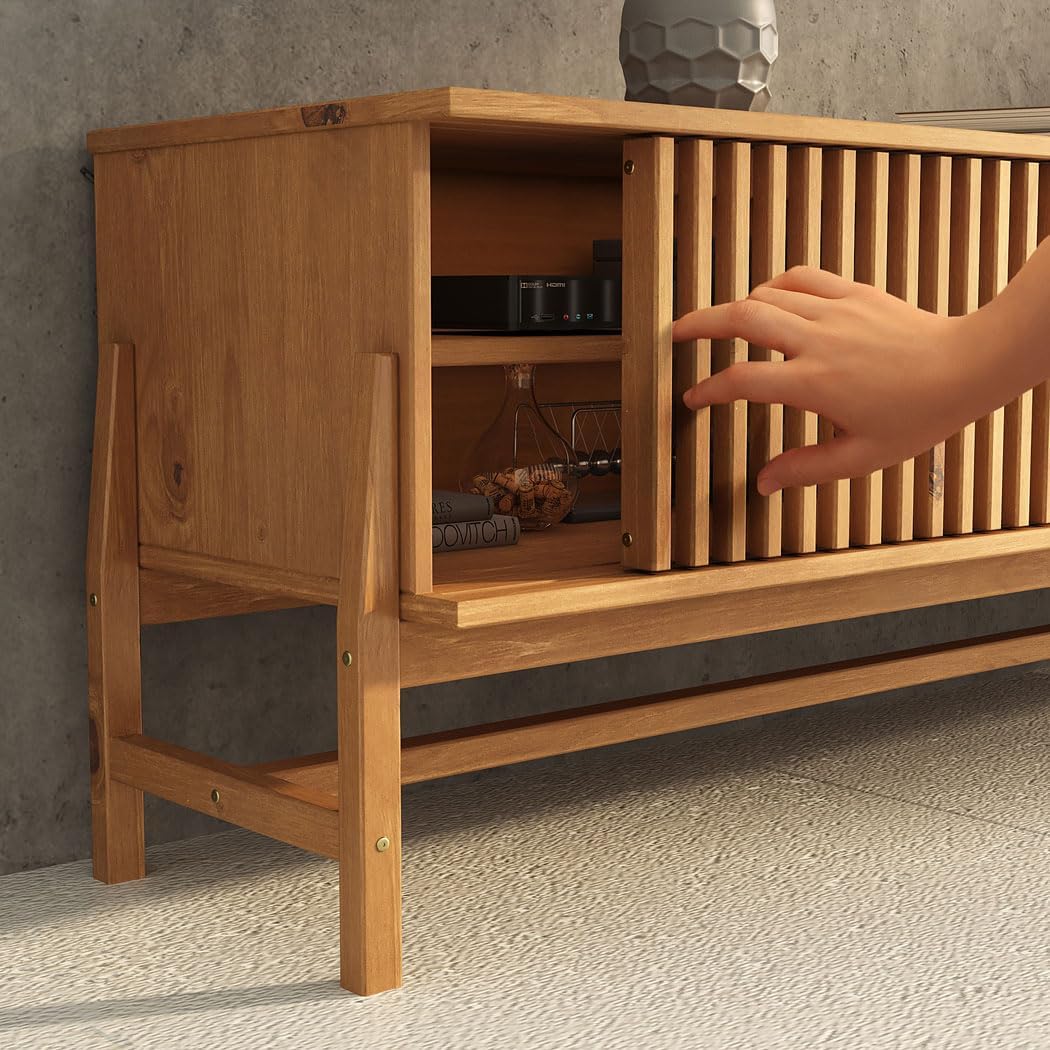
Figure 4.4: A hand demonstrating the smooth operation of the slatted sliding door, revealing the interior compartment.
4.5. Cable Management
- Utilize the pre-drilled openings and internal space for routing cables from your TV and media devices.
- Ensure cables are not pinched or strained.

Figure 4.5: Internal view of the TV stand's compartments, showing dedicated cutouts for cable passage to maintain an organized setup.
5. Operating Instructions
5.1. Placing Your Television
- Place your television centrally on the top surface of the rack. This rack is designed for TVs up to 75 inches.
- Ensure the TV's base is fully supported and does not overhang the edges.
- Do not place excessively heavy items on the top surface beyond the TV's weight.
5.2. Using Storage Compartments
- The slatted doors slide smoothly to reveal or conceal internal shelves, ideal for media players, game consoles, or decorative items.
- The drawer provides enclosed storage for smaller accessories, remote controls, or documents.
- Distribute items evenly within compartments to maintain stability.

Figure 5.1: The TV stand with its compartments organized, showcasing its functionality for storing media devices and decorative elements.
6. Maintenance
6.1. Cleaning
- Wipe the wooden surfaces with a soft, dry, or slightly damp cloth.
- Avoid using harsh chemicals, abrasive cleaners, or excessive moisture, as these can damage the wood finish.
- For stubborn marks, use a wood-friendly cleaner sparingly and wipe dry immediately.
6.2. General Care
- Periodically check all screws and fasteners to ensure they remain tight. Retighten if necessary, but do not overtighten.
- Avoid exposing the furniture to direct sunlight or extreme temperature changes, which can cause warping or fading.
- Protect surfaces from spills and scratches by using coasters or protective mats.
7. Troubleshooting
7.1. Rack is Wobbly
- Solution: Ensure all screws and fasteners are securely tightened. Check that the rack is placed on a level surface. Adjust if necessary.
7.2. Sliding Doors are Sticking
- Solution: Inspect the tracks for any debris or obstructions. Clean the tracks with a dry cloth. Ensure the doors are properly seated in both the top and bottom tracks.
7.3. Drawer Does Not Slide Smoothly
- Solution: Check the drawer slides for proper alignment and ensure they are free of obstructions. Lightly lubricate the slides with a silicone-based lubricant if needed.
8. Specifications
| Model Number | 80123 |
| Overall Dimensions (L x H x D) | 185 cm x 52 cm x 40.5 cm (72.8 in x 20.5 in x 15.9 in) |
| Drawer Dimensions (H x L x D) | 13 cm x 53 cm x 30 cm (5.1 in x 20.9 in x 11.8 in) |
| Material | Wood |
| Color | Freijó |
| Compatible TV Size | Up to 75 inches |
| Item Weight | 33 kg (72.7 lbs) |
| Components Included | Hardware kit |

Figure 8.1: Detailed dimension diagram of the TV stand, indicating length, height, depth, and internal measurements.
9. Warranty Information
For specific warranty terms and conditions, please refer to the documentation provided at the time of purchase or contact your retailer. Warranty coverage typically includes manufacturing defects for a specified period from the date of purchase.
10. Customer Support
If you have any questions, require assistance with assembly, or need to report missing/damaged parts, please contact IDIMEX customer support or your retailer. Please have your model number (80123) and purchase information ready when contacting support.
For more information, visit the official IDIMEX website or contact your local distributor.