
Introduction
This manual provides detailed instructions for the safe and proper installation, operation, and maintenance of your Sunrosa 24"x76" Shower Glass Panel Half Wall. Please read all instructions carefully before beginning installation and retain this manual for future reference. Proper installation is crucial for the safety and longevity of the product.
Important Safety Information:
- Always wear safety glasses during installation.
- Handle glass panels with extreme care. Tempered glass, while strong, can shatter if struck at the edges.
- Ensure the installation surface (wall, floor) is structurally sound and capable of supporting the weight of the glass panel.
- Use appropriate tools and hardware for your specific wall type.
- If you are unsure about any step, consult a qualified professional.
Package Contents
Verify that all components are present and undamaged before beginning installation. If any parts are missing or damaged, do not proceed with installation and contact customer support.
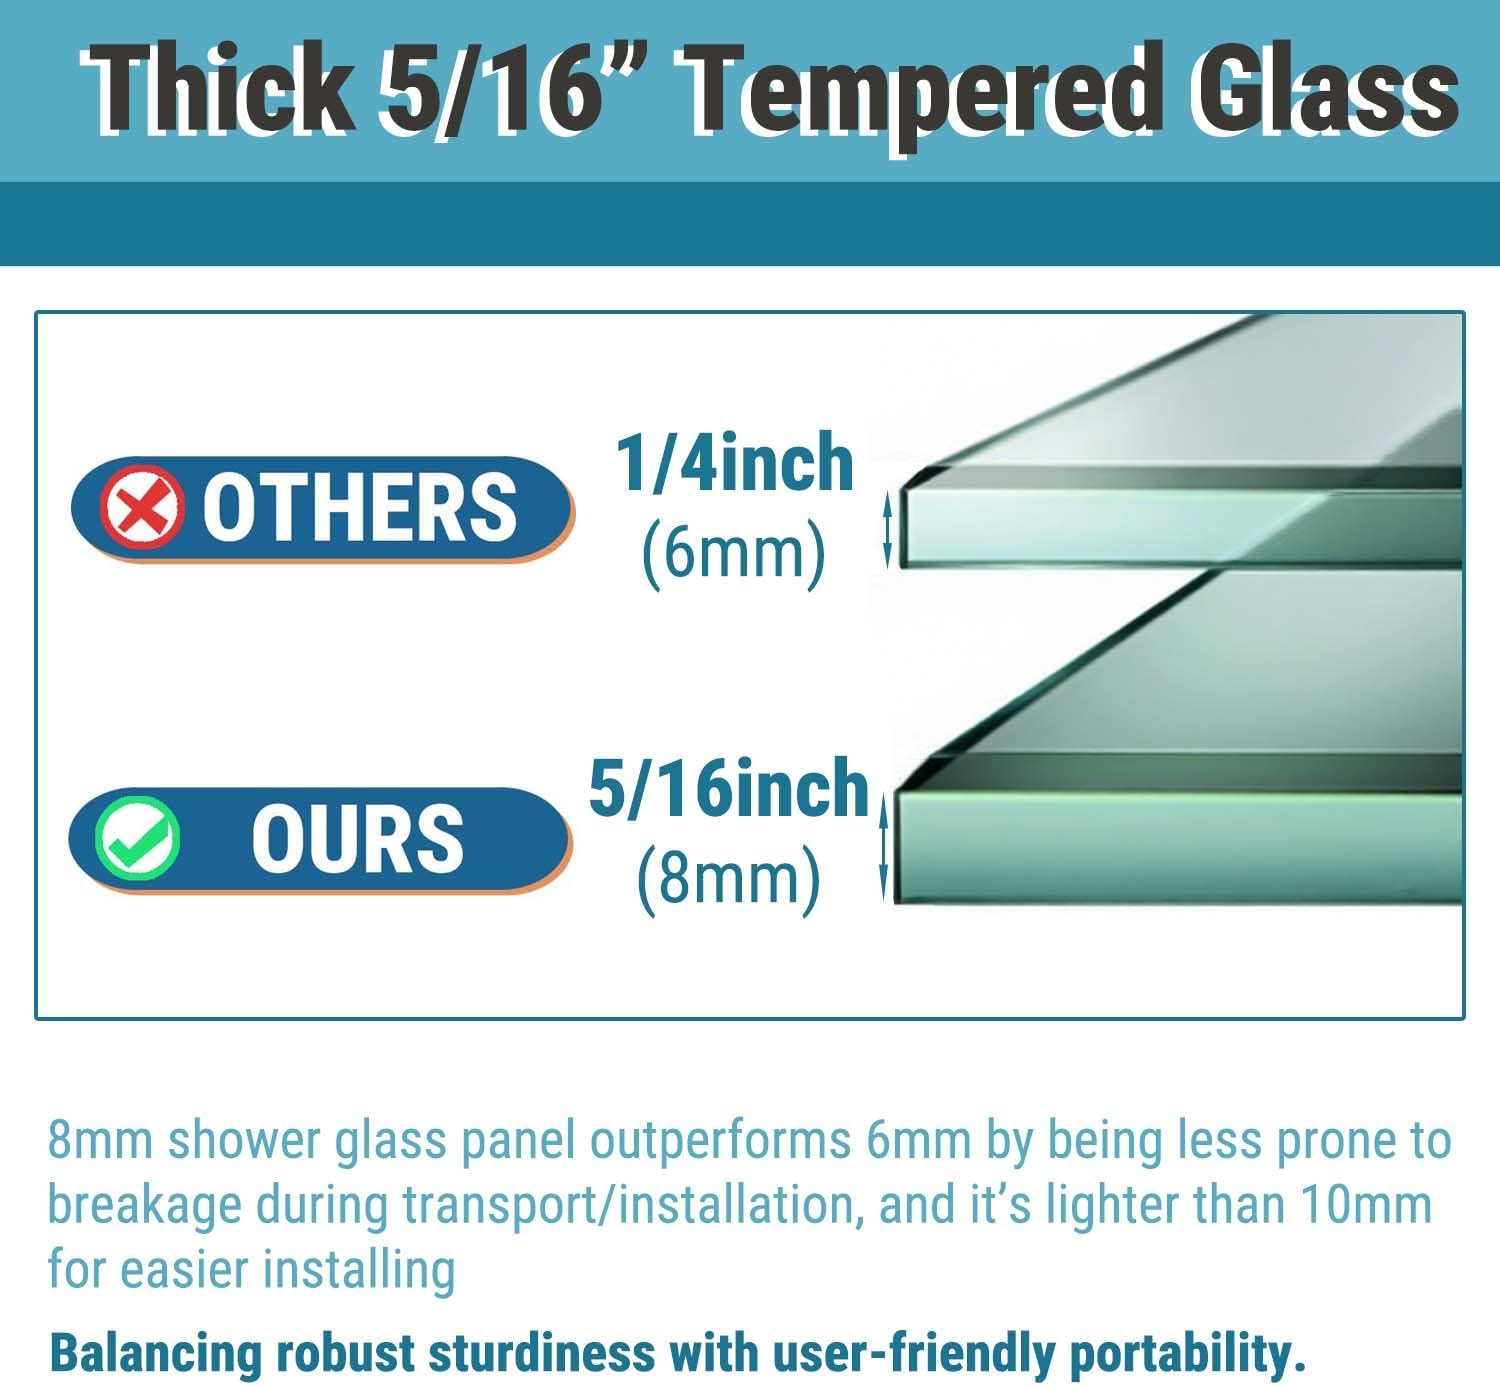
- 1x Tempered Glass Panel (8mm thick)
- 2x Aluminum Wall Profiles (Brushed Nickel finish)
- Mounting Hardware (screws, anchors, gaskets, seals)
- Installation Guide
Specifications
| Feature | Detail |
|---|---|
| Brand | Sunrosa |
| Model Number | GP24760N |
| Color | Brushed Nickel |
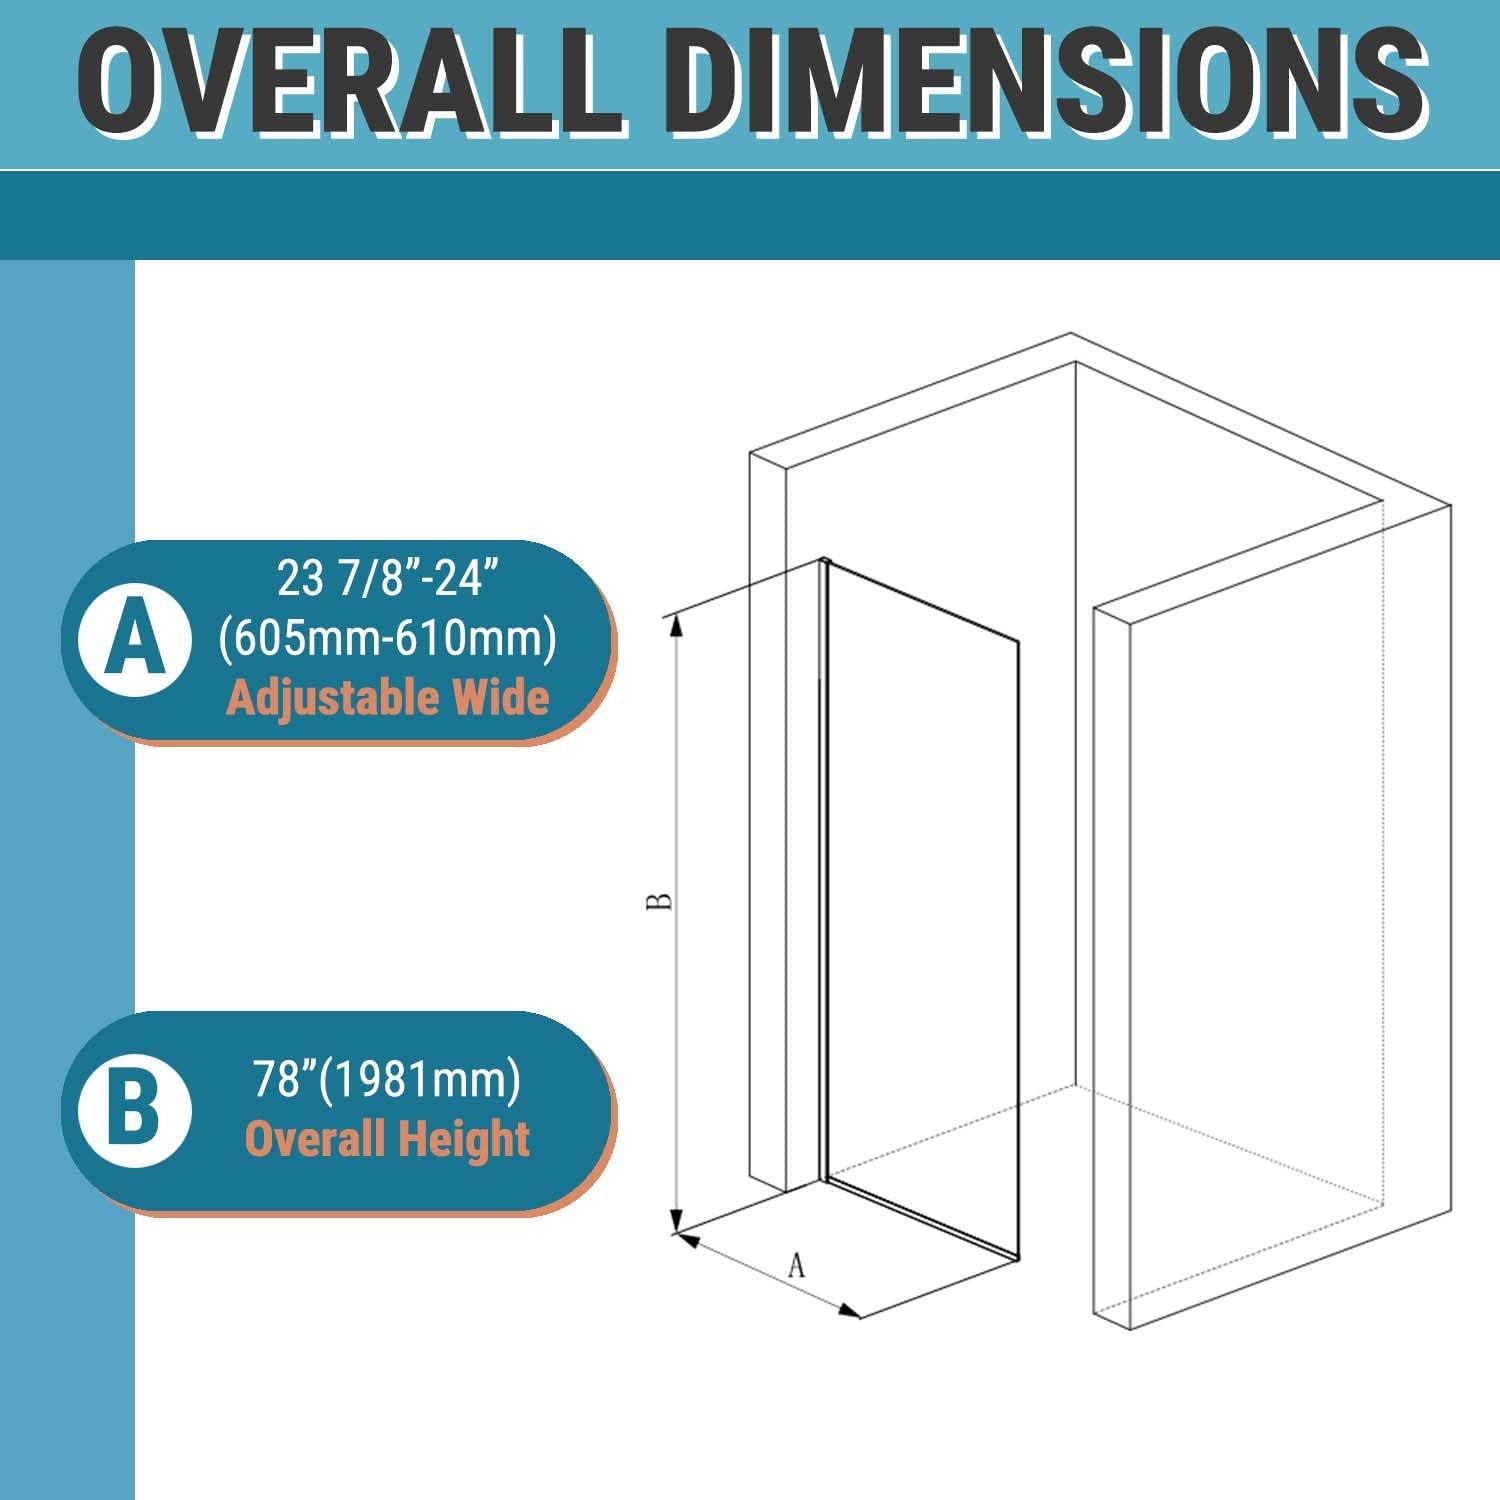
| Dimensions (W x H) | 24 inches x 76 inches (605-610mm x 1930mm) |
| Glass Thickness | 8mm (5/16 inch) Tempered Glass |
| Material | Tempered Glass, Aluminum |
| Style | Minimalist |
| Installation Type | Reversible (Left or Right side mounting) |
| Width Adjustment | 5mm (1/5 inch) for uneven surfaces |
Setup and Installation
This section outlines the steps for installing your shower glass panel. Ensure you have all necessary tools and safety equipment before proceeding.
1. Measure and Plan
Carefully measure the installation area to confirm the panel dimensions are suitable. The panel offers a 5mm width adjustment range to accommodate minor unevenness in bathroom floors or walls.
2. Reversible Installation
The Sunrosa shower glass panel is designed for reversible installation, allowing it to be mounted on either the left or right side to best suit your bathroom layout.

3. Mounting the Aluminum Profiles
Attach the two robust aluminum profiles to the wall using the provided mounting hardware. Ensure they are level and securely fastened. The profiles provide stable support for the glass panel and resist warping and corrosion.

4. Installing the Glass Panel
Carefully insert the 8mm thick tempered glass panel into the installed aluminum profiles. The 5mm width adjustment feature allows for a snug, stable fit even on slightly uneven surfaces, ensuring a secure installation and professional finish.

5. Sealing
Apply a high-quality silicone sealant along all seams where the glass panel meets the wall profiles and the shower base to ensure a watertight seal. Allow adequate drying time before using the shower.
Operating Instructions
The Sunrosa Shower Glass Panel functions as a fixed splash guard, effectively blocking water from splashing out of the shower area. No specific operational steps are required beyond its proper installation.

Maintenance
Regular cleaning and maintenance will preserve the appearance and functionality of your shower glass panel.
Cleaning the Glass Panel
- The smooth surface of the glass minimizes water spots and grime buildup.
- Clean regularly with a soft cloth and a mild, non-abrasive glass cleaner.
- Avoid using harsh chemicals, abrasive pads, or scouring powders, as these can scratch the glass or damage the finish of the aluminum profiles.
- For best results, wipe down the glass after each use to prevent hard water stains.
Cleaning the Aluminum Profiles
- Wipe the brushed nickel aluminum profiles with a soft, damp cloth.
- Do not use abrasive cleaners or solvents, as they can damage the finish.
Troubleshooting
This section addresses common issues you might encounter.
Water Leakage
- Issue: Water is leaking from around the panel.
- Solution: Check the silicone sealant along all edges. Reapply sealant if any gaps or cracks are found. Ensure the panel is properly seated in the wall profiles.
Panel Instability
- Issue: The glass panel feels loose or wobbly.
- Solution: Verify that the aluminum wall profiles are securely fastened to the wall. Tighten any loose screws. Ensure the glass panel is correctly inserted into the profiles and the adjustment mechanism is tightened.
Scratches or Damage
- Issue: Scratches or chips on the glass or profiles.
- Solution: Minor scratches on glass may be polished with specialized kits, but deep scratches or chips may require professional assessment or replacement of the panel for safety. Damaged aluminum profiles may also require replacement.
Warranty and Support
Sunrosa products are manufactured to high-quality standards. For specific warranty details, please refer to the warranty card included with your product or visit the official Sunrosa website. If you require technical assistance, have questions about installation, or need to report a missing/damaged part, please contact Sunrosa customer support through the retailer where the product was purchased or via the contact information provided on the Sunrosa website.

