
1. Introduction
Thank you for choosing the HOVER HEART Electric ATV, Model EA500-AN-10. This manual provides essential information for the safe assembly, operation, and maintenance of your new electric quad bike. Please read all instructions carefully before use to ensure optimal performance and safety.

Figure 1: HOVER HEART Electric ATV, Model EA500-AN-10 (Orange)
2. Safety Information
WARNING: Always ensure children wear appropriate safety gear, including a helmet, when operating the ATV. Adult supervision is required at all times.
- Read and understand all instructions before operating the vehicle.
- Ensure all components are correctly assembled and secured before each use.
- Do not exceed the maximum weight load of 143 lbs.
- Keep hands, feet, hair, and clothing away from moving parts.
- Operate only on flat, dry surfaces away from traffic, steep inclines, or water.
- Always use the emergency kill switch in case of immediate danger.
- This product is EPA Approved, ensuring it meets environmental and health standards when used according to the manual.
3. What's in the Box
Upon unpacking, please verify that all the following components are present:
- 1 x EA500-AN ATV Body
- 1 x 36V 12Ah Battery (pre-installed or separate)
- 1 x Charger
- 4 x Wheels
- 1 x Handlebar Assembly
- 1 x Front Bumper
- 1 x Rear Rack
- 1 x Seat
- Assembly Hardware (screws, washers, pins, etc.)
- Instruction Manual
4. Assembly Instructions
Follow these steps to assemble your HOVER HEART Electric ATV. While the video below demonstrates a similar model, the general assembly principles apply. Please note the video shows a 24V model, whereas your ATV is 36V.
4.1. General Assembly Overview
Video 1: General Assembly Guide (Note: This video demonstrates a 24V model. Your HOVER HEART ATV is 36V, but the assembly steps are similar.)
4.2. Connecting the Battery
Before initial use, ensure the battery is properly connected. The battery is typically located under the seat. Remove the seat, connect the battery terminals (red to red, black to black), and then replace the seat.

Figure 2: Battery compartment under the seat.
4.3. Attaching Wheels and Suspension
Install the wheels onto the axles, securing them with the provided washers and nuts. Ensure the dual shock absorbers are correctly positioned and fastened for optimal ride comfort and stability.

Figure 3: Front and rear dual shock absorbers for enhanced ride comfort.
4.4. Handlebar and Bumper Installation
Attach the handlebar assembly to the steering column. Secure the front bumper to the front of the ATV chassis using the provided screws. This bumper offers additional protection.

Figure 4: Key features including the robust front bumper.
5. Operating Instructions
Familiarize yourself with the controls and features before riding.
5.1. Powering On/Off and Speed Selection
Insert the key into the ignition and turn to power on the ATV. Use the speed selector switch to choose between the two available speed settings: Low (10mph) for beginners and High (15mph) for experienced riders.

Figure 5: Dual speed adjustment for varied riding experience.
5.2. Battery Management
The 36V 12Ah battery provides 45-60 minutes of continuous riding time, covering 12-15 miles on a full charge. Monitor the battery indicator and recharge for 6-8 hours when needed.
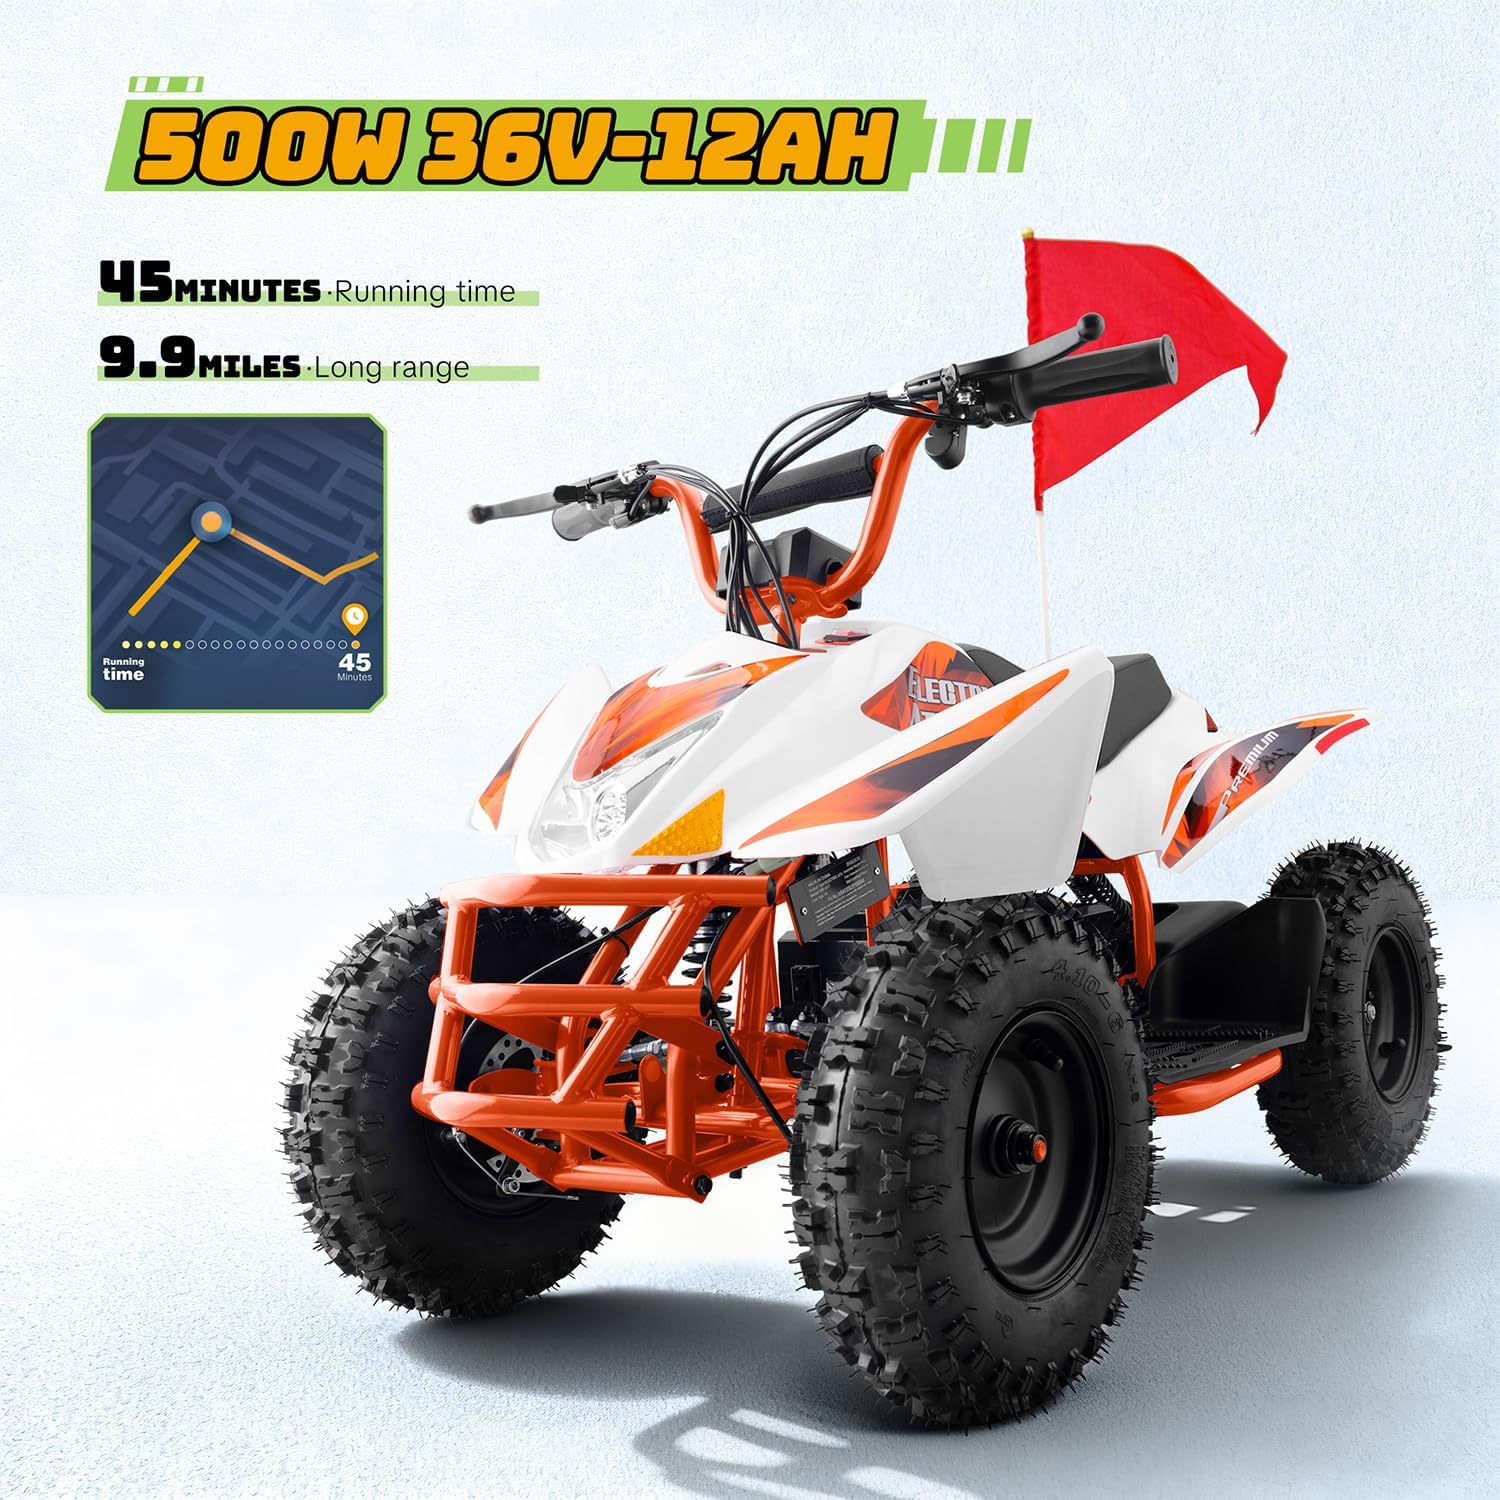
Figure 6: Battery specifications and performance.
5.3. Riding on Various Terrains
The stable 4-wheel design and 4.10-6 pneumatic tires allow the ATV to be ridden on various terrains including flat surfaces, parks, lawns, sand, and mud. The dual suspension system ensures a comfortable ride even on uneven ground.

Figure 7: ATV suitable for diverse terrains with pneumatic tires.
5.4. Key Features
- 500W Brushless Motor: Delivers powerful performance for various riding conditions.
- Lights: Integrated headlights for visibility.
- Disc Brake: Provides reliable stopping power.
- Emergency Kill Switch: For immediate power cut-off in emergencies.
5.5. Riding Demonstrations
Video 2: HOVER HEART Kids ATV in action.
Video 3: HOVER HEART Electric 4 Wheeler demonstration.
6. Maintenance
Regular maintenance ensures the longevity and safe operation of your ATV.
- Charging: Always use the provided charger. Charge the 36V 12Ah battery for 6-8 hours. Do not overcharge.
- Cleaning: Wipe down the ATV with a damp cloth after use. Avoid using harsh chemicals or high-pressure water.
- Storage: Store the ATV in a dry, cool place away from direct sunlight. If storing for extended periods, ensure the battery is fully charged and recharge periodically.
- Inspections: Regularly check all nuts, bolts, and connections to ensure they are tight and secure. Inspect tires for wear and tear.
7. Troubleshooting
If you encounter issues with your ATV, please refer to the following general troubleshooting tips:
- ATV Not Turning On: Check if the battery is fully charged and properly connected. Ensure the emergency kill switch is disengaged.
- Reduced Power/Speed: The battery may be low. Recharge the battery fully.
- Unusual Noises: Inspect for loose parts or obstructions in the wheels or motor area.
For persistent issues, please contact customer support.
8. Specifications
| Feature | Specification |
|---|---|
| Model Number | EA500-AN-10 |
| Motor | 500W Brushless Motor |
| Battery | 36V 12Ah |
| Speed Settings | Low: 10mph, High: 15mph |
| Run Time | 45-60 minutes (continuous) |
| Range per Charge | 12-15 miles |
| Charging Time | 6-8 hours |
| Product Dimensions | 41" × 26" × 23" |
| Item Weight | 100 lbs |
| Maximum Load Capacity | 143 lbs |
| Recommended Age | 6 months - 12 years |
| Tires | 4.10-6 Pneumatic Tires |
| Suspension | Dual Front and Rear Shock Absorbers |
| Manufacturer | DLUBLA GOABAL INC |

Figure 8: Product dimensions and weight capacity.
9. Warranty and Support
Seller Warranty: Please retain your product packaging. If the packaging is lost, the warranty may be void. The warranty includes:
- 1-30 days: Free return and refund.
- 31-90 days: Free shipping for parts or exchange (depending on ATV status).
- Over 90 days: Seller warranty expires. Limited customer service instruction and parts links (not free) are provided. Alternatively, contact your extended plan provider.
For any inquiries or support, please refer to the contact information provided with your purchase documentation.