
1. Important Safety Instructions
Please read and understand all safety instructions before using the KUAIQU 203D Digital Soldering Station. Failure to follow these instructions may result in electric shock, fire, or serious injury.
- Always wear appropriate personal protective equipment, including safety glasses, to protect against solder splashes and fumes.
- Use the soldering station in a well-ventilated area to avoid inhaling harmful fumes. Consider using a fume extractor.
- The soldering iron tip can reach temperatures up to 480°C (896°F). Avoid direct contact with the hot tip or heating element.
- Always place the soldering iron in its designated holder when not in use.
- Ensure the power cord is in good condition and properly grounded.
- Do not operate the soldering station near flammable materials or liquids.
- Disconnect the power supply before performing any maintenance or changing tips.
- Keep out of reach of children.
2. Product Overview
The KUAIQU 203D Digital Soldering Station is a 75W precision tool designed for various soldering applications. It features a ceramic heating element for rapid heating and stable temperature control, an ESD-safe design, and an automatic sleep function to prolong tip life.
2.1 Components
- KUAIQU 203D Soldering Station Unit
- Soldering Iron with Ceramic Heating Core
- Soldering Iron Holder
- Cleaning Sponge
- Grounding Wire
- Assorted Soldering Tips (900-series)
- LT909A Helping Hand (if included in kit)

Figure 2.1: Overview of the KUAIQU 203D Soldering Station with labeled components including the LED display, control buttons, handle, and soldering iron holder.

Figure 2.2: Package contents including the soldering station, iron, holder, cleaning sponge, grounding wire, and various tips.
3. Setup
Follow these steps to set up your soldering station for first use.
- Unpack Components: Carefully remove all items from the packaging.
- Place the Station: Position the soldering station on a stable, heat-resistant surface in a well-ventilated area.
- Connect Soldering Iron: Insert the soldering iron's connector securely into the 'AIRLINE JACK' port on the front of the soldering station.
- Position Iron Holder: Place the soldering iron holder in a convenient and safe location near the station. Ensure the cleaning sponge is moistened and placed in the holder's tray.
- Grounding (Optional but Recommended): If your application requires additional ESD protection, connect the grounding wire to the designated grounding terminal on the station and to an appropriate ground point.
- Power Connection: Plug the power cord into a grounded electrical outlet.
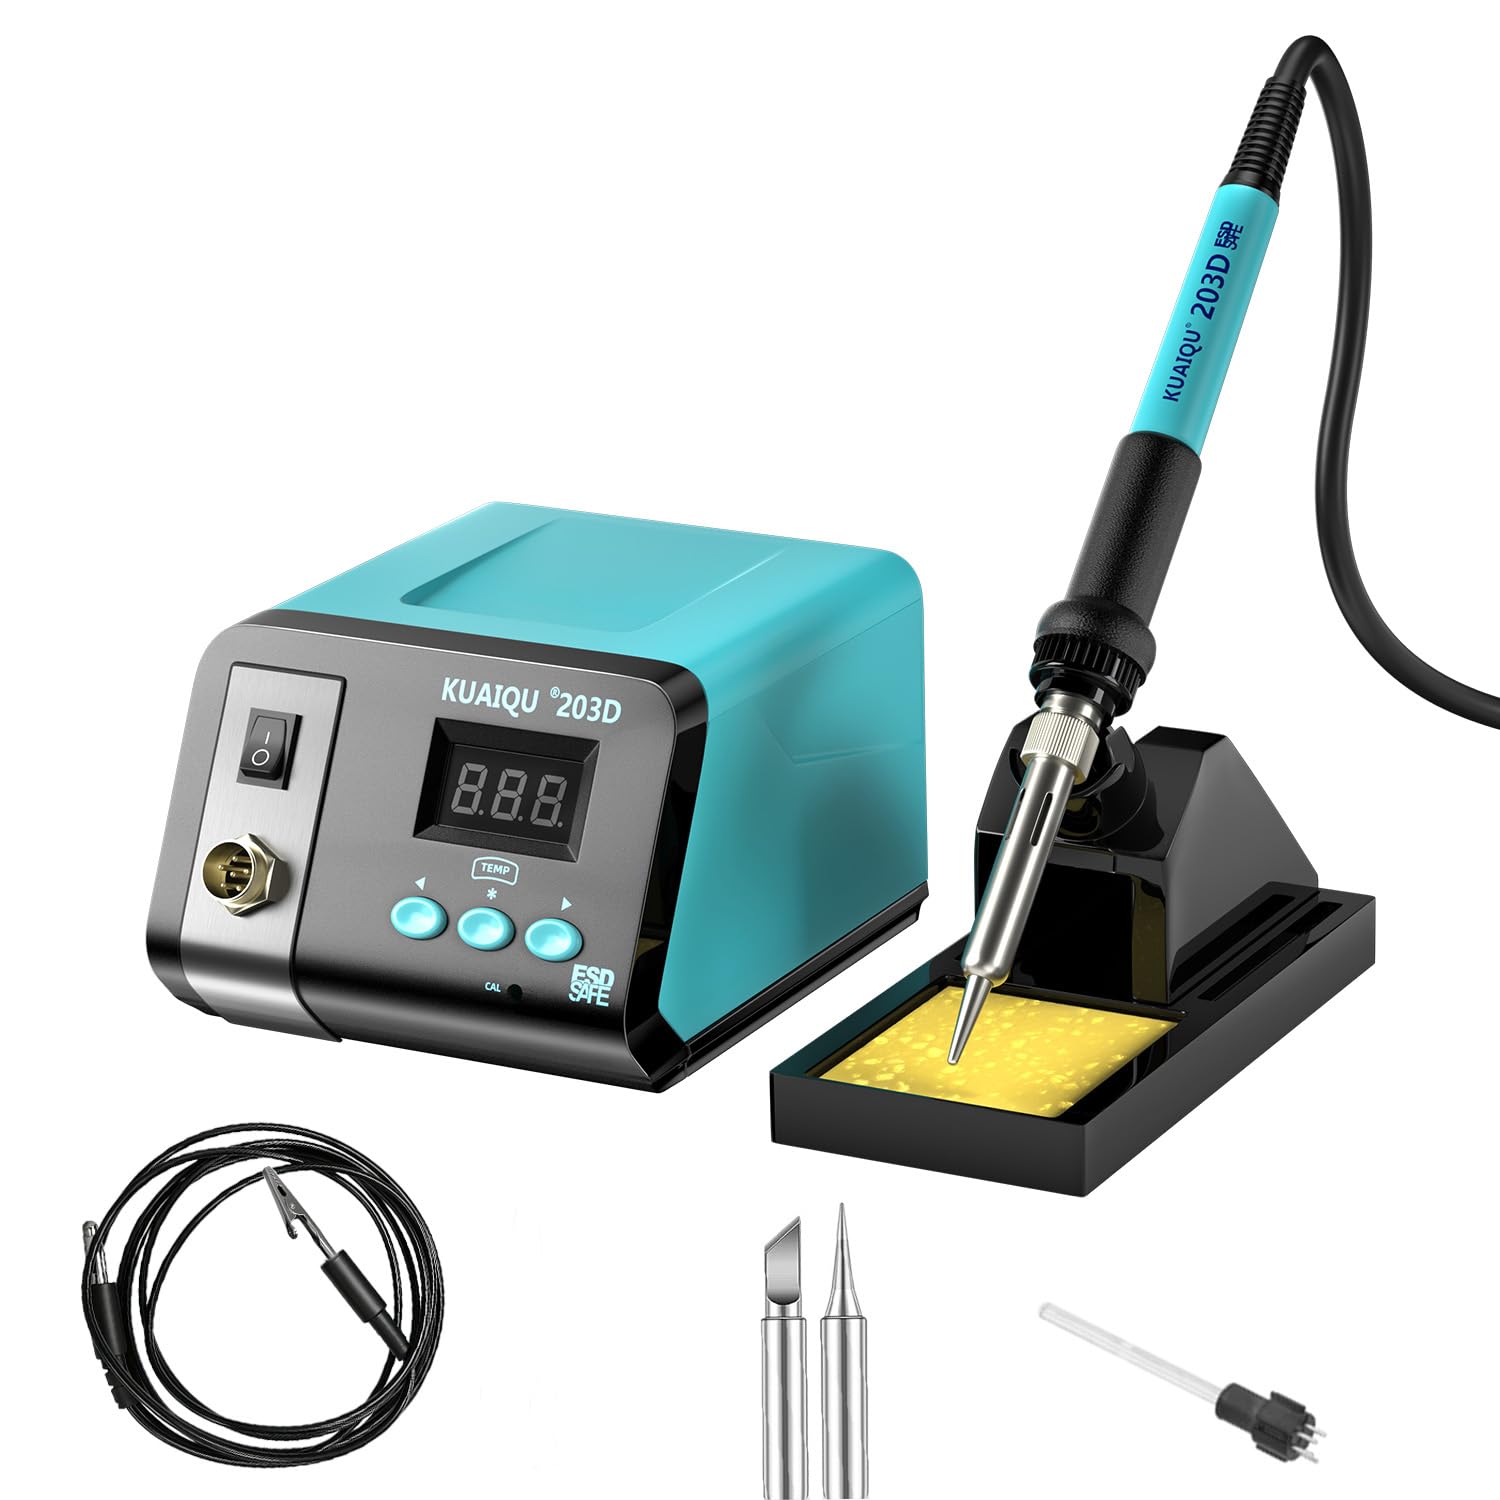
Figure 3.1: The KUAIQU 203D Soldering Station fully assembled with the iron in its holder, ready for operation.
4. Operating Instructions
This section details how to operate your KUAIQU 203D Digital Soldering Station.
4.1 Power On/Off
To power on the station, flip the 'SWITCH' located on the front panel to the 'ON' position. The LED display will illuminate, showing the current temperature. To power off, flip the switch to the 'OFF' position.
4.2 Temperature Adjustment
The station offers a temperature range of 50°C to 480°C (122°F to 896°F).
- Use the 'INCREASE SETTING VALUE' (up arrow) and 'DECREASING SETTING VALUES' (down arrow) buttons to adjust the desired temperature.
- The display will show the set temperature briefly, then return to displaying the actual tip temperature as it heats up or cools down.

Figure 4.1: The digital display indicating the adjustable temperature range and real-time temperature.
4.3 Celsius/Fahrenheit Conversion
The station supports switching between Celsius (°C) and Fahrenheit (°F) temperature units. Refer to the specific button combination in your quick start guide or experiment with pressing and holding the temperature adjustment buttons simultaneously to toggle units.
4.4 Automatic Sleep Mode
The soldering station features an automatic sleep function. If the soldering iron remains inactive for approximately 20 minutes, it will enter sleep mode to conserve energy and extend the lifespan of the soldering tip and heating elements. The display may show a sleep indicator (e.g., 'Z' or '--'). To exit sleep mode, simply pick up the soldering iron or press any button.

Figure 4.2: Visual representation of the automatic sleep mode, showing the power off state and how to reactivate.
4.5 Temperature Calibration (CAL)
The station includes a temperature calibration function to correct any discrepancies between the displayed temperature and the actual tip temperature. This function should only be used if you have a reliable external thermometer to measure the tip temperature.
- To enter calibration mode, press the 'CAL' button.
- Use the 'INCREASE' and 'DECREASE' buttons to adjust the displayed temperature to match the reading from your external thermometer.
- Press 'CAL' again or wait a few seconds to save the calibration and exit the mode.
4.6 Usage Scenarios
The KUAIQU 203D is suitable for a variety of applications:
- Circuit Board Repair
- Parts Welding
- Phone Repair
- DIY Projects
- Research Labs

Figure 4.3: Examples of common applications for the KUAIQU 203D Soldering Station.
4.7 Operational Videos
Video 4.1: A general overview of the KUAIQU 203D Soldering Station and its basic operation. This video demonstrates key features and how to get started.
Video 4.2: Demonstration of temperature adjustment and the automatic sleep function of the soldering station.
5. Maintenance
Proper maintenance ensures the longevity and optimal performance of your soldering station.
5.1 Soldering Tip Care
- Cleaning: Regularly clean the soldering tip using the provided cleaning sponge. Ensure the sponge is damp, not soaking wet. Wipe the tip before and after each use.
- Tinning: Always tin the tip with a small amount of solder after cleaning and before storing to prevent oxidation.
- Replacement: Replace worn or oxidized tips promptly to maintain efficient heat transfer and soldering quality.
5.2 Heating Core Replacement
The ceramic heating core is a removable plug-in type. If the heating element fails, it can be replaced.
- Ensure the soldering station is powered off and unplugged, and the iron has cooled completely.
- Unscrew the retaining nut or collar on the soldering iron handle to expose the heating core.
- Carefully remove the old heating core.
- Insert the new C1321 removable heating core, ensuring it is properly seated.
- Reassemble the soldering iron handle.

Figure 5.1: Illustration of the ceramic heating core, which is a removable plug-in type for easy replacement.
5.3 General Cleaning
Wipe the exterior of the soldering station with a soft, dry cloth. Do not use abrasive cleaners or solvents.
6. Troubleshooting
This section addresses common issues you might encounter with your soldering station.
6.1 Error Codes
- S.-E. Error: This error code indicates a faulty sensor or poor contact with the soldering iron.
Troubleshooting Steps for S.-E. Error:
- Ensure the soldering iron connector is fully and securely inserted into the 'AIRLINE JACK' on the station.
- Check the soldering iron handle for any loose connections or damage.
- If the issue persists, the heating element or sensor within the iron may be faulty and require replacement.

Figure 6.1: The 'S.-E.' error displayed on the screen, indicating a sensor or connection issue.
6.2 Other Common Issues
- Iron Not Heating: Check power connection, ensure the station is switched on, and verify the iron is properly connected. If the display shows temperature but the tip remains cold, the heating element may need replacement.
- Poor Solder Joints: Ensure the tip is clean and tinned. Adjust the temperature to the appropriate setting for your solder and components. Use fresh solder.
- Temperature Fluctuations: While the station has excellent stability, significant fluctuations might indicate a faulty sensor or an issue with the heating element. Ensure the iron is fully inserted.
7. Specifications
| Feature | Specification |
|---|---|
| Model Number | 203D (LED Screen) |
| Power Source | AC |
| Wattage | 75 Watts |
| Temperature Range | 50°C ~ 480°C (122°F ~ 896°F) |
| Temperature Stability | ±2°C |
| Display Type | LED Digital |
| Heating Element | Ceramic (Removable Plug-in Type) |
| ESD Safe | Yes |
| Auto Sleep Function | Yes (after 20 minutes of inactivity) |
| Calibration Support | Yes |
| Item Weight | 1.76 kg |
| UPC | 768351110624 |
8. Warranty and Support
KUAIQU provides a 12-month repair service for this product from the date of purchase.
For any questions, technical assistance, or warranty claims, please contact KUAIQU customer support through the retailer where the product was purchased or visit the official KUAIQU website for contact information.
Please retain your proof of purchase for warranty service.

