1. Product Overview
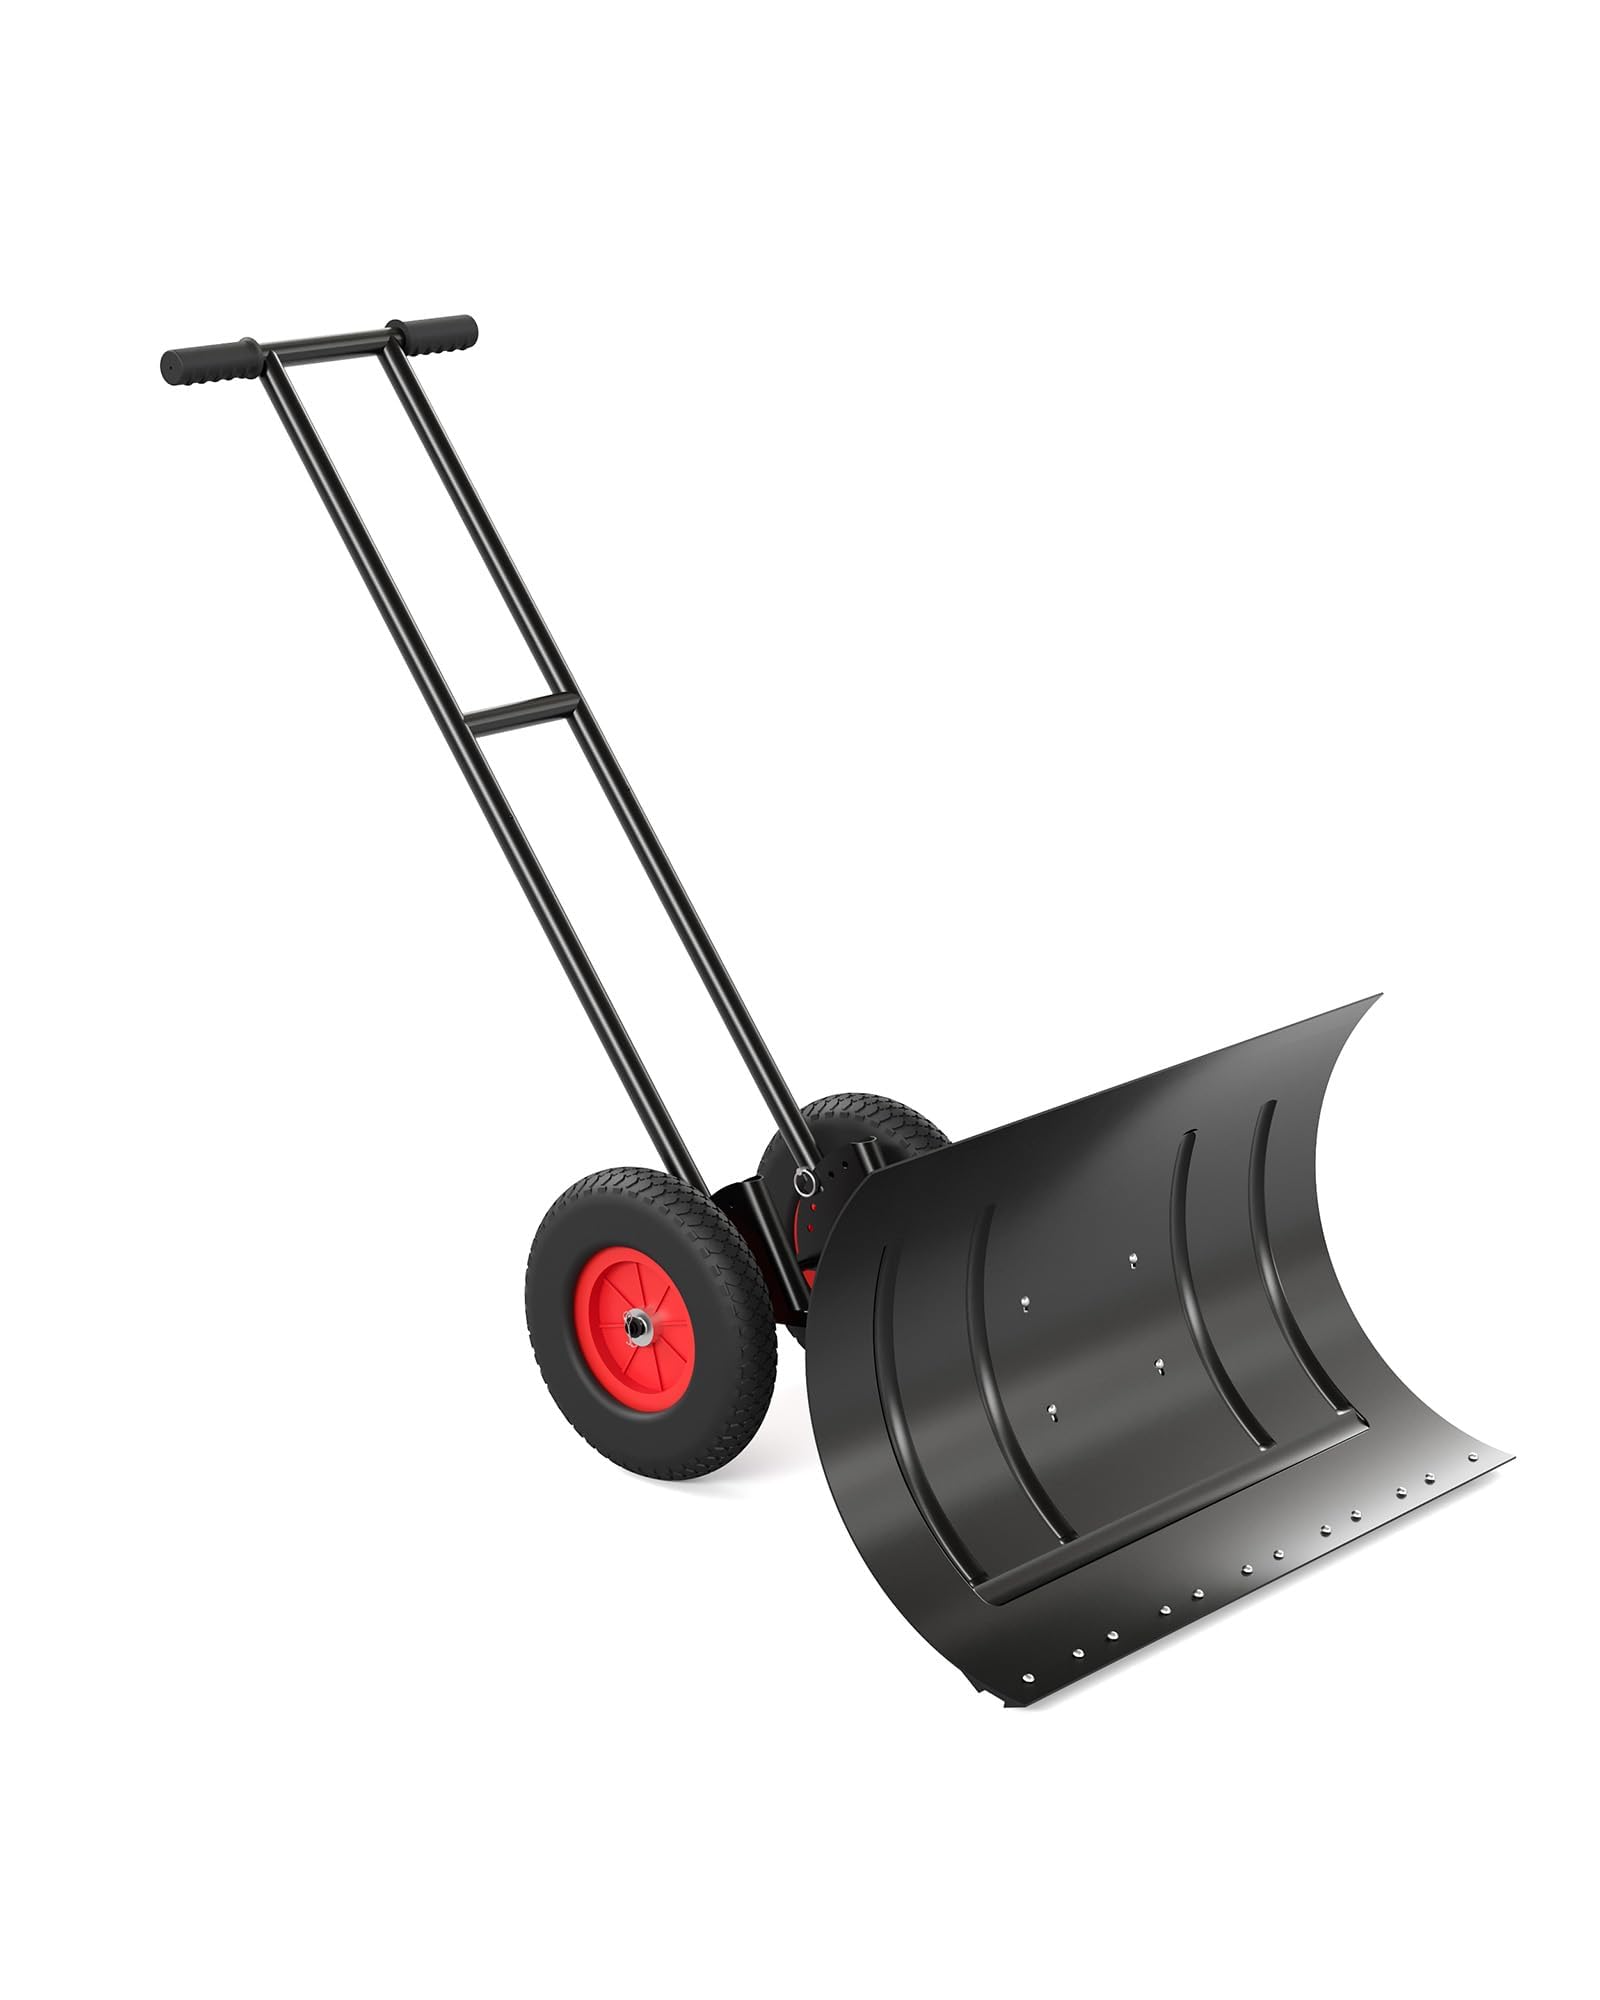
The Garvee Heavy Duty Snow Pusher is engineered for efficient and effortless snow removal from driveways, sidewalks, and decks. Featuring a robust design with a 40-inch wide blade, adjustable handle, and large rubber wheels, this snow pusher significantly reduces the physical effort and time required for clearing snow.
Key Features:
- Wheeled Design: Equipped with 9.8-inch rubber wheels for smooth gliding and reduced effort.
- Adjustable Handle: 5 height settings (15 to 44 inches) with non-slip rubber grips for ergonomic use and easy storage.
- Adjustable Blade Angle: Blade adjusts 45 degrees left or right for multi-directional snow removal.
- Heavy-Duty Construction: Durable steel blade with a plastic base to protect surfaces and a solid steel frame for long-lasting strength.
- Easy Assembly & Storage: Designed for quick assembly and disassembly, allowing for convenient storage.
2. Safety Information
Please read and understand all safety warnings and instructions before operating the Garvee Snow Pusher. Failure to follow these instructions may result in injury or property damage.
- Always wear appropriate eye protection when using the shovel.
- Be aware of your surroundings and avoid contact with underground utilities.
- Keep hands and feet away from the blade and wheels while in use.
- Store the shovel in a dry place and keep it out of reach of children when not in use.
3. Package Contents
Verify that all components are present before beginning assembly:
- Main Frame Assembly with Wheels
- Adjustable Handle Sections
- 40-Inch Angled Blade
- Hardware (bolts, pins, wrenches)
- Instruction Manual
4. Assembly Instructions
Follow these steps to assemble your Garvee Snow Pusher. Refer to the included video for a visual guide.
- Unpack all components and lay them out on a clean, flat surface.
- Attach the main handle sections to the wheeled frame using the provided bolts and knobs. Ensure they are securely tightened.
- Connect the angled blade to the main frame using the designated bolts and the pivot mechanism.
- Secure the wheels to the axle using the provided pins.
- Verify all connections are tight and secure before use.
5. Operation Guide
The Garvee Snow Pusher is designed for ease of use. Follow these guidelines for optimal performance.
Adjusting Handle Height:
The handle can be adjusted to 5 different heights (15 to 44 inches) to suit your comfort and reduce strain. Loosen the double-ended bolts on the handle, slide the handle to your desired height, and re-tighten the bolts securely.

Adjusting Blade Angle:
The blade can be adjusted 45 degrees to either the left or right. To change the angle, remove the pin securing the blade, pivot the blade to the desired angle, and re-insert the pin to lock it in place. This allows for multi-directional snow clearing.

Clearing Snow:
Push the snow pusher forward, allowing the angled blade to direct snow to the side. For deeper snow, take smaller passes. The large rubber wheels facilitate smooth movement over various surfaces.

6. Maintenance and Care
Proper maintenance ensures the longevity and performance of your Garvee Snow Pusher.
- Cleaning: After each use, clear any remaining snow, ice, or debris from the blade and wheels. Wipe down metal parts to prevent rust.
- Storage: When not in use, lock the handle in an upright position for compact storage. Store the snow pusher in a dry, covered area such as a garage or shed to protect it from the elements.
- Inspection: Periodically check all bolts, pins, and connections to ensure they are tight and secure. Replace any worn or damaged parts immediately.

7. Troubleshooting
If you encounter issues with your Garvee Snow Pusher, consider the following:
- Wobbly Handle: Ensure all bolts securing the handle sections are fully tightened. If the handle still feels wobbly, disassemble and reassemble, ensuring proper alignment of all parts.
- Wheels Not Rolling Smoothly: Check for debris or ice buildup around the wheel axles. Ensure the pins securing the wheels are correctly inserted and not bent.
- Difficulty Pushing Heavy Snow: Adjust the handle height to a position that provides better leverage. For very deep or heavy snow, clear smaller sections at a time.
- Blade Not Holding Angle: Verify the pin for blade angle adjustment is fully inserted and secured.
8. Specifications
| Feature | Specification |
|---|---|
| Brand | Garvee |
| Model Number | PPG_33HMCFUF_1007 |
| Material | Metal (Frame), Alloy Steel (Blade), Carbon Steel (Handle) |
| Color | Black |
| Product Dimensions (L x W x H) | 18.11 x 7.09 x 40.16 inches |
| Item Weight | 35.5 Pounds |
| Handle Material | Carbon Steel |
| Blade Material | Alloy Steel |
| Grip Type | Ergonomic |
| UPC | 199809976095 |
9. Warranty and Support
For warranty information or technical support, please refer to the contact details provided with your purchase documentation or visit the official Garvee website. Keep your proof of purchase for any warranty claims.


