
Grunkel RD-2000PRO
GRUNKEL RD-2000PRO 2000W Oil Radiator User Manual
Model: RD-2000PRO
1. Introduction
Thank you for choosing the GRUNKEL RD-2000PRO 2000W Oil Radiator. This manual provides essential information for the safe and efficient operation, maintenance, and troubleshooting of your new appliance. Please read these instructions carefully before use and retain them for future reference.
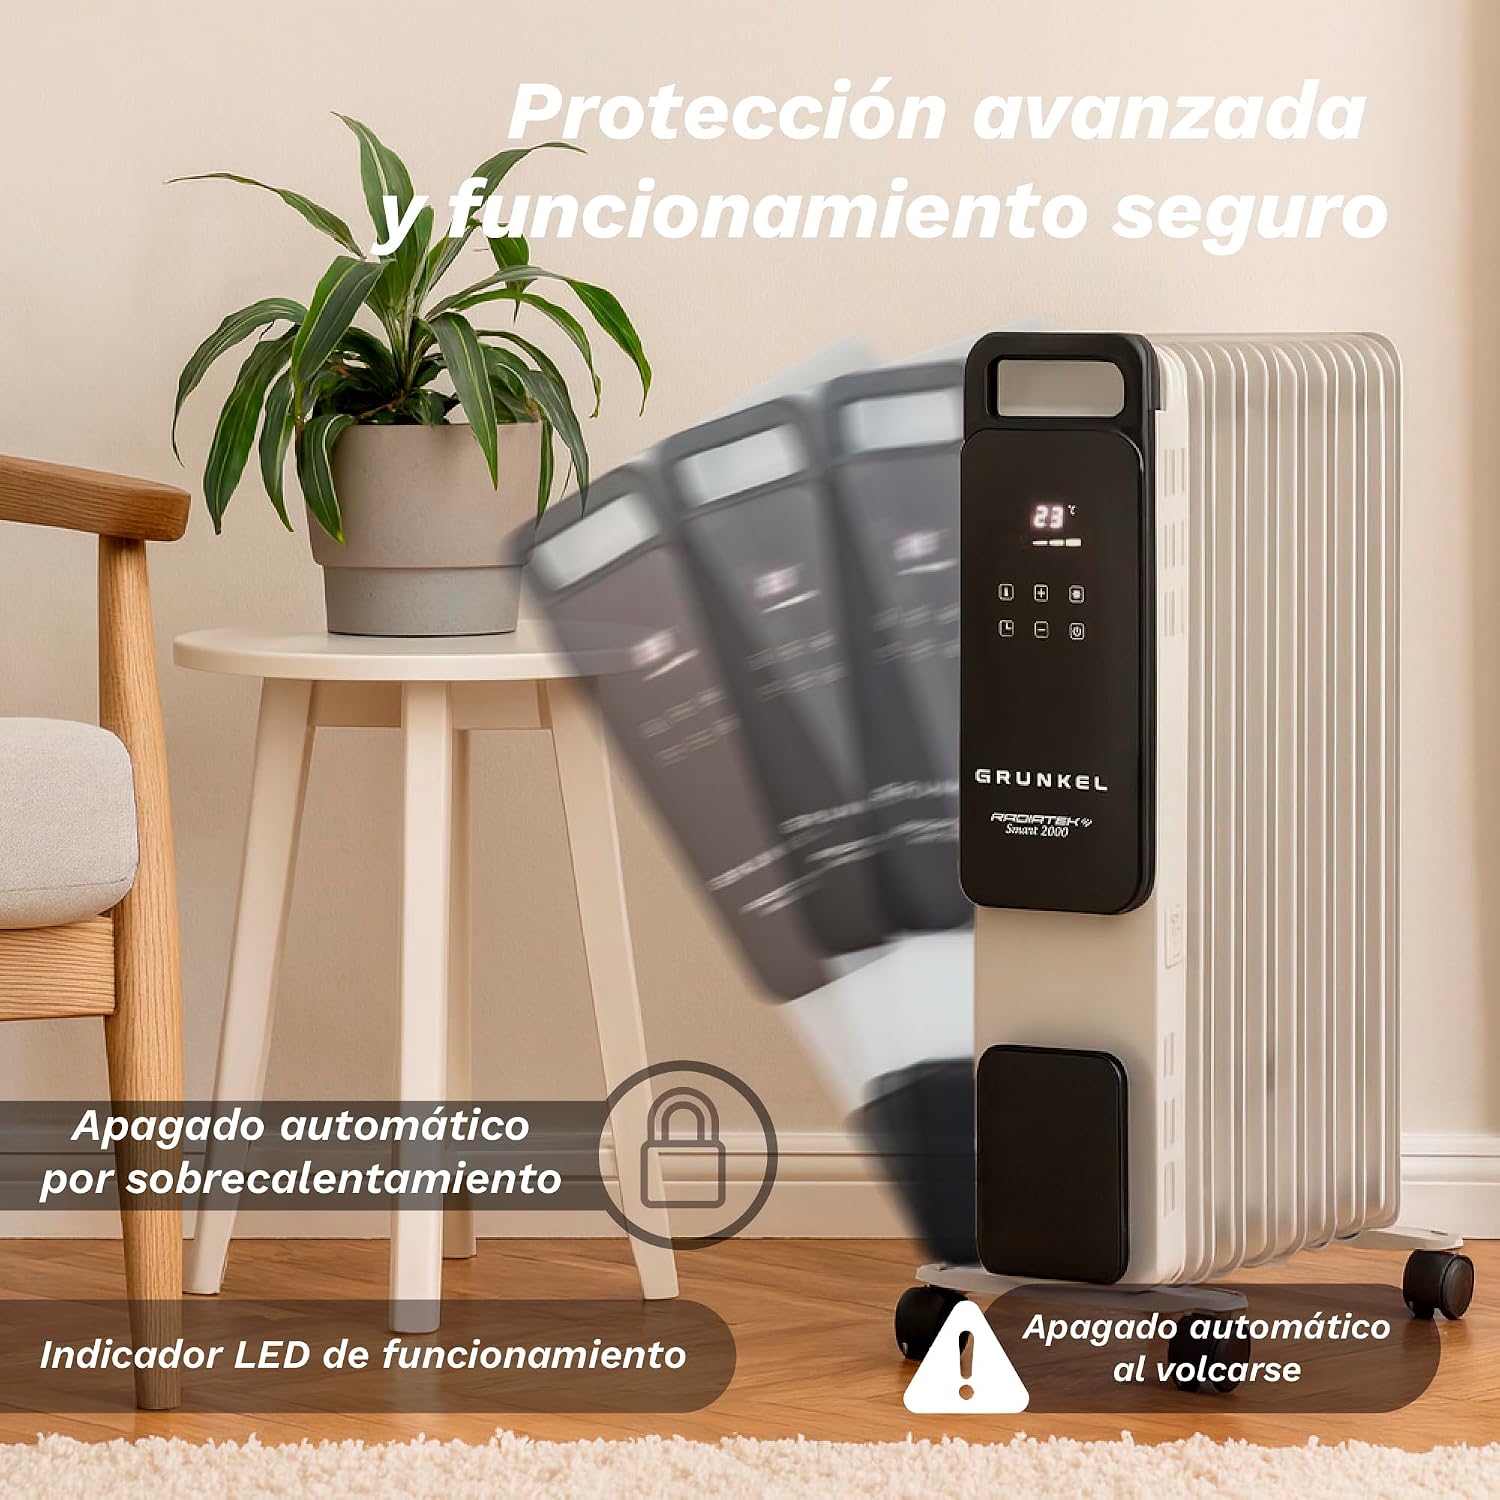
The GRUNKEL RD-2000PRO is a 2000W oil-filled radiator featuring 9 heating elements, integrated Wi-Fi for smart control, a touch panel, ECO mode for energy saving, and 24-hour programming. It is designed for indoor use and includes safety features such as anti-tip and overheat protection.
2. Important Safety Instructions
WARNING: To reduce the risk of fire, electric shock, or injury, observe the following:
- Read all instructions before using this heater.
- This heater is hot when in use. To avoid burns, do not let bare skin touch hot surfaces. Use handles when moving this heater. Keep combustible materials, such as furniture, pillows, bedding, papers, clothes, and curtains at least 1 meter (3 feet) from the front of the heater and keep them away from the sides and rear.
- Extreme caution is necessary when any heater is used by or near children or invalids and whenever the heater is left operating and unattended.
- Always unplug the heater when not in use.
- Do not operate any heater with a damaged cord or plug or after the heater malfunctions, has been dropped, or damaged in any manner. Return heater to authorized service facility for examination, electrical or mechanical adjustment, or repair.
- Do not use outdoors.
- This heater is not intended for use in bathrooms, laundry areas, and similar indoor locations. Never locate heater where it may fall into a bathtub or other water container.
- Do not run cord under carpeting. Do not cover cord with throw rugs, runners, or similar coverings. Arrange cord away from traffic area and where it will not be tripped over.
- To disconnect heater, turn controls to OFF, then remove plug from outlet.
- Do not insert or allow foreign objects to enter any ventilation or exhaust opening as this may cause an electric shock or fire, or damage the heater.
- To prevent a possible fire, do not block air intakes or exhaust in any manner. Do not use on soft surfaces, like a bed, where openings may become blocked.
- A heater has hot and arcing or sparking parts inside. Do not use it in areas where gasoline, paint, or flammable liquids are used or stored.
- Use this heater only as described in this manual. Any other use not recommended by the manufacturer may cause fire, electric shock, or injury to persons.
- Always plug heaters directly into a wall outlet/receptacle. Never use with an extension cord or relocatable power tap (outlet/power strip).
- This heater includes an automatic tip-over safety switch and overheat protection. If the heater tips over or overheats, it will automatically shut off.
3. Package Contents
Upon opening the package, please ensure all components are present and undamaged:
- GRUNKEL RD-2000PRO Oil Radiator Unit
- Wheel Assembly (wheels and mounting hardware)
- User Manual (this document)
If any parts are missing or damaged, please contact Grunkel customer support immediately.
4. Product Overview


Components:
- Heating Elements: 9 oil-filled fins for efficient heat distribution.
- Digital Touch Panel: Intuitive interface for temperature setting, mode selection, and programming. Displays current temperature.
- Integrated Handle: Located at the top for easy lifting and repositioning.
- Cable Storage Compartment: For neat storage of the power cord when not in use or during transport.
- Multidirectional Wheels: Four wheels for easy movement of the radiator between rooms.
- Power Switch: Main power on/off switch, typically located on the side.
- LED Indicator: Indicates operational status.
5. Setup and Initial Placement
5.1 Attaching the Wheels
- Carefully unpack the radiator and all accessories.
- Turn the radiator upside down on a soft, stable surface to avoid scratching.
- Locate the wheel mounting brackets on the base of the radiator.
- Attach each wheel assembly to the designated points using the provided screws and tools. Ensure they are securely fastened.
- Carefully turn the radiator upright.
5.2 Placement
- Place the radiator on a firm, level surface.
- Ensure there is at least 1 meter (3 feet) of clear space around the front of the heater and adequate space from the sides and rear to allow for proper air circulation and prevent fire hazards.
- Do not place the heater directly below a power outlet.
- Avoid placing the heater in areas with high humidity or near water sources.


6. Operating Instructions
6.1 Basic Operation (Touch Panel)
- Plug the radiator into a suitable electrical outlet.
- Turn on the main power switch, usually located on the side of the unit. The LED indicator will illuminate.
- Press the Power button on the touch panel to turn the heater on.
- Use the '+' and '-' buttons to set your desired temperature, ranging from 5°C to 30°C.
- Press the Mode button to cycle through the 3 adjustable power levels (low, medium, high).
- Activate ECO Mode by pressing the dedicated ECO button. In this mode, the heater automatically adjusts its power output to maintain the set temperature with reduced energy consumption.
- To turn off the heater, press the Power button again, then turn off the main power switch.


6.2 Wi-Fi Connectivity and Smart Life App Control
The GRUNKEL RD-2000PRO features integrated Wi-Fi, allowing you to control it remotely via the Smart Life App and integrate with voice assistants like Alexa and Google Home.
- Download the App: Download the "Smart Life" app from your smartphone's app store (iOS or Android).
- Register/Log In: Create an account or log in to your existing Smart Life account.
- Add Device: Ensure your radiator is plugged in and powered on. In the Smart Life app, tap '+' to add a new device. Follow the in-app instructions to connect your radiator to your home Wi-Fi network. This typically involves putting the radiator into pairing mode (refer to the app or radiator display for specific instructions, often indicated by a blinking Wi-Fi icon).
- Remote Control: Once connected, you can control all functions of the radiator (power, temperature, mode, ECO, programming) from your smartphone, anywhere with an internet connection.
- Voice Control: To enable voice control, link your Smart Life account with Alexa or Google Home through their respective apps. You can then use voice commands to operate your radiator (e.g., "Alexa, turn on the heater," "Hey Google, set heater to 22 degrees").

6.3 24-Hour Programming
The 24-hour programming feature allows you to set specific on/off times for the radiator, ensuring your space is warm when needed and saving energy when not. This can be done via the touch panel or more conveniently through the Smart Life App.
- Via Touch Panel: Consult the specific programming instructions on the radiator's display or refer to the Smart Life App for a more user-friendly interface.
- Via Smart Life App: Within the app, navigate to the radiator's control interface. Look for a 'Schedule' or 'Timer' function. Here, you can set multiple on/off times for different days of the week, along with desired temperature and mode settings for each programmed period.
7. Maintenance
Regular cleaning and proper care will ensure the longevity and efficient operation of your GRUNKEL RD-2000PRO Oil Radiator.
7.1 Cleaning
- Always unplug the radiator from the power outlet and allow it to cool completely before cleaning.
- Wipe the exterior surfaces with a soft, damp cloth. Do not use abrasive cleaners, solvents, or harsh chemicals, as these can damage the finish.
- Ensure no water or liquid enters the control panel or other electrical components.
- For dust accumulation between the fins, use a vacuum cleaner with a brush attachment or compressed air.
- Ensure the radiator is completely dry before plugging it back in and operating.
7.2 Storage
When storing the radiator for extended periods:
- Unplug the unit and allow it to cool.
- Neatly wrap the power cord and secure it in the integrated cable storage compartment.
- Store the radiator in a cool, dry place, away from direct sunlight and moisture.
8. Troubleshooting
If you encounter issues with your GRUNKEL RD-2000PRO, please refer to the following common problems and solutions before contacting customer support.
| Problem | Possible Cause | Solution |
|---|---|---|
| Radiator does not turn on. | No power supply. Main power switch is off. Overheat protection activated. Tip-over switch activated. | Check if the plug is securely inserted into a working outlet. Ensure the main power switch (on the side) is in the 'ON' position. Unplug the unit, let it cool down for 30 minutes, then plug it back in. Ensure the radiator is on a flat, stable surface and upright. |
| Radiator is on but not heating. | Temperature setting is too low. ECO mode is active and room temperature is met. Overheat protection activated. | Increase the desired temperature setting. If in ECO mode, the heater will cycle on/off to maintain temperature. If you desire continuous heat, switch to a different power mode. Unplug the unit, let it cool down for 30 minutes, then plug it back in. |
| Wi-Fi connection fails. | Incorrect Wi-Fi password. Radiator too far from router. Router issues. Incorrect pairing mode. | Double-check your Wi-Fi password. Move the radiator closer to your Wi-Fi router. Restart your Wi-Fi router. Ensure the radiator is in the correct pairing mode (e.g., blinking Wi-Fi icon) as per Smart Life app instructions. |
| Radiator makes unusual noises. | Normal expansion/contraction of metal. Loose components. | Minor clicking or crackling sounds are normal as the oil heats and cools. If noises are loud or persistent, discontinue use and contact support. Check if wheels are securely fastened. |
| Missing screws for wheels (as per customer feedback). | Packaging error. | If you received the product without the necessary screws for wheel assembly, please contact Grunkel customer support immediately for assistance. Do not attempt to use the radiator without properly installed wheels. |
9. Specifications
| Feature | Detail |
|---|---|
| Brand | Grunkel |
| Model | RD-2000PRO |
| Power | 2000W |
| Heating Elements | 9 |
| Voltage | 220-240V (Standard EU) |
| Color | White |
| Dimensions (L x W x H) | 25 x 50 x 65 cm (approx. 38 x 23 x 63 cm with wheels) |
| Weight | 9 kg |
| Special Features | Integrated Wi-Fi, Touch Panel, ECO Mode, 24H Programming, Anti-tip Protection, Overheat Protection, LED Indicator, Cable Storage, Multidirectional Wheels |
| Indoor/Outdoor Use | Indoor |
10. Warranty and Support
10.1 Warranty Information
This GRUNKEL product is covered by a manufacturer's warranty. Grunkel ensures the availability of spare parts for this product in the EU for a period of 3 years from the date of purchase. Please retain your proof of purchase for warranty claims.
The warranty covers defects in materials and workmanship under normal use. It does not cover damage resulting from misuse, accident, unauthorized modifications, or failure to follow the instructions in this manual.
10.2 Customer Support
For technical assistance, warranty claims, or any questions regarding your GRUNKEL RD-2000PRO Oil Radiator, please contact Grunkel customer support. Contact details can typically be found on the official Grunkel website or on your product packaging.
When contacting support, please have your product model (RD-2000PRO) and proof of purchase readily available.
Ask a question about this manual
Ask about setup, troubleshooting, compatibility, parts, safety, or missing instructions. Manuals+ will review the question and use this page’s manual context to help answer it.