
1. Important Safety Information
Please read all instructions carefully before operating your ICEPURE YD-ZB001 5-in-1 Ice Maker. Retain this manual for future reference.
- Ensure the appliance is placed on a stable, level surface away from direct sunlight and heat sources.
- Do not immerse the appliance, power cord, or plug in water or other liquids.
- Unplug the ice maker from the power outlet before cleaning or when not in use.
- This appliance is for household use only. Do not use outdoors.
- Keep children away from the ice maker during operation.
- Use only potable water in the water reservoir.
- Do not block ventilation openings.
2. Product Overview
Familiarize yourself with the components of your ICEPURE YD-ZB001 5-in-1 Ice Maker.
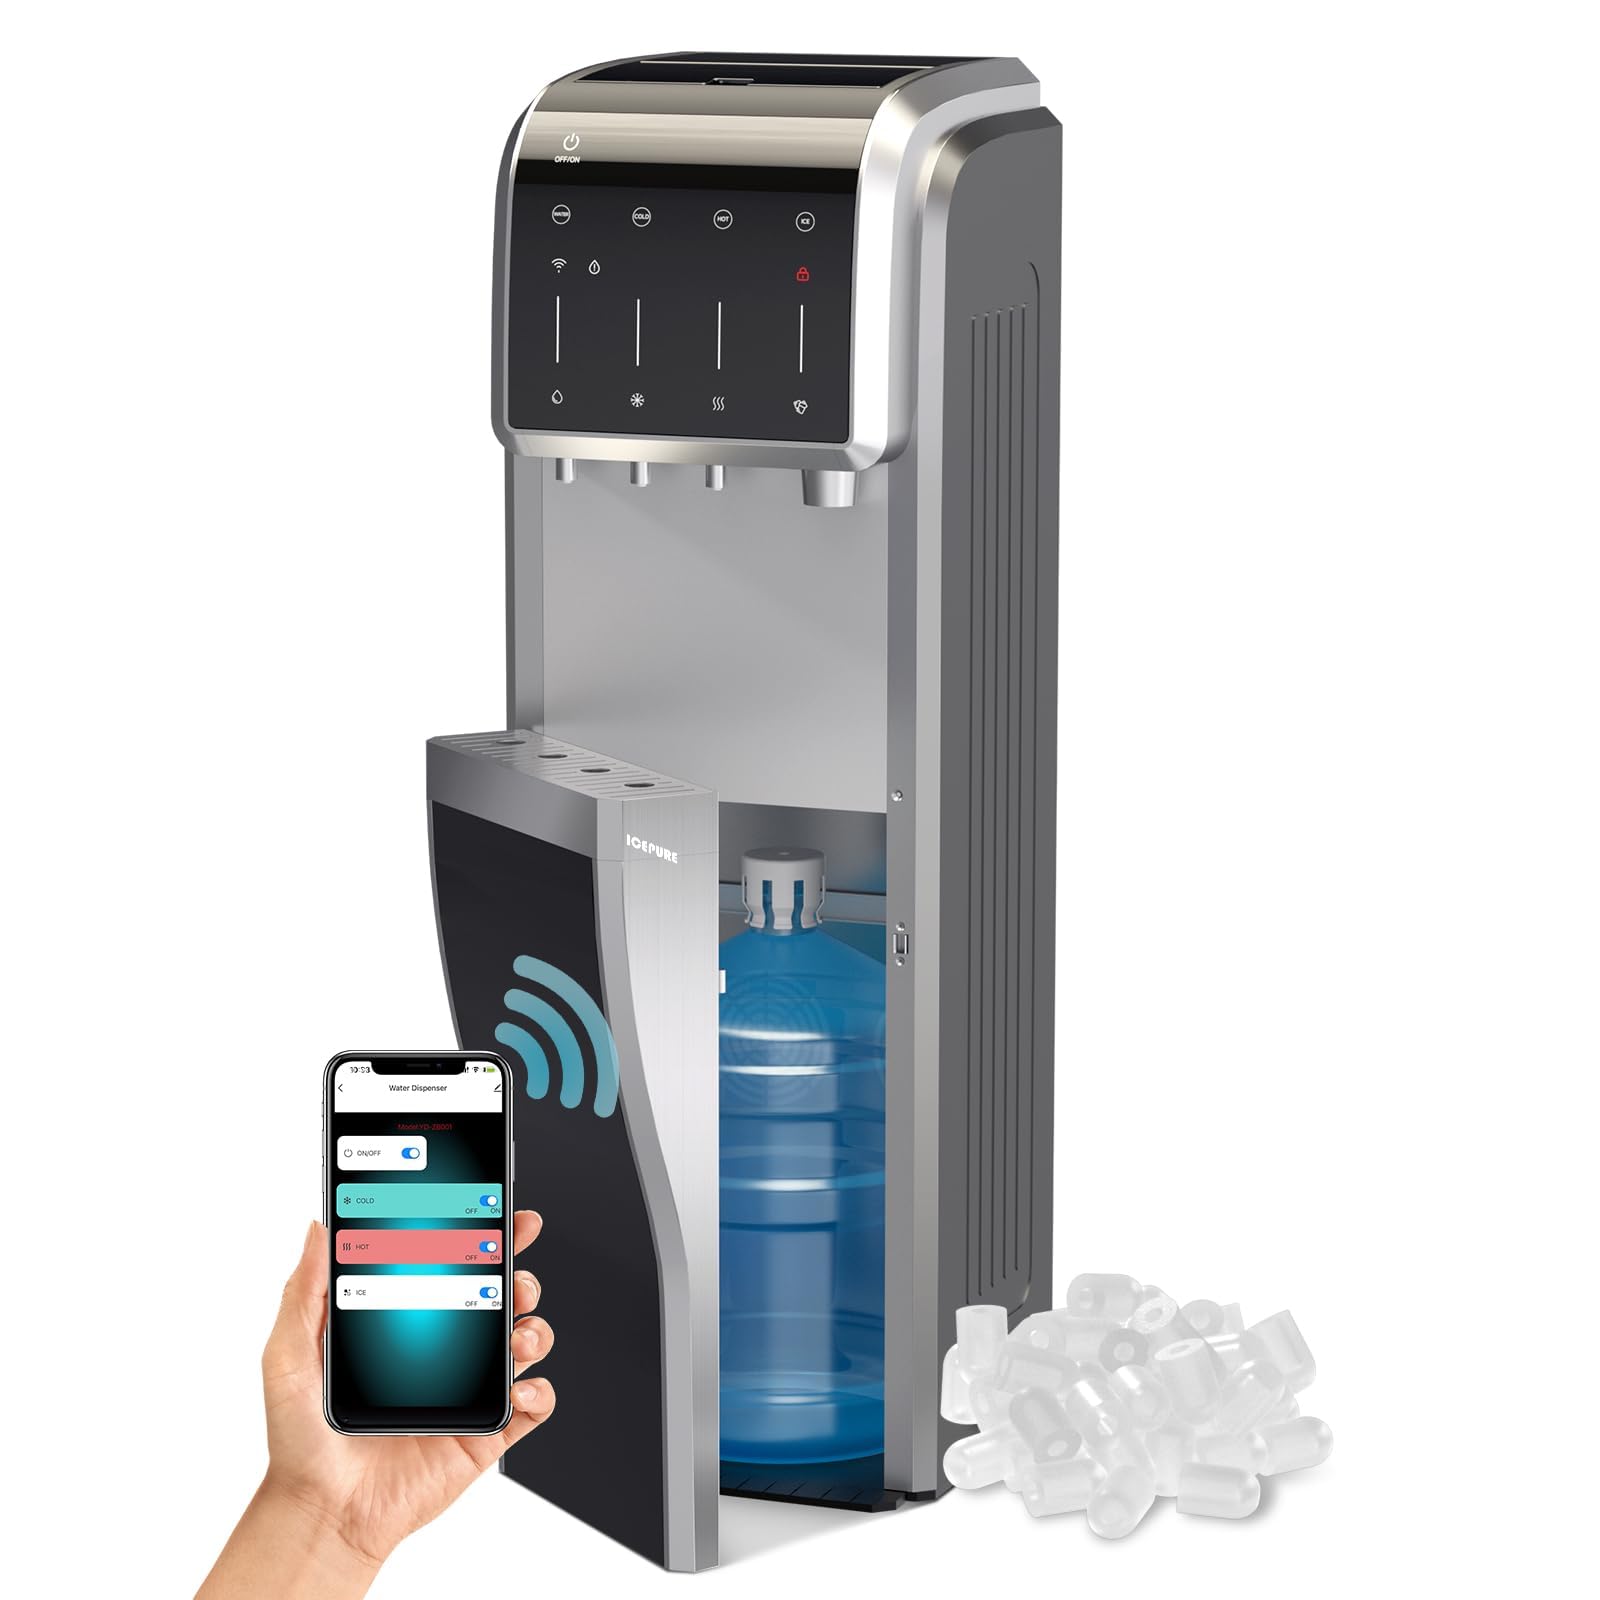
Figure 1: Front view of the ICEPURE YD-ZB001 5-in-1 Ice Maker. This image displays the compact design, control panel, and ice dispensing area.
Key Components:
- Control Panel: Buttons and indicator lights for operation.
- Water Reservoir: Area for filling water.
- Ice Basket: Removable basket for collecting ice.
- Ice Scoop: For safely removing ice.
- Drain Plug: Located at the bottom for water drainage.
- Air Vents: For proper ventilation of the compressor.
3. Setup Instructions
3.1 Unpacking and Placement
- Remove all packaging materials, including tape and protective film.
- Place the ice maker on a firm, level surface. Ensure there is at least 6 inches (15 cm) of space around the unit for proper ventilation.
- Allow the unit to stand upright for at least 2 hours before plugging it in. This allows the refrigerant to settle.
3.2 Initial Cleaning
- Wash the ice basket and ice scoop with warm water and a mild detergent. Rinse thoroughly and dry.
- Clean the interior of the water reservoir and ice-making components with a soft cloth dampened with warm water and a small amount of vinegar or mild detergent. Rinse by running a cycle with clean water and then draining.
- Ensure all parts are dry before use.
3.3 Power Connection and Water Filling
- Plug the power cord into a grounded electrical outlet.
- Open the water reservoir cover and fill with potable water up to the "MAX" fill line. Do not overfill.
- Close the water reservoir cover securely.
4. Operating Instructions
4.1 Making Ice
- After filling the water reservoir and plugging in the unit, press the "ON/OFF" button on the control panel. The "ICE MAKING" indicator light will illuminate.
- The ice maker will begin the ice-making cycle. The first batch of ice may take longer and might be smaller.
- Ice will be dispensed into the ice basket. When the basket is full, the "ICE FULL" indicator light will turn on, and the unit will pause.
- Remove ice from the basket using the provided scoop. The unit will resume ice production automatically once ice is removed.
- If the water level is low, the "ADD WATER" indicator light will illuminate. Add more water to the reservoir to continue ice production.
4.2 Selecting Ice Size (if applicable)
If your model supports multiple ice sizes, press the "SELECT" button to cycle through available sizes (e.g., Small, Medium, Large). The corresponding indicator light will show the selected size.
4.3 Other Functions (e.g., Water Dispenser, Self-Cleaning)
Refer to the control panel for specific buttons related to other functions. For example, if equipped with a water dispenser, press the "WATER" button to dispense water. For self-cleaning, press and hold the "CLEAN" button for 3 seconds to initiate the cleaning cycle.
5. Maintenance
5.1 Daily Cleaning
- Empty any remaining water from the reservoir by removing the drain plug.
- Wipe the interior with a soft cloth.
- Clean the exterior with a damp cloth.
5.2 Deep Cleaning / Descaling (Monthly or as needed)
- Unplug the unit.
- Remove the ice basket.
- Prepare a cleaning solution of water and vinegar (1:1 ratio) or a commercial ice maker cleaning solution.
- Pour the solution into the water reservoir up to the MAX line.
- Plug in the unit and run 2-3 ice-making cycles (discard the ice produced).
- Drain the cleaning solution completely.
- Rinse by filling the reservoir with clean water and running 2-3 cycles (discard the ice). Drain thoroughly.
- Wipe all surfaces dry.
Note: Regular cleaning prevents mineral buildup and ensures optimal ice quality.
6. Troubleshooting
| Problem | Possible Cause | Solution |
|---|---|---|
| Ice maker not working. | No power; unit not plugged in. | Ensure the unit is properly plugged into a grounded outlet. Check the circuit breaker. |
| "ADD WATER" indicator is on. | Water reservoir is empty or low. | Fill the water reservoir with potable water up to the MAX line. |
| "ICE FULL" indicator is on. | Ice basket is full. | Remove ice from the basket. The unit will resume operation. |
| Ice production is slow or ice is small. | Room temperature too high; poor ventilation; water temperature too high. | Ensure proper ventilation. Use cold water. Operate in a cooler environment. Clean the unit. |
| Unusual noise during operation. | Normal compressor operation; unit not level. | Ensure the unit is on a level surface. If noise is excessive or unusual, contact customer support. |
7. Specifications
- Model: YD-ZB001
- Brand: ICEPURE
- Certifications: ETL & FCC Certified
8. Warranty and Customer Support
8.1 Limited Warranty
ICEPURE warrants this product to be free from defects in material and workmanship for a period of one (1) year from the original date of purchase. This warranty does not cover damage caused by accident, misuse, abuse, commercial use, or unauthorized modification. Proof of purchase is required for all warranty claims. For full warranty details, please refer to the official ICEPURE website or contact customer support.
8.2 Customer Support
For technical assistance, troubleshooting, or warranty inquiries, please contact ICEPURE customer support through their official channels. Please have your model number (YD-ZB001) and purchase date available when contacting support.
