
Introduction
Thank you for purchasing the Hyper Tough DC 12V Digital Tire Inflator. This portable air compressor is designed for convenient and efficient inflation of various items, including car tires, bicycle tires, sports balls, and other inflatables. Please read this manual thoroughly before operation to ensure safe and proper use of the device.
Safety Information
Always observe the following safety precautions to prevent injury or damage to the product.
- Ensure the vehicle engine is running when operating the inflator to prevent draining the vehicle's battery.
- Do not leave the inflator unattended during operation.
- Keep out of reach of children.
- Avoid over-inflating. Always check the recommended pressure for the item being inflated.
- Do not operate the inflator in wet conditions or near flammable liquids or gases.
- Allow the inflator to cool down after extended use to prevent overheating.
- Inspect the power cord and air hose for damage before each use. Do not use if damaged.
- Use only the provided accessories and nozzles.
Package Contents
Verify that all items are present in the package:
- Hyper Tough DC 12V Digital Tire Inflator
- Detachable LED Light
- 10ft (3m) Power Cord with 12V DC Car Adapter
- Yellow Coil Air Hose with Twist Disconnect (approx. 4.9 meters)
- 2 Additional Nozzles (for bicycles, sports balls, etc.)
- Storage Bag
- Instruction Manual (this document)
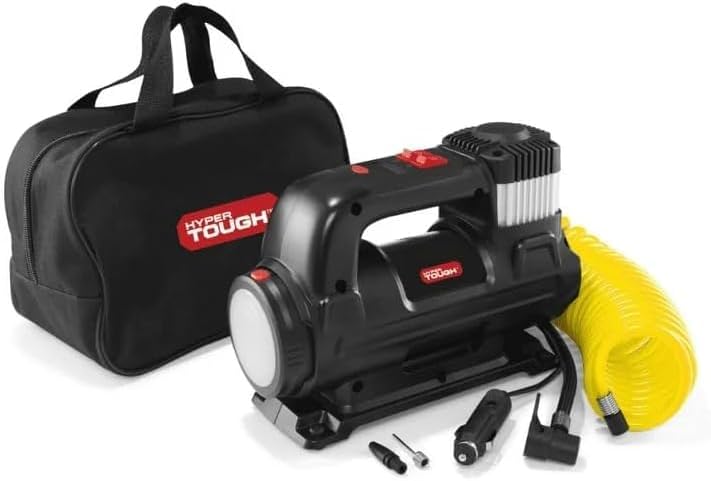
Image: The Hyper Tough digital tire inflator, its black storage bag, the yellow coil air hose, and various inflation nozzles.
Product Features
- Quick Inflation: Inflates standard car tires from 0-35 PSI in under 4 minutes.
- Direct Drive Motor: Powerful, air-cooled motor for efficient and reliable performance.
- Digital Precision: Backlit LCD display shows accurate pressure readings in PSI, KPA, or BAR (up to 100 PSI).
- Detachable LED Light: Magnetic LED light for illumination during nighttime emergencies or low-light conditions.
- Extended Reach: 10ft power cord and 4.9m yellow coil air hose for convenient access to all tires.
- Versatile Use: Includes additional nozzles for inflating bicycles, sports balls, air mattresses, and other inflatables.
- Portability: Compact design with an included carrying bag for easy storage and transport.
Setup
- Prepare the Vehicle: Ensure your vehicle is parked on a level surface and the engine is running to provide power to the inflator.
- Connect Power: Insert the 12V DC car adapter plug firmly into your vehicle's cigarette lighter socket.
- Attach Air Hose: Connect the yellow coil air hose to the inflator's air outlet by twisting it securely.
- Select Nozzle (if needed): For items other than standard Schrader valves (e.g., Presta valves on bikes, sports balls), select the appropriate additional nozzle and attach it to the end of the air hose.
Operating Instructions
1. Inflating Car/Motorcycle Tires
- Check Recommended Pressure: Refer to your vehicle's owner's manual or the sticker inside the driver's side door jamb for the recommended tire pressure (PSI).
- Connect to Tire Valve: Unscrew the cap from the tire valve stem. Firmly twist the air hose connector onto the tire valve stem until it is secure and no air is leaking.
- Power On: Press the power button on the inflator. The LCD display will illuminate and show the current tire pressure.
- Set Target Pressure: Use the '+' and '-' buttons to set your desired target pressure. The display allows selection between PSI, KPA, and BAR units.
- Start Inflation: Press the inflation start button. The compressor will begin to inflate the tire.
- Automatic Shut-off: The inflator will automatically shut off once the preset target pressure is reached.
- Disconnect: Quickly unscrew the air hose connector from the tire valve stem and replace the valve cap.

Image: The Hyper Tough inflator positioned next to a car tire, with its hose connected to the tire valve for inflation.
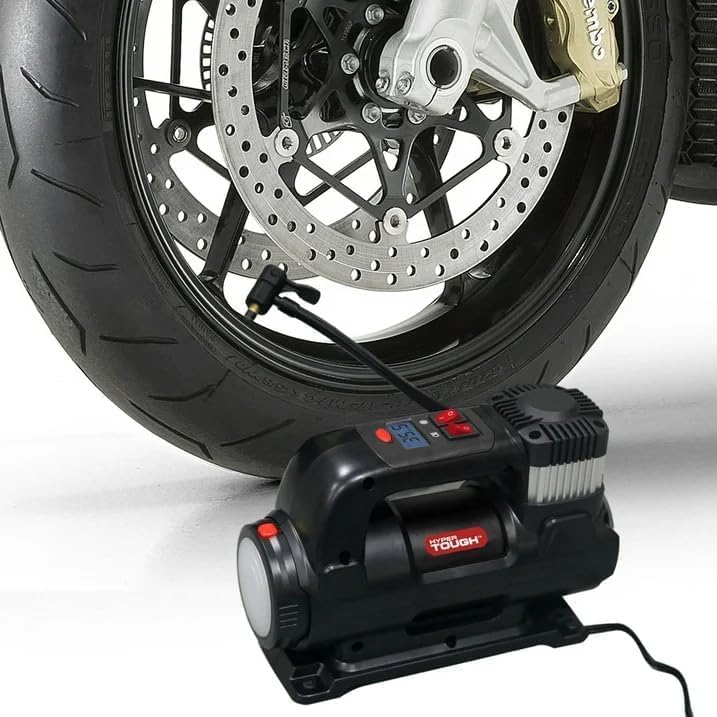
Image: The Hyper Tough inflator connected to a motorcycle tire, showing its compact size relative to the wheel.
2. Inflating Bicycle Tires
- Identify Valve Type: Determine if your bicycle has a Schrader or Presta valve. For Presta valves, an adapter (one of the additional nozzles) is required.
- Attach Nozzle: If using a Presta valve, screw the Presta adapter onto the valve stem, then attach the inflator hose to the adapter. For Schrader valves, attach the inflator hose directly.
- Set Pressure: Refer to the recommended pressure on your bicycle tire sidewall. Set the target pressure on the inflator.
- Inflate: Follow steps 4-7 from "Inflating Car/Motorcycle Tires".

Image: The Hyper Tough inflator connected to a bicycle tire, demonstrating its use for smaller vehicle tires.
3. Inflating Sports Balls and Other Inflatables
- Attach Needle Nozzle: Select the appropriate needle nozzle from the additional accessories and screw it onto the air hose connector.
- Insert Needle: Carefully insert the needle into the inflation port of the sports ball or inflatable.
- Set Pressure: Refer to the recommended pressure for the item (often printed near the inflation port). Set the target pressure on the inflator.
- Inflate: Follow steps 4-7 from "Inflating Car/Motorcycle Tires". Be cautious not to over-inflate delicate items.

Image: The Hyper Tough inflator placed next to a basketball, illustrating its capability for inflating sports equipment.
4. Using the Detachable LED Light
The inflator features a magnetic detachable LED light for convenience in low-light conditions.
- To detach, gently pull the LED light module from the side of the inflator.
- The light has its own power button. Press to turn on/off.
- The magnetic base allows it to be attached to metal surfaces, such as a car hood, for hands-free illumination.
- To reattach, align the module with the slot on the inflator and push until it clicks into place.
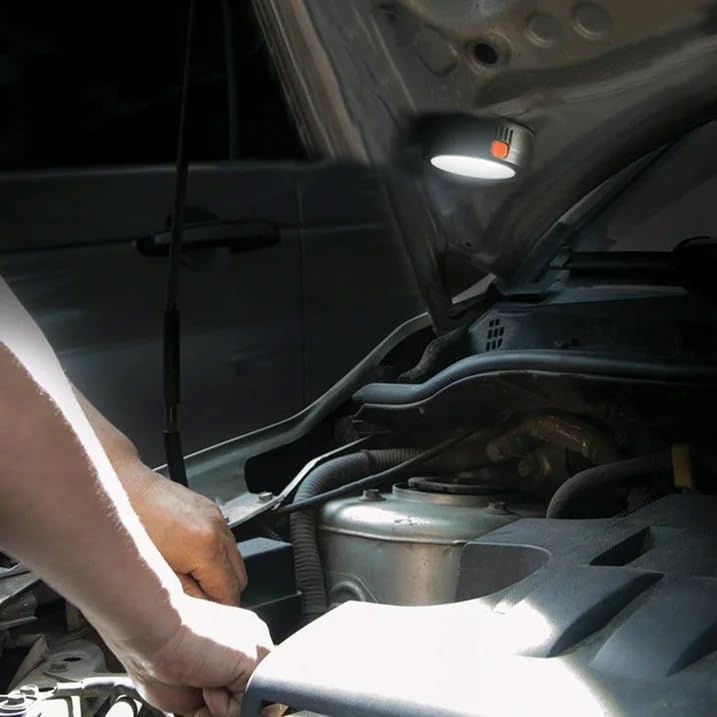
Image: The detachable LED light from the inflator magnetically attached to a car hood, providing illumination for engine bay work.
Maintenance
- Cleaning: Wipe the inflator with a damp cloth. Do not use harsh chemicals or abrasive cleaners. Ensure the device is unplugged before cleaning.
- Storage: Store the inflator and its accessories in the provided carrying bag in a cool, dry place, away from direct sunlight and extreme temperatures.
- Cord and Hose Inspection: Regularly check the power cord and air hose for any signs of wear, cuts, or damage. Replace if necessary.
Troubleshooting
| Problem | Possible Cause | Solution |
|---|---|---|
| Inflator does not turn on. | No power from 12V socket; Blown fuse in 12V plug; Loose connection. | Ensure vehicle engine is running. Check vehicle's 12V socket for power. Inspect the fuse in the inflator's 12V plug and replace if necessary. Ensure plug is fully inserted. |
| Slow inflation or no inflation. | Air leak from hose connection; Incorrect nozzle; Blocked air intake. | Tighten hose connection to valve stem. Ensure correct nozzle is used and securely attached. Check for obstructions in the air intake vents. |
| Inflator overheats and shuts off. | Extended continuous use. | Allow the inflator to cool down for at least 10-15 minutes before resuming operation. Avoid continuous use for more than 10 minutes. |
| Inaccurate pressure reading. | Loose connection to valve stem; Sensor malfunction. | Ensure the hose is securely attached to the valve stem without leaks. If problem persists, contact customer support. |
Specifications
- Model: RCP-B55A
- Power Source: DC 12V (Vehicle Cigarette Lighter Socket)
- Max Pressure: 100 PSI
- Pressure Units: PSI, KPA, BAR
- Power Cord Length: 10 ft (approx. 3 meters)
- Air Hose Length: 4.9 meters (yellow coil hose)
- Included Components: Inflator unit, detachable LED light, 12V DC power cord, coil air hose, 2 additional nozzles, carrying bag.
- Material: Plastic
- Item Weight: Approximately 5.03 lbs (2.28 kg)
Warranty and Support
For warranty information or technical support, please refer to the documentation included with your purchase or contact the retailer where the product was acquired. Specific warranty terms may vary by region and retailer.