
1. Introduction
This manual provides essential information for the safe and effective operation, setup, and maintenance of your GEPRC CineLog35 V3 O4 Pro FPV Drone (ELRS 2.4G With GPS). Please read this manual thoroughly before using the product to ensure proper functionality and to prevent damage or injury.
2. Product Overview
The GEPRC CineLog35 V3 O4 Pro FPV Drone is designed for cinematic FPV flight, offering advanced features for capturing high-quality aerial footage. It integrates the O4 Air Unit Pro system, capable of recording 4K video at 120 frames per second with a 155° ultra-wide field of view and 10-bit D-Log M color mode for enhanced dynamic range.
Key design elements include a bottom-mounted camera structure with damping balls to effectively isolate frame vibrations, ensuring stable and smooth video capture even during dynamic maneuvers. The drone is equipped with a GEP-F722-45A AIO V2 flight controller and powerful SPEEDX2 2105.5 2650KV motors, paired with HQProp D-T90MM tri-blade propellers, providing excellent thrust, responsiveness, and precise control.
For versatility, the CineLog35 V3 O4 Pro supports both its built-in O4 Pro recording capabilities and external action cameras like GoPro. The customized frame design allows for easy access to the Type-C port and microSD slot, simplifying data transfer and storage management. Durability is enhanced by an upgraded propeller guard made from high-toughness modified material, offering improved impact resistance for safer flights.

Figure 1: Top-down view of the GEPRC CineLog35 V3 O4 Pro FPV Drone.
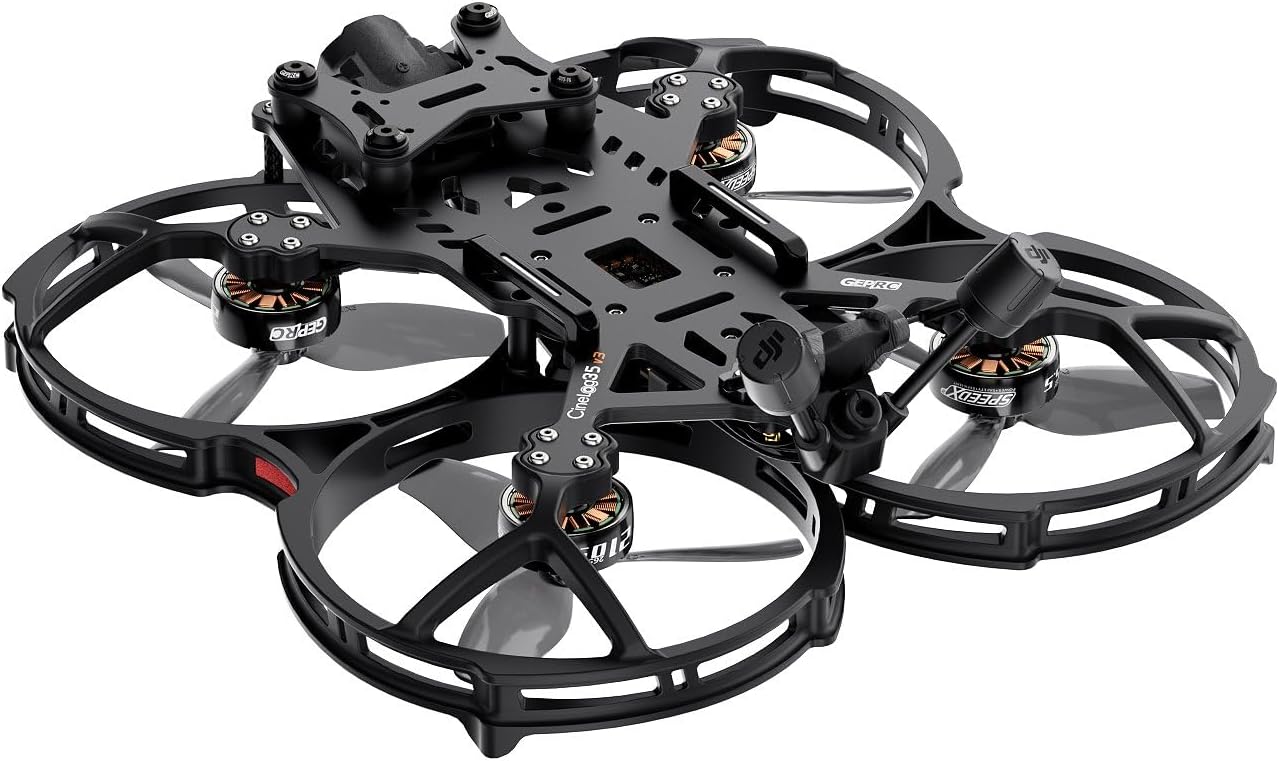
Figure 2: Angled view of the GEPRC CineLog35 V3 O4 Pro FPV Drone.
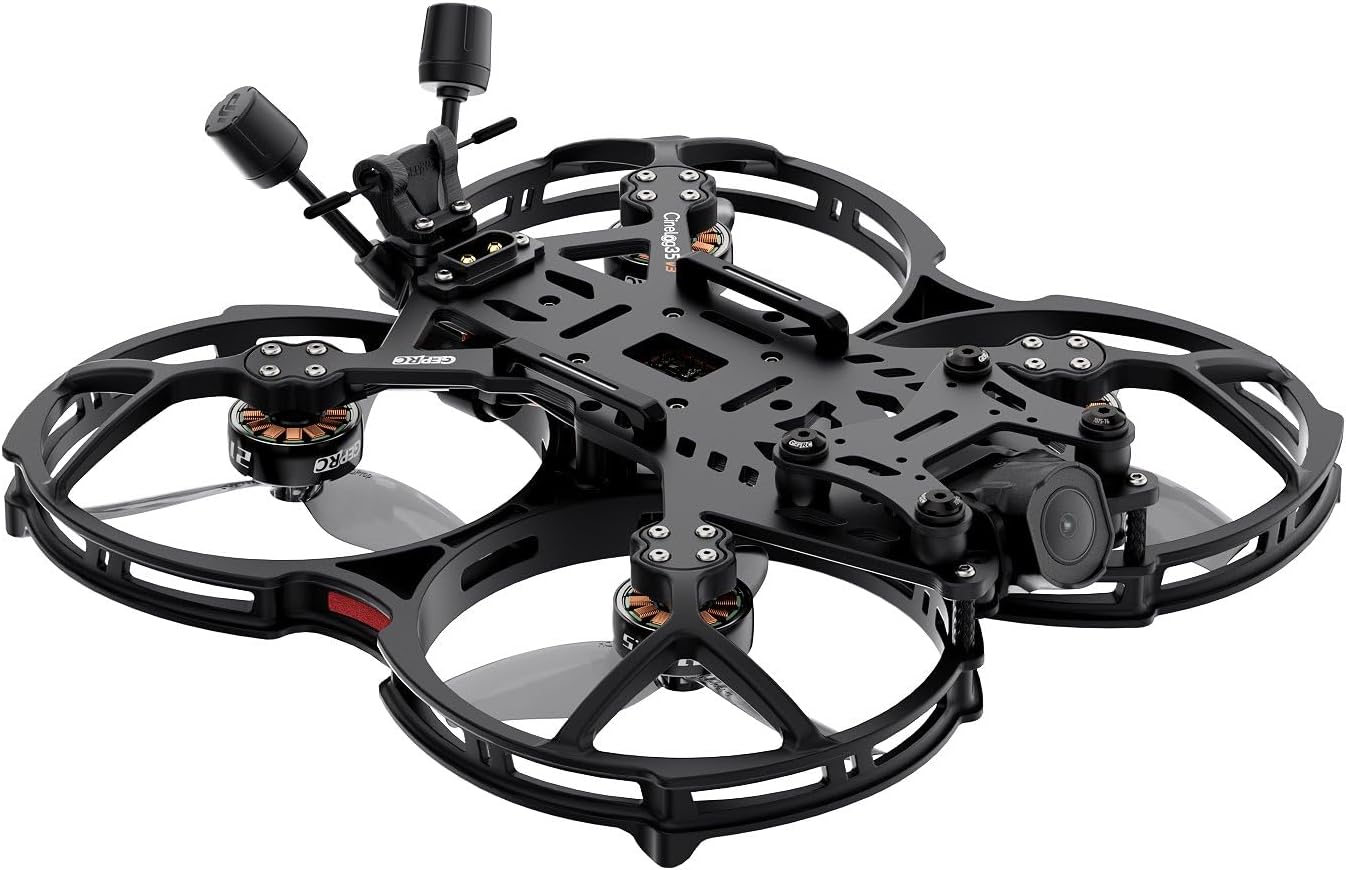
Figure 3: Angled view of the GEPRP CineLog35 V3 O4 Pro FPV Drone with antennas.
3. Specifications
| Feature | Specification |
|---|---|
| Model | CineLog35 V3 O4 Pro |
| Frame | GEP-CL35 V3 |
| Main Carbon Plate Thickness | 3.5mm |
| Wheelbase | 142mm |
| FC System | GEP-F722-45A AIO V2 |
| MCU | STM32F722RET6 |
| Gyro | ICM42688-P |
| FC Firmware | GEPRC_F722_AIO |
| Flash | 16MB |
| ESC | 8Bit 45A |
| Motor | SPEEDX2 2105.5 2650KV |
| Propellers | HQProp D-T90MM |
| Power Connector | XT60EW-M |
| VTX | O4 Air Unit Pro module |
| Camera | O4 Air Unit Pro camera module |
| Antenna | O4 Air Unit Pro antenna |
| Receiver | PNP (O4 Pro built-in) / ELRS 2.4G |
| Weight (ELRS 2.4G version) | 280g ± 2g |
| Recommended Battery | LiPo 6S 1100mAh–1300mAh |
| Flight Time | 7min-8min30s (tested under smooth cruising; actual time depends on flight style) |
| Video Capture Resolution | 4K |
| Connectivity Technology | USB |
| Item Weight | 285 Grams (10.1 ounces) |
| Battery Capacity | 1200 Milliamp Hours |
| Video Capture Format | MP4 |
| Control Type | Remote Control |
| Wireless Communication Technology | Radio Frequency |
| Product Dimensions | 9.65"L x 9.65"W x 2.64"H |
4. Setup
- Unboxing and Inspection: Carefully remove all components from the packaging. Inspect the drone, propellers, and accessories for any signs of damage. Ensure all included items are present as per the packing list.
- Battery Charging: Use a compatible LiPo charger to fully charge the recommended 6S 1100mAh–1300mAh battery. Always follow LiPo battery safety guidelines during charging and handling.
- Receiver Binding (ELRS 2.4G): As an ELRS 2.4G variant, the drone features a built-in receiver. Refer to the ELRS binding procedure specific to your remote controller. Typically, this involves putting the drone into binding mode (often by cycling power three times) and then initiating the binding process on your ELRS-compatible radio transmitter.
- Controller Setup: Ensure your remote controller is properly configured for FPV drone flight, including stick modes (e.g., Mode 2) and channel assignments. Calibrate the controller if necessary.
- Pre-Flight Checks: Before your first flight, perform a thorough visual inspection. Check that all propellers are securely attached and undamaged. Verify that the flight controller is correctly configured and that all control surfaces respond appropriately to your remote controller inputs.
5. Operating Instructions
- Power On: Connect the fully charged battery to the drone's XT60EW-M power connector. The drone will perform a self-test.
- Arming the Motors: With the drone on a stable, level surface and clear of obstructions, arm the motors using the designated switch or stick command on your remote controller (e.g., throttle down and yaw right). The propellers will begin to spin slowly.
- Takeoff: Slowly increase the throttle to lift the drone off the ground. Maintain a stable hover before attempting forward flight.
- Flight Controls:
- Throttle: Controls altitude (up/down).
- Yaw: Rotates the drone left or right on its vertical axis.
- Pitch: Tilts the drone forward or backward.
- Roll: Tilts the drone left or right.
- Camera Operation: The O4 Air Unit Pro camera module allows for 4K video recording. Refer to the O4 Air Unit Pro manual for detailed instructions on recording, settings, and accessing footage.
- Landing: Slowly decrease the throttle to bring the drone down gently. Once on the ground, disarm the motors using the designated switch or stick command (e.g., throttle down and yaw left).
- Power Off: Disconnect the battery from the drone immediately after landing and disarming.
6. Maintenance
- Propeller Inspection: Regularly inspect propellers for cracks, bends, or nicks. Damaged propellers can cause instability and reduce flight performance. Replace them immediately if any damage is found.
- Frame and Motor Inspection: Check the carbon fiber frame and motor mounts for any signs of stress, cracks, or loose screws. Ensure all motors spin freely without obstruction.
- Cleaning: Keep the drone clean from dust, dirt, and debris. Use a soft brush or compressed air to clean the motors, flight controller, and camera lens. Avoid using liquids directly on electronic components.
- Firmware Updates: Periodically check the GEPRC official website for any available firmware updates for the flight controller or O4 Air Unit Pro. Follow the provided instructions carefully for any updates.
- Battery Care: Store LiPo batteries in a cool, dry place at storage voltage (around 3.8V per cell). Do not overcharge or over-discharge batteries. Discard damaged or swollen batteries safely.
7. Troubleshooting
- Drone Does Not Power On:
- Ensure the battery is fully charged and properly connected.
- Check the power connector (XT60EW-M) for damage or loose connections.
- Motors Do Not Arm:
- Verify that the remote controller is powered on and bound to the drone.
- Ensure the drone is on a level surface. Most flight controllers require a level calibration before arming.
- Check for any error messages in your FPV goggles or flight controller software (e.g., Betaflight configurator).
- Unstable Flight:
- Inspect all propellers for damage and ensure they are correctly installed.
- Check for loose motor screws or frame components.
- Ensure the flight controller is securely mounted and free from excessive vibrations.
- Video Signal Loss/Interference:
- Check the antenna connections on both the drone and your FPV goggles.
- Ensure you are within the effective range of the video transmitter.
- Avoid flying near sources of strong electromagnetic interference.
- Drone Lost/Unresponsive:
- If equipped, activate the 'Beeper' function on your remote controller to help locate the drone.
- In case of a complete loss of signal, the drone may initiate a 'failsafe' procedure (e.g., auto-landing or return-to-home if GPS is active and configured).
8. Warranty and Support
For detailed warranty information, technical support, and service inquiries regarding your GEPRC CineLog35 V3 O4 Pro FPV Drone, please refer to the official GEPRC website or contact GEPRC customer service directly. Keep your proof of purchase for any warranty claims.