
1. Introduction
The ACEMAGIC M1 Mini PC is a compact and powerful desktop computer designed for gaming, business, and everyday use. Featuring an AMD Ryzen 7 7735HS processor, integrated AMD Radeon Graphics, 24GB DDR5 RAM, and a 1TB PCIe SSD, it delivers high performance in a small form factor. This manual provides essential information for setting up, operating, maintaining, and troubleshooting your ACEMAGIC M1 Mini PC.

Image 1: Overview of the ACEMAGIC M1 Mini PC and its core features.
2. Package Contents
Please check the box for the following items:
- 1 x ACEMAGIC M1 Mini PC
- 1 x Power Adapter
- 1 x HDMI Cable
- 1 x Mounting Bracket with Screws
- 1 x User Manual
3. Product Overview
The ACEMAGIC M1 Mini PC is designed for efficiency and connectivity. Its compact size (5.04 x 1.61 x 5.04 inches) makes it ideal for various setups.
Front Panel
- 1 x USB-C Port (Data/Display Output)
- 2 x USB-A 3.2 Ports
- 1 x Audio Jack (Headphone/Microphone)
- 1 x Power Button
Rear Panel
- 4 x USB-A 3.2 Ports
- 1 x HDMI Port (4K@60Hz)
- 1 x DisplayPort (4K@60Hz)
- 1 x 2.5G LAN Port
- 1 x DC-in Port (Power)

Image 2: Front and rear view of the ACEMAGIC M1 Mini PC highlighting available ports.
4. Setup Guide
- Connect Peripherals: Connect your keyboard, mouse, and any other USB devices to the available USB-A ports on the front or rear panel.
- Connect Display: Connect your monitor(s) to the HDMI, DisplayPort, or USB-C ports using appropriate cables. The Mini PC supports up to three 4K displays simultaneously.
- Connect Power: Plug the power adapter into the DC-in port on the rear panel of the Mini PC, then plug the adapter into a power outlet.
- Power On: Press the Power Button on the front panel to turn on the Mini PC.
- Initial Windows Setup: Follow the on-screen instructions to complete the Windows 11 Pro setup, including network connection (Wi-Fi 6 or 2.5G LAN), user account creation, and privacy settings.
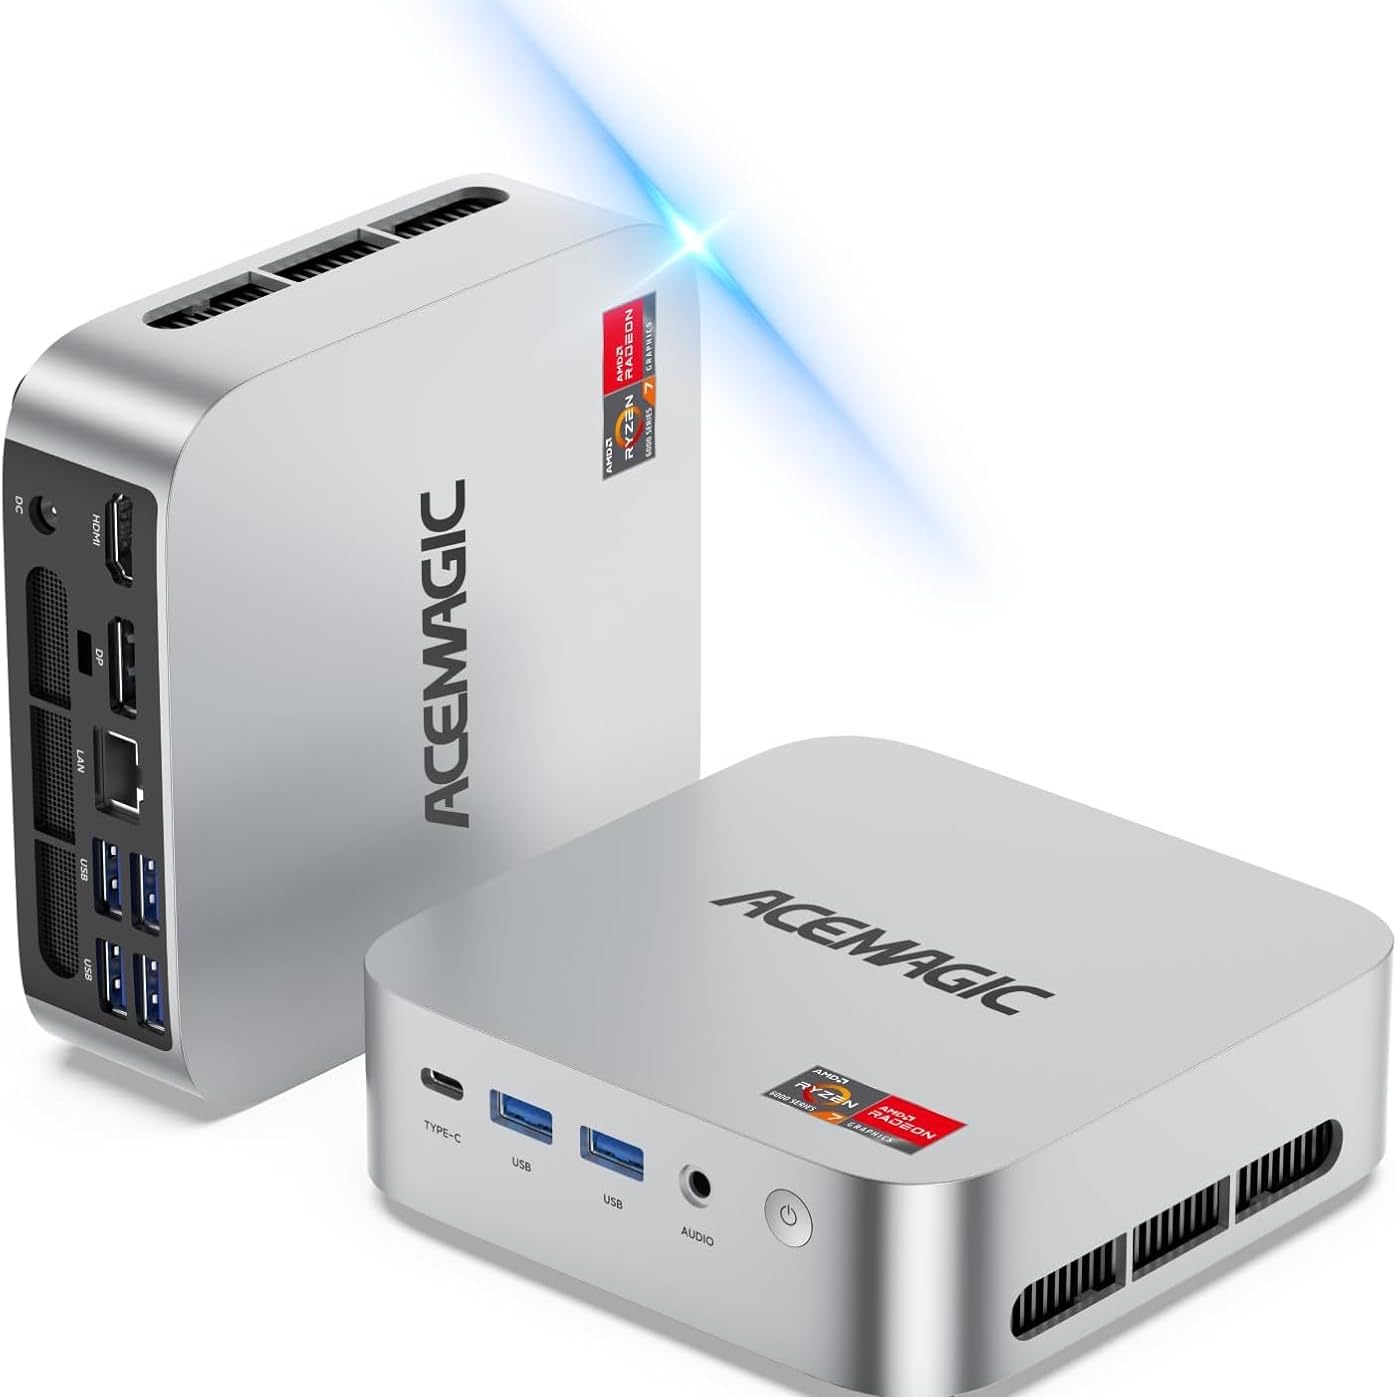
Image 3: ACEMAGIC M1 Mini PC connected and ready for initial setup.
5. Operating Instructions
Your ACEMAGIC M1 Mini PC comes pre-installed with Windows 11 Pro, offering a familiar and intuitive user experience. Use your connected keyboard and mouse for navigation.
- Power On/Off: Press the power button once to turn on or off the device.
- Restart: From the Windows Start Menu, select Power > Restart.
- Sleep Mode: From the Windows Start Menu, select Power > Sleep.
- Network Connectivity: Connect to the internet via built-in Wi-Fi 6 (802.11ax) or the 2.5G LAN port for stable and high-speed connections.
- Bluetooth Devices: Pair Bluetooth 5.2 compatible devices like headphones, speakers, or game controllers through Windows Settings.
6. Storage Expansion
The ACEMAGIC M1 Mini PC includes a fast 1TB PCIe SSD. For additional storage, you can expand it:
- 2.5" SSD/HDD Slot: The device features an internal slot for a 2.5-inch SSD or HDD (not included), allowing expansion up to 4TB. Refer to the detailed user manual for installation steps.

Image 4: Illustration of the internal storage expansion capabilities.
7. Display Setup
Enhance your productivity or gaming experience by connecting multiple displays:
- Triple 4K Display Support: Connect up to three 4K monitors simultaneously using the HDMI, DisplayPort, and USB-C outputs.
- Configuration: Once connected, configure your display settings through Windows Display Settings (Right-click on desktop > Display settings) to extend or duplicate your desktop.

Image 5: Example of a triple 4K display setup for enhanced work efficiency.
8. Performance & Cooling
The ACEMAGIC M1 Mini PC is engineered for high performance and quiet operation:
- Processor: AMD Ryzen 7 7735HS (8-core/16-thread, up to 4.75GHz boost clock) for seamless multitasking.
- Graphics: Integrated AMD Radeon Graphics (12CU, 2200MHz GPU Frequency) for immersive visuals.
- RAM: 24GB LPDDR5 5500MT/s memory for smooth operations.
- Cooling System: Features an ultra-quiet, low-noise cooling system with efficient cooling, a high-speed fan, and dual exhaust, maintaining noise levels around 38 decibels.

Image 6: Internal view highlighting the efficient and quiet cooling system.
9. Specifications
| Brand | ACEMAGIC |
| Model | M1 |
| Operating System | Windows 11 Pro |
| CPU Model | AMD Ryzen 7 7735HS (up to 4.75GHz) |
| Graphics | Integrated AMD Radeon Graphics (12CU, 2200MHz) |
| RAM | 24GB LPDDR5 5500MT/s |
| Storage | 1TB PCIe SSD (M.2 2280, expandable up to 4TB with 2.5" SSD) |
| Display Output | HDMI, DisplayPort, USB-C (Triple 4K Display) |
| Connectivity | 2.5G LAN, WiFi 6 (802.11ax), Bluetooth 5.2 |
| Ports | 1x USB-C, 6x USB-A, 1x Audio, 1x HDMI, 1x DisplayPort, 1x LAN, 1x DC-in |
| Dimensions | 5.04 x 1.61 x 5.04 inches |
| Weight | 1.2 Kilograms |
10. Troubleshooting
- No Display: Ensure all display cables are securely connected and the monitor is powered on and set to the correct input source.
- No Power: Verify the power adapter is correctly plugged into both the Mini PC and a working power outlet.
- Network Issues: Check Wi-Fi settings in Windows or ensure the Ethernet cable is properly connected to the LAN port and your router.
- Slow Performance: Close unnecessary applications, check for Windows updates, and ensure sufficient free storage space.
11. Warranty and Support
Your ACEMAGIC M1 Mini PC is covered by a complete 12-month assurance. For any questions or technical assistance, please contact ACEMAGIC customer service through Amazon, available 7 days a week, 24 hours a day.


