
Introduction
Thank you for choosing the RYOBI ONE+ HP 18V Brushless 15 in. Attachment Capable String Trimmer. This manual provides essential information for the safe operation, assembly, maintenance, and troubleshooting of your new tool. Please read this manual thoroughly before operating the product and retain it for future reference.
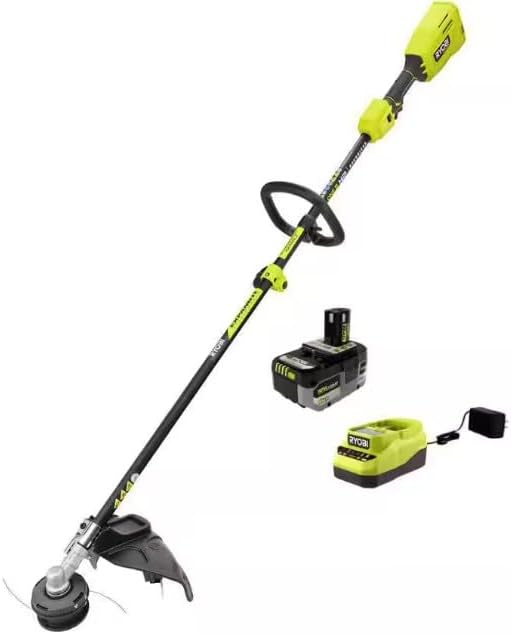
Image: The RYOBI ONE+ HP 18V Brushless 15 in. Attachment Capable String Trimmer, shown with its accompanying 6.0 Ah battery and charger, ready for use.
Important Safety Information
WARNING: To reduce the risk of injury, always wear eye protection and gloves when operating this tool. Keep bystanders and pets at a safe distance. Do not operate near flammable materials. Inspect the area for hidden objects before use.
- Always ensure the battery is removed before performing any adjustments, cleaning, or maintenance.
- Do not operate the string trimmer in wet conditions or rain.
- Keep hands and feet away from the cutting line.
- Use only RYOBI recommended replacement parts and accessories.
Package Contents
Verify that all items listed below are included in your package:
- RYOBI ONE+ HP 18V Brushless 15 in. Attachment Capable String Trimmer
- 6.0 Ah High Performance Battery
- Battery Charger
- Operator's Manual (this document)

Image: A clear layout of the RYOBI ONE+ HP 18V Brushless 15 in. String Trimmer, a 6.0Ah High Performance Battery, and the battery charger, illustrating the complete kit contents.
Product Features
The RYOBI ONE+ HP 18V String Trimmer is designed for efficient and powerful trimming tasks.
- ONE+ HP Technology: Combines a powerful brushless motor, advanced electronics, and high-performance lithium technology for increased power, runtime, and durability.
- Attachment Capable: Transforms your string trimmer into various tools with RYOBI EXPAND-IT attachments and other universal attachments.
- Adjustable Cut Swath: Easily switch between a 13-inch and 15-inch cut swath for optimal performance or extended runtime.
- Variable Speed Trigger & 2-Speed Switch: Provides maximum control and allows for adjustment between two speeds for optimal power or runtime.
- REEL EASY+ Bump-Feed Head: Designed for quick and convenient line reloading in under 60 seconds, using .080" line.

Image: A detailed diagram of the RYOBI ONE+ HP 18V Brushless 15 in. String Trimmer, highlighting key features such as the variable speed trigger, 2-speed switch, quick change coupler, adjustable cut swath, and REEL EASY+ bump feed head.

Image: A person operating the RYOBI string trimmer near a brick wall, demonstrating its powerful performance for trimming tasks.

Image: A close-up view of the RYOBI string trimmer's shaft, emphasizing its attachment-capable design for versatile use with various EXPAND-IT attachments.
Setup
1. Assembly
While the product is largely pre-assembled, some minor setup is required.
- Attach the Guard: Secure the debris guard to the trimmer head using the provided hardware. Ensure it is firmly attached to prevent debris from being thrown towards the operator.
- Install the Auxiliary Handle: Position the auxiliary handle on the shaft to a comfortable operating height and tighten it securely.
2. Battery Charging and Installation
- Charge the Battery: Connect the charger to a standard power outlet. Insert the 6.0 Ah battery into the charger. The indicator light on the charger will show the charging status. Allow the battery to fully charge before first use.
- Install the Battery: Once charged, slide the battery pack into the battery port on the trimmer handle until it clicks securely into place. Ensure it is fully seated.
Operating Instructions
1. Starting and Stopping
- To Start: Ensure the battery is installed. Press the safety lock-out button (if present) and then squeeze the variable speed trigger.
- To Stop: Release the variable speed trigger.
2. Adjusting Speed and Cut Swath
- 2-Speed Switch: Use the 2-speed switch located on the handle to select between high speed for maximum power or low speed for extended runtime.
- Adjustable Cut Swath: The trimmer head can be adjusted between 13 inches and 15 inches. Refer to the trimmer head instructions for details on how to change the cutting diameter. A larger swath covers more area, while a smaller swath conserves battery life.

Image: A close-up of the RYOBI string trimmer's handle, highlighting the 2-speed switch for optimal power and runtime control.
3. Trimming Techniques
- Hold the trimmer firmly with both hands.
- Maintain a balanced stance.
- Swing the trimmer from side to side, using the tip of the line to cut.
- Avoid hitting hard objects, as this can damage the line and the trimmer head.

Image: A person using the RYOBI string trimmer to trim grass around shrubs in a medium-sized yard, demonstrating its suitability for such tasks.
4. Using Attachments
This string trimmer is attachment capable. To attach an accessory:
- Ensure the trimmer is off and the battery is removed.
- Loosen the quick-change coupler on the trimmer shaft.
- Insert the attachment shaft into the coupler, aligning the locking pin.
- Tighten the coupler securely.
- Refer to the attachment's manual for specific operating instructions.
Maintenance
1. Line Replacement (REEL EASY+ Bump-Feed Head)
The REEL EASY+ head allows for quick line reloading.
- Ensure the trimmer is off and the battery is removed.
- Align the arrows on the bump knob and the trimmer head.
- Insert approximately 20 feet of .080" diameter trimmer line into the eyelet and push it through until it exits the opposite eyelet.
- Evenly pull the line through until there is an equal amount on both sides.
- Rotate the bump knob clockwise to wind the line into the head.

Image: A close-up view of the RYOBI REEL EASY+ bump feed head, showing the trimmer line extending from it, illustrating its design for easy line management.
2. Cleaning and Storage
- After each use, clean the trimmer with a damp cloth. Do not use harsh chemicals.
- Remove any grass clippings or debris from the guard and trimmer head.
- Store the trimmer in a dry, secure location, out of reach of children.
- Remove the battery from the trimmer before storing for extended periods.
Troubleshooting
| Problem | Possible Cause | Solution |
|---|---|---|
| Trimmer does not start | Battery not charged or improperly installed | Charge battery fully; ensure battery is securely seated. |
| Trimmer line does not advance | Line tangled or too short; head clogged with debris | Remove battery, clear debris, replace line if necessary. |
| Reduced cutting performance | Line worn or incorrect diameter; low battery charge | Replace line with .080" diameter; recharge battery. |
| Excessive vibration | Damaged trimmer head or unbalanced line | Inspect head for damage; ensure line is evenly distributed. |
Specifications
| Feature | Specification |
|---|---|
| Brand | RYOBI |
| Model Number | P2020A |
| Power Source | Battery Powered (18V ONE+ HP) |
| Cutting Width | 13 - 15 Inches (Adjustable) |
| Line Diameter | .080 Inches |
| Product Dimensions | 32"L x 15"W |
| Assembly Required | No (Minor setup) |
| UPC | 693070932946 |
Warranty and Support
RYOBI products are manufactured to high-quality standards and are backed by a limited warranty. For specific warranty details, registration, or technical support, please refer to the warranty card included with your product or visit the official RYOBI website. Keep your purchase receipt as proof of purchase.
For further assistance, contact RYOBI customer service through their official channels.


