
ZEBRONICS Pixaplay 35
Zebronics Pixaplay 35 Android Smart LED Projector User Manual
Model: Pixaplay 35
Introduction
This manual provides detailed instructions for the setup, operation, and maintenance of your Zebronics Pixaplay 35 Android Smart LED Projector. Please read this manual thoroughly before using the product to ensure proper functionality and to prevent damage.
Important Safety Information
- Do not block ventilation openings. Ensure adequate airflow around the projector.
- Avoid direct eye exposure to the projector lens when the lamp is on.
- Use only the power adapter supplied with the device.
- Keep the projector away from water, moisture, and extreme temperatures.
- Do not attempt to disassemble or repair the projector yourself. Refer all servicing to qualified personnel.
Product Overview
The Zebronics Pixaplay 35 is a compact Android Smart LED Projector designed for versatile home entertainment. It features 4K UHD support, 4000 lumens brightness, and a 240° tilt mechanism for flexible projection.
Package Contents
- Projector - 1 Unit
- Remote Control
- Power Adapter - 1 Unit
- HDMI Cable
- QR Code Guide - 1 Unit
- Cotton Swab Pack - 1 Unit
Projector Components

Figure 1: Front-top view of the Zebronics Pixaplay 35 projector with its remote control.
The projector features a compact design with a lens at the front, ventilation grilles on the sides, and various ports at the rear for connectivity. The included remote control allows for easy navigation and settings adjustment.
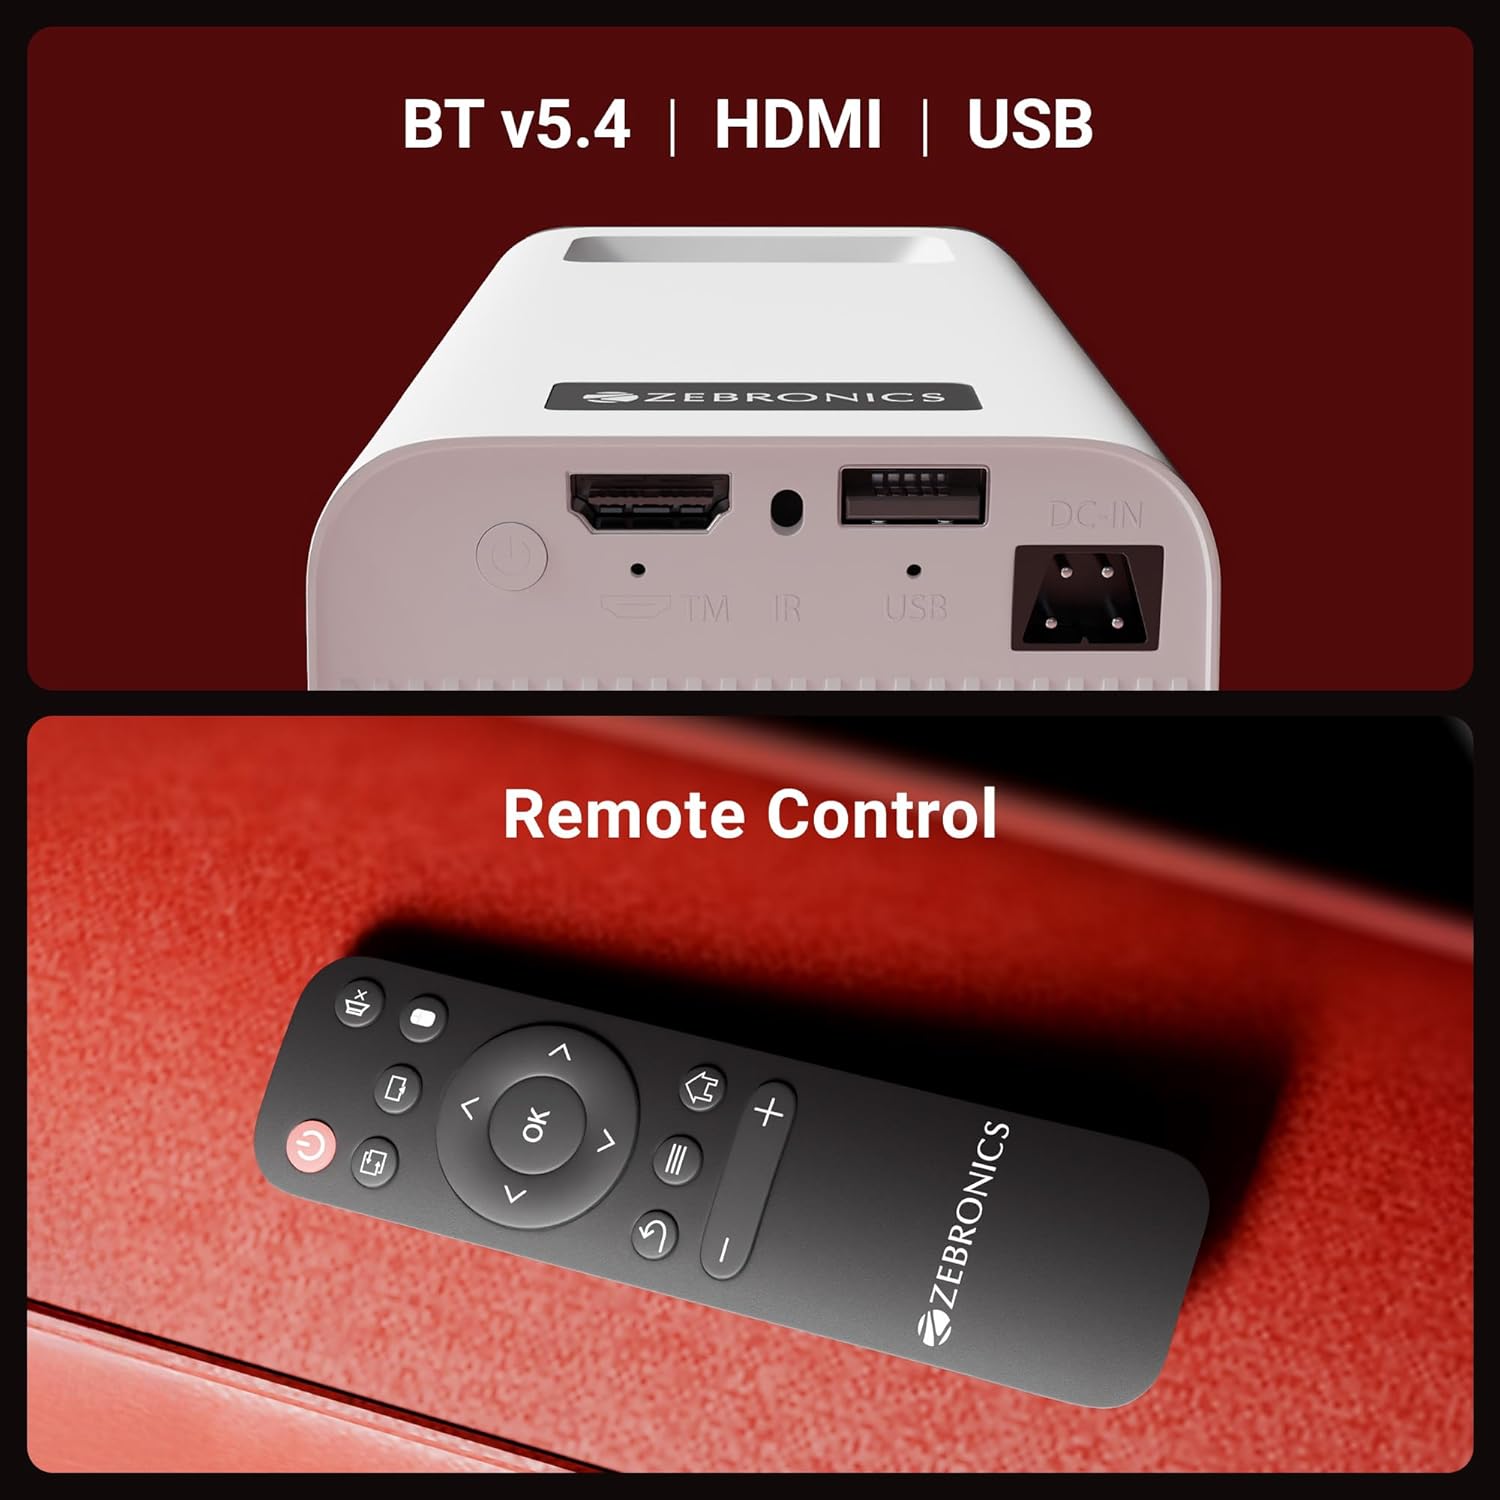
Figure 2: Rear view of the projector highlighting the connectivity ports (DC-IN, USB, HDMI) and the remote control.
The rear panel includes a DC-IN port for power, a USB port for media playback, and an HDMI port for connecting external devices. An IR receiver is also present for remote control operation.
Setup Instructions
1. Placement
Position the projector on a stable, flat surface. The 240° tilt mechanism allows you to adjust the projection angle for optimal viewing on a wall or screen. Ensure there are no obstructions in front of the lens or around the ventilation areas.

Figure 3: The projector's 240° tilt mechanism allows for flexible positioning and projection angles.
For best results, project onto a smooth, light-colored surface. The projector can create a screen size of up to 254cm (100 inches).

Figure 4: The projector can display images up to 254cm (100 inches) diagonally, creating a large viewing experience.
2. Power Connection
Connect the provided power adapter to the DC-IN port on the projector and then plug it into a power outlet.
3. Initial Power On
Press the power button on the projector or the remote control to turn on the device. The projector will boot up and display the Android smart interface.
Operating Instructions
Remote Control
Use the included remote control to navigate the projector's interface, adjust settings, and control media playback. Ensure batteries are correctly inserted.
Focus Adjustment
Rotate the focus wheel located near the lens to achieve a clear and sharp image on your projection surface.
Auto Keystone Adaptation
The projector features automatic vertical keystone correction. This function automatically adjusts the image to be rectangular even if the projector is placed at an angle. Manual adjustment may be available in settings for fine-tuning.
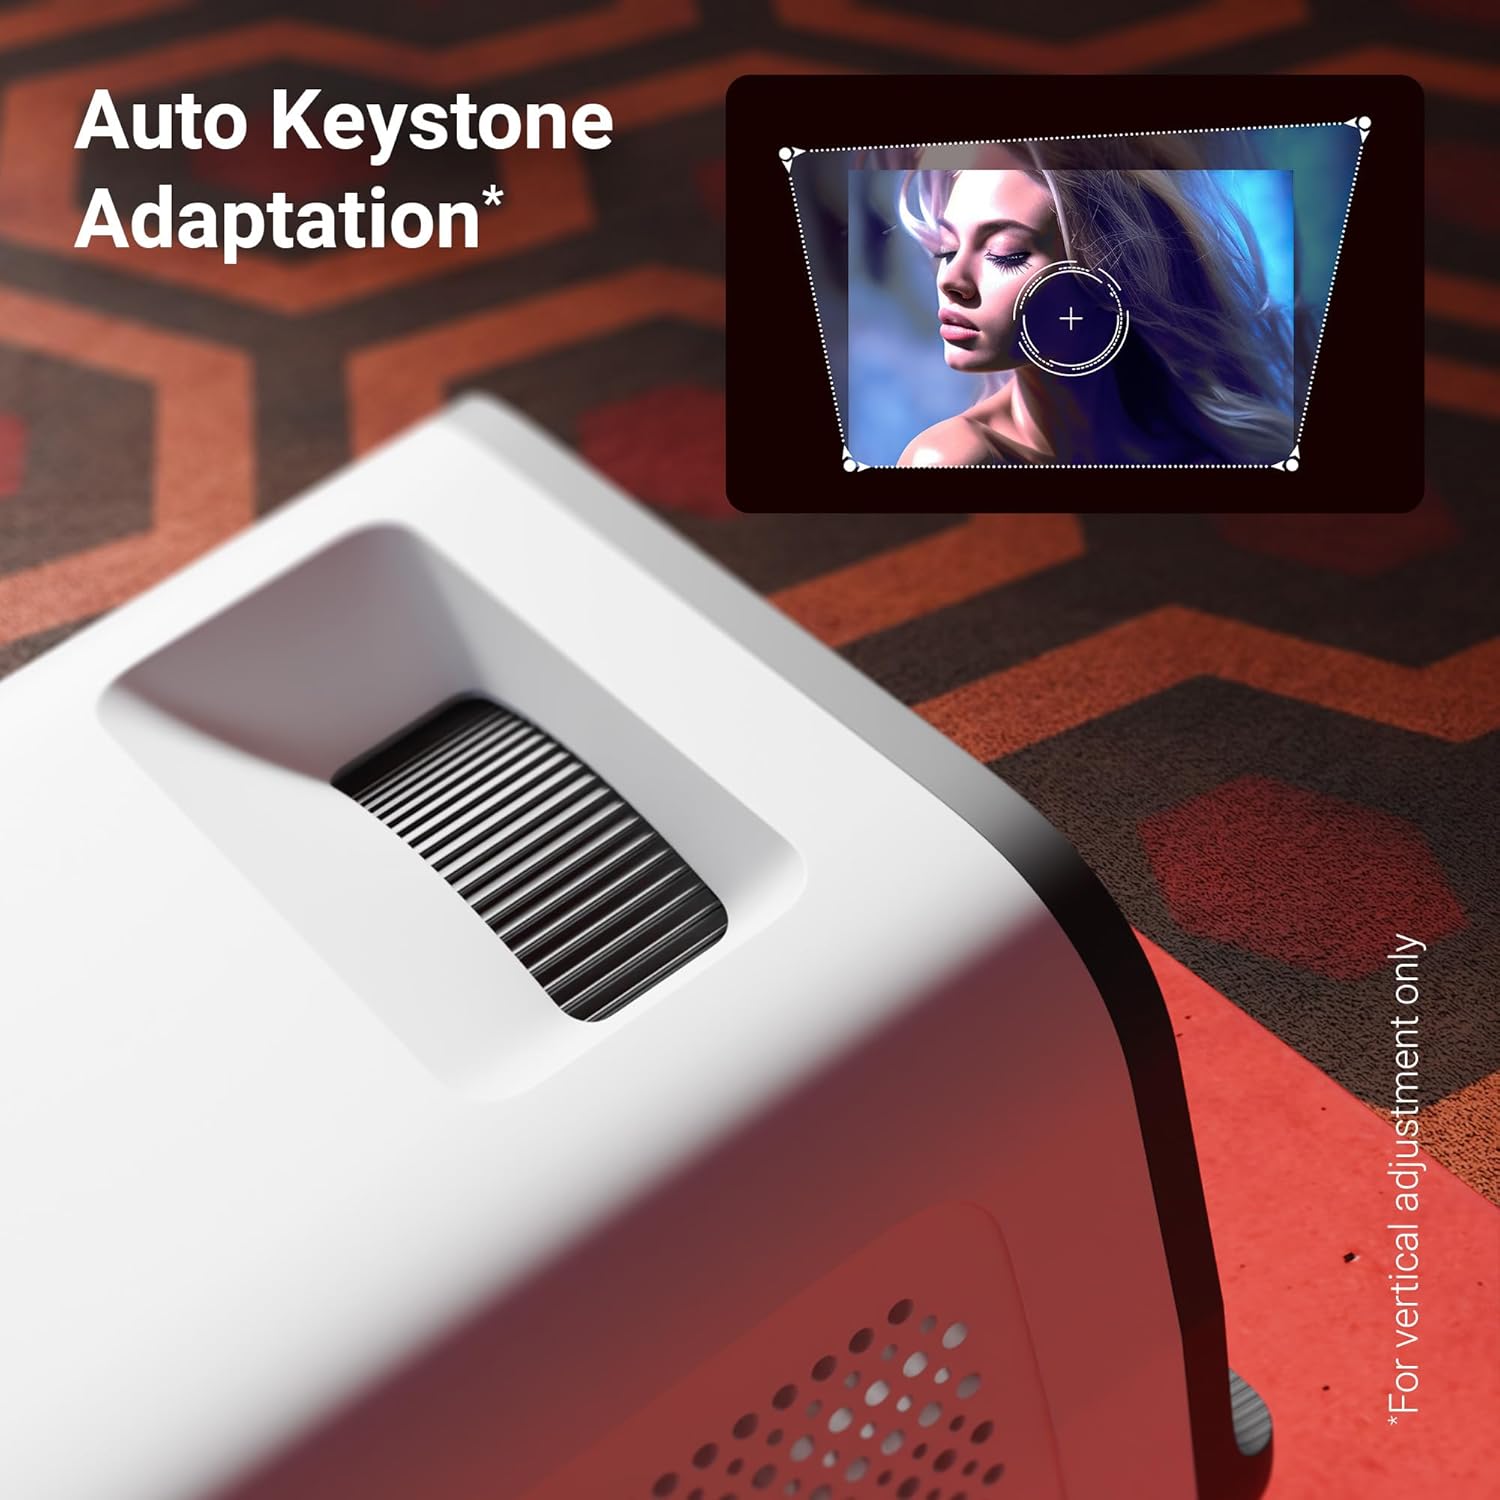
Figure 5: The auto keystone adaptation feature corrects vertical image distortion automatically.
Connectivity
- HDMI: Connect external devices such as laptops, gaming consoles, or Blu-ray players using an HDMI cable. Select the HDMI input source from the projector's menu.
- USB: Insert a USB drive into the USB port to play media files (photos, videos, music) directly from the drive.
- Bluetooth v5.4: Pair Bluetooth audio devices like speakers or headphones for enhanced sound. Access Bluetooth settings in the Android interface.
- Wi-Fi (2.4GHz & 5GHz): Connect the projector to your home Wi-Fi network to access online content, streaming apps, and firmware updates.
- Miracast & iOS Screen Mirroring: Wirelessly mirror the screen of your Android or iOS smartphone/tablet to the projector. Follow the on-screen instructions for pairing.
Smart Features (Android OS)
The projector runs on an Android operating system, allowing you to download and use various OTT (Over-The-Top) applications like Netflix and Prime Video directly on the device. Navigate the app store to install desired applications.
Key Features
- 4K UHD Support: Experience high-resolution content with support for 4K Ultra HD input, delivering sharp and detailed images.
- 4000 Lumens Brightness: The LED lamp provides 4000 lumens, ensuring bright and clear visuals for an immersive viewing experience.
- Up to 254cm (100") Screen Size: Project large images suitable for home theater setups.
- 240° Tilt Mechanism: Offers flexible projection angles, reducing glare and improving viewing comfort.
- Auto Keystone Adaptation: Automatically corrects vertical image distortion for a perfectly rectangular picture.
- Built-in Speaker: Integrated speaker provides audio output for convenience. External audio can be connected via Bluetooth or other ports.
- 30,000-hour LED Lamp Life: The long-lasting LED lamp ensures extended usage without frequent replacement.
- Quad-Core Processor: Enhances performance and responsiveness for smooth operation of the Android OS and applications.
- Dual-Band Wi-Fi: Supports both 2.4GHz and 5GHz Wi-Fi for stable and fast wireless connectivity.
- Miracast & iOS Screen Mirroring: Seamlessly cast content from Android and iOS devices.

Figure 6: Overview of key features including brightness, connectivity, and processing power.

Figure 7: The projector includes a built-in speaker for integrated audio playback.
Maintenance
- Lens Cleaning: Use a soft, lint-free cloth or the provided cotton swab to gently clean the projector lens. Do not use abrasive cleaners.
- Ventilation: Regularly check and clean the ventilation grilles to prevent dust buildup, which can affect performance and lifespan.
- Storage: When not in use for extended periods, store the projector in a cool, dry place, protected from dust and direct sunlight.
Troubleshooting
| Problem | Possible Cause | Solution |
|---|---|---|
| No image displayed | Power not connected; Incorrect input source; Lens cap on. | Ensure power is connected and unit is on. Select correct HDMI/USB input. Remove lens cap. |
| Image is blurry | Focus not adjusted; Projector too far/close to screen. | Adjust the focus wheel. Reposition the projector for optimal distance. |
| No sound | Volume too low; Muted; External audio device not connected/paired. | Increase volume. Unmute. Check Bluetooth connection or external audio cable. |
| Remote control not working | Batteries low/incorrectly inserted; Obstruction between remote and projector. | Replace batteries. Ensure clear line of sight to IR receiver. |
| Wi-Fi connection issues | Incorrect password; Router too far; Network interference. | Verify Wi-Fi password. Move projector closer to router. Try connecting to 2.4GHz or 5GHz band. |
Specifications
| Brand | ZEBRONICS |
| Model | Zeb-Pixa Play 35 |
| Display Technology | LED |
| Display Type | 4K UHD Support |
| Native Resolution | 1280 x 720 Pixels |
| Image Brightness | 4000 Lumens |
| Image Contrast Ratio | 1000:1 |
| Aspect Ratio | 16:10 |
| Connectivity Technology | Bluetooth v5.4, HDMI, USB, Dual-band Wi-Fi (2.4GHz & 5GHz) |
| Compatible Devices | Laptops, Smartphones, Tablets, Gaming Consoles, Blu-ray Players, Media Streaming Devices |
| Product Dimensions | 10.5 x 8.8 x 16.5 cm |
| Item Weight | 355 g |
| Mounting Type | Tabletop Mount |
Warranty and Support
The Zebronics Pixaplay 35 Projector comes with a 1-year warranty from the date of purchase. For warranty claims, technical support, or service inquiries, please contact Zebronics customer service. Refer to the QR Code Guide included in your package for contact details or visit the official Zebronics website.
Manufacturer: Zebronics India Private Limited
Related documentsPixaplay 35


Ask a question about this manual
Ask about setup, troubleshooting, compatibility, parts, safety, or missing instructions. Manuals+ will review the question and use this page’s manual context to help answer it.