
1. Introduction
Thank you for choosing the Magcubic HY350MAX Portable Projector. This manual provides essential information for setting up, operating, and maintaining your device. Please read it thoroughly before use to ensure optimal performance and safety.

Figure 1: Magcubic HY350MAX Portable Projector Overview
2. What's in the Box
Verify that all items are present in the package:
- 1 x Magcubic HY350MAX Portable Projector
- 1 x Air Mouse Remote Control
- 1 x User Manual
3. Product Features
The Magcubic HY350MAX projector offers a range of advanced features for an immersive viewing experience:
- High Resolution: Native 1080P Full HD (1920x1080) with support for 4K and 8K content decoding, enhanced by HDR10+.
- Brightness: 600 ANSI Lumens for clear images even in ambient light.
- Smart Automation: Automatic focus, 6D keystone correction, screen detection, and intelligent obstacle avoidance for a perfectly aligned and sharp image.
- Integrated Smart System: Powered by Allwinner H726 chip, 2GB RAM, and 16GB internal storage, running Android 14 with over 6000 pre-installed apps.
- Advanced Connectivity: Dual-band WiFi 6 (2.4 GHz and 5 GHz) for fast and stable wireless screen mirroring, and Bluetooth 5.4 for audio device connections.
- Immersive Audio: Built-in 12W Hi-Fi stereo speaker.
- Flexible Projection: 180° rotation allows projection onto walls or ceilings. Short throw ratio of 1.0:1, projecting 40 to 140 inches.
- Universal Compatibility: HDMI and USB ports for connecting PS5, laptops, TV sticks, USB drives, smartphones, and tablets.
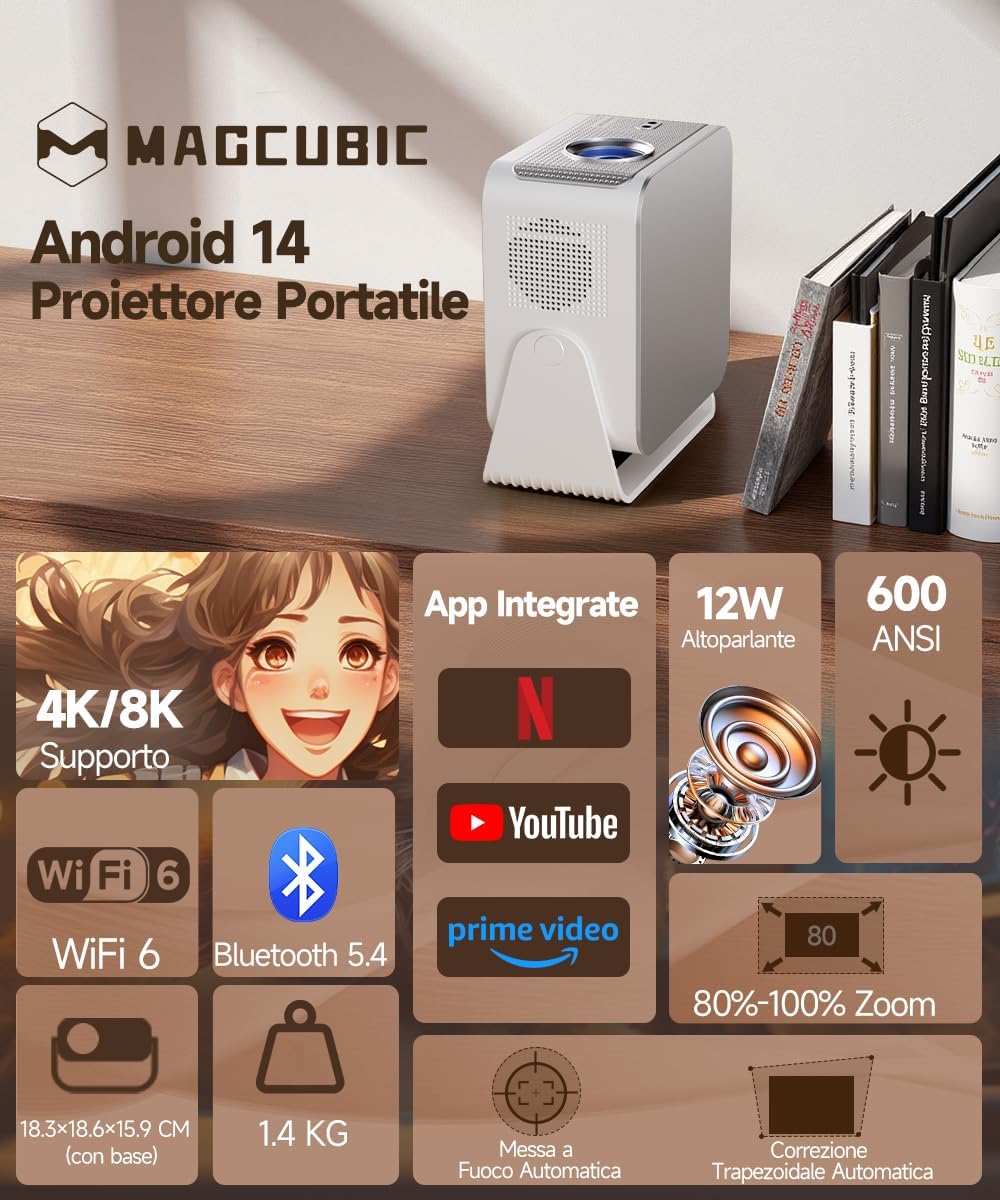
Figure 2: Key Features of the HY350MAX Projector

Figure 3: 1080P Native Resolution Clarity

Figure 4: Android 14 and Integrated Applications
4. Setup
4.1 Placement and Power
- Place the projector on a stable, flat surface. The 180° rotation feature allows for versatile placement, including ceiling projection.
- Connect the power cable to the projector and then to a power outlet.
- For optimal projection, ensure the room is sufficiently dark.

Figure 5: Flexible 180° Rotation for Placement
4.2 Initial Image Adjustment
The projector features automatic focus and keystone correction. Upon powering on or moving the projector, it will automatically adjust the image for clarity and shape.
- Automatic Focus: The projector will automatically focus the image. This works best for projection distances under 2.5 meters.
- Automatic Keystone Correction: The projector will automatically correct the image's trapezoidal distortion.
- Manual Focus: If the projection distance is greater than 2.5 meters or if automatic focus is not sensitive enough, use the remote control to adjust focus manually.

Figure 6: Automatic Image Correction Features

Figure 7: Auto and Manual Focus Guide
4.3 Connecting Devices
The projector supports various input methods:
- HDMI: Connect gaming consoles (e.g., PS5), laptops, or TV sticks using an HDMI cable.
- USB: Insert USB drives for media playback.
- WiFi 6: Connect to your home network for streaming and wireless screen mirroring from smartphones and tablets.
- Bluetooth 5.4: Pair with external Bluetooth speakers or headphones for enhanced audio.
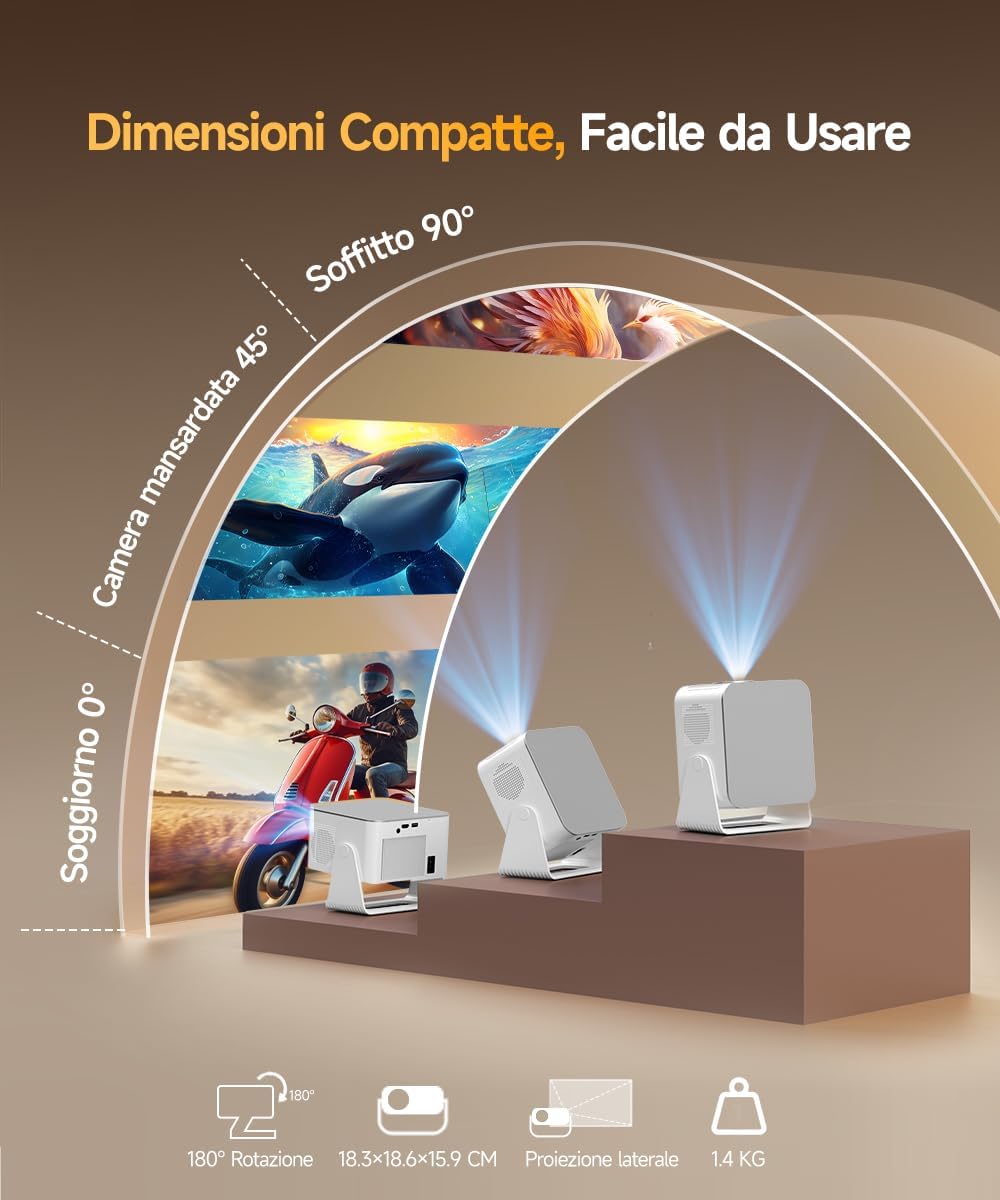
Figure 8: Universal Connectivity Options
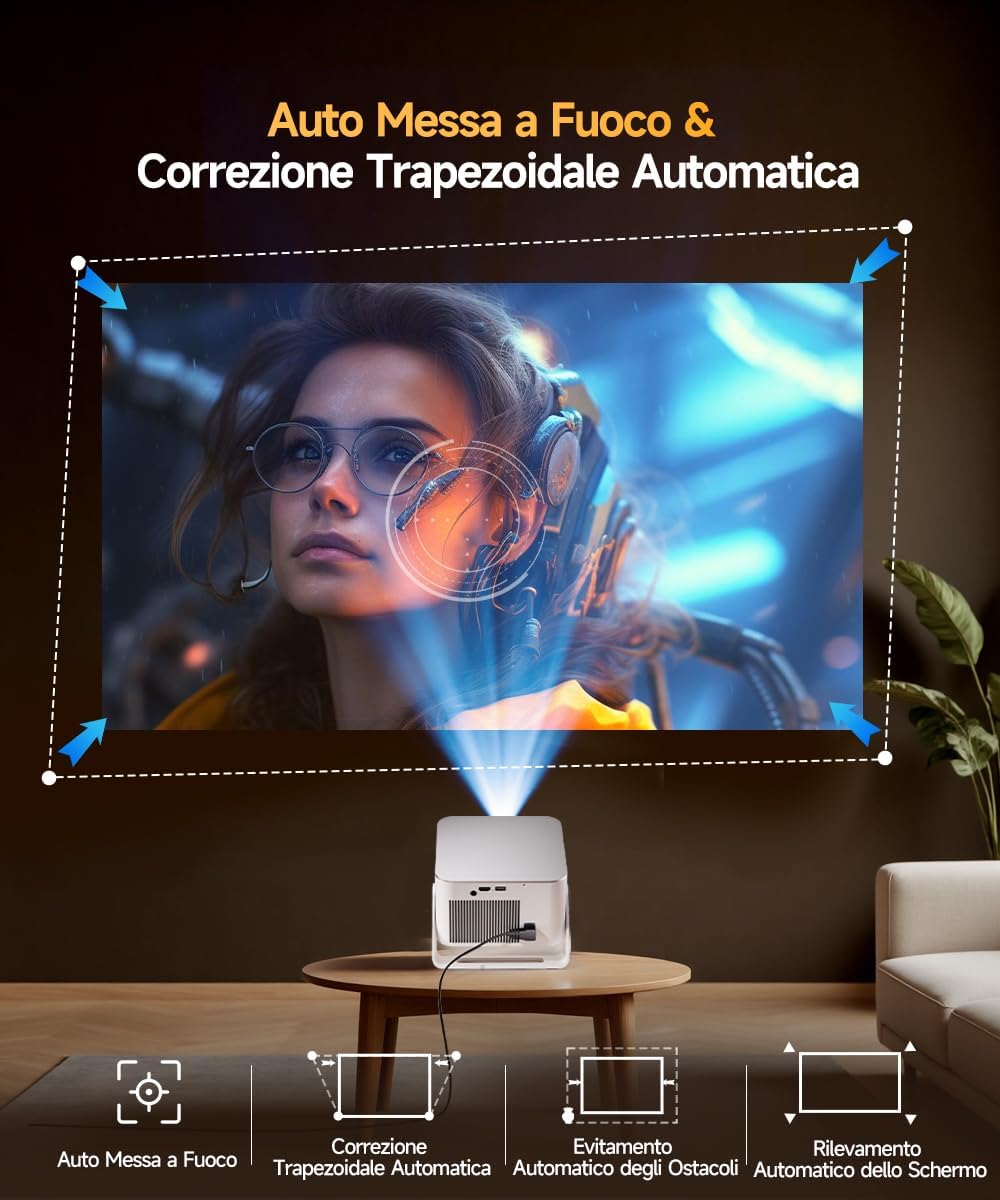
Figure 9: WiFi 6 and Bluetooth 5.4
4.4 Air Mouse Remote Control Setup
To use the Air Mouse function of your remote control, follow these steps:
- Activate Bluetooth on your projector.
- Simultaneously press the left and right directional buttons on the remote control until the projector emits an audible signal.
- Press the button with the 'mouse' symbol on the remote control to activate the Air Mouse function.
- Move your wrist to control the on-screen cursor.

Figure 10: Air Mouse Remote Control Usage
Video 1: Demonstrates the steps to pair and use the Air Mouse remote control for navigation.
5. Operating Instructions
5.1 Power On/Off
Press the power button on the projector or the remote control to turn the device on or off.
5.2 Navigating the Interface
The projector runs on Android 14, providing a user-friendly interface. Use the remote control (or Air Mouse) to navigate through menus, select apps, and adjust settings.
- Home Screen: Access integrated apps, input sources (HDMI, USB), and settings.
- App Store: Download additional applications as needed.
- Settings: Adjust display, sound, network, and system preferences.
5.3 Screen Mirroring
Utilize the WiFi 6 dual-band connectivity for seamless screen mirroring from compatible devices.
- Ensure both your device (smartphone, tablet, laptop) and the projector are connected to the same WiFi network.
- Select the screen mirroring option on the projector's interface (e.g., Airplay, Miracast).
- Initiate screen mirroring from your device's settings.
5.4 Audio Output
The projector features a built-in 12W Hi-Fi stereo speaker. For external audio, use Bluetooth 5.4 to connect to speakers or headphones.
- To connect via Bluetooth, go to the projector's settings, select Bluetooth, and pair with your desired audio device.
Video 2: Overview of the projector's features, including automatic adjustments, connectivity, and smart interface.
Video 3: Demonstration of the projector's image quality and clarity with various nature scenes.
6. Maintenance
6.1 Cleaning
- Use a soft, dry cloth to clean the exterior of the projector.
- For the lens, use a specialized lens cleaning cloth and solution. Avoid abrasive materials.
- Ensure ventilation openings are free from dust and obstructions.
6.2 Storage
When not in use for extended periods, store the projector in a cool, dry place, away from direct sunlight and extreme temperatures.
7. Troubleshooting
If you encounter issues with your projector, refer to the following common solutions:
- No Power: Check the power cable connection and ensure the power outlet is functional.
- No Image: Verify the input source is correctly selected (HDMI, USB, WiFi). Ensure the lens cap is removed.
- Blurry Image: Allow the automatic focus to complete. If still blurry, manually adjust focus using the remote control. Ensure the projection surface is flat.
- Distorted Image: The automatic keystone correction should resolve this. If not, check projector placement or manually adjust keystone settings if available.
- No Sound: Check volume settings on both the projector and the connected source device. Ensure Bluetooth audio devices are correctly paired.
- WiFi/Bluetooth Connection Issues: Ensure the projector is within range of the router/Bluetooth device. Restart both devices.
For further assistance, please contact customer support.
8. Specifications
| Feature | Specification |
|---|---|
| Brand | Magcubic |
| Model Number | HY350MAX |
| Native Resolution | 1920 x 1080 (1080P Full HD) |
| Maximum Display Resolution | 7680 x 4320 (8K Support) |
| Brightness | 600 ANSI Lumens |
| Contrast Ratio | High |
| Connectivity Technology | Bluetooth 5.4, HDMI, USB, WiFi 6 (5 Ghz+2.4 Ghz) |
| Operating System | Android 14 |
| CPU | Allwinner H726 |
| RAM | 2 GB |
| Internal Storage | 16 GB |
| Audio | 12W Hi-Fi Stereo Speaker |
| Projection Size | 40 - 140 Inches |
| Projection Distance (Min/Max) | 0.9 m / 3.1 m |
| Weight | 1.4 Kilograms |
| Power Consumption | 100 Watts |
| Special Features | Integrated Apps, Auto Focus, Auto Keystone Correction, Intelligent Image Adjustment, 180° Rotatable, HDR10+ |
Video 4: Comparison between Magcubic HY350MAX and HY350 models, highlighting system and CPU upgrades.
9. Warranty and Support
Magcubic is committed to providing quality products and customer satisfaction.
- Product Warranty: 1-year manufacturer warranty.
- Refund Guarantee: 30-day money-back guarantee.
- Customer Support: 24-hour live customer assistance.
- Technical Support: Lifetime technical support.
For any inquiries or support needs, please refer to the contact information provided with your purchase or visit the official Magcubic website.


