
1. Introduction
The Poolin EOM 15 Needles Embroidery Machine is designed for high-efficiency, multi-color embroidery on various materials, including hats, caps, patches, and garments. Featuring a 9-inch touchscreen interface and Institch OS4 computer system, it offers user-friendly operation for both beginners and experienced users. This manual provides essential information for safe operation, setup, maintenance, and troubleshooting to ensure optimal performance of your embroidery machine.
2. Safety Information
- Always disconnect the power supply before cleaning, servicing, or when the machine is not in use.
- Keep hands and loose clothing away from moving parts, especially needles and the embroidery head, during operation.
- Ensure the machine is placed on a stable, level surface to prevent tipping.
- Do not operate the machine in damp or wet conditions.
- Use only recommended accessories and parts to avoid damage and ensure safe operation.
- Keep children and pets away from the machine during operation.
3. Package Contents
Verify that all items listed below are included in your package. If any items are missing or damaged, contact customer support.

Image: The Poolin EOM 15 Needles Embroidery Machine with various accessories laid out, including hoops, cap attachments, power adapter, toolkit, bobbins, and embroidery thread.
- Poolin EOM 15 Needles Embroidery Machine
- Power Adapter
- 5 Standard Embroidery Hoops (14"x7.9", 12"x7.9", 7"x5", 4"x4", 2.4"x1.6")
- 1 Cap Station
- 2 Cap Hoops
- 1 Cap Driver
- Table Support
- Toolkit
- Prewound Bobbins
- Cut Away Stabilizer
- Embroidery Thread (starter set)
- USB Cable

Image: A detailed view of the included embroidery hoops (various sizes), cap station, cap hoops, cap driver, table support, power adapter, toolkit, prewound bobbins, cut away stabilizer, and embroidery thread.
4. Setup
4.1 Machine Placement
Place the embroidery machine on a sturdy, level surface capable of supporting its weight (approximately 165 pounds). Ensure adequate space around the machine for operation and maintenance.
4.2 Power Connection
- Connect the power adapter to the machine's power input port.
- Plug the power adapter into a grounded electrical outlet.
- Turn on the main power switch, usually located at the back or side of the machine.
4.3 Threading the Machine
The Poolin EOM features 15 needles, allowing for multi-color designs without frequent thread changes. Refer to the on-screen instructions or the detailed threading guide in the supplementary documentation for proper thread path for each needle.

Image: A close-up view of the 15 needles and thread guides on the Poolin EOM machine, highlighting its multi-color capability.
4.4 Attaching Hoops
Select the appropriate hoop size for your design and material. Securely attach the hoop to the embroidery arm. For cap embroidery, use the provided cap station and hoops.
4.5 Connectivity (Wi-Fi/USB)
The machine supports design transfer via Wi-Fi or USB. Connect to your local Wi-Fi network through the touchscreen interface or insert a USB drive containing your DST/DSB format designs into the designated port.
5. Operating Instructions
5.1 Using the 9-inch Touchscreen Interface
The 9-inch touchscreen provides intuitive control over the machine. Navigate through menus to select designs, adjust settings, and monitor embroidery progress.

Image: The 9-inch touchscreen of the Poolin EOM, showing options for pattern selection, configuration, and embroidery start.
5.2 Design Selection and Editing
- From the main menu, select 'Pattern' to browse designs from USB, built-in patterns, or Wi-Fi.
- Choose your desired DST or DSB format design.
- Use the 'Config' menu to adjust design size, rotation, position, and color sequence. The Institch OS4 system allows for easy editing.
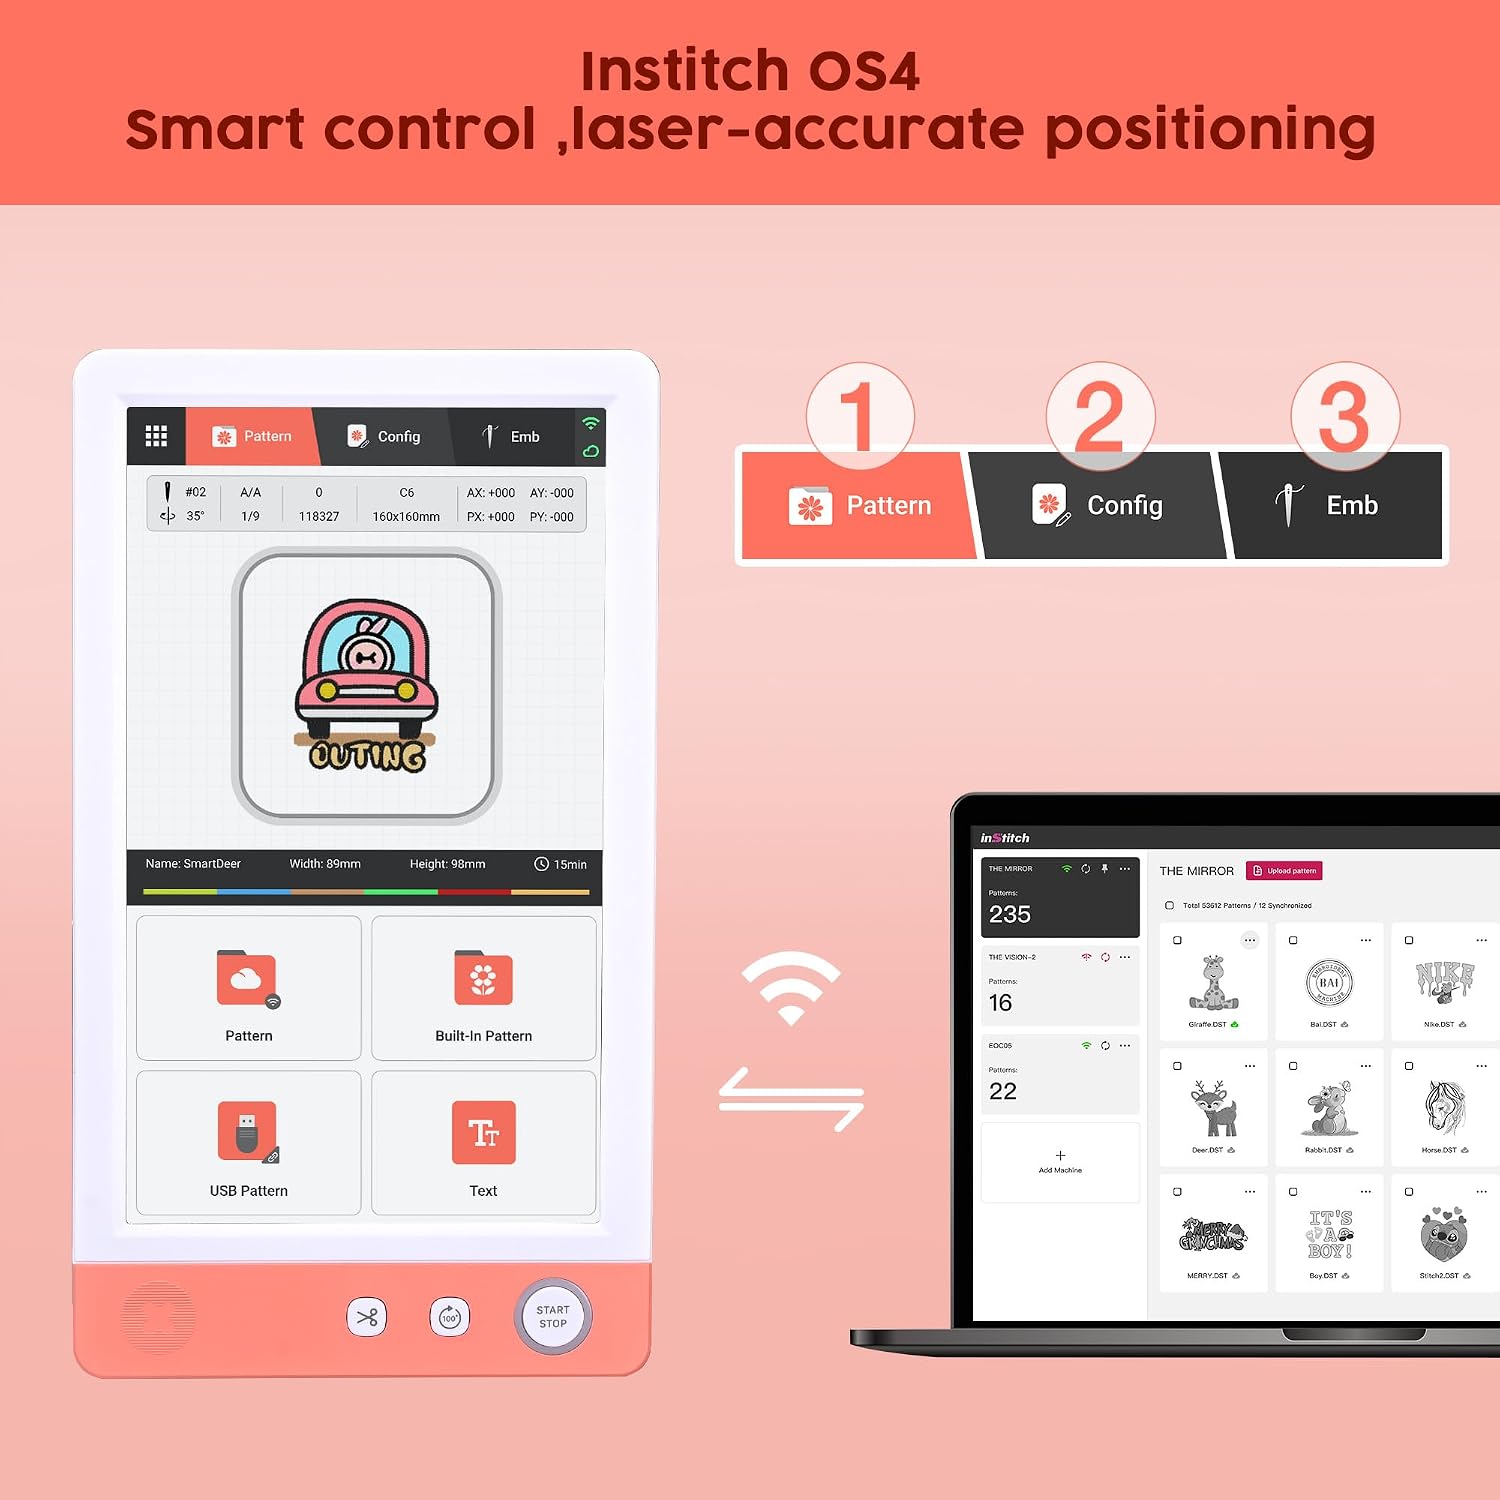
Image: The Institch OS4 interface on the machine's touchscreen, demonstrating design transfer via Wi-Fi and USB, and pattern editing capabilities.
5.3 Starting Embroidery (3-Step Process)
- Select Design: Choose your pattern from the touchscreen.
- Set Hoop: Ensure your material is properly hooped and attached to the machine.
- Start Stitching: Press the 'Start' button on the touchscreen to begin the embroidery process. The machine features automatic color change and thread break detection for seamless operation.
5.4 Large Embroidery Area
The Poolin EOM supports a maximum embroidery area of 14.2" x 9.5" (360mm x 240mm), accommodating large designs for items like jackets, hoodies, and tote bags. Custom and third-party hoops are also supported.
5.5 Cap Embroidery
Utilize the included cap station and hoops for professional cap embroidery. Follow the specific instructions for attaching and hooping caps to ensure proper alignment and stitching.

Image: A close-up of the embroidery machine actively stitching a design onto a cap, demonstrating its cap embroidery capability.
6. Maintenance
6.1 Cleaning
- Regularly clean lint and dust from the bobbin area, needle plate, and tension discs using a soft brush or vacuum.
- Wipe the machine's exterior with a soft, dry cloth. Avoid using harsh chemicals.
6.2 Lubrication
Periodically apply a small amount of sewing machine oil to designated lubrication points as indicated in the detailed maintenance guide (refer to supplementary documentation). Over-oiling can cause issues.
6.3 Thread Path Inspection
Before each use, inspect the thread paths for any obstructions, frayed threads, or incorrect threading that could lead to stitching problems.
7. Troubleshooting
This section addresses common issues you might encounter. For more complex problems, refer to the comprehensive troubleshooting guide or contact customer support.
| Problem | Possible Cause | Solution |
|---|---|---|
| Thread breaks frequently | Incorrect threading, tension issues, dull needle, poor quality thread | Re-thread the machine, adjust tension, replace needle, use high-quality thread |
| Skipped stitches | Incorrect needle, bent needle, improper hooping, fabric too thick | Use correct needle type/size, replace bent needle, re-hoop fabric tightly, use appropriate stabilizer |
| Machine not starting | Power not connected, safety sensor triggered, emergency stop engaged | Check power connection, ensure all covers are closed, disengage emergency stop button |
| Poor stitch quality | Incorrect tension, wrong stabilizer, dirty machine parts | Adjust thread tension, use suitable stabilizer for fabric, clean machine thoroughly |
8. Specifications
- Model Number: Eom-15
- Needle Count: 15
- Maximum Embroidery Area: 14.2" x 9.5" (360mm x 240mm)
- Dimensions (Product): 24"D x 28.3"W x 59"H (61cm D x 71.9cm W x 150cm H)
- Item Weight: 165 pounds (75 kg)
- Operating System: Institch OS4
- Connectivity: Wi-Fi, USB
- Supported Formats: DST, DSB
- Continuous Operation: 24+ Hours
- Color: White

Image: A visual representation of the Poolin EOM machine with key dimensions and weight specifications labeled.
9. Warranty and Support
For any questions, technical assistance, or warranty claims, please contact Poolin customer support. You can also find valuable resources and community support through the following channels:
- Facebook Group: Search for "Poolin Embroidery Machine Groups" to join our community and receive free one-to-one after-sales service from engineers.
- YouTube Channel: Follow the official "Poolin" YouTube channel for teaching videos and real usage feedback.

Image: A screenshot of the 'Poolin Embroidery Machine Group' on Facebook, indicating community support and resources available to users.


