1. Introduction
Thank you for choosing the LEKATO Drum Looper Pedal. This compact and versatile pedal combines a looper and a drum machine, offering musicians a powerful tool for practice, songwriting, and live performance. This manual provides detailed instructions to help you get the most out of your new device.
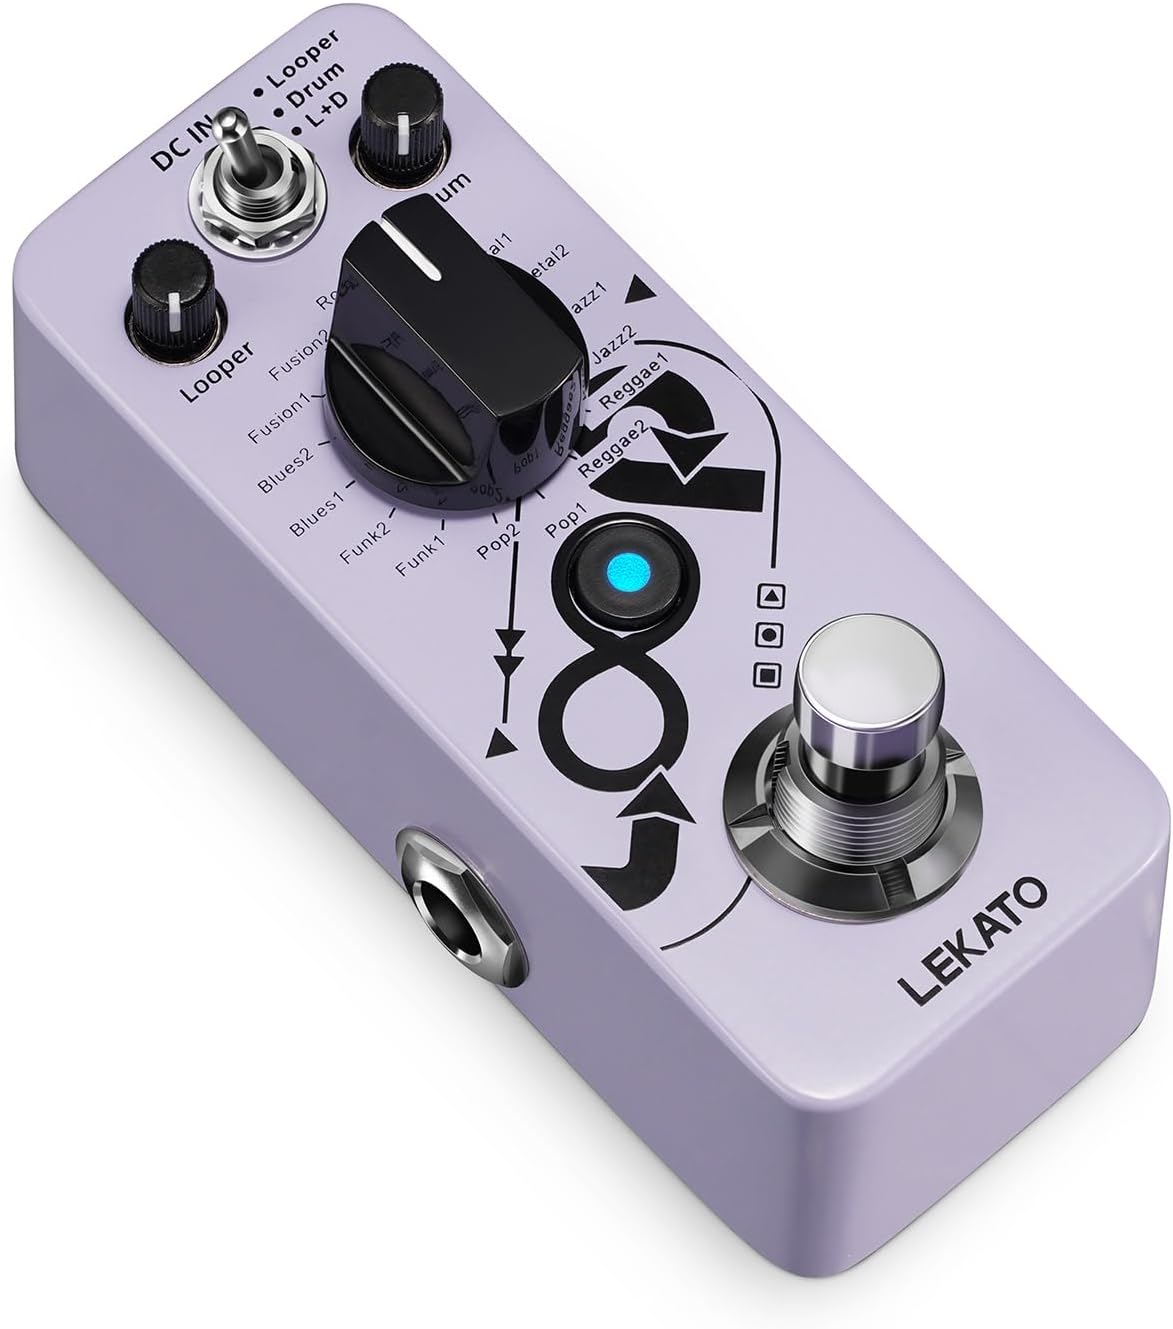
Figure 1: Main view of the LEKATO Drum Looper Pedal.
2. Product Overview & Key Features
The LEKATO Drum Looper Pedal is designed for ease of use and robust performance. It integrates essential functionalities for guitarists and other musicians.
- 2-in-1 Looper & Drum Machine: Features three operational modes: Looper, Drum, and Looper+Drum, allowing independent or combined use. Independent playback level controls are available for both looper and drum functions.
- 16 Drum Grooves: Offers 8 distinct drum groove styles, each with 2 variations, suitable for genres like Rock, Metal, Jazz, Reggae, Pop, Funk, Blues, and Fusion. All drum sounds are derived from real drum samples.
- 20 Minutes Loop Time: Supports unlimited overlay loop recording, with the ability to save multiple loop tracks, each up to 20 minutes in duration.
- Tap Tempo Control: Allows precise adjustment of the drum groove tempo by tapping.
- Optimal Circuit Design: High-quality electronic components ensure clear and pure tone. A high-quality chip automatically saves recorded files even if power is disconnected.
- Mini Portable Design: Constructed from aluminum alloy, its compact size optimizes pedalboard space and enhances portability.

Figure 2: The pedal's 2-in-1 Looper and Drum Machine functionality.

Figure 3: Overview of the 16 available drum grooves.

Figure 4: The pedal supports up to 20 minutes of loop recording.

Figure 5: The compact and portable design of the pedal.
3. Setup
Follow these steps to set up your LEKATO Drum Looper Pedal:
- Power Connection: Connect a DC 9V center negative power adapter (not included) to the DC IN jack on the pedal.
- Audio Input: Connect your instrument (e.g., electric guitar) to the INPUT jack using a 1/4-inch audio cable.
- Audio Output: Connect the OUTPUT jack to your amplifier or audio interface using a 1/4-inch audio cable.

Figure 6: Power connection for the pedal (DC 9V center negative).
Controls Overview
Familiarize yourself with the pedal's controls:

Figure 7: Detailed diagram of the pedal's controls and their functions.
- MODE Switch: Selects between Looper, Drum, or Looper+Drum modes.
- LOOPER Level Knob: Adjusts the playback volume of the recorded loop.
- DRUM Level Knob: Adjusts the master volume of the drum groove.
- GROOVE Selector Knob: Selects the desired drum groove.
- FOOTSWITCH: Controls looping functions (record, play, overdub, undo/redo, stop).
- TAP TEMPO Button: Press several times to set the tempo of the drum groove.
4. Operating Instructions
4.1. Looper Mode
In Looper mode, the pedal functions solely as a looper.
- Start Recording: Press the footswitch once. The LED will turn RED.
- Stop Recording/Start Playback: Press the footswitch once more. The LED will turn BLUE.
- Overdub: During playback, press the footswitch once to start overdubbing. The LED will flash RED/BLUE. Press again to stop overdubbing and return to playback.
- Undo/Redo: During playback, hold the footswitch for 2 seconds to undo the last recorded layer (LED flashes BLUE). Hold again for 2 seconds to redo (LED flashes BLUE).
- Stop Playback: Double-press the footswitch quickly.
- Delete Loop: While stopped, hold the footswitch for 2 seconds. The LED will flash RED. Press again to confirm deletion.

Figure 8: Visual indicators for looper recording and playback states.
4.2. Drum Mode
In Drum mode, the pedal functions solely as a drum machine.
- Select Groove: Rotate the GROOVE Selector knob to choose from 16 drum patterns.
- Adjust Tempo: Use the TAP TEMPO button to set the desired BPM.
- Adjust Volume: Use the DRUM Level knob to control the drum volume.
4.3. Looper+Drum Mode
In Looper+Drum mode, both functions operate simultaneously.
- Synchronized Operation: The looper and drum machine will synchronize their playback.
- Independent Volume Control: Adjust LOOPER Level and DRUM Level knobs independently to balance the mix.
4.4. Tap Tempo
To set the tempo for the drum grooves, simply tap the TAP TEMPO button multiple times at your desired speed. The pedal will automatically detect and set the BPM.
4.5. Saving and Deleting Loops
The pedal automatically saves your recorded loops even after power-off. To delete a loop, follow the instructions in the Looper Mode section.
Video 1: Official demonstration of the LEKATO Loop Pedal Drum Machine features and operation.
Video 2: Tutorial video for the GL100 Groove Loop Series Phrase Drum Station, showcasing similar functionalities.
Video 3: A brief overview of the LEKATO Looper Guitar Pedal.
5. Specifications
| Feature | Detail |
|---|---|
| Item Weight | 5.9 ounces |
| Package Dimensions | 4.53 x 2.13 x 1.65 inches |
| Item Model Number | Loop1 |
| Hardware Interface | 1/4-inch Audio |
| Power Source | Corded Electric (DC 9V Center Negative, not included) |
| Voltage | 9 Volts |
| Color | Purple Looper Drum |
6. Maintenance
To ensure the longevity and optimal performance of your LEKATO Drum Looper Pedal, please follow these maintenance guidelines:
- Cleaning: Use a soft, dry cloth to clean the pedal's exterior. Avoid using abrasive cleaners or solvents, as they may damage the finish.
- Storage: Store the pedal in a dry environment, away from extreme temperatures, humidity, and direct sunlight.
- Power Supply: Always use a DC 9V center negative power adapter. Using an incorrect power supply can damage the unit and void the warranty.
- Connections: Ensure all cables are securely connected but avoid excessive force when plugging or unplugging.
7. Troubleshooting
If you encounter any issues with your pedal, please refer to the following common troubleshooting tips:
- No Sound:
- Check all cable connections (instrument to INPUT, OUTPUT to amplifier).
- Ensure the power adapter is correctly connected and functioning.
- Verify that the LOOPER Level and DRUM Level knobs are not set to minimum.
- Pedal Not Powering On:
- Confirm you are using a DC 9V center negative power adapter.
- Test the power adapter with another device if possible to ensure it is working.
- Loop Recording Issues:
- Ensure you are in the correct mode (Looper or Looper+Drum).
- Check the input signal from your instrument.
- Drum Groove Not Playing:
- Ensure you are in Drum or Looper+Drum mode.
- Verify the DRUM Level knob is not set to minimum.
- Check if a drum groove is selected using the GROOVE Selector knob.
If these steps do not resolve the issue, please contact LEKATO customer support for further assistance.
8. Warranty and Support
LEKATO products are designed and manufactured to the highest quality standards. This product is covered by a manufacturer's warranty against defects in materials and workmanship. For specific warranty terms and conditions, please refer to the warranty card included with your purchase or visit the official LEKATO website.
For technical support, product inquiries, or service requests, please contact LEKATO customer service through the contact information provided on our official website or your retailer's support channels.
Please retain your proof of purchase for any warranty claims.


