
1. Introduction
This manual provides detailed instructions for the installation, operation, and maintenance of your GIGABYTE X870E AORUS ELITE X3D Motherboard. Designed for high-performance computing, this motherboard supports AMD Ryzen 9000 series processors and features advanced power delivery, high-speed memory support, and extensive connectivity options. Please read this manual thoroughly before proceeding with installation to ensure proper setup and optimal performance.
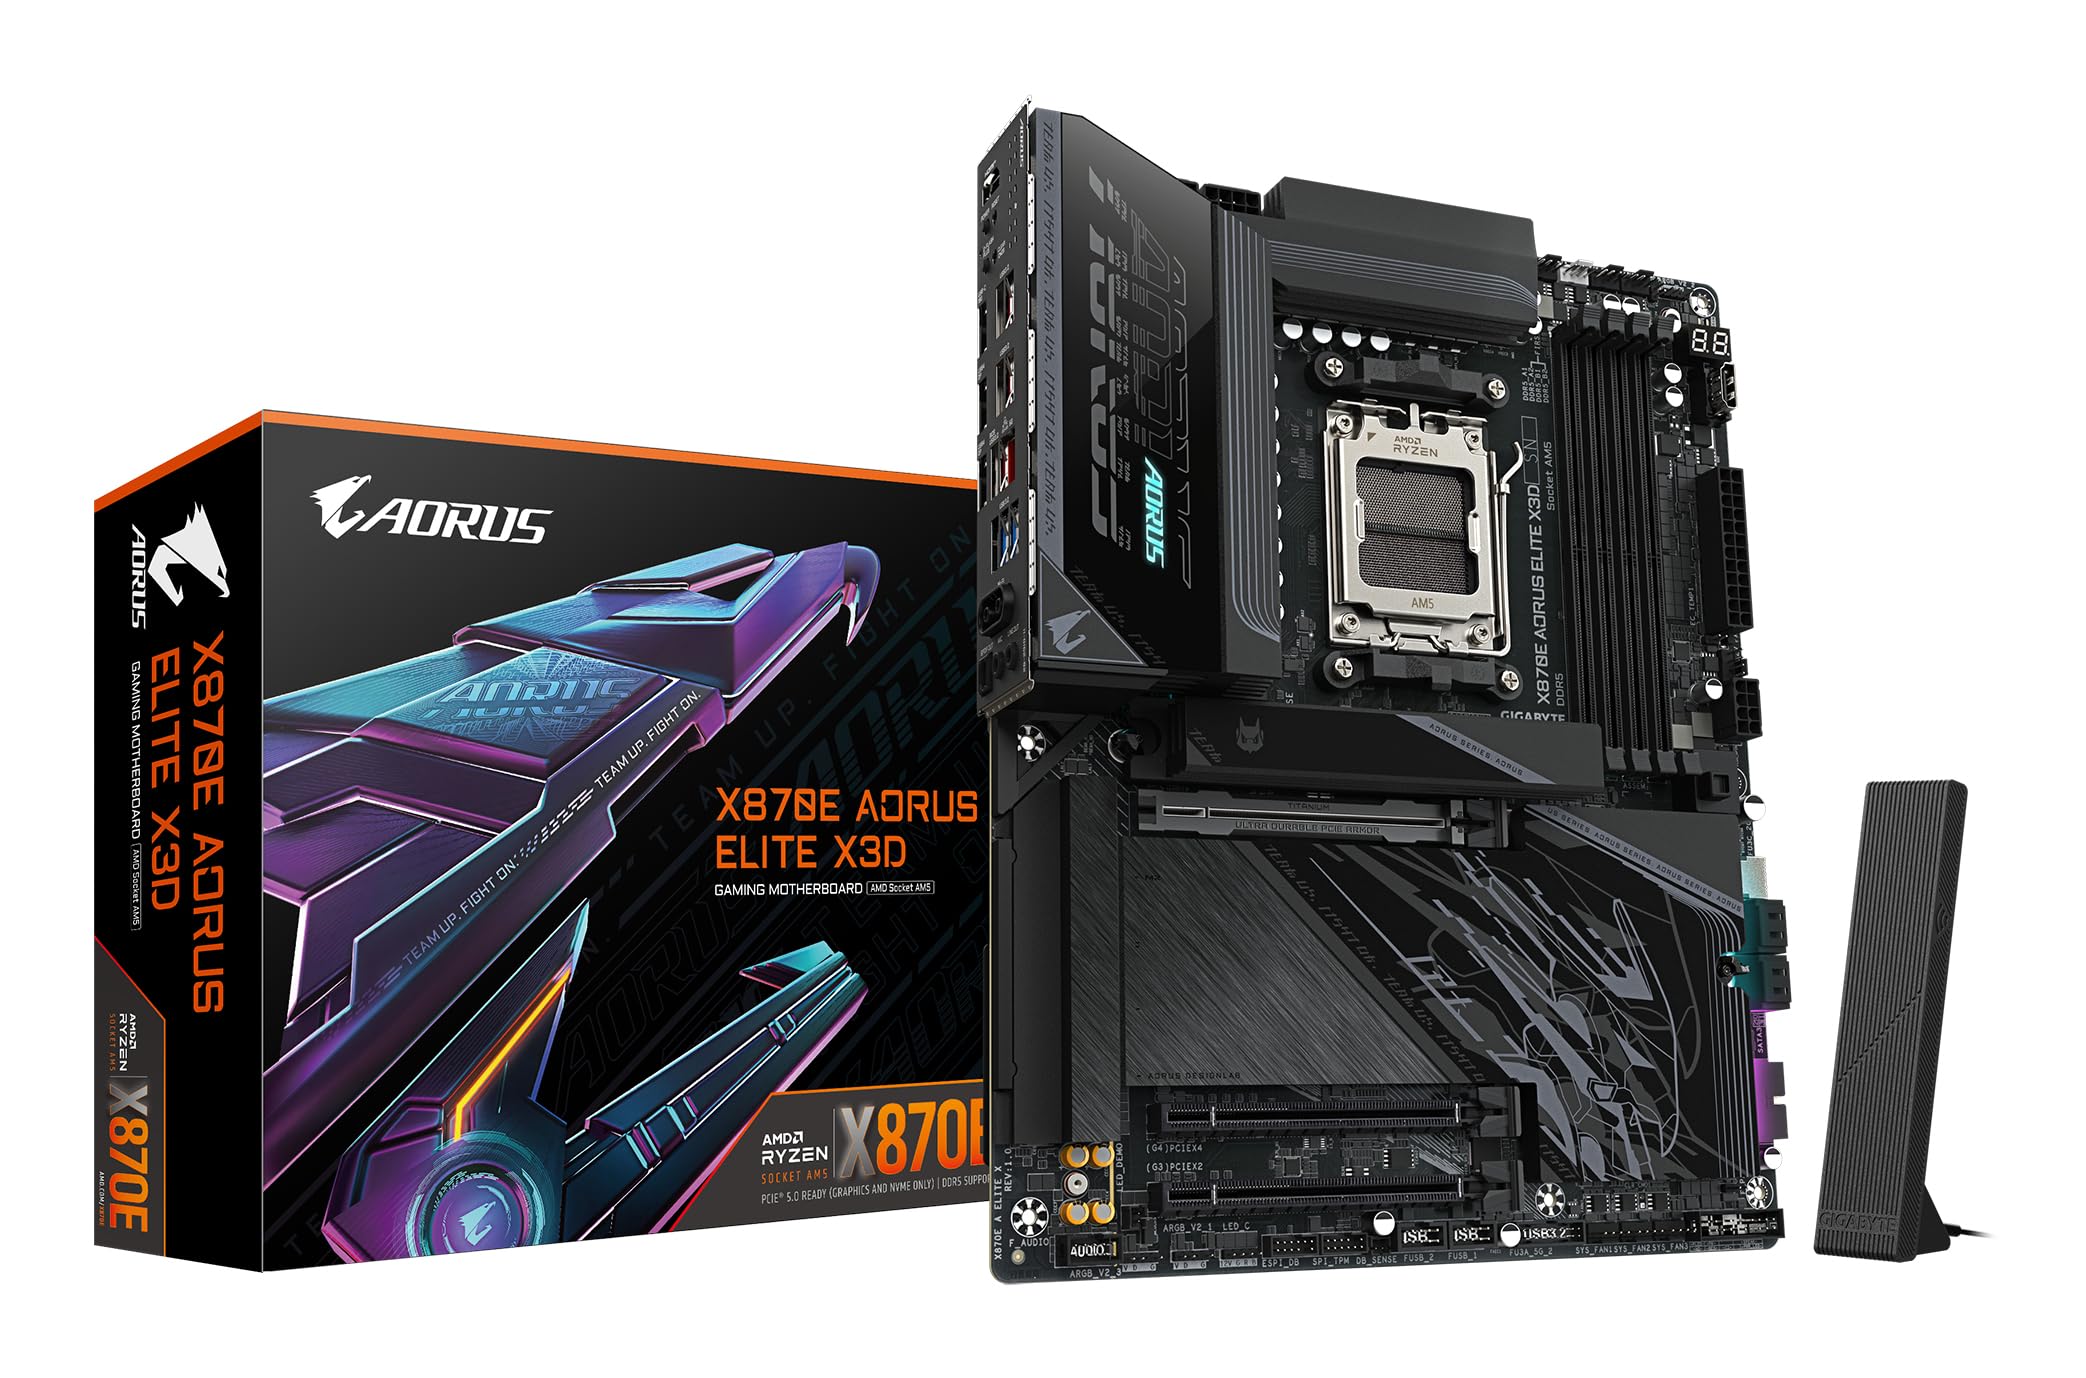
Figure 1: GIGABYTE X870E AORUS ELITE X3D Motherboard - Top View
2. Setup and Installation
Before beginning installation, ensure your system is powered off and disconnected from the power source. Handle the motherboard by its edges to avoid static discharge.
2.1 CPU Installation (Socket AM5)
- Locate the AM5 CPU socket on the motherboard.
- Open the CPU retention lever.
- Carefully align the CPU with the socket, ensuring the triangular markers match. Do not force the CPU into the socket.
- Gently lower the CPU into place.
- Close the retention lever to secure the CPU.

Figure 2: AMD Ryzen 3D Processor for Socket AM5
2.2 RAM Installation (DDR5)
- Open the clips on both ends of the DDR5 memory slots.
- Align the memory module with the slot, ensuring the notch on the module matches the key in the slot.
- Press down firmly on both ends of the memory module until the clips snap into place.
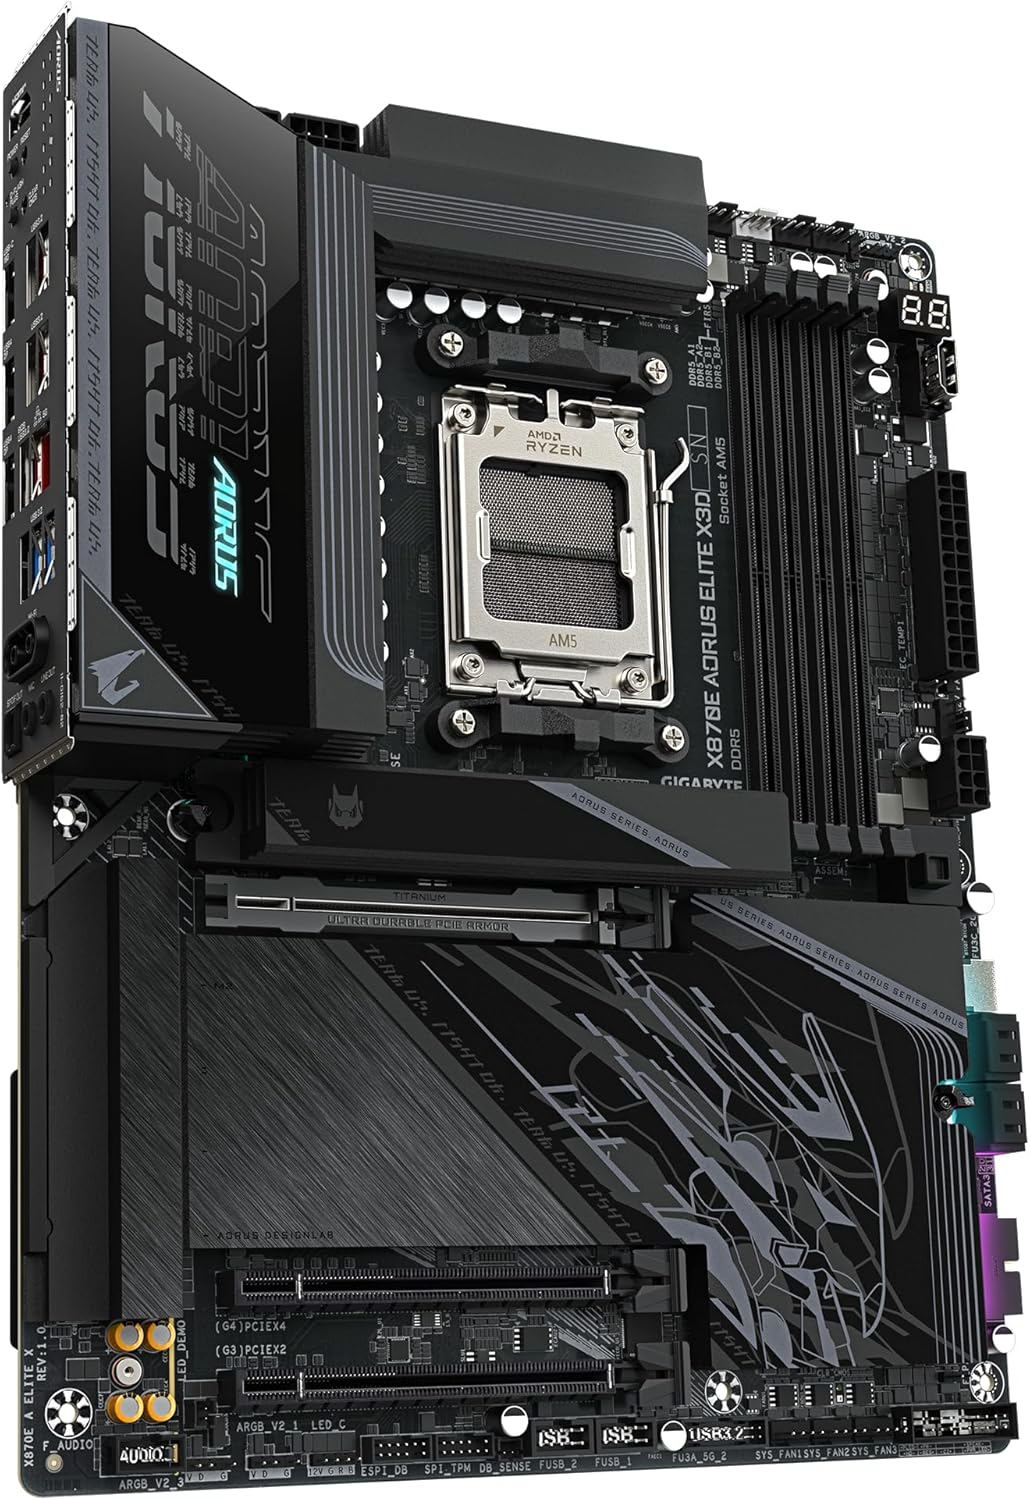
Figure 3: DDR5 Memory Slots
2.3 M.2 SSD Installation (EZ-Latch Click & Plus)
The motherboard features M.2 EZ-Latch Click & Plus for tool-less installation of M.2 SSDs and their heatsinks.
- Locate an M.2 slot and remove the protective film from the thermal pad on the M.2 heatsink.
- Insert the M.2 SSD into the slot at an angle.
- Gently push down the M.2 SSD and secure it using the EZ-Latch mechanism.
- Place the M.2 heatsink over the SSD and secure it using the EZ-Latch Plus mechanism.

Figure 4: EZ DIY Features for M.2 and PCIe Installation
2.4 PCIe Card Installation
Insert your graphics card or other PCIe expansion cards into the appropriate PCIe 5.0 or PCIe 4.0 slots. Ensure the card is fully seated and secured with the case's retention mechanism.
2.5 Wi-Fi Antenna Installation (EZ-Plug)
Attach the included Wi-Fi antenna to the designated connectors on the rear I/O panel. The EZ-Plug design ensures a quick and easy connection.
2.6 Power Connections
Connect the 24-pin ATX main power connector and the 8-pin (or 4+4-pin) CPU power connector from your power supply to the motherboard.
2.7 Rear I/O Panel Overview

Figure 5: Rear I/O Panel Connectivity
The rear I/O panel provides a range of connectivity options including HDMI, Dual USB4 Type-C with DP-Alt, multiple USB 3.2 ports, 5GbE LAN, and Wi-Fi 7 antenna connectors.
3. Operating Instructions
3.1 Initial Boot and BIOS/UEFI Access
Upon first power-on, the system will perform a Power-On Self-Test (POST). To access the BIOS/UEFI setup, press the DEL key repeatedly during the POST process. The BIOS allows you to configure system settings, boot order, and advanced features.
3.2 X3D Turbo Mode 2.0
The GIGABYTE X870E AORUS ELITE X3D motherboard features X3D Turbo Mode 2.0, an AI-driven technology designed to optimize performance for AMD Ryzen X3D processors. This mode intelligently adjusts CPU parameters to maximize gaming and application performance. This feature can typically be enabled or configured within the BIOS/UEFI settings under the 'Tweaker' or 'Performance' sections.

Figure 6: AI-Driven Performance Optimization
3.3 Memory Overclocking (AMD EXPO)
This motherboard supports AMD EXPO for easy DDR5 memory overclocking up to 9000MT/s. To enable EXPO profiles, navigate to the BIOS/UEFI settings, usually under the 'Tweaker' or 'Memory' section, and select the desired EXPO profile for your memory modules.
3.4 Driver Installation
After installing your operating system, install the necessary drivers for the motherboard components. These typically include chipset drivers, LAN drivers, Wi-Fi drivers, and audio drivers. Drivers can be found on the GIGABYTE official website for your specific motherboard model. It is recommended to download the latest drivers for optimal compatibility and performance.
4. Maintenance
Regular maintenance helps ensure the longevity and stable operation of your motherboard and PC system.
- Dust Removal: Periodically clean dust from inside your PC case, especially from heatsinks and fans, using compressed air. Ensure the system is powered off and unplugged before cleaning.
- Connection Checks: Occasionally check all power and data cable connections to ensure they are secure.
- BIOS/UEFI Updates: Keep your BIOS/UEFI firmware updated to benefit from performance improvements, bug fixes, and support for new hardware. Refer to the GIGABYTE website for update procedures and files.
- Software Updates: Ensure your operating system and drivers are up-to-date.

Figure 7: Motherboard Thermal Design
5. Troubleshooting
If you encounter issues, refer to the following common troubleshooting steps:
- No Power/No POST:
- Verify all power cables (24-pin ATX, CPU power) are securely connected.
- Ensure RAM modules are correctly seated in their slots. Try reseating them or testing with one module at a time.
- Check CPU installation and ensure the CPU cooler is properly installed.
- Clear CMOS by removing the CMOS battery for a few minutes or using the Clear CMOS jumper/button (refer to motherboard diagram).
- No Display:
- Ensure your monitor is connected to the correct graphics output (either dedicated GPU or motherboard's integrated graphics port).
- Reseat your graphics card.
- Test with a different display cable or monitor if possible.
- Network Connectivity Issues (LAN/Wi-Fi):
- Ensure LAN cable is properly connected or Wi-Fi antennas are securely attached.
- Verify that the correct LAN and Wi-Fi drivers are installed. If not, download them from the GIGABYTE website using another device and transfer them via USB.
- Check network settings in your operating system.
- M.2 SSD Not Detected:
- Ensure the M.2 SSD is fully inserted into its slot and secured.
- Check BIOS/UEFI settings to ensure the M.2 slot is enabled and configured correctly.
- Some M.2 slots may share bandwidth with SATA ports; ensure no conflicts exist (refer to the full motherboard manual for details).
6. Specifications
| Feature | Detail |
|---|---|
| Brand | Gigabyte |
| Model Name | X870E A ELITE X |
| CPU Socket | Socket AM5 |
| Compatible Processors | AMD Ryzen 9000 / 8000 / 7000 Series |
| Chipset Type | AMD X870E |
| RAM Technology | DDR5 |
| Memory Speed | Up to 9000 MHz (OC) |
| Memory Slots | 4 (Dual Channel) |
| Max RAM Size | 256 GB |
| VRM Design | 16+2+2 Phase Digital |
| PCIe Slots | 2 x PCIe 5.0, 2 x PCIe 4.0 (Total 3 physical slots) |
| M.2 Slots | 4 (including PCIe 5.0 x4 support) |
| SATA Ports | 4 |
| LAN | 5 GbE LAN |
| Wireless Connectivity | Wi-Fi 7 |
| USB Ports | 11 (including Dual USB4 Type-C with DP-Alt, QC-USB 65W front) |
| HDMI Ports | 1 |
| Main Power Connector | 24 pin |
| Dimensions (LxWxH) | 30.5L x 24.4W x 3.5H cm |
| Weight | 2980 Grams |
7. Warranty and Support
7.1 Product Warranty
The GIGABYTE X870E AORUS ELITE X3D Motherboard comes with a 3-year manufacturer's warranty. Please retain your proof of purchase for warranty claims. The warranty covers defects in materials and workmanship under normal use. It does not cover damage caused by improper installation, accidents, misuse, abuse, natural disasters, or unauthorized modifications.
7.2 Technical Support
For technical assistance, driver downloads, BIOS updates, or further information, please visit the official GIGABYTE website. You can find support resources, FAQs, and contact information for customer service there.
GIGABYTE Official Website: www.gigabyte.com


