
Introduction
Thank you for choosing the CHOEZON Floating Shelves and Hanging Pot Rack. This product is designed to provide versatile storage and display solutions for your living room, kitchen, bedroom, or bathroom. Crafted from high-quality particleboard and sturdy metal, these units offer both functionality and a modern aesthetic. This manual provides detailed instructions for proper assembly, installation, usage, and maintenance to ensure safe and long-lasting enjoyment of your product.
Safety Information
- Read all instructions carefully before assembly and installation.
- Keep all small parts and packaging materials away from children.
- Ensure all screws and fasteners are securely tightened before use.
- Do not exceed the maximum weight capacity for each shelf and rack tier.
- Install on a solid wall surface using appropriate mounting hardware. If unsure, consult a professional.
- Avoid placing heavy or fragile items on the edges of the shelves.
- Regularly check the stability of the installed units.
Package Contents
Please verify that all components listed below are present before beginning assembly. If any parts are missing or damaged, please contact customer support.
- 2 x Floating Shelf Units (with diamond-shaped metal frames and particleboard shelves)
- 1 x Hanging Pot Rack Unit (with metal frame, mesh tiers, and particleboard base)
- 12 x Detachable S-Hooks for Pot Rack
- 6 x Side Lid Holders for Pot Rack
- Mounting Hardware (screws, anchors suitable for various wall types)
- Assembly Guide
Setup and Installation
Follow these steps for the correct assembly and installation of your CHOEZON Floating Shelves and Hanging Pot Rack. All necessary installation tools are included.
1. Floating Shelves Installation
- Step 1: Position the floating shelf unit against the wall at your desired height. Mark the drilling points through the pre-drilled holes on the metal frame.
- Step 2: Drill pilot holes into the wall at the marked locations. Insert wall anchors if required for your wall type (e.g., drywall).
- Step 3: Align the shelf unit with the drilled holes and secure it to the wall using the provided screws. Ensure the screws are tightened firmly for stability.

Image: Visual guide for installing the floating shelves, showing marking and securing steps.
2. Hanging Pot Rack Installation
- Step 1: Assemble the pot rack frame according to the included assembly guide, ensuring all parts are securely connected.
- Step 2: Choose a suitable location on your wall for the pot rack. Mark the drilling points for the wall-mount brackets.
- Step 3: Drill pilot holes and insert wall anchors as needed. Attach the pot rack to the wall using the provided mounting screws, ensuring it is level and stable.
- Step 4: Attach the 12 detachable S-hooks to the bottom bar of the pot rack.
- Step 5: Install the 6 side lid holders onto the sides of the pot rack as desired.

Image: Detailed view of the pot rack's components, including the versatile S-hooks and side lid holders.
Operating and Usage
The CHOEZON Floating Shelves and Hanging Pot Rack are designed for efficient storage and display. Here are guidelines for optimal use:
Floating Shelves
- Each floating shelf has a maximum weight capacity of 22 lbs (10 kg). Distribute weight evenly.
- Ideal for displaying decorative items, small plants, books, or lightweight essentials.
- The double-tier design allows for efficient use of vertical space.

Image: Floating shelves showcasing various items in a living room setting.

Image: Floating shelf demonstrating its sturdy construction and 22 lb capacity with books.
Hanging Pot Rack
- Each tier of the pot rack has a maximum weight capacity of 50 lbs (22.7 kg).
- Use the mesh tiers to store pots, pans, dishes, and other kitchen essentials.
- The 12 detachable S-hooks are perfect for hanging spoons, spatulas, ladles, mugs, and other utensils. Their movable design allows for flexible arrangement.
- The 6 side lid holders provide convenient storage for pot and pan lids, keeping them organized and easily accessible.
- This unit helps free up countertop space and keeps your kitchen tidy.

Image: Pot rack in a kitchen setting, demonstrating its use for storing various kitchen items.
Maintenance
- Cleaning: Wipe surfaces with a soft, damp cloth. Avoid abrasive cleaners or harsh chemicals that could damage the finish.
- Dusting: Regularly dust the shelves and rack to maintain their appearance.
- Inspection: Periodically check all screws and connections to ensure they remain tight and secure. Re-tighten if necessary.
- Avoid Moisture: While durable, prolonged exposure to excessive moisture should be avoided to prevent damage to the particleboard.
Troubleshooting
- Unit feels wobbly after installation: Ensure all mounting screws are fully tightened. Verify that appropriate wall anchors were used for your wall type. If the issue persists, consider relocating to a more secure wall stud or reinforcing the mounting points.
- Missing parts: Refer to the 'Package Contents' section. If any parts are missing, contact CHOEZON customer support for assistance.
- Difficulty assembling: Review the assembly guide carefully. Ensure all parts are oriented correctly. Do not force components together.
Specifications
| Feature | Detail |
|---|---|
| Model Number | TBJ01P2BB-TPR02BC |
| Brand | CHOEZON |
| Material | Particleboard, Metal |
| Floating Shelf Dimensions (each) | 15.0"L x 5.5"W x 15.0"H (38cm L x 14cm W x 38cm H) |
| Floating Shelf Weight Capacity (each) | 22 lbs (10 kg) |
| Pot Rack Dimensions | 29"L x 12.5"W x 16"H (75cm L x 32cm W x 42cm H) |
| Pot Rack Tier Weight Capacity (each tier) | 50 lbs (22.7 kg) |
| Pot Rack Product Weight | 9.5 lbs (4.3 kg) |
| Number of S-Hooks | 12 |
| Number of Side Lid Holders | 6 |
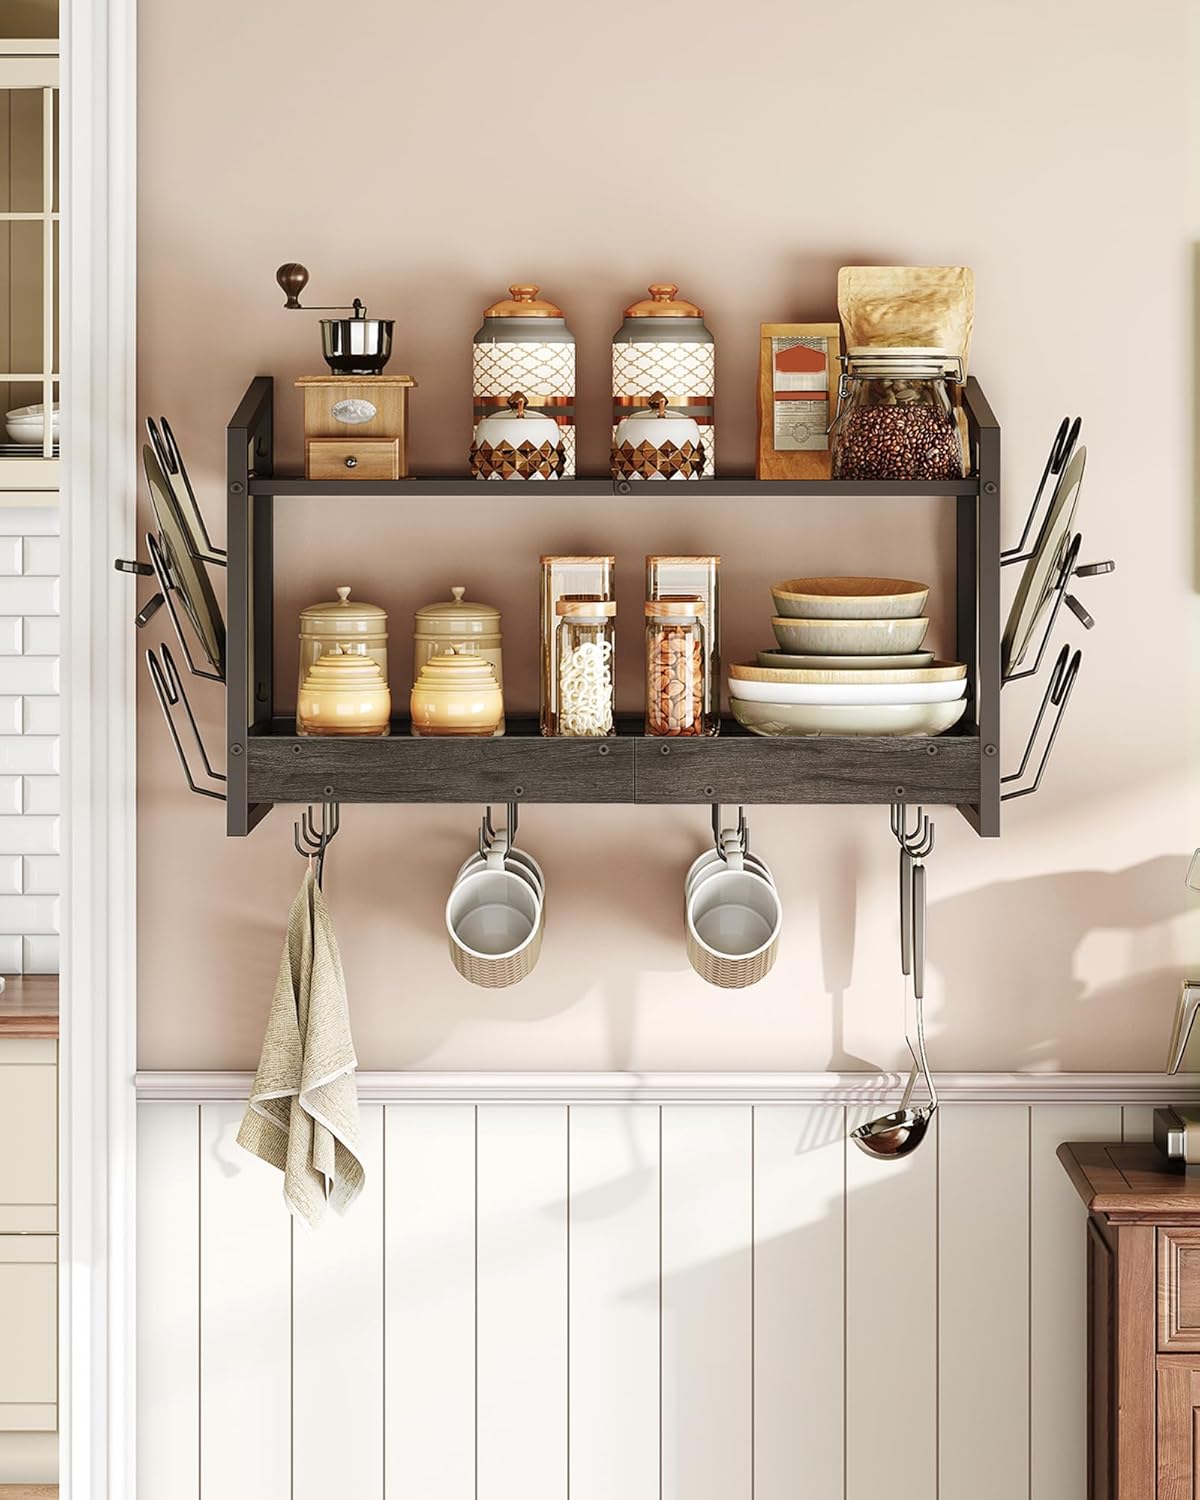
Image: Detailed dimensions for the floating shelves.

Image: Detailed dimensions and weight capacity for the hanging pot rack.
Warranty and Support
CHOEZON products are manufactured with quality and customer satisfaction in mind. For any questions, concerns, or assistance with your product, please refer to your purchase documentation or contact CHOEZON customer support directly. Please have your model number (TBJ01P2BB-TPR02BC) ready when contacting support.