Introduction
This manual provides detailed instructions for the MECHEER JK-TM02-FR Digital Programmable Timer Outlet. This device allows you to automate the on/off cycles of electrical appliances, helping to save energy and enhance home security. Please read this manual carefully before use to ensure proper operation and safety.
Safety Instructions
- Do not immerse the timer in water or any other liquid.
- Do not connect any appliance that exceeds the maximum load rating (16A, 3680W).
- Ensure the timer is securely plugged into a grounded outlet.
- Do not disassemble or attempt to repair the unit. Contact qualified personnel for service.
- Keep out of reach of children.
Product Overview
The MECHEER JK-TM02-FR is a digital timer outlet designed for easy programming and control of your electrical devices. It features a clear LCD screen and intuitive buttons for setting various programs.
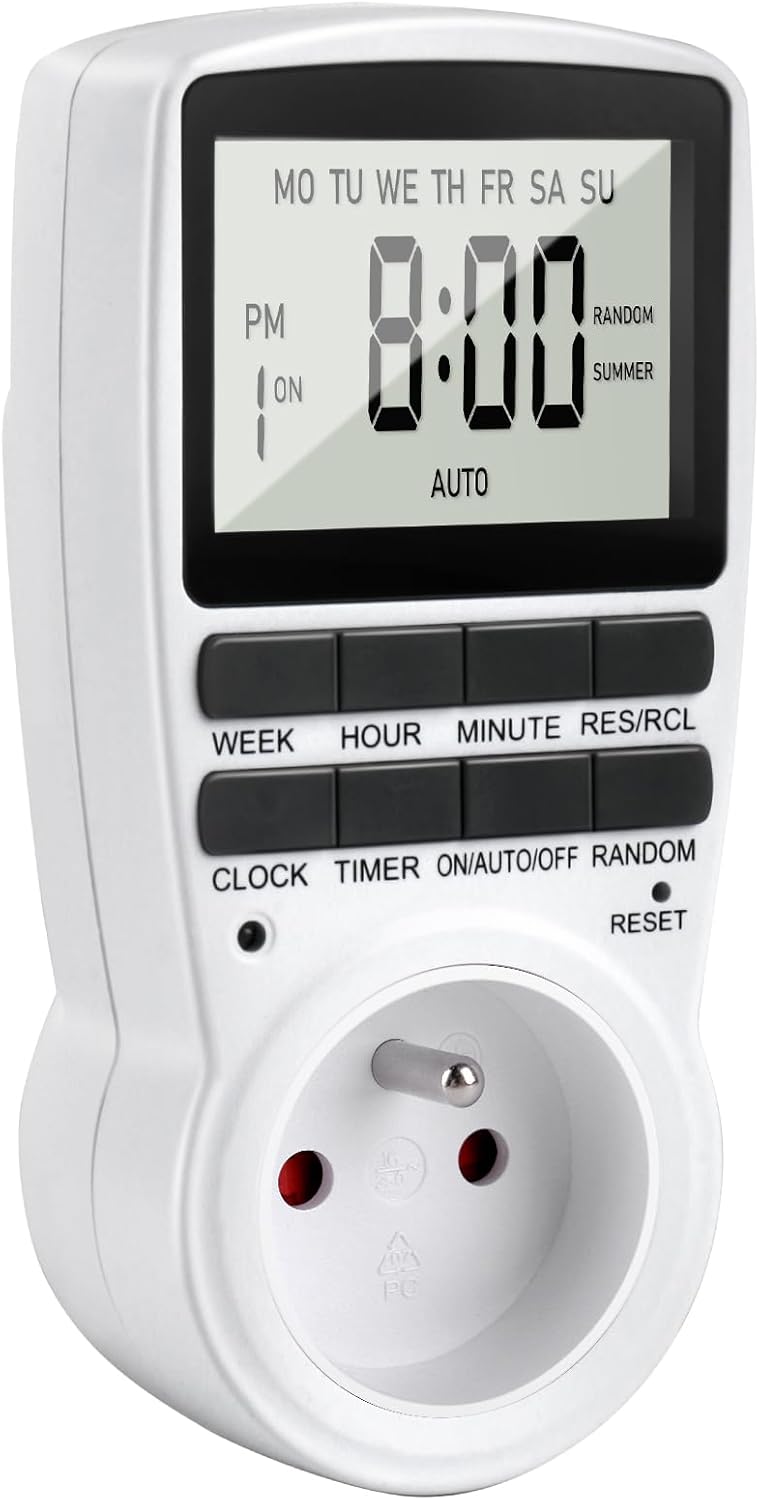
Figure 1: Front view of the MECHEER JK-TM02-FR Digital Programmable Timer Outlet, showing the LCD display and control buttons.
Key Features:
- Up to 16 On/Off programs.
- Multiple day combinations (daily, specific days, weekdays, weekends).
- Random mode for enhanced home security.
- Manual override function.
- Large LCD display with backlight.
- Built-in backup battery to retain settings during power outages.
Button Functions:
- WEEK: Sets the day of the week.
- HOUR: Sets the hour.
- MINUTE: Sets the minute.
- RES/RCL: Resets or recalls program settings.
- CLOCK: Enters or exits clock setting mode.
- TIMER: Enters program setting mode.
- ON/AUTO/OFF: Cycles through ON, AUTO, and OFF modes.
- RANDOM: Activates/deactivates random mode.
- RESET: Resets the unit to factory defaults (requires a pointed object).
Setup
1. Initial Charge and Reset:
Before first use, plug the timer into a live electrical outlet for at least 30 minutes to charge the internal backup battery. After charging, use a small pointed object (like a pen tip) to press the RESET button to clear all memory and reset the unit to factory defaults. The display will show "0:00".

Figure 2: Locating and pressing the RESET button with a pointed object to clear settings.
2. Setting the Current Time:
- Press the CLOCK button.
- While holding CLOCK, press the WEEK button repeatedly until the correct day of the week is displayed.
- While holding CLOCK, press the HOUR button repeatedly until the correct hour is displayed.
- While holding CLOCK, press the MINUTE button repeatedly until the correct minute is displayed.
- Release the CLOCK button. The current time is now set.

Figure 3: Visual guide for setting the current time (Step 1: Set current time, Step 2: Set schedule, Step 3: Activate AUTO mode).
To switch between 12-hour (AM/PM) and 24-hour formats, press the CLOCK and TIMER buttons simultaneously.
Operating Instructions
1. Programming On/Off Cycles (16 Programs):
The timer allows you to set up to 16 distinct ON/OFF programs. Each program consists of an ON time and an OFF time.
- Press the TIMER button once. The display will show "1 ON". This is for the first ON program.
- Press WEEK to select the desired day(s) for this program. Options include:
- MO TU WE TH FR SA SU (Every day)
- MO (Monday only)
- TU (Tuesday only)
- ... (Each individual day)
- MO TU WE TH FR (Weekdays)
- SA SU (Weekends)
- MO TU WE TH FR SA (Mon-Sat)
- MO WE FR (Mon, Wed, Fri)
- TU TH SA (Tue, Thu, Sat)
- MO TU WE (Mon, Tue, Wed)
- TH FR SA (Thu, Fri, Sat)
- MO WE FR SU (Mon, Wed, Fri, Sun)
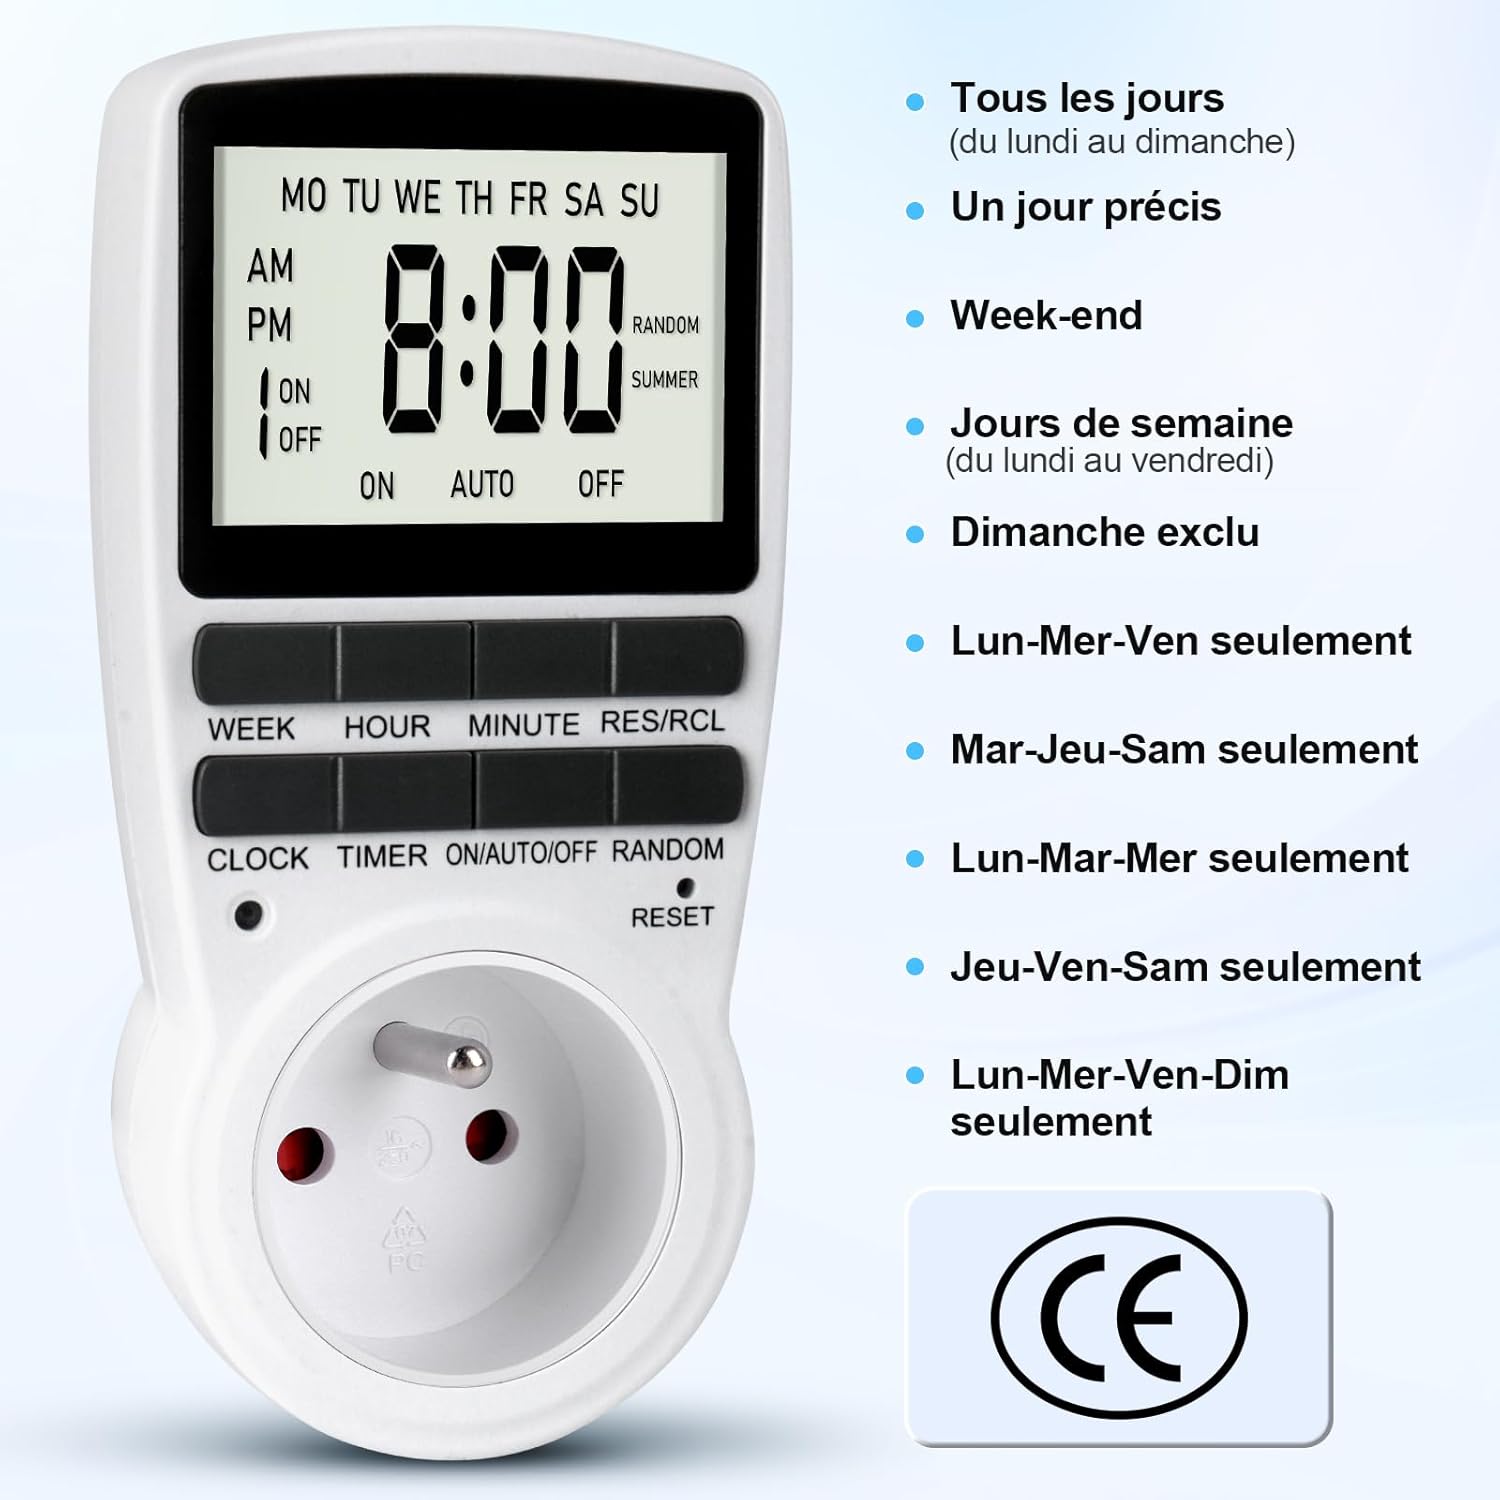
Figure 4: Various day combination options available for programming the timer.
- Press HOUR to set the desired hour for the ON time.
- Press MINUTE to set the desired minute for the ON time.
- Press TIMER again. The display will show "1 OFF". This is for the first OFF program.
- Repeat steps 2-4 to set the desired day(s), hour, and minute for the OFF time.
- Continue pressing TIMER to cycle through "2 ON", "2 OFF", up to "16 ON", "16 OFF", and set additional programs as needed.
- After setting all desired programs, press the CLOCK button to return to the current time display.

Figure 5: Illustration of setting multiple On/Off programs, such as for an aquarium light or a toaster.

Figure 6: Example of a daily On/Off timer, such as turning on a coffee machine at 7:00 AM and off at 8:00 AM.
2. Activating Programs (ON/AUTO/OFF Mode):
Once programs are set, you need to select the operating mode:
- Press the ON/AUTO/OFF button to cycle through the modes:
- ON: The connected appliance is continuously ON, ignoring all programs.
- AUTO: The connected appliance will operate according to the programmed ON/OFF times. The display will show "AUTO".
- OFF: The connected appliance is continuously OFF, ignoring all programs.
- For your programs to run, ensure the timer is in AUTO mode.
3. Random Mode (Anti-Theft):
The random mode is designed to deter intruders by making it appear as if someone is home. When activated, the timer will randomly turn the connected appliance ON and OFF within a specific time window (e.g., 6:00 PM to 6:00 AM).
- Ensure the timer is in AUTO mode.
- Press the RANDOM button. "RANDOM" will appear on the display.
- To deactivate, press the RANDOM button again. "RANDOM" will disappear from the display.

Figure 7: Using the random mode to simulate occupancy and enhance home security while away.
4. Summer Time Adjustment:
To adjust for daylight saving time (summer time):
- Press the CLOCK and RANDOM buttons simultaneously. The display will show "SUMMER" and the time will advance by one hour.
- Repeat the action to revert to standard time.
Maintenance
The MECHEER JK-TM02-FR timer requires minimal maintenance.
- Cleaning: Wipe the unit with a dry, soft cloth. Do not use abrasive cleaners or immerse in water.
- Backup Battery: The internal NiMH 1.2V backup battery maintains your programmed settings for over 100 hours during a power outage, provided it is adequately charged. Regular use (plugged into an outlet) keeps the battery charged.
Troubleshooting
- Display is blank or unresponsive:
- Ensure the timer is plugged into a live electrical outlet.
- The internal battery might be depleted. Plug the timer in for at least 30 minutes to charge.
- Perform a full reset by pressing the RESET button with a pointed object. Note that this will erase all programmed settings.
- Programs are not running:
- Check if the timer is in AUTO mode. Press ON/AUTO/OFF until "AUTO" is displayed.
- Verify that the current time is set correctly.
- Review your programmed ON/OFF times to ensure they are set as intended.
- Ensure the connected appliance is switched ON (if it has its own power switch).
- Random mode is not working:
- Ensure "RANDOM" is displayed on the screen. If not, press the RANDOM button.
- Confirm the timer is in AUTO mode.
Specifications
| Brand | MECHEER |
| Model Number | JK-TM02-FR |
| Color | Grey |
| Material | Polycarbonate |
| Product Dimensions (L x W x H) | 5 x 8 x 15 cm |
| Item Weight | 150 g |
| Max Load | 16A / 3680W |
| Operating Temperature | -10°C to 40°C |
| Minimum Setting Time | 1 Minute |
| Accuracy | ±1 Minute/Month |
| Backup Battery | NiMH 1.2V (>100 Hours) |
Warranty and Support
For information regarding warranty coverage, please refer to the purchase documentation or contact your retailer. For technical support or further assistance, please contact MECHEER customer service through the platform where the product was purchased.


