
1. Introduction
This manual provides comprehensive instructions for the assembly, operation, and maintenance of your VIAGDO Twin Floating Bed Frame. Please read this manual thoroughly before assembly and use to ensure safe and correct operation. Keep this manual for future reference.
2. Safety Information
- Ensure all parts are present and undamaged before assembly. Do not use if any parts are missing or broken.
- Assemble the bed frame on a soft, clean surface to prevent scratches.
- Tighten all screws and bolts securely. Periodically check and re-tighten fasteners to maintain stability.
- Do not exceed the maximum weight capacity of 800 pounds.
- Keep children away from the assembly area. Small parts can be a choking hazard.
- Ensure electrical connections for the charging station and LED lights are properly secured and not exposed to moisture.
- The low-profile design minimizes tripping hazards, but exercise caution when moving around the bed.
3. Package Contents
Verify that all components listed below are included in your package:
- Headboard (with integrated charging station and LED lights)
- Bed Frame Side Rails
- Bed Slats
- Support Legs (concealed)
- Hardware Pack (screws, bolts, Allen wrench)
- LED Light Strip (for under-bed lighting)
- Remote Control for LED Lights
- Power Cord (6.5-foot)
- Installation Manual
4. Assembly Instructions (Setup)
Follow these steps for assembling your VIAGDO Twin Floating Bed Frame. It is recommended to have two people for assembly.
- Unpack and Identify Parts: Carefully remove all components from the packaging. Lay them out on a soft, clean surface and compare them against the parts list in the included installation manual.
- Assemble the Headboard: Attach the headboard sections as per the detailed diagrams in your manual. Ensure the charging station and LED light wiring are accessible.
- Attach Side Rails: Connect the side rails to the assembled headboard using the provided hardware. Do not fully tighten bolts until the entire frame is assembled.
- Install Footboard: Secure the footboard to the side rails.
- Insert Bed Slats: Place the bed slats into the designated slots on the side rails. The slats are designed for easy plug-in assembly. Ensure EVA pads are correctly positioned to prevent noise.

Image: Close-up of the bed frame's metal structure, illustrating the easy plug-in design for slats and the placement of EVA pads to ensure noise-free operation.
- Install Under-Bed LED Strip: Adhere the LED light strip to the underside of the bed frame as indicated in the manual. Ensure it is securely attached.
- Final Tightening: Once all components are in place, systematically tighten all screws and bolts.
For detailed visual guidance, refer to the diagrams in your included installation manual.
5. Operating Instructions
5.1. Multifunctional Storage Headboard

Image: The headboard features open shelves for displaying items and a hidden compartment behind the upholstered backrest for discreet storage.
The headboard features open shelves for convenient access to items like books, glasses, or decorative pieces. The upholstered backrest can be lifted to reveal a hidden storage compartment, ideal for storing personal belongings, seasonal clothing, or extra bedding.
5.2. Integrated Charging Station
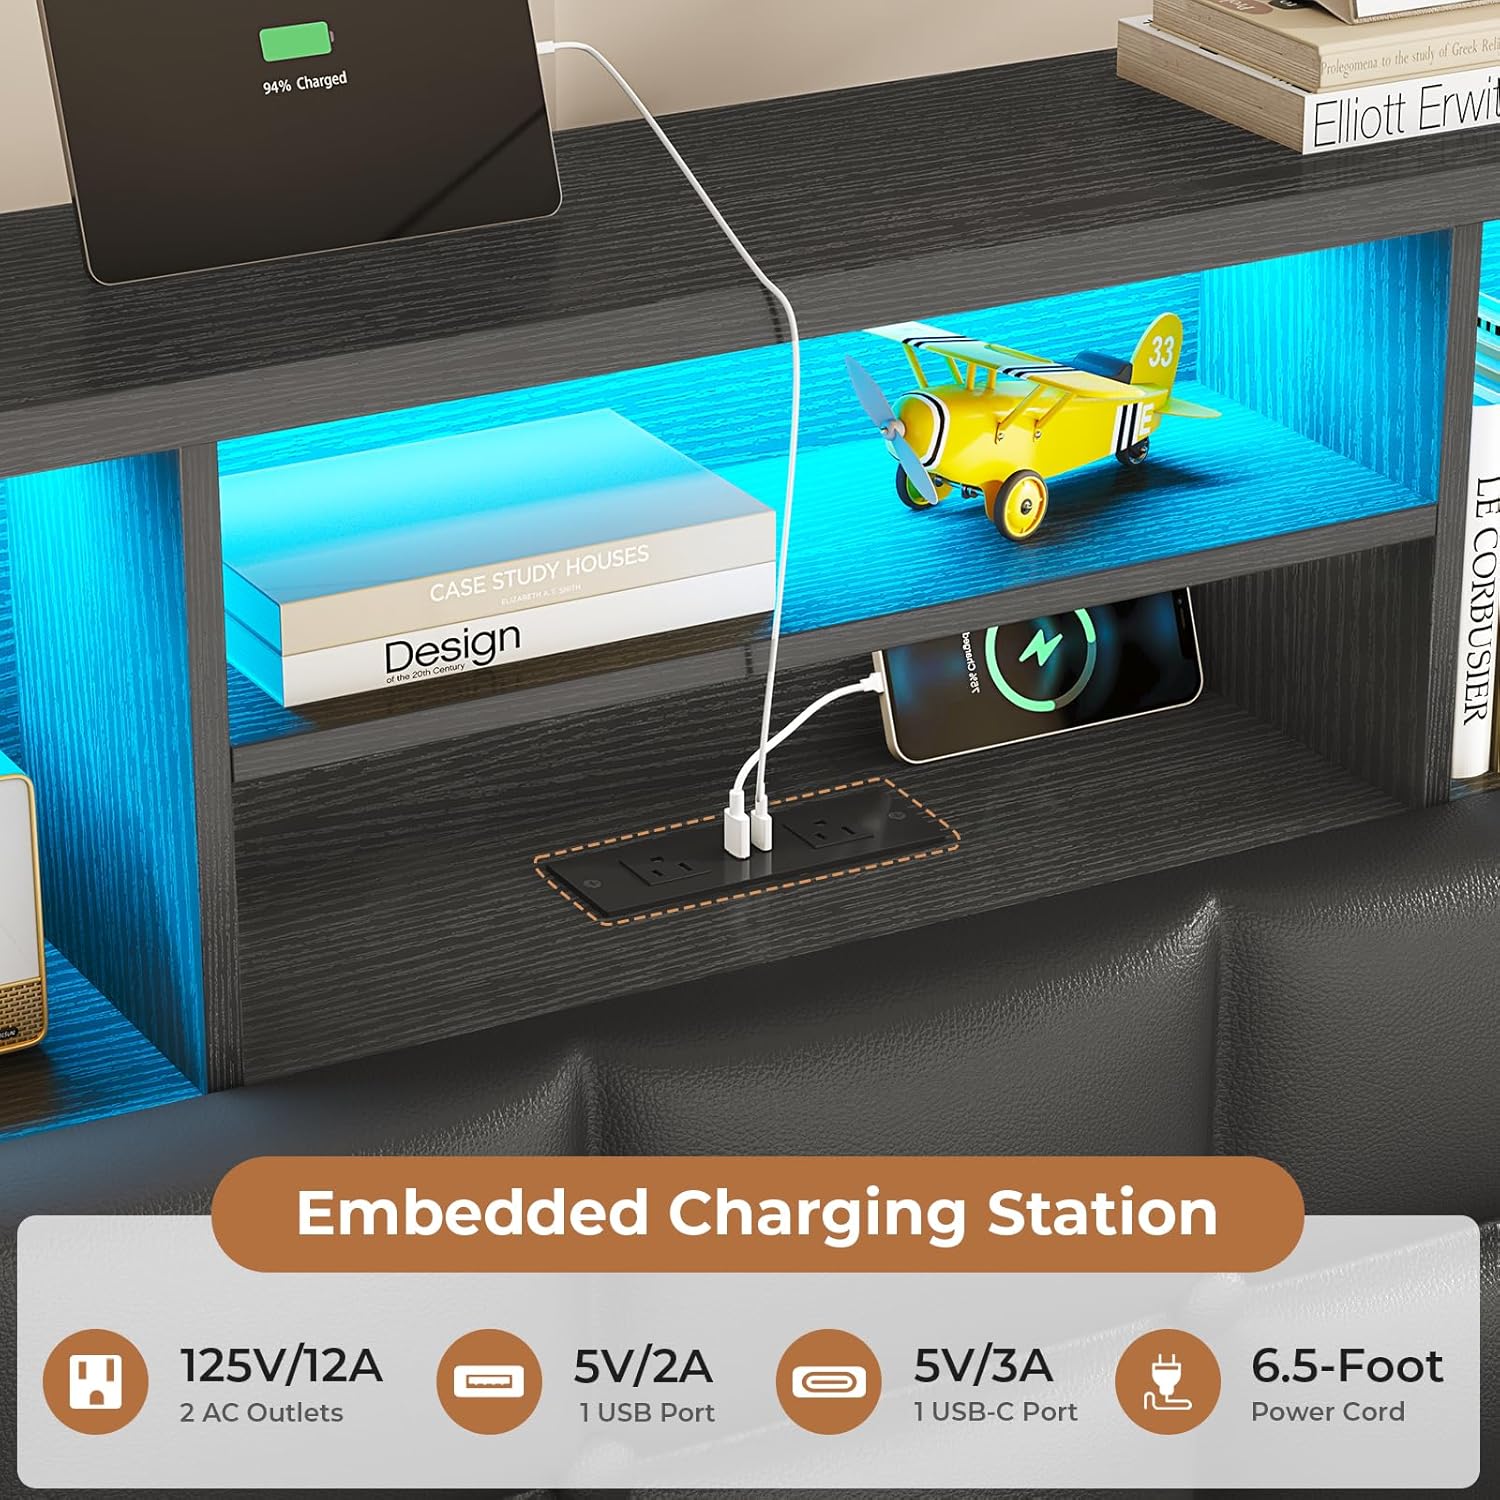
Image: A detailed view of the charging station, showing two AC outlets, one USB port, and one Type-C port, along with the 6.5-foot power cord.
The headboard includes an integrated charging station with:
- 2 AC Outlets (125V/12A)
- 1 USB Port (5V/2A)
- 1 Type-C Port (5V/3A)
Connect the bed frame's 6.5-foot power cord to a wall outlet. You can then charge multiple electronic devices simultaneously directly from the headboard.
5.3. LED Lighting System
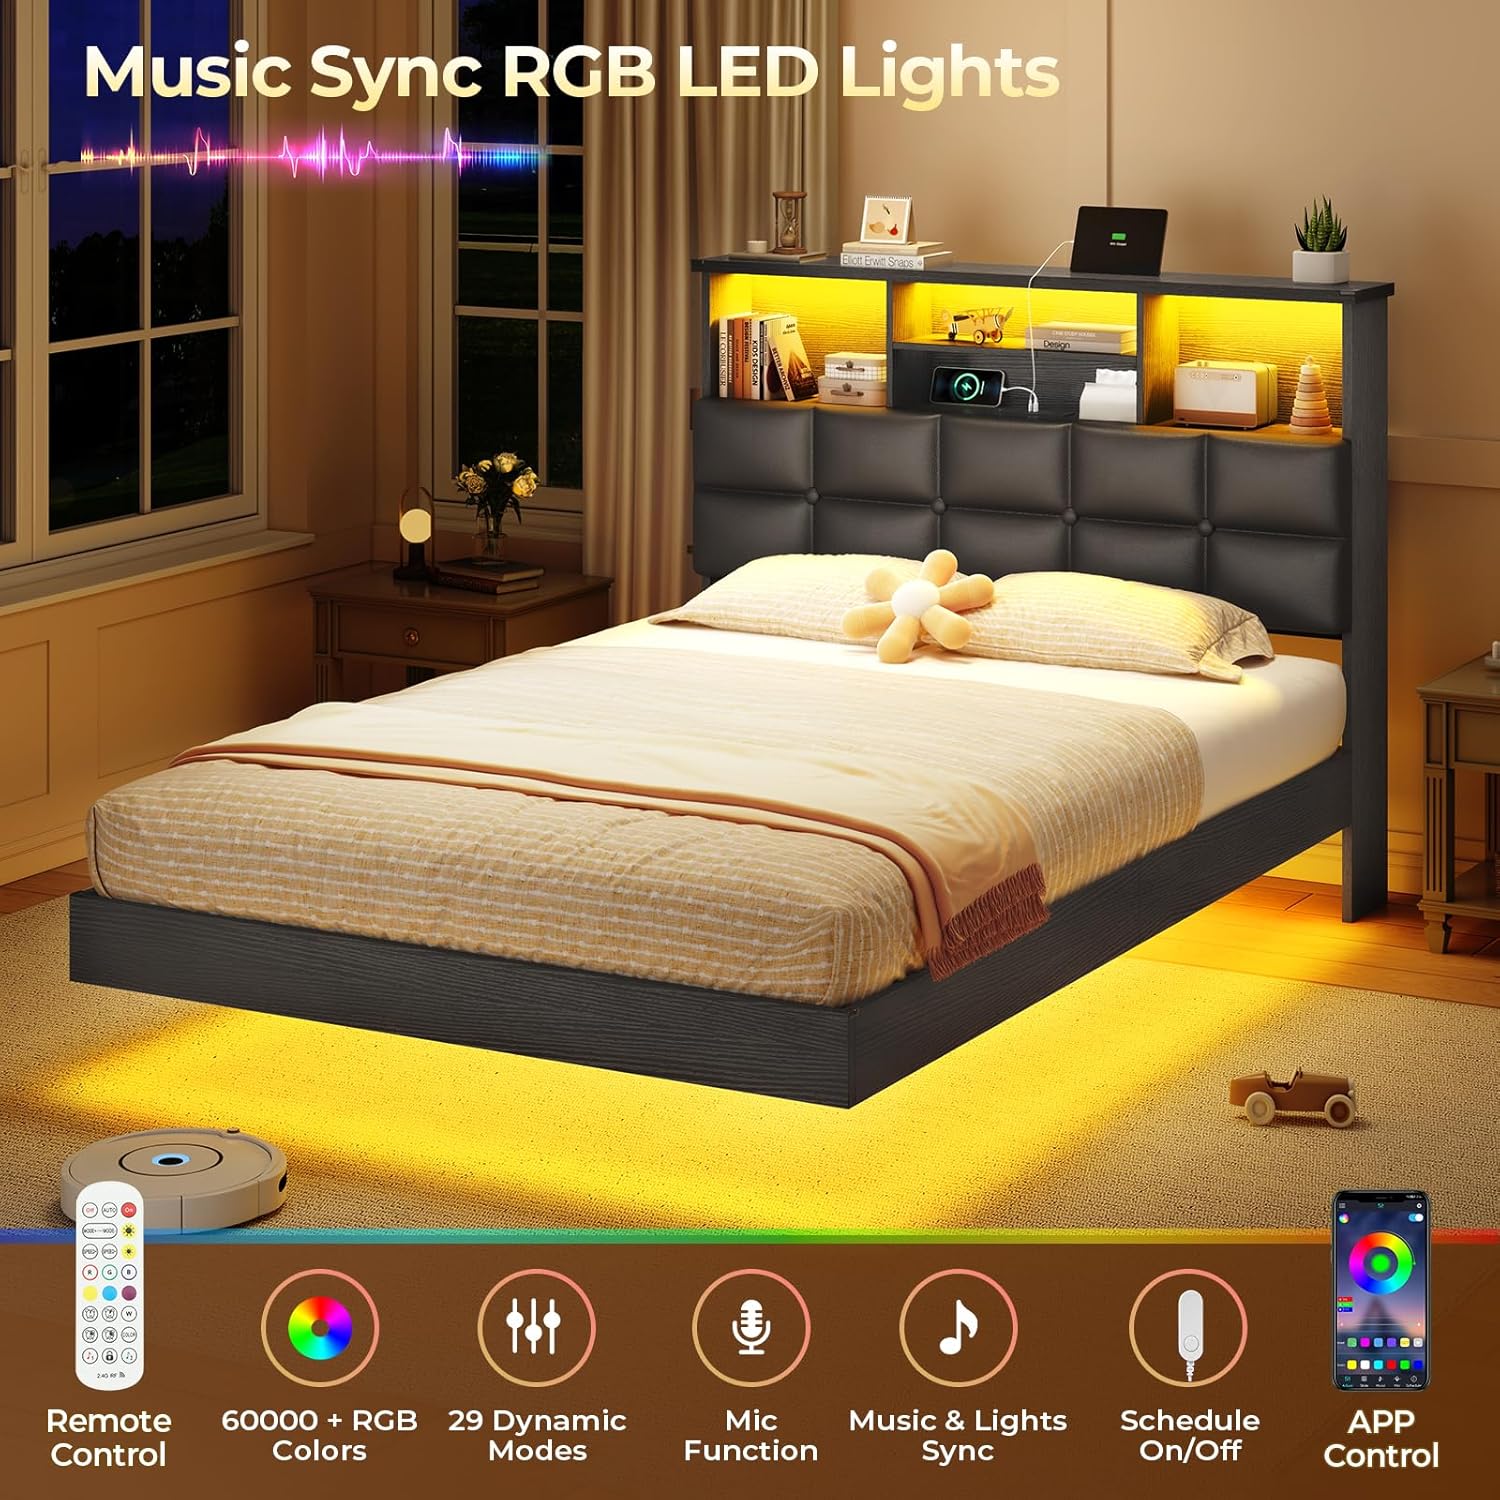
Image: The bed frame illuminated with yellow LED lights, showcasing the remote control, mobile app icon, and features like 60,000+ RGB colors, 29 dynamic modes, mic function, music sync, and schedule on/off.
The bed frame features integrated RGB LED lighting around the base and within the headboard shelves. Control the lights using the provided remote control or a dedicated mobile application.
- Color Selection: Choose from over 60,000 RGB colors.
- Dynamic Modes: Select from 29 pre-set dynamic lighting modes.
- Music Sync Mode: Activate this mode for lights to pulse and change in sync with music played in the room (via built-in microphone).
- Schedule On/Off: Set timers for the lights to turn on or off automatically.
- App Control: Download the specified mobile application (refer to the included LED light manual for app details) for advanced control features.
6. Maintenance
- Cleaning: Wipe the bed frame surfaces with a damp cloth. Avoid harsh chemicals or abrasive cleaners.
- Fasteners: Periodically check all screws and bolts to ensure they remain tight. Re-tighten as necessary to maintain structural integrity.
- LED Strips: Ensure LED light strips remain securely adhered. If adhesive weakens, re-secure with appropriate adhesive.
- Electrical Components: Keep the charging station and power cord free from dust and debris. Do not expose to liquids.
7. Troubleshooting
- Bed Squeaks: Ensure all bolts are tightened. Check that the EVA pads on the slats are correctly positioned and not damaged.
- LED Lights Not Working: Verify the power cord is securely plugged into both the bed frame and the wall outlet. Check the remote control battery. Ensure the LED strip connections are secure.
- LED Lights Turn On Randomly: This can sometimes occur due to interference. Try repositioning the LED controller or using the mobile app for control instead of the remote. If the issue persists, contact customer support.
- Charging Station Not Functioning: Confirm the bed frame's main power cord is plugged in. Test with different devices and cables.
- Missing or Damaged Parts: If you receive the product with missing or damaged parts, contact VIAGDO customer support immediately for assistance.
8. Specifications
| Feature | Detail |
|---|---|
| Size | Twin |
| Material | Engineered Wood, Metal |
| Product Dimensions (L x W x H) | 79.2" x 40.9" x 42.5"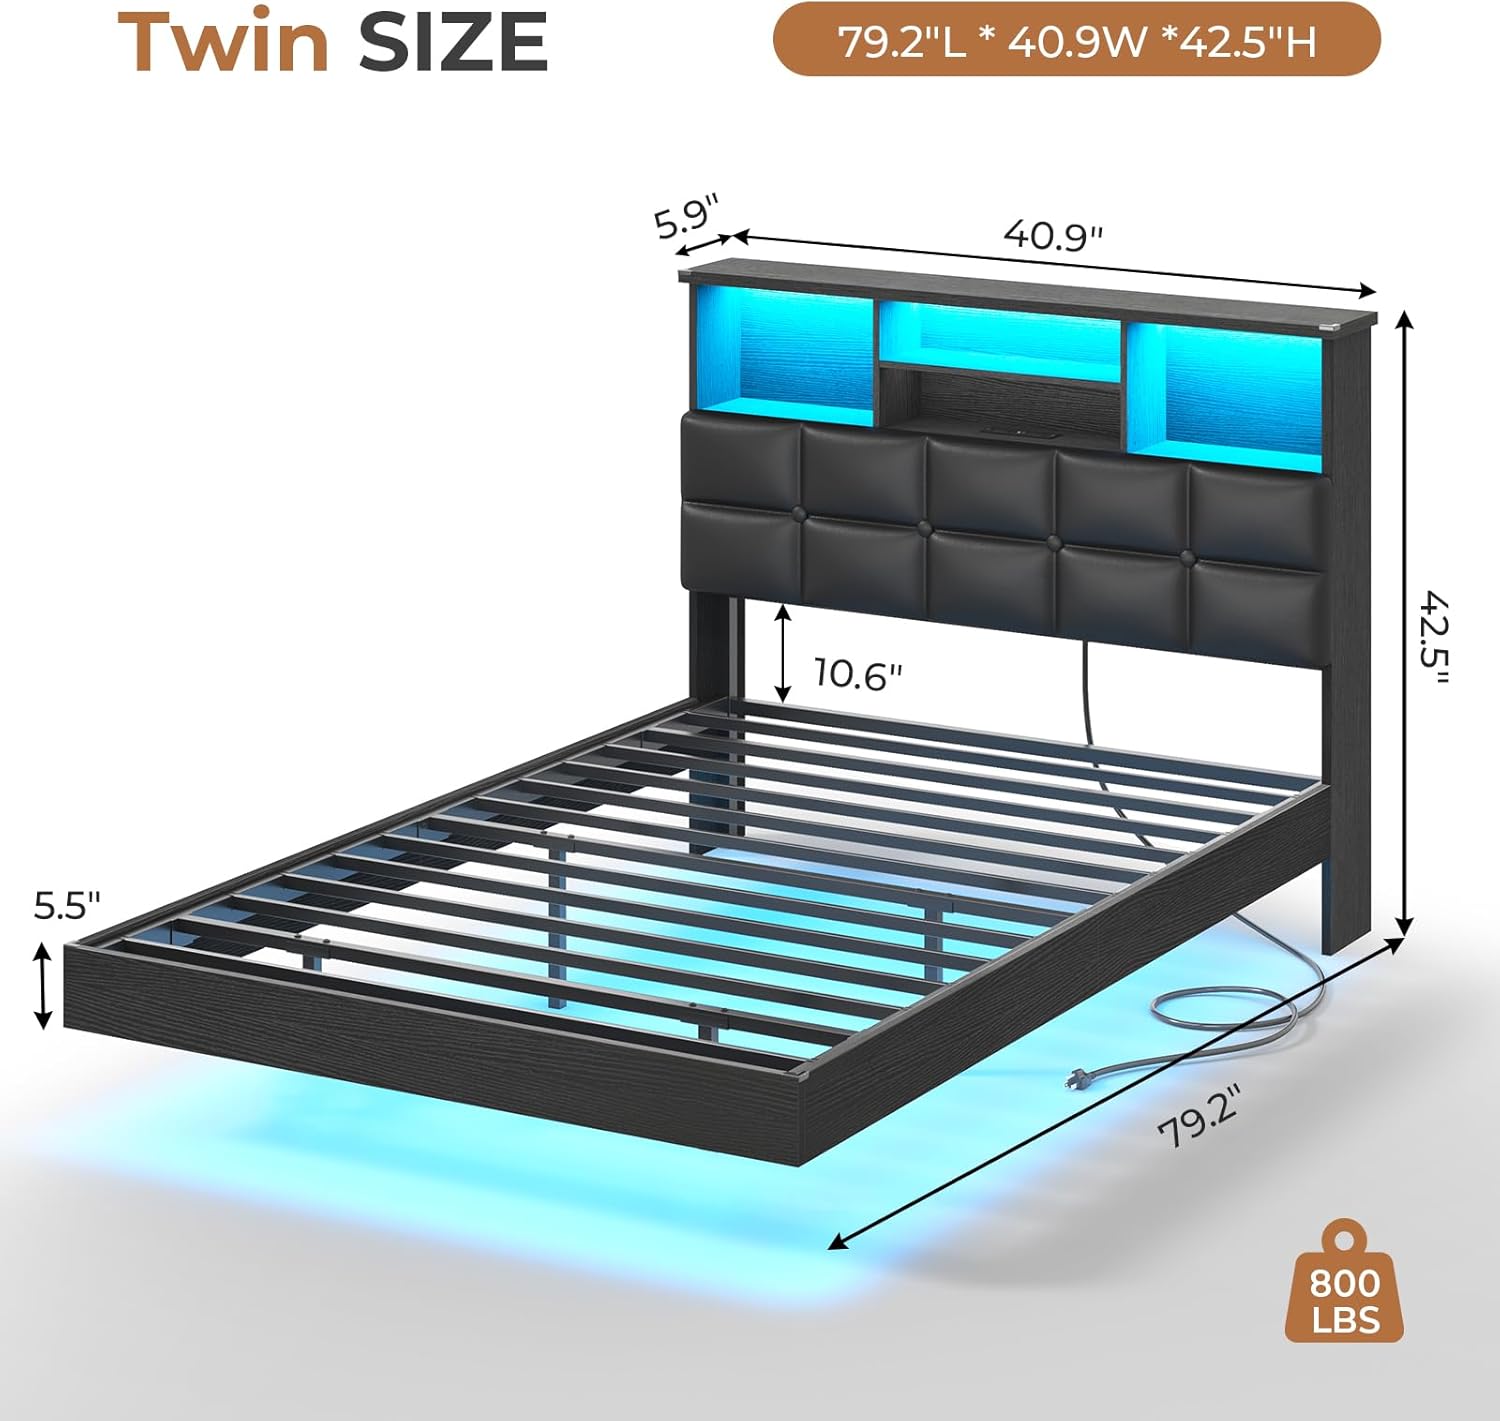 Image: Dimensional drawing of the bed frame, indicating length, width, and height measurements. |
| Style | Modern |
| Special Features | Charging Station, LED Lighting, No Box Spring Needed, Slatted, Upholstered, Hidden Storage, Floating Design |
| Charging Station Output | 2 AC Outlets (125V/12A), 1 USB Port (5V/2A), 1 Type-C Port (5V/3A) |
| Power Cord Length | 6.5 Feet |
| Maximum Weight Capacity | 800 Pounds |
| Assembly Required | Yes |
| Product Care | Wipe with Damp Cloth |
9. Warranty and Support
VIAGDO products are designed for durability and customer satisfaction. While specific warranty details are not provided in this document, please retain your proof of purchase for any warranty claims.
If you encounter any issues during assembly or use, or if you require replacement parts, please do not hesitate to reach out to our customer support team. Contact information can typically be found on the product packaging or the retailer's website where the product was purchased.
We are committed to providing assistance and ensuring your satisfaction with your VIAGDO Floating Bed Frame.