
1. Introduction
This manual provides essential information for the safe and effective operation of your Protmex Cordless Mini Buffer Polisher. Please read it thoroughly before initial use and retain it for future reference. This device is designed for automotive detailing, including polishing, waxing, and light sanding tasks on various vehicle surfaces.
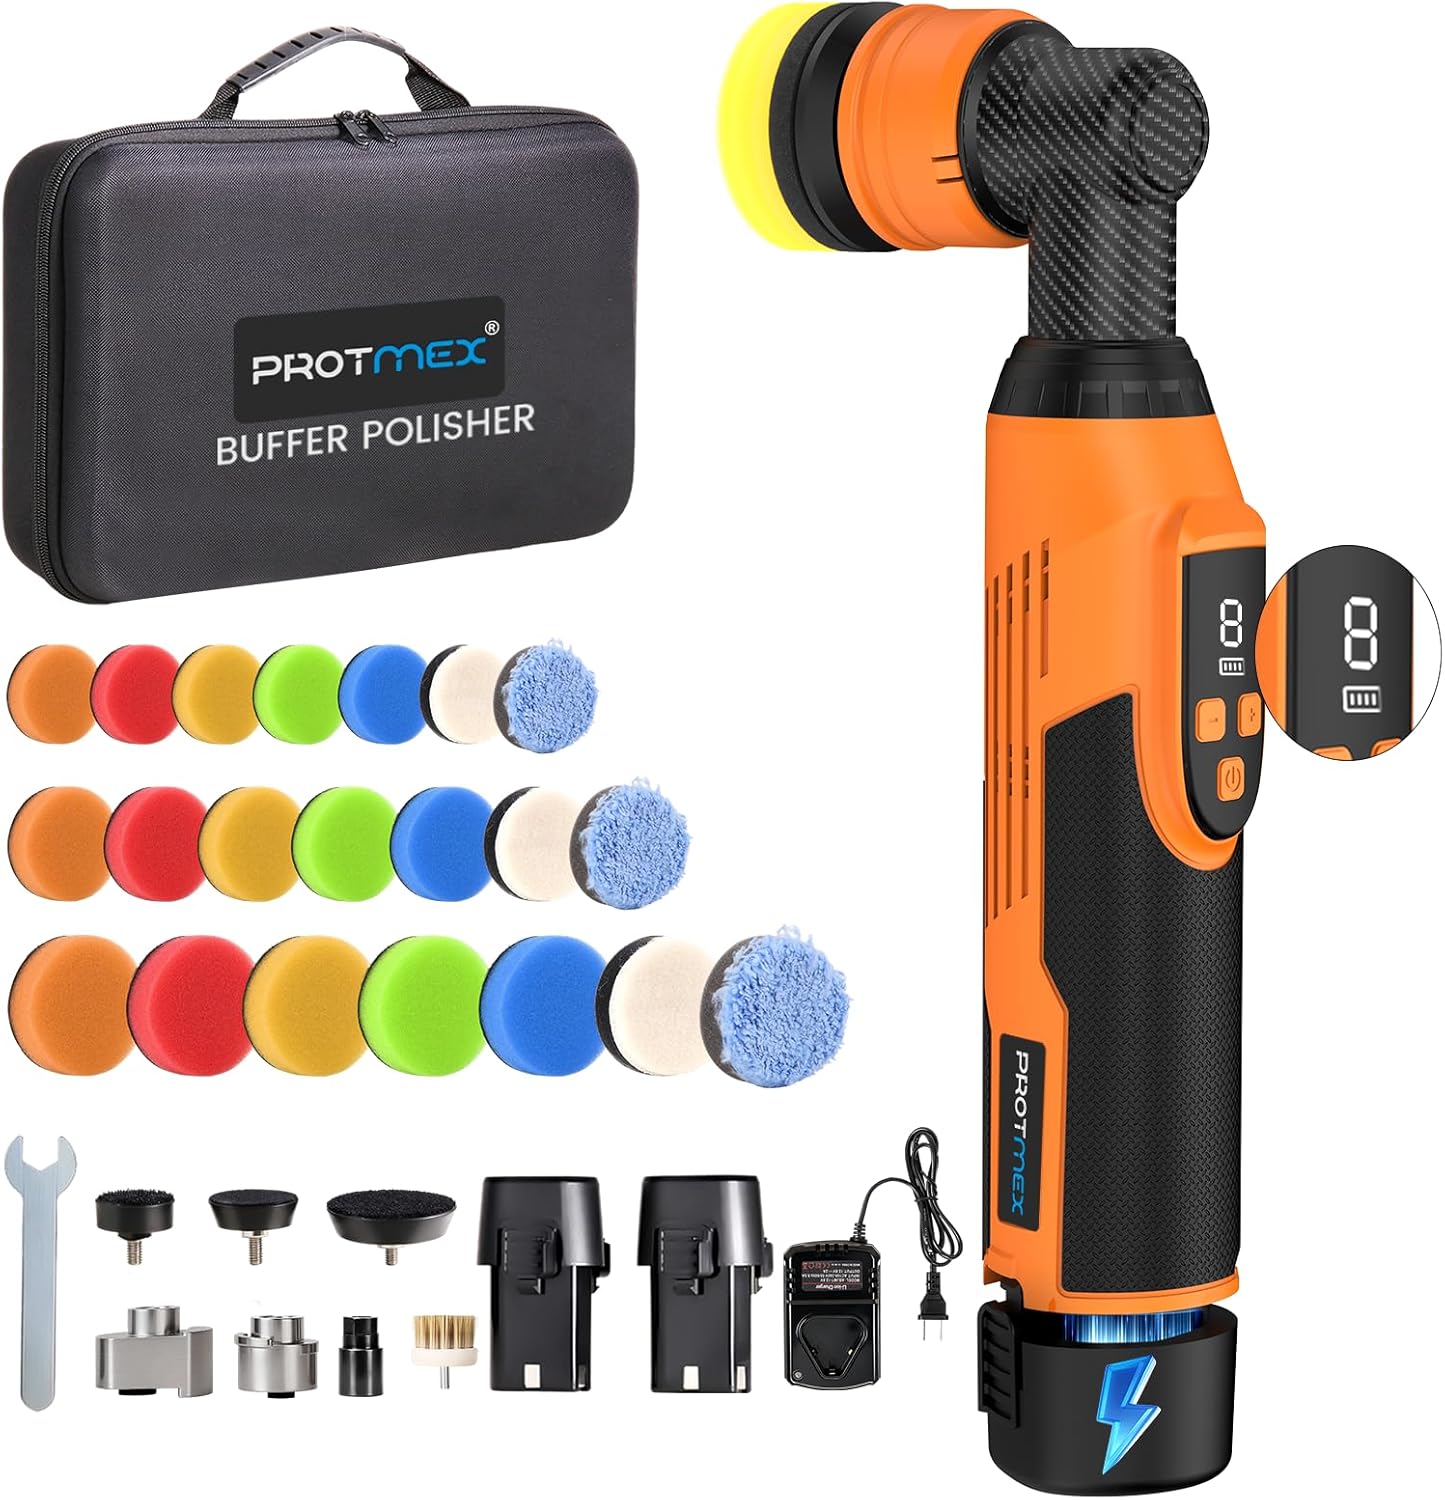
Figure 1: Protmex Cordless Mini Buffer Polisher and accessories.
2. What's Included
Your Protmex Cordless Mini Buffer Polisher kit includes the following components:
- 1 x Protmex Cordless Mini Buffer Polisher Unit
- 2 x 12V 2000mAh Lithium Batteries
- 1 x Battery Charger
- 1 x Straight Rod
- 1 x 3mm Orbit Block (for Dual Action mode)
- 1 x 5mm Orbit Block (for Dual Action mode)
- 3 x Backing Pads (1.2" / 30mm, 1.6" / 40mm, 2" / 50mm) - 7 pads per size, including Orange Hard Pad, Soft Pads, Cloth Cover, and Wool Pad.
- 1 x 1.4" (35mm) Brush
- 1 x Rotary Rod
- 1 x Carrying Case

Figure 2: Detailed view of all included accessories and the polisher unit.
3. Setup
3.1 Battery Installation and Charging
- Ensure batteries are fully charged before first use. Connect the charger to a power outlet and insert the battery. The charger indicator will show charging status.
- To install a battery, align it with the base of the polisher handle and slide it in until it clicks securely into place.
- To remove a battery, press the release button on the battery and slide it out.

Figure 3: The polisher comes with two 12V 2000mAh batteries for continuous use.
3.2 Attaching Polishing Heads and Pads
The polisher features a quick-change head mechanism. To change attachments:
- Pull back the black collar on the polisher head.
- Insert the desired attachment (Rotary, 3mm Orbit Block, or 5mm Orbit Block) into the opening.
- Release the collar to secure the attachment.
- Attach the appropriate backing pad (1.2", 1.6", or 2") to the chosen orbit block. The pads use a Velcro-based system for easy attachment and removal.
- Select the correct buffing pad (wool, foam, or cloth) for your task and firmly press it onto the backing pad.
Figure 4: Installation steps for different polishing heads and pads.
Video 1: Demonstration of attaching and detaching polishing pads and heads.
4. Operating Instructions
4.1 Power On/Off and Speed Adjustment
- Press the power button to turn the polisher ON or OFF.
- Use the '+' and '-' buttons to adjust the speed. The digital display shows the current speed setting and battery level.
- The polisher offers 8 variable speeds ranging from 2500-6000 RPM.

Figure 5: Speed adjustment and battery display on the polisher unit.
4.2 Polishing Modes (DA/RO)
The Protmex Mini Buffer Polisher supports both Dual Action (DA) and Rotary (RO) modes:
- Dual Action (DA) Mode: Achieved by using the 3mm or 5mm Orbit Blocks. This mode provides safe, swirl-free polishing, ideal for general polishing, cleaning, fine finishing, and waxing.
- Rotary (RO) Mode: Achieved by using the Straight Rod attachment. This mode delivers powerful cutting action, suitable for deep scratch removal and heavy dirt/oxidation removal.

Figure 6: Visual representation of the three available polishing modes.
4.3 Recommended Speed Settings for Tasks
- Speed 6-8 (4800-6000 RPM): Heavy dirt/oxidation removal, deep scratch removal (Rotary mode recommended).
- Speed 4-6 (3400-4800 RPM): General polishing/cleaning.
- Speed 2-3 (2500-3400 RPM): Fine finish/high-gloss.
- Speed 1-2 (2500-2700 RPM): Waxing/sealing/shine.
5. Usage Tips and Applications
This mini polisher is designed for precise detailing in hard-to-reach areas:
- Works effectively on A/B/C pillars, bumpers, grilles, chrome trims, windshield edges, door seams, and headlights.
- Use wool pads for heavy cutting, foam pads for polishing, and cloth pads for waxing/protection.
- The lightweight design (4.4 lbs) and ergonomic TPE+ABS grip help combat wrist fatigue and cord tangle, offering cordless freedom.

Figure 7: Examples of detailed areas where the polisher excels.
Video 2: Demonstration of the polisher's use on a car grille for polishing.
Video 3: Demonstration of using collets and the mini polisher for various tasks.
6. Maintenance
To ensure the longevity and optimal performance of your polisher:
- Regularly clean polishing pads after use.
- Store the polisher and accessories in the provided carrying case in a dry, cool place.
- Inspect the unit and attachments for any damage before and after each use.
7. Troubleshooting
If you encounter any issues with your Protmex Cordless Mini Buffer Polisher, please refer to the following common troubleshooting tips:
- Polisher not turning on: Ensure the battery is fully charged and properly inserted. Check the power button.
- Reduced performance: Check battery level and recharge if necessary. Ensure polishing pads are clean and not worn out.
- Excessive vibration/noise: Ensure all attachments are securely fastened. Replace worn or damaged pads.
For further assistance, please contact customer support.
8. Specifications
| Feature | Specification |
|---|---|
| Brand | Protmex |
| Model Number | EX007-2 |
| Item Weight | 4.2 pounds |
| Product Dimensions | 15.9 x 9.6 x 3.9 inches |
| Batteries | 2 x 12V 2000mAh Lithium (included) |
| Speed Range | 2500-6000 RPM (8 variable speeds) |
| Polishing Modes | Dual Action (DA) / Rotary (RO) |
9. Warranty and Support
Protmex is committed to providing 100% service satisfaction. If you have any questions or require assistance with your product, please do not hesitate to contact us. Our team is available to help anytime.
For warranty information and customer support, please refer to the contact details provided with your purchase or visit the official Protmex website.