Important Safety Information
Please read all instructions carefully before assembling and using the Wenoker Magnetic Exercise Bike. Retain this manual for future reference.
- Consult a physician before starting any exercise program.
- Ensure all bolts and nuts are securely tightened before each use.
- Keep children and pets away from the exercise bike during operation.
- Place the bike on a flat, stable surface. Use a mat to protect flooring.
- Wear appropriate exercise clothing and footwear.
- Do not exceed the maximum user weight of 350 pounds (158 kg).
- If you experience pain, dizziness, or shortness of breath, stop exercising immediately.
Product Overview
The Wenoker Magnetic Exercise Bike is designed for effective indoor cardio and weight loss. It features a robust design with advanced connectivity options.
Key Features
- APP Connectivity: Connects with popular fitness apps like Zwift and Kinomap to track time, speed, distance, and calories.
- Quiet Magnetic Resistance: Smooth magnetic resistance system and belt drive ensure near-silent operation.
- Stable & Durable Frame: Reinforced steel frame and wide stabilizers provide excellent stability.
- LCD Display & Adjustable Seat: Built-in monitor displays workout metrics, and the seat adjusts for various user heights.
- Fast & Easy Assembly: Mostly pre-assembled for quick setup, typically 20-30 minutes.
Components
Familiarize yourself with the main components of your exercise bike.

Image: The Wenoker Magnetic Exercise Bike, showcasing its overall design and structure.
Setup and Assembly
The Wenoker Magnetic Exercise Bike comes mostly pre-assembled. Follow these steps for quick and easy setup.
Step 1: Attach Stabilizer Bars
Attach the front and rear stabilizer bars to the main frame using the provided bolts and washers. Ensure they are securely tightened for stability.

Image: An exploded view of the Wenoker Exercise Bike components, illustrating the parts involved in assembly.
Step 2: Install Pedals
Identify the left (L) and right (R) pedals. Apply a small amount of lubricant to the pedal threads. Screw the pedals into their respective crank arms. The left pedal tightens counter-clockwise, and the right pedal tightens clockwise. Use the provided wrench to secure them firmly.

Image: A close-up of the exercise bike pedals, showing the foot straps and attachment point.
Step 3: Adjust Seat and Handlebars
Adjust the seat height and fore-aft position, and the handlebar height to your comfort. Ensure the adjustment knobs are fully tightened after setting your preferred positions.

Image: Demonstrates the adjustable seat and handlebar features of the exercise bike.
Assembly Video Guide
Video: A step-by-step guide on how to assemble the Wenoker Exercise Bike, demonstrating the process from unboxing to final adjustments.
Operating Instructions
Powering On
The LCD monitor is battery-powered and will activate automatically when you begin pedaling or press any button.
Using the LCD Monitor
The built-in LCD monitor displays essential workout metrics. Use the 'MODE' button to cycle through different display functions:
- SCAN: Automatically cycles through all metrics.
- TIME: Displays the duration of your workout.
- SPEED: Shows your current cycling speed.
- DISTANCE: Tracks the distance covered during your session.
- CALORIES: Estimates calories burned.
- ODOMETER: Records total accumulated distance.
Press 'RESET' to clear current workout data. Press 'SET' to confirm settings or enter specific modes.

Image: A close-up of the LCD monitor, showing various workout data points and control buttons.
Adjusting Resistance
The resistance level is controlled by the red knob located on the main frame. Turn the knob clockwise to increase resistance and counter-clockwise to decrease it. Push down on the knob to engage the emergency brake and stop the flywheel immediately.
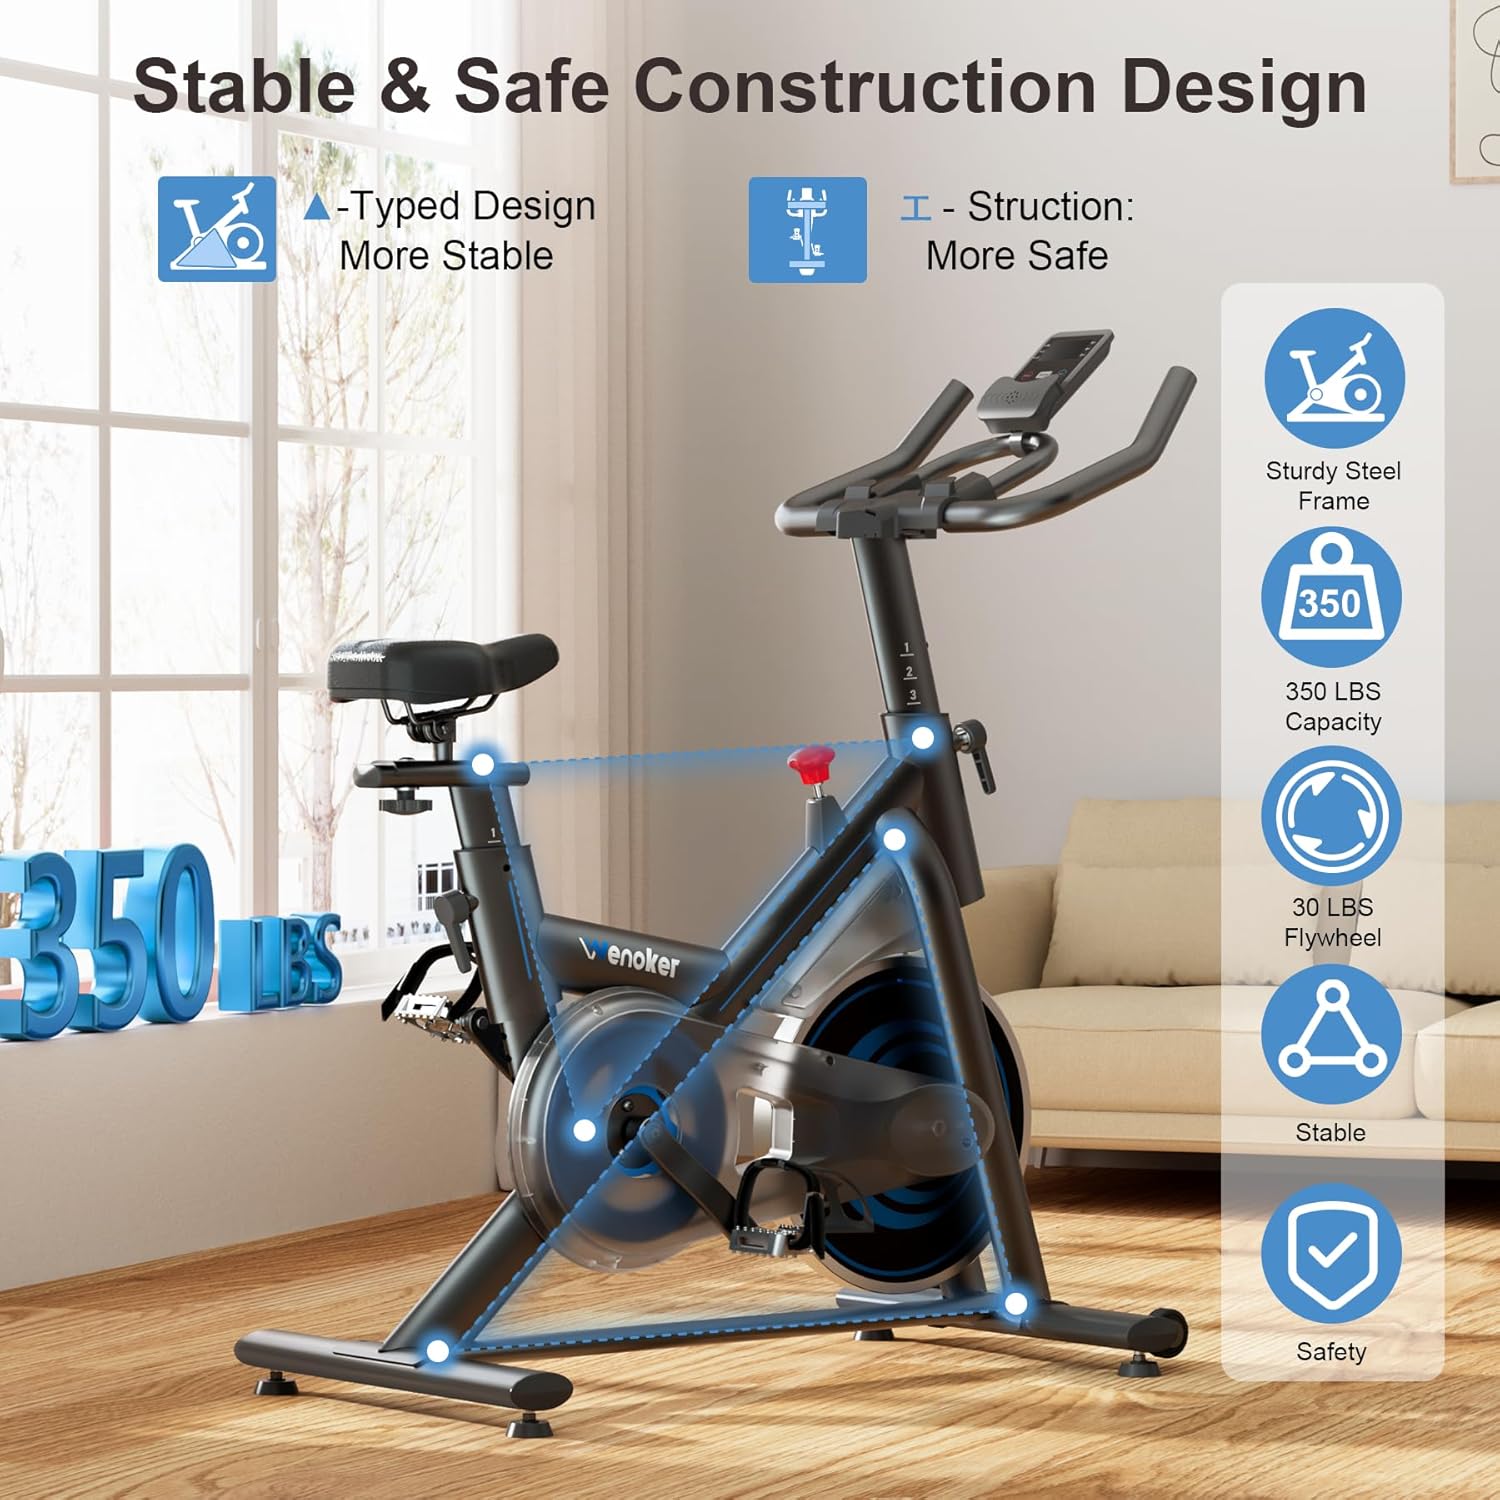
Image: The red resistance knob, indicating clockwise for increased resistance and counter-clockwise for decreased resistance, with a 'PUSH TO STOP' function.
App Connectivity
The bike supports connectivity with popular fitness applications like Zwift and Kinomap. Download the desired app on your smartphone or tablet and follow the app's instructions to pair with your exercise bike via Bluetooth. This allows for real-time data tracking and interactive workout experiences.

Image: A user exercising on the bike with a tablet displaying a fitness app, illustrating the app connectivity feature.
Maintenance
Regular maintenance ensures the longevity and safe operation of your Wenoker Magnetic Exercise Bike.
Cleaning
- Wipe down the bike with a damp cloth after each use to remove sweat and dust.
- Avoid using abrasive cleaners or solvents that could damage the finish.
Regular Checks
- Periodically check all nuts and bolts to ensure they are tight.
- Inspect pedals and straps for wear and tear. Replace if necessary.
- Ensure the seat and handlebar adjustment mechanisms function smoothly.
- Check the stability of the bike on its leveling feet.
Troubleshooting
Refer to this section for solutions to common issues.
| Problem | Possible Cause | Solution |
|---|---|---|
| Bike is noisy during operation. | Loose bolts or components; worn belt. | Check and tighten all visible bolts. If noise persists, contact customer support. |
| LCD monitor not displaying. | Dead batteries; loose connection. | Replace batteries in the monitor. Check the connection cable from the sensor to the monitor. |
| Resistance adjustment not working. | Resistance knob not properly engaged; internal mechanism issue. | Ensure the resistance knob is fully engaged. If the issue continues, contact customer support. |
| Bike feels unstable or wobbles. | Uneven floor; loose stabilizer bars. | Adjust the leveling feet on the stabilizer bars. Ensure stabilizer bar bolts are tight. |
Specifications
Detailed technical specifications for the Wenoker Magnetic Exercise Bike.
| Feature | Detail |
|---|---|
| Brand | Wenoker |
| Model Number | 51-VIP3-KFF6 |
| Special Features | Adjustable Footstrap, Adjustable Pedal, Adjustable Seat, App Connectivity, Console Display |
| Color | Blue |
| Power Source | Battery Powered |
| Recommended Uses | Indoor |
| Material | Alloy Steel |
| Resistance Mechanism | Magnetic |
| Product Dimensions | 37.4"D x 7.48"W x 29.92"H |
| Maximum Weight Recommendation | 350 Pounds |
| Drive System | Belt |
Warranty and Customer Support
For specific warranty details, please refer to the warranty card included with your product or visit the official Wenoker website. If you encounter any issues or have questions not covered in this manual, please contact Wenoker customer support.
Customer Support: Refer to your purchase documentation or the Wenoker brand store on Amazon for contact information.
Visit the Wenoker Store on Amazon


