
1. Introduction
Thank you for choosing the Prym Steamer 1200W Handheld Garment Steamer. This device is designed for quick and efficient wrinkle removal from various fabrics, offering convenience for daily use and travel. Please read this manual carefully before operating the steamer to ensure safe and optimal performance. Keep this manual for future reference.
2. Important Safety Instructions
WARNING: To reduce the risk of fire, electric shock, or injury, always follow basic safety precautions when using electrical appliances.
- Read all instructions before use.
- Do not immerse the steamer or its cord in water or other liquids.
- Always unplug the appliance from the electrical outlet when filling with water, emptying, or when not in use.
- Do not operate the steamer with a damaged cord or plug, or if the appliance has been dropped or damaged.
- Keep the steam head away from your body and hands during operation. Steam is hot and can cause burns.
- Use only distilled or demineralized water to prevent mineral buildup.
- Never direct steam at people or pets.
- This appliance is not intended for use by persons (including children) with reduced physical, sensory or mental capabilities, or lack of experience and knowledge, unless they have been given supervision or instruction concerning use of the appliance by a person responsible for their safety.
- Children should be supervised to ensure that they do not play with the appliance.
- Do not leave the steamer unattended while it is plugged in or operating.
- Always place the steamer on a stable, heat-resistant surface.
3. Package Contents
Upon unpacking, please ensure all items listed below are present and in good condition:
- Prym Steamer 1200W Handheld Unit
- Detachable Water Tank (230ml capacity)
- Fabric Brush Attachment
- Instruction Manual

Figure 1: Prym Steamer with its detachable water tank shown separately. This image illustrates how to access and refill the tank.
4. Product Overview and Features
The Prym Steamer is a powerful and compact device designed for efficient garment care. Key features include:
- 1200W Power: Ensures quick heating and strong steam output.
- Ceramic Soleplate: Gentle on all fabrics, providing smooth gliding.
- 230ml Water Tank: Provides up to 15 minutes of continuous steam.
- Quick Heat-up: Ready to use in approximately 30 seconds.
- Anti-Drip System: Prevents water leakage and protects delicate textiles.
- Automatic Shut-off: Enhances safety by turning off when water is low or not in use.
- Fabric Brush Attachment: Helps remove lint, dust, and pet hair.
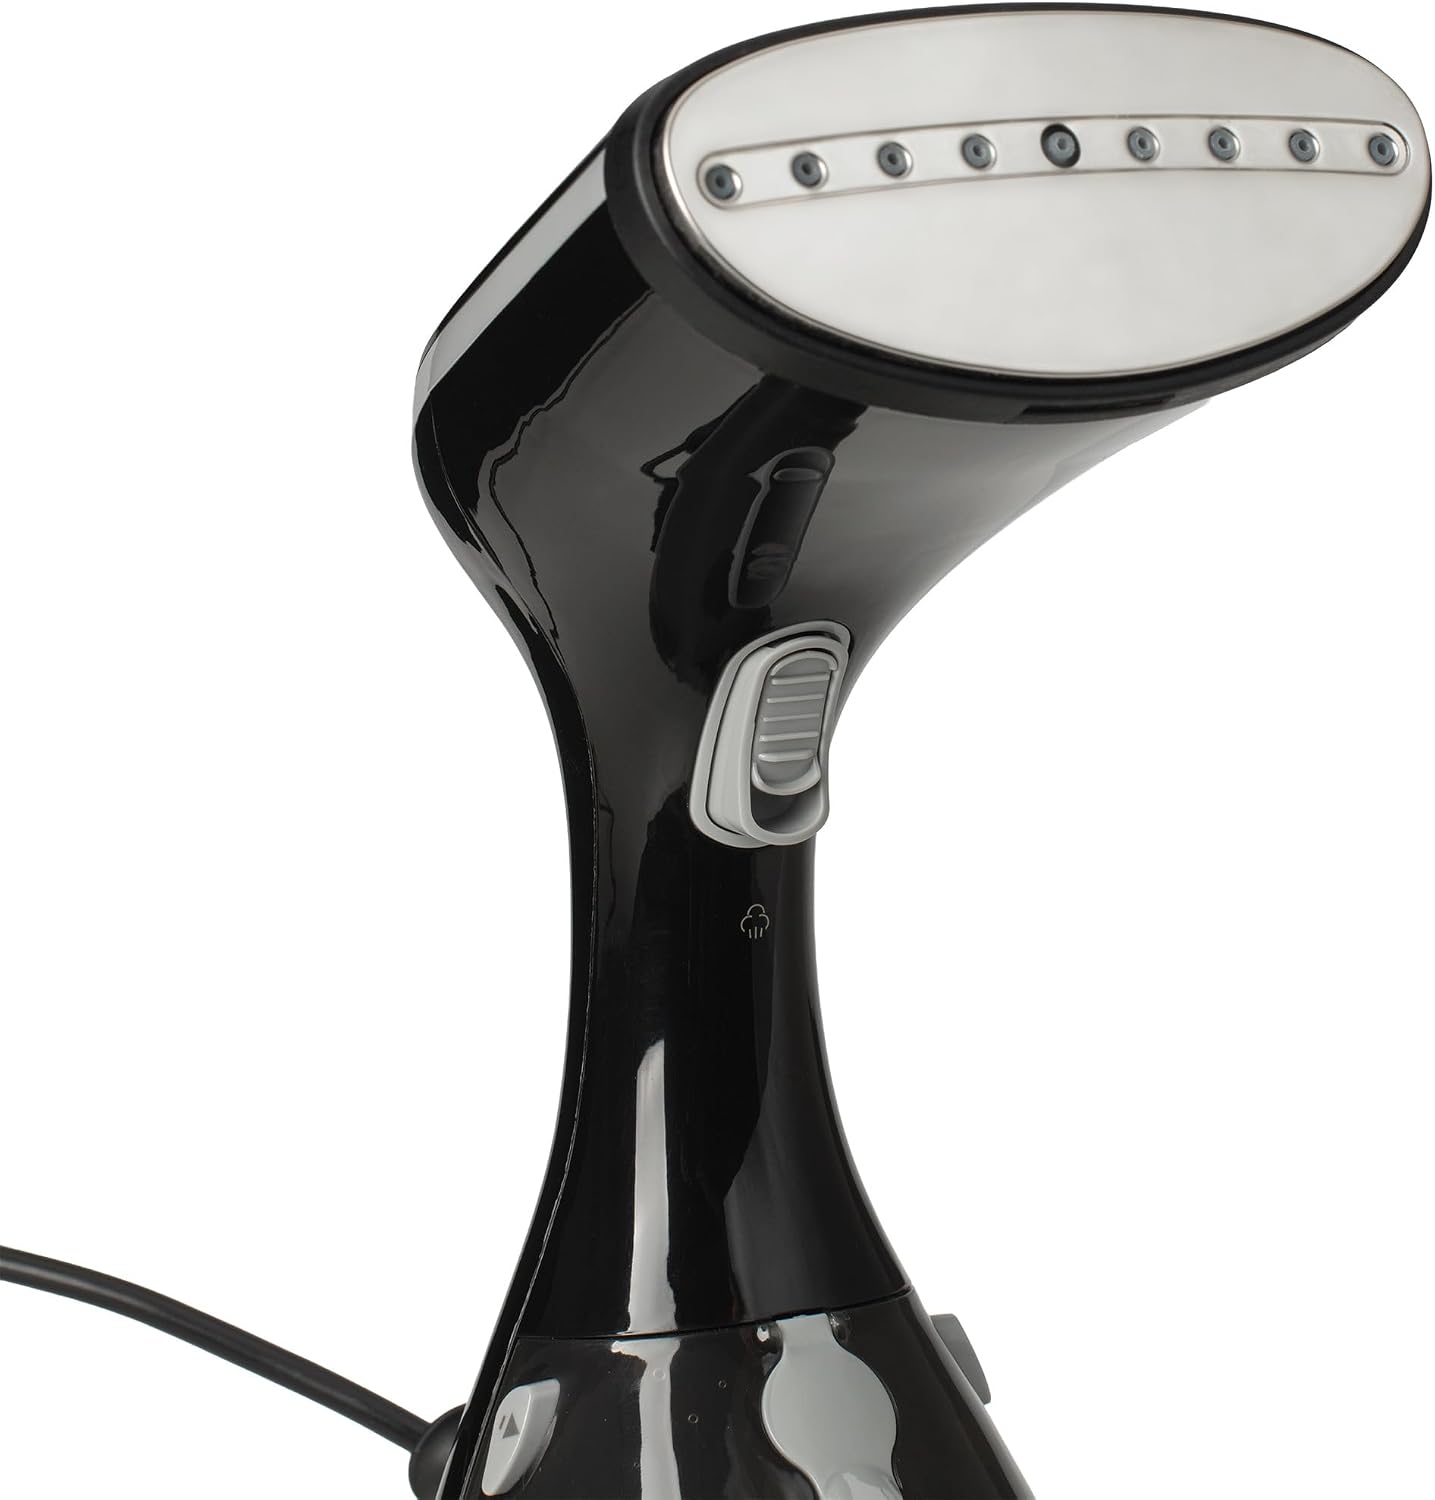
Figure 2: Close-up view of the Prym Steamer's ceramic soleplate and steam vents. This image shows the steam vents and the integrated fabric brush attachment.

Figure 3: Diagram illustrating key features of the Prym Steamer including wattage, tank size, auto-off, anti-drip, and quick heat-up.
5. Setup
- Unpack: Carefully remove all components from the packaging.
- Fill Water Tank:
- Ensure the steamer is unplugged.
- Remove the water tank from the main unit (refer to Figure 1).
- Open the rubber stopper on the tank.
- Fill the tank with distilled or demineralized water up to the MAX fill line. Do not overfill.
- Close the rubber stopper securely and reattach the water tank to the steamer unit until it clicks into place.
- Attach Fabric Brush (Optional): If desired, align the fabric brush attachment with the steamer head and press firmly until it locks into position.
- Position Garment: Hang the garment you wish to steam on a hanger. Ensure there is enough space around the garment for steam application.
6. Operating Instructions
- Plug In: Plug the steamer into a suitable electrical outlet (220V). The indicator light will illuminate, indicating the steamer is heating up.
- Heat-up Time: The steamer will be ready for use in approximately 30 seconds. The indicator light may change or turn off once ready, depending on the model.
- Start Steaming: Hold the steamer upright, ensuring the steam head is facing away from you. Press and hold the steam trigger button to release steam.
- Steam Garment: Hold the fabric taut with one hand and move the steamer head slowly over the fabric in a vertical motion, from top to bottom. For stubborn wrinkles, hold the steamer in place for a few seconds.
- Using the Fabric Brush: The fabric brush helps to open fabric weaves for better steam penetration and removes lint or pet hair. Use it by gently brushing the fabric while steaming.
- Continuous Steam: The 230ml water tank provides up to 15 minutes of continuous steam. If more time is needed, unplug the steamer, allow it to cool slightly, and refill the water tank as described in the Setup section.
- Finish Steaming: Release the steam trigger button to stop steaming.
- Automatic Shut-off: The steamer will automatically turn off if the water tank runs dry or if it remains inactive for a period, enhancing safety.
- Unplug: Once finished, unplug the steamer from the electrical outlet.

Figure 4: A hand holding the Prym Steamer, demonstrating its ergonomic design and ease of use during operation.
7. Maintenance and Cleaning
Regular maintenance ensures the longevity and optimal performance of your Prym Steamer.
- After Each Use:
- Unplug the steamer and allow it to cool completely (at least 30 minutes).
- Remove the water tank and empty any remaining water.
- Wipe the exterior of the steamer with a soft, damp cloth. Do not use abrasive cleaners.
- Ensure the steam vents are clear of any lint or debris.
- Descaling (Monthly or as needed): If you notice reduced steam output or mineral residue, descaling may be necessary.
- Mix a solution of 50% white vinegar and 50% water.
- Fill the water tank with this solution.
- Plug in the steamer and allow it to heat up.
- Run the steamer until the tank is empty, directing steam into a sink or basin.
- Repeat the process with clean distilled water to rinse out any vinegar residue.
- Storage: Store the steamer in a cool, dry place, away from direct sunlight. Ensure the water tank is empty before storage.
8. Troubleshooting
If you encounter issues with your Prym Steamer, please refer to the following common problems and solutions:
| Problem | Possible Cause | Solution |
|---|---|---|
| No steam or low steam output |
|
|
| Water leaking from steam head |
|
|
| Steamer not turning on |
|
|
9. Specifications
- Model Number: 611955
- Brand: Prym
- Power: 1200 Watts
- Voltage: 220 Volts
- Water Tank Capacity: 230 Milliliters
- Heat-up Time: Approximately 30 Seconds
- Item Weight: 1.13 Kilograms
- Color: Black
- Style: Handheld
10. Warranty and Support
Prym products are manufactured to high-quality standards. For information regarding warranty coverage, please refer to the warranty card included with your purchase or contact your retailer. For technical support or service inquiries, please contact Prym customer service through their official website or the contact information provided with your product documentation.