
VISTAGET Golvia Pro
VISTAGET Golvia Pro Golf Rangefinder User Manual
Model: Golvia Pro
Introduction
The VISTAGET Golvia Pro Golf Rangefinder is designed to provide accurate distance measurements for golf and other outdoor activities. Featuring an advanced OLED screen, 7X magnification, and various measurement modes, this device enhances precision and confidence on the course. It includes a rechargeable battery, magnetic mount, and is resistant to rain and fog.
Package Contents
Upon unboxing, please ensure all the following items are present:
- Laser Rangefinder
- Rangefinder Pouch
- Magnetic Belt Clip
- Charging Cable (USB-C)
- User Manual
- Mountaineering Buckle
- Hand Rope
- Lens Cloth

Setup
1. Charging the Device
The Golvia Pro Rangefinder is equipped with a 1000mAh Lithium-Ion Polymer battery. Before first use, fully charge the device using the provided USB-C charging cable. The charging port is located on the side of the device, typically covered by a protective flap.

2. Powering On/Off
To power on the device, short press the Power Button (marked with a power symbol). The display will activate. The device features an auto power-off function after 15 seconds of inactivity to conserve battery life.
3. Adjusting Focus
Rotate the eyepiece until the display appears clear and sharp to your vision. This ensures optimal readability of measurements.

Operating Modes
The Golvia Pro Rangefinder offers multiple modes for various measurement needs. Use the Mode Button (marked 'M') to switch between modes.
1. Golf Mode (Flag Lock with Slope)
This mode is ideal for golf, providing both straight-line distance and slope-adjusted distance. The device can lock onto a flag and vibrate to confirm the target.
- Activate Golf Mode: Short press the 'M' button until the Golf Mode icon (typically a flag or golf-related symbol) appears on the display.
- Measure Straight-Line Distance: Aim at the target and short press the Power Button. The straight-line distance will be displayed.
- Toggle Slope: Use the Slope Switch (marked 'S') to turn slope compensation ON or OFF. When ON, the indicator light will turn red, and the display will show the slope-adjusted distance. This feature can be turned OFF for tournament legal play.
- Flag Lock with Vibration: To lock onto a flag, aim at the flag and long press the Power Button. The device will vibrate to confirm flag acquisition and display both the straight-line distance and the slope-adjusted distance (if slope is enabled).


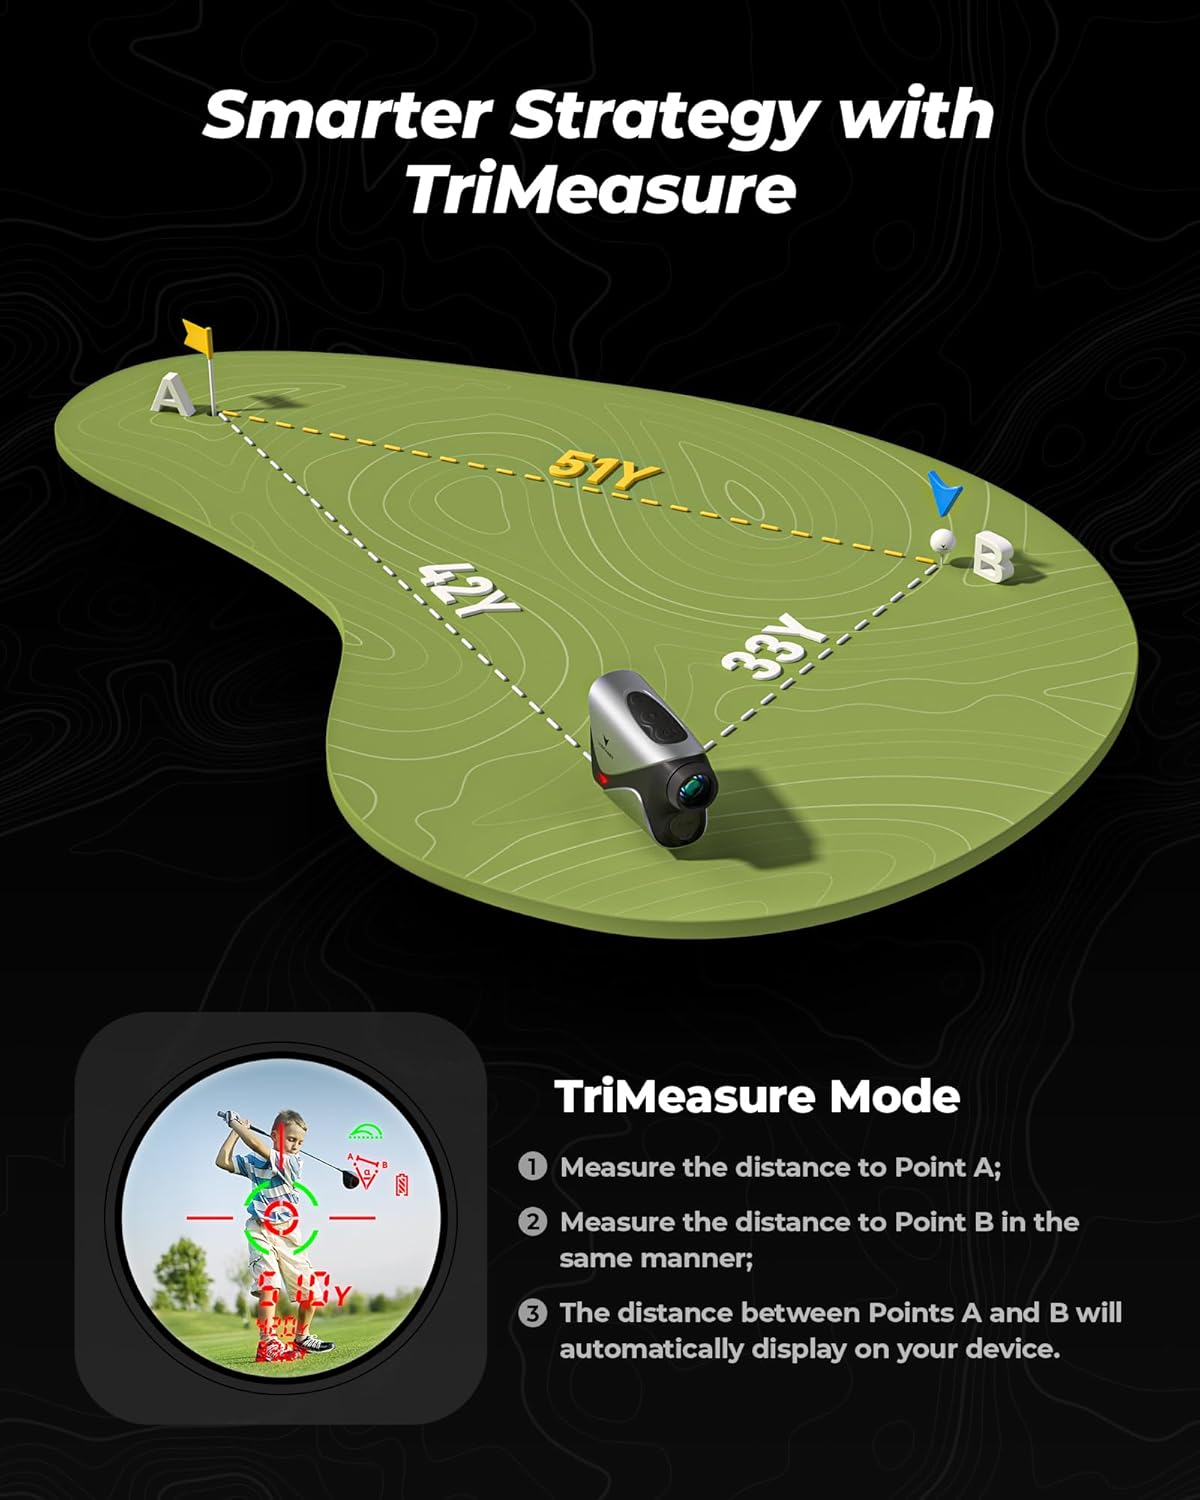
2. TriMeasure Mode (Triangle Tech)
This advanced mode allows you to measure the distance between two points (A and B) by taking two separate measurements from your current position. This is useful for strategic planning on the course.
- Activate TriMeasure Mode: Short press the 'M' button until the TriMeasure icon (a triangle with points A and B) appears.
- Measure Point A: Aim at the first target (Point A) and short press the Power Button. The distance to Point A will be displayed.
- Measure Point B: Aim at the second target (Point B) and short press the Power Button. The distance to Point B will be displayed, and the device will automatically calculate and display the distance between Point A and Point B.
3. Distance Ranging Mode
This is the standard mode for measuring straight-line distances to any target. It supports both single measurements and continuous scanning.
- Activate Distance Mode: Short press the 'M' button until the Distance Mode icon (typically a simple crosshair) appears.
- Single Measurement: Aim at the target and short press the Power Button for a quick distance reading.
- Continuous Scan: Long press and hold the Power Button to continuously scan multiple points. The distance will update in real-time as you move the crosshair across different targets.
Settings
To access and adjust device settings, long press the 'M' button.
- Adjust Brightness: While in settings, short press the Power Button to cycle through 4 levels of display brightness. Select the desired brightness for optimal visibility in various lighting conditions.
- Switch Units: While in settings, short press the 'M' button to switch between Yards (Y) and Meters (M).
- Rain/Fog Mode: While in settings, short press the 'M' button again to toggle Rain/Fog mode ON or OFF. This mode helps improve measurement accuracy in adverse weather conditions.
- Exit Settings: Press the 'M' button once more after making adjustments to exit the settings menu.

Maintenance
- Cleaning: Use the provided lens cloth to gently clean the lenses. For the body, wipe with a soft, dry cloth. Avoid abrasive materials or harsh chemicals.
- Storage: Store the rangefinder in its protective pouch when not in use. Keep it in a cool, dry place away from direct sunlight and extreme temperatures.
- Battery Care: Recharge the device regularly, even if not used frequently, to maintain battery health. Avoid fully discharging the battery for extended periods.
- Water Resistance: The device has an IP54 rating, meaning it is resistant to splashes of water and dust. It is not designed for submersion. Dry the device thoroughly if it gets wet.
Troubleshooting
| Problem | Possible Cause | Solution |
|---|---|---|
| Device does not power on. | Low battery. | Charge the device using the USB-C cable. |
| Display is blurry. | Eyepiece out of focus. | Rotate the eyepiece to adjust focus until the display is clear. |
| Inaccurate measurements. | Obstruction, poor weather, or incorrect mode. | Ensure a clear line of sight. Activate Rain/Fog mode in adverse conditions. Verify correct operating mode. |
| Flag Lock not working. | Target too far, unstable hand, or multiple targets. | Ensure the flag is within range. Keep the device steady. Try scanning around the flag to isolate it. |
Specifications
- Brand: VISTAGET
- Model Name: Golvia Pro
- Measuring Range: 1200 yards
- Magnification: 7X
- Accuracy: ±0.5Y
- Display: OLED Screen with 4-level brightness control
- Features: Triangle Tech, Slope On/Off, Flag Lock Vibration, Magnetic Mount
- Battery: 1000mAh Lithium-Ion Polymer (Rechargeable via USB-C)
- Water Resistance: IP54 (Rain & Fog Resistant)
- Material: Aluminum, Silicone
- Item Weight: 6.88 ounces
- Product Dimensions: 4.2"L x 1.6"W x 2.8"H
Warranty and Support
The VISTAGET Golvia Pro Golf Rangefinder comes with a 2-year warranty. VISTAGET also provides lifetime customer support for any inquiries or assistance you may need. For support, please refer to the contact information provided in your product packaging or visit the official VISTAGET website.

Official Product Videos
Watch these official videos from VISTAGET for a visual guide on using your Golvia Pro Rangefinder.
Video 1: "How to use your Golvia Pro rangefinder" - A comprehensive guide from VISTAGET on operating the device's various features and modes.
Video 2: "VISTAGET Golvia Pro Golf Rangefinder Unboxing & First Look" - An unboxing experience and initial overview of the Golvia Pro Rangefinder by VISTAGET.
Video 3: "VISTAGET Golvia Pro Rangefinder" - A brief promotional video showcasing the VISTAGET Golvia Pro Rangefinder's key features.
Video 4: "VISTAGET Golvia Pro: Never Let Light Limit Your Shot." - A video highlighting the OLED display's performance in various lighting conditions.
Related documentsGolvia Pro

Ask a question about this manual
Ask about setup, troubleshooting, compatibility, parts, safety, or missing instructions. Manuals+ will review the question and use this page’s manual context to help answer it.