
1. Introduction
Thank you for choosing the Breezary 84 Inch Industrial Ceiling Fan with Light and Remote. This manual provides essential information for the safe installation, operation, and maintenance of your new ceiling fan. Please read these instructions thoroughly before installation and retain them for future reference.

Image 1.1: Breezary 84 Inch Industrial Ceiling Fan in a living room setting.
This 84-inch ceiling fan is designed for large spaces, featuring 10 dual-finish blades, a 6-speed reversible DC motor, and an integrated 3CCT LED light. It includes a multi-function remote control for convenient operation.
2. Safety Information
Always follow basic safety precautions when installing and operating this appliance to reduce the risk of fire, electric shock, and personal injury.
- Read all instructions: Before beginning installation, read all instructions and safety information.
- Electrical Safety: All electrical wiring must be performed by a qualified electrician and conform to local codes and national electrical codes. Disconnect power at the main circuit breaker before installation or servicing.
- Mounting: The mounting structure must be capable of supporting the weight of the fan (approximately 30 lbs) plus the dynamic load of the fan in motion.
- Blade Clearance: Ensure there is adequate clearance from the blades to any obstructions. A minimum of 7 feet (2.13 meters) from the floor to the blade trailing edge is recommended.
- Downrod Usage: Use only the provided downrods (6", 12", 24") or approved extensions.
- Light Source: The integrated LED light is not dimmable and does not have a memory function. Do not attempt to replace the LED module yourself; contact qualified service personnel.
- Remote Control: Keep the remote control away from water and extreme temperatures.
3. Package Contents
Verify that all components are present and undamaged before proceeding with installation. If any parts are missing or damaged, contact customer support.
- Ceiling Fan Motor Housing
- Fan Blades (10)
- Downrods (6", 12", 24")
- Mounting Bracket
- Canopy
- LED Light Kit
- Remote Control with Wall Mount
- Mounting Hardware (screws, wire nuts, washers)
- Instruction Manual
4. Specifications
| Feature | Specification |
|---|---|
| Model Number | 35086-BLACK |
| Fan Size | 84 inches |
| Number of Blades | 10 |
| Motor Type | DC Motor |
| Fan Speeds | 6 |
| Noise Level | Under 35 dB |
| Light Type | Integrated 24W LED |
| Color Temperature (CCT) | 3000K (Warm), 4000K (Natural), 6000K (Cool White) |
| Light Dimmable | No |
| Remote Control | Yes, Multi-function |
| Timer Function | 1H, 2H, 4H |
| Reversible Airflow | Yes |
| Downrod Lengths Included | 6", 12", 24" |
| Sloped Ceiling Compatibility | Up to 12° |
| Recommended Room Size | Over 400 sq. ft. |
| Weight | Approximately 30 lbs |
| Materials | Acrylic, Engineered Wood, Metal |

Image 4.1: Fan dimensions, downrod options, and room size recommendation.
5. Setup and Installation
Professional installation is recommended. Ensure power is disconnected at the circuit breaker before beginning. Refer to the included wiring diagram for electrical connections.
5.1 Mounting the Fan
- Secure the Mounting Bracket: Attach the mounting bracket to a ceiling joist or an outlet box rated for ceiling fan support. Use appropriate hardware.
- Assemble Downrod: Select the desired downrod (6", 12", or 24") based on your ceiling height. For ceilings 10 to 13 feet high, longer downrods are generally preferred. Feed the electrical wires through the downrod.
- Attach Downrod to Motor: Secure the downrod to the fan motor housing.
- Hang the Fan: Carefully lift the fan assembly and hang it on the mounting bracket.
5.2 Wiring Connections
Connect the fan's electrical wires to the household wiring according to the provided wiring diagram. Ensure all connections are secure and insulated with wire nuts.
5.3 Attaching Blades
Attach the 10 fan blades to the motor housing using the provided screws. The blades are dual-finish, allowing you to choose between matte black or a wood grain appearance.
5.4 Installing the Light Kit
Connect the LED light kit wires to the fan's light kit wires. Secure the light kit to the bottom of the fan motor housing.
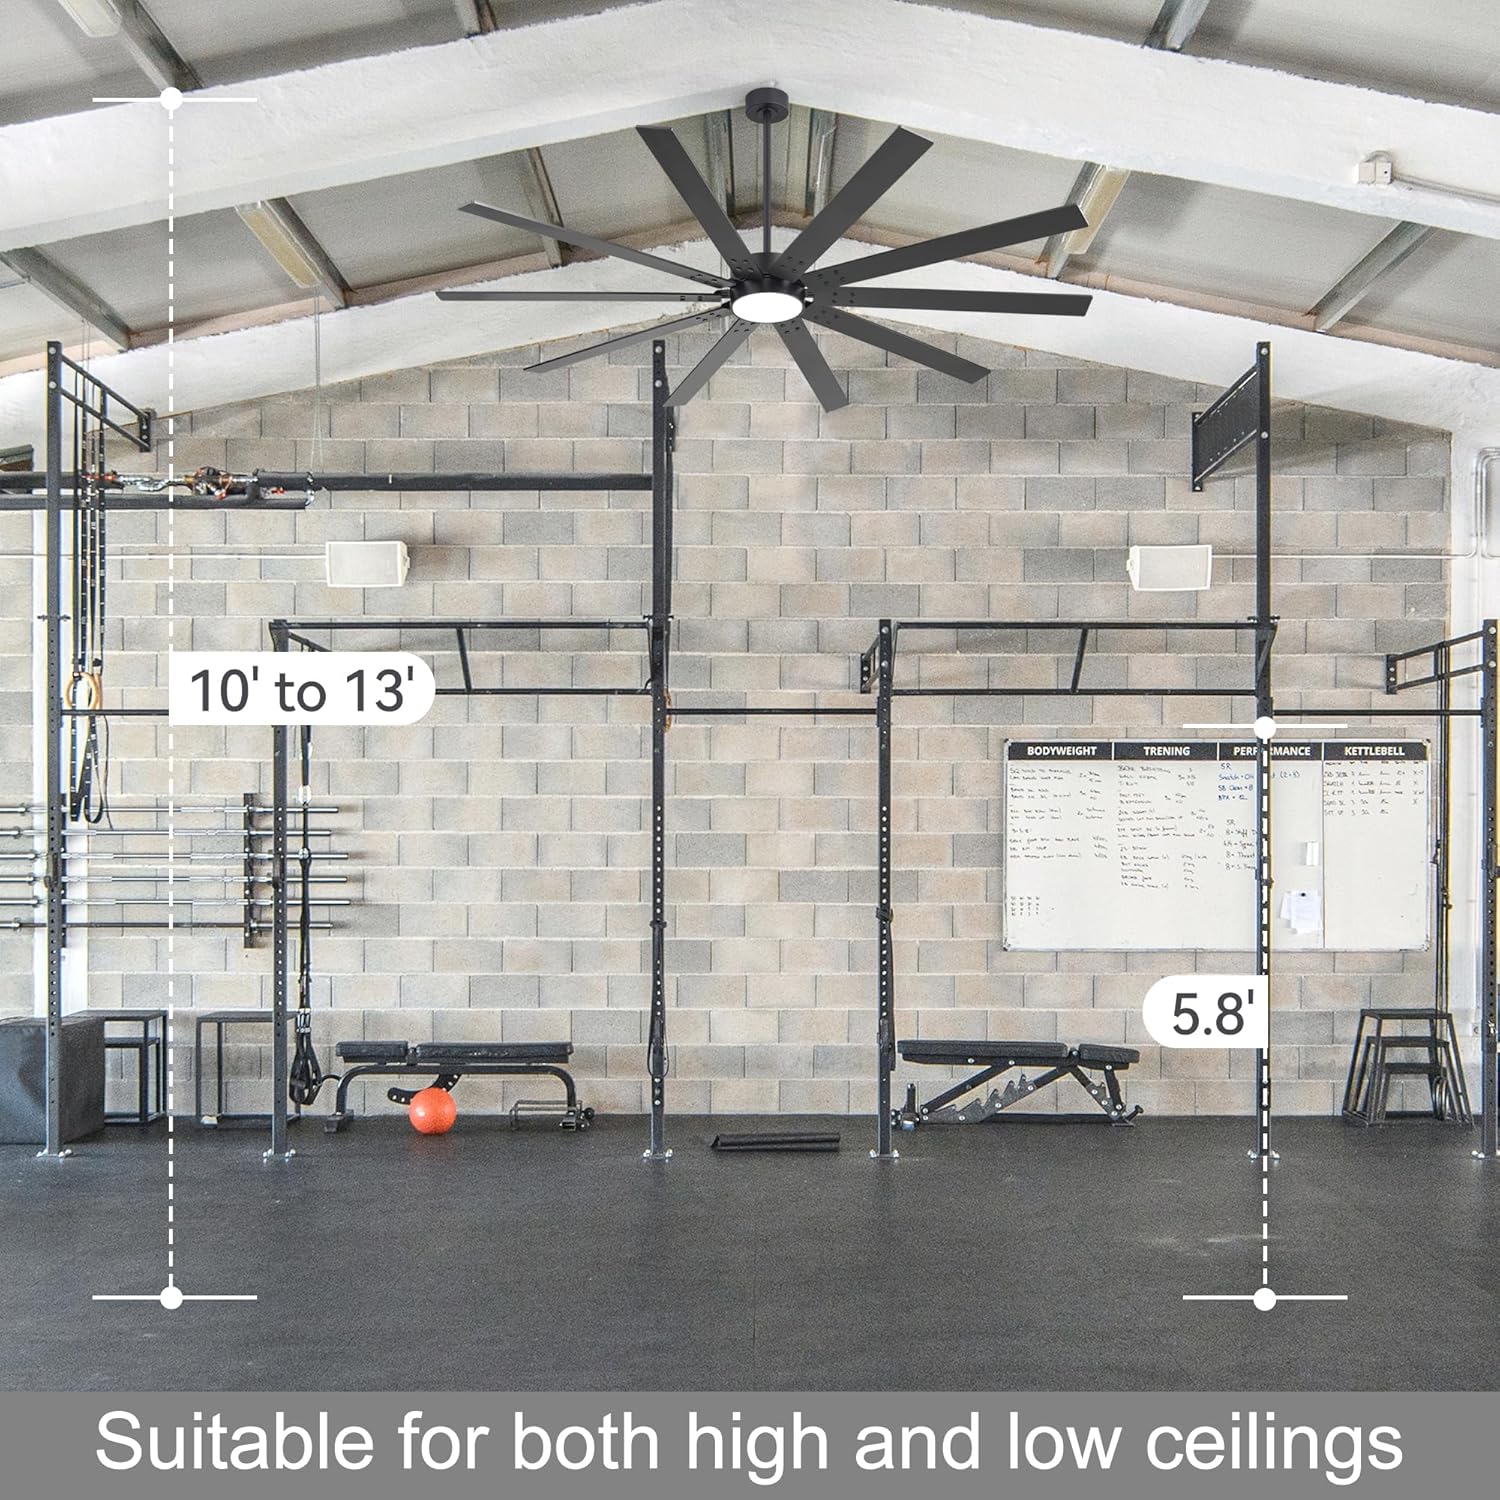
Image 5.1: Fan suitability for various ceiling heights.
6. Operating Instructions
Your Breezary ceiling fan is operated using the included multi-function remote control.
6.1 Remote Control Functions

Image 6.1: Remote control layout and functions.
- ALL OFF: Turns off both the fan and the light.
- LIGHT ON/OFF: Toggles the light on or off.
- Buzzer Mute: Turns off the beep sound from the remote for quiet operation.
- Fan Speeds (1-6): Adjusts the fan speed from 1 (lowest) to 6 (highest).
- Speed 1-2: Low comfortable wind, ideal for sleep.
- Speed 3-4: Medium natural wind, suitable for work.
- Speed 5-6: High cooling wind, for active environments.
- Forward Rotating (F): Sets the fan to rotate clockwise, pushing air downwards for a cooling effect (Summer Mode).
- Reversal Rotating (R): Sets the fan to rotate counter-clockwise, drawing air upwards to circulate warm air (Winter Mode).
- Timer (1H, 2H, 4H): Sets the fan to turn off automatically after 1, 2, or 4 hours.

Image 6.2: Fan speed settings.
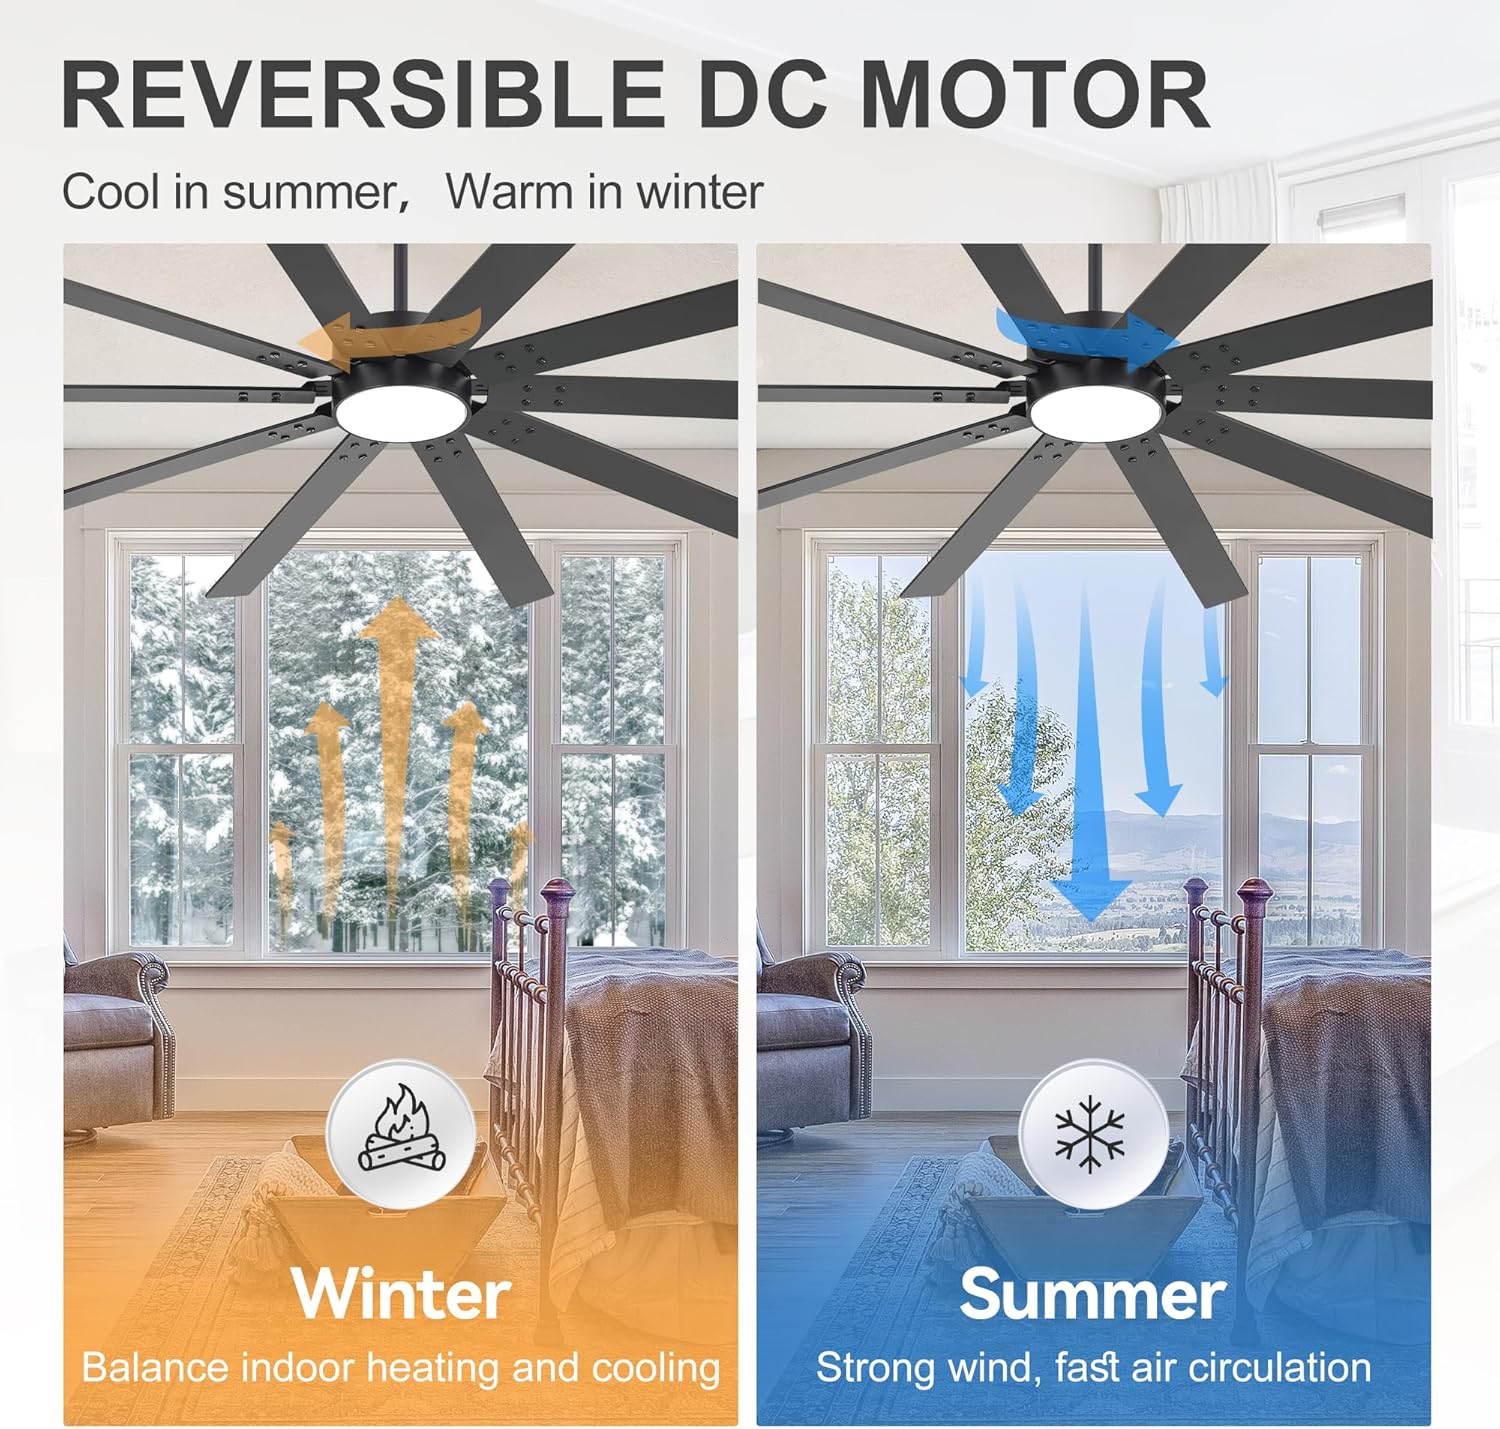
Image 6.3: Reversible DC motor for year-round comfort.
6.2 Light Operation
The integrated 24W LED light offers three color temperature options: 3000K (Warm Light), 4000K (Natural Light), and 6000K (Cool White Light). Press the light button on the remote to cycle through these options. Note that the light is not dimmable and does not retain the last color temperature setting after being turned off.

Image 6.4: 3 Color Temperature (CCT) options.
6.3 Quiet Operation
The fan features a quiet DC motor, operating at under 35 dB, ensuring minimal noise disturbance during use.

Image 6.5: Noise level comparison.
7. Maintenance
Regular maintenance ensures the longevity and optimal performance of your ceiling fan.
- Cleaning: To clean the fan, wipe the blades and motor housing with a soft, damp cloth. Do not use abrasive cleaners or solvents, as these can damage the finish.
- Dusting: Periodically dust the fan blades and light kit to prevent dust buildup, which can affect performance and light output.
- Tighten Fasteners: Check all screws and fasteners on the fan and mounting hardware periodically to ensure they are secure. Loose connections can cause noise or wobble.
- No Lubrication Needed: The DC motor is permanently lubricated and does not require oiling.
Always ensure the power is turned off at the circuit breaker before performing any cleaning or maintenance.
8. Troubleshooting
If you experience issues with your ceiling fan, refer to the following common problems and solutions:
| Problem | Possible Cause | Solution |
|---|---|---|
| Fan does not start | No power to the fan; Loose wire connections; Remote control battery low or not paired. | Check circuit breaker and wall switch; Verify all wire connections are secure; Replace remote battery or re-pair remote (refer to remote pairing instructions if available). |
| Light does not work | Loose wire connection to light kit; Faulty LED module. | Check light kit wiring connections; Contact customer support if LED module is faulty. |
| Fan wobbles | Loose blade screws; Unbalanced blades; Loose mounting bracket. | Ensure all blade screws are tight; Use a balancing kit (not included) if necessary; Tighten mounting bracket screws. |
| Remote control not responding | Low or dead battery; Remote not paired with fan; Obstruction between remote and receiver. | Replace remote battery; Re-pair remote with fan (if applicable); Ensure clear line of sight to fan. |
| Fan makes excessive noise | Loose screws; Motor hum (normal for DC motors); Blades hitting an obstruction. | Check and tighten all screws; Ensure no obstructions are near blades; If noise persists, contact customer support. |
9. Warranty and Customer Support
For warranty information, please refer to the documentation included with your purchase or contact the retailer. Breezary is committed to customer satisfaction.
Our dedicated and responsive customer service team is available 24/7 to assist you. Should you encounter any issues during installation or usage, please do not hesitate to reach out. We are committed to addressing your concerns promptly and ensuring your complete satisfaction.
Contact Information: Please refer to your purchase receipt or the manufacturer's website for the most current customer support contact details.