
1. Introduction
Thank you for choosing the Husgw 12V15A 24V8A Smart Car Battery Charger. This intelligent battery charger is designed to provide efficient and safe charging for a wide range of battery types, including 12V (2Ah-200Ah) and 24V (2Ah-100Ah) lead-acid batteries, ternary lithium batteries, and LiFePO4 batteries. It is suitable for various vehicles such as cars, motorcycles, SUVs, and other mobile equipment. This manual provides essential information for the safe and effective use of your charger.

Image 1.1: The Husgw 12V15A 24V8A Smart Car Battery Charger, featuring a red and black casing with a digital display, connected to red and black alligator clips.
2. Safety Instructions
Please read and understand all safety instructions before using the charger. Failure to follow these instructions may result in electric shock, fire, or serious injury.
- Ventilation: Ensure the charging area is well-ventilated. Do not operate the charger in a confined area or restrict ventilation.
- Eye and Skin Protection: Always wear eye protection and protective clothing when working near batteries. Batteries can produce explosive gases.
- Avoid Sparks: Do not smoke or allow sparks or flames in the vicinity of the battery or engine.
- Connection Order: Connect the output clips to the battery and chassis in the order specified in the operating instructions. Disconnect in the reverse order.
- Power Disconnection: Disconnect the charger from the power supply before making or breaking connections to the battery.
- Damaged Cables: Do not operate the charger with a damaged cord or plug. Replace immediately.
- Water Exposure: Do not expose the charger to rain or excessive moisture.
- Children: Keep the charger out of reach of children.
- Battery Type: Ensure the charger is set to the correct battery type and voltage before connecting.
- Internal Protection: The charger features multiple built-in protections including anti-reverse connection, anti-short circuit, overcharge protection, overcurrent protection, overtemperature protection, and low voltage protection. However, always exercise caution.

Image 2.1: Visual representation of the charger's six safety protections: Anti-Reverse Connection, Anti-Short Circuit, Overcharge Protection, Overcurrent Protection, Overtemperature Protection, and Low Voltage Protection.
3. Product Overview
3.1. Key Features
- Wide Compatibility: Supports 12V (2Ah-200Ah) and 24V (2Ah-100Ah) lead-acid, ternary lithium, and LiFePO4 batteries.
- Intelligent Charging: Features a 9-stage charging process for optimal battery health and longevity.
- Multi-Mode Operation: Includes modes for Standard (STD), LiFePO4/AGM, Motorcycle (MTO), TKL, and Repair.
- Temperature Compensation: Automatically adjusts charging parameters based on ambient temperature (Winter and Summer modes).
- Pulse Repair Function: Designed to help revive old or sulfated batteries.
- Advanced Safety: Equipped with multiple protections against reverse polarity, short circuits, overcharging, overcurrent, overtemperature, and low voltage.
- Color LCD Display: Provides real-time monitoring of battery voltage, current, charging status, and selected mode.
- Memory Function: Recalls the last used charging mode after a power interruption.

Image 3.1: The charger's display and a summary of its key features, including 5 charging modes, multiple safety protections, intelligent charging management, and pulse repair function.
3.2. Display and Controls
The charger features a clear color LCD display that shows various charging parameters and status indicators. A single 'MODE' button allows selection of charging programs.
- Digital Readout: Displays voltage (V), current (A), and temperature (°C/°F).
- Battery Level Indicator: Graphical representation of battery charge percentage (20%, 40%, 60%, 80%, 100%).
- Mode Indicators: Icons for STD, LiFePO4/AGM, MTO (Motorcycle), TKL, and REPAIR.
- Status Indicators: Recovery, Charge, Full.
- Temperature Modes: Winter (snowflake icon) and Summer (sun icon) indicators.
- MODE Button: Press to cycle through charging modes.

Image 3.2: Detailed view of the smart color LCD display, showing real-time monitoring capabilities including voltage, current, repair status, and battery charge levels.
4. Setup and Connection
4.1. Before You Begin
- Ensure the battery terminals are clean.
- Verify the battery voltage (12V or 24V) and type (Lead-Acid, LiFePO4, etc.).
- Place the charger on a stable, non-flammable surface.
4.2. Connecting the Charger
- Connect the Red Clip: Attach the red positive (+) alligator clip to the positive (+) terminal of the battery.
- Connect the Black Clip: Attach the black negative (-) alligator clip to the negative (-) terminal of the battery. If charging a battery installed in a vehicle, connect the black clip to the vehicle chassis away from the battery and fuel line.
- Connect to Power: Plug the charger's AC power cord into a standard 230V AC electrical outlet.
- The charger will automatically detect the battery voltage and display the current battery status.
Important: Always connect the battery clips before plugging the charger into the AC power outlet. Disconnect in reverse order: unplug from AC, then remove black clip, then remove red clip.
5. Operating Instructions
5.1. Selecting a Charging Mode
After connecting the charger and plugging it into power, the display will show the current battery status. Press the MODE button to cycle through the available charging programs:
- STD (Standard): For standard lead-acid batteries (Wet, MF, Ca/Ca).
- LiFePO4/AGM: For LiFePO4 batteries and AGM batteries.
- MTO (Motorcycle): Optimized for motorcycle batteries (typically smaller 12V batteries).
- TKL: (Specific mode, details not provided in source, assume general purpose or specific lead-acid variant).
- REPAIR: For desulfation and recovery of deeply discharged or sulfated batteries.
The charger will automatically detect ambient temperature and switch between Winter (snowflake icon) and Summer (sun icon) modes to optimize charging performance.
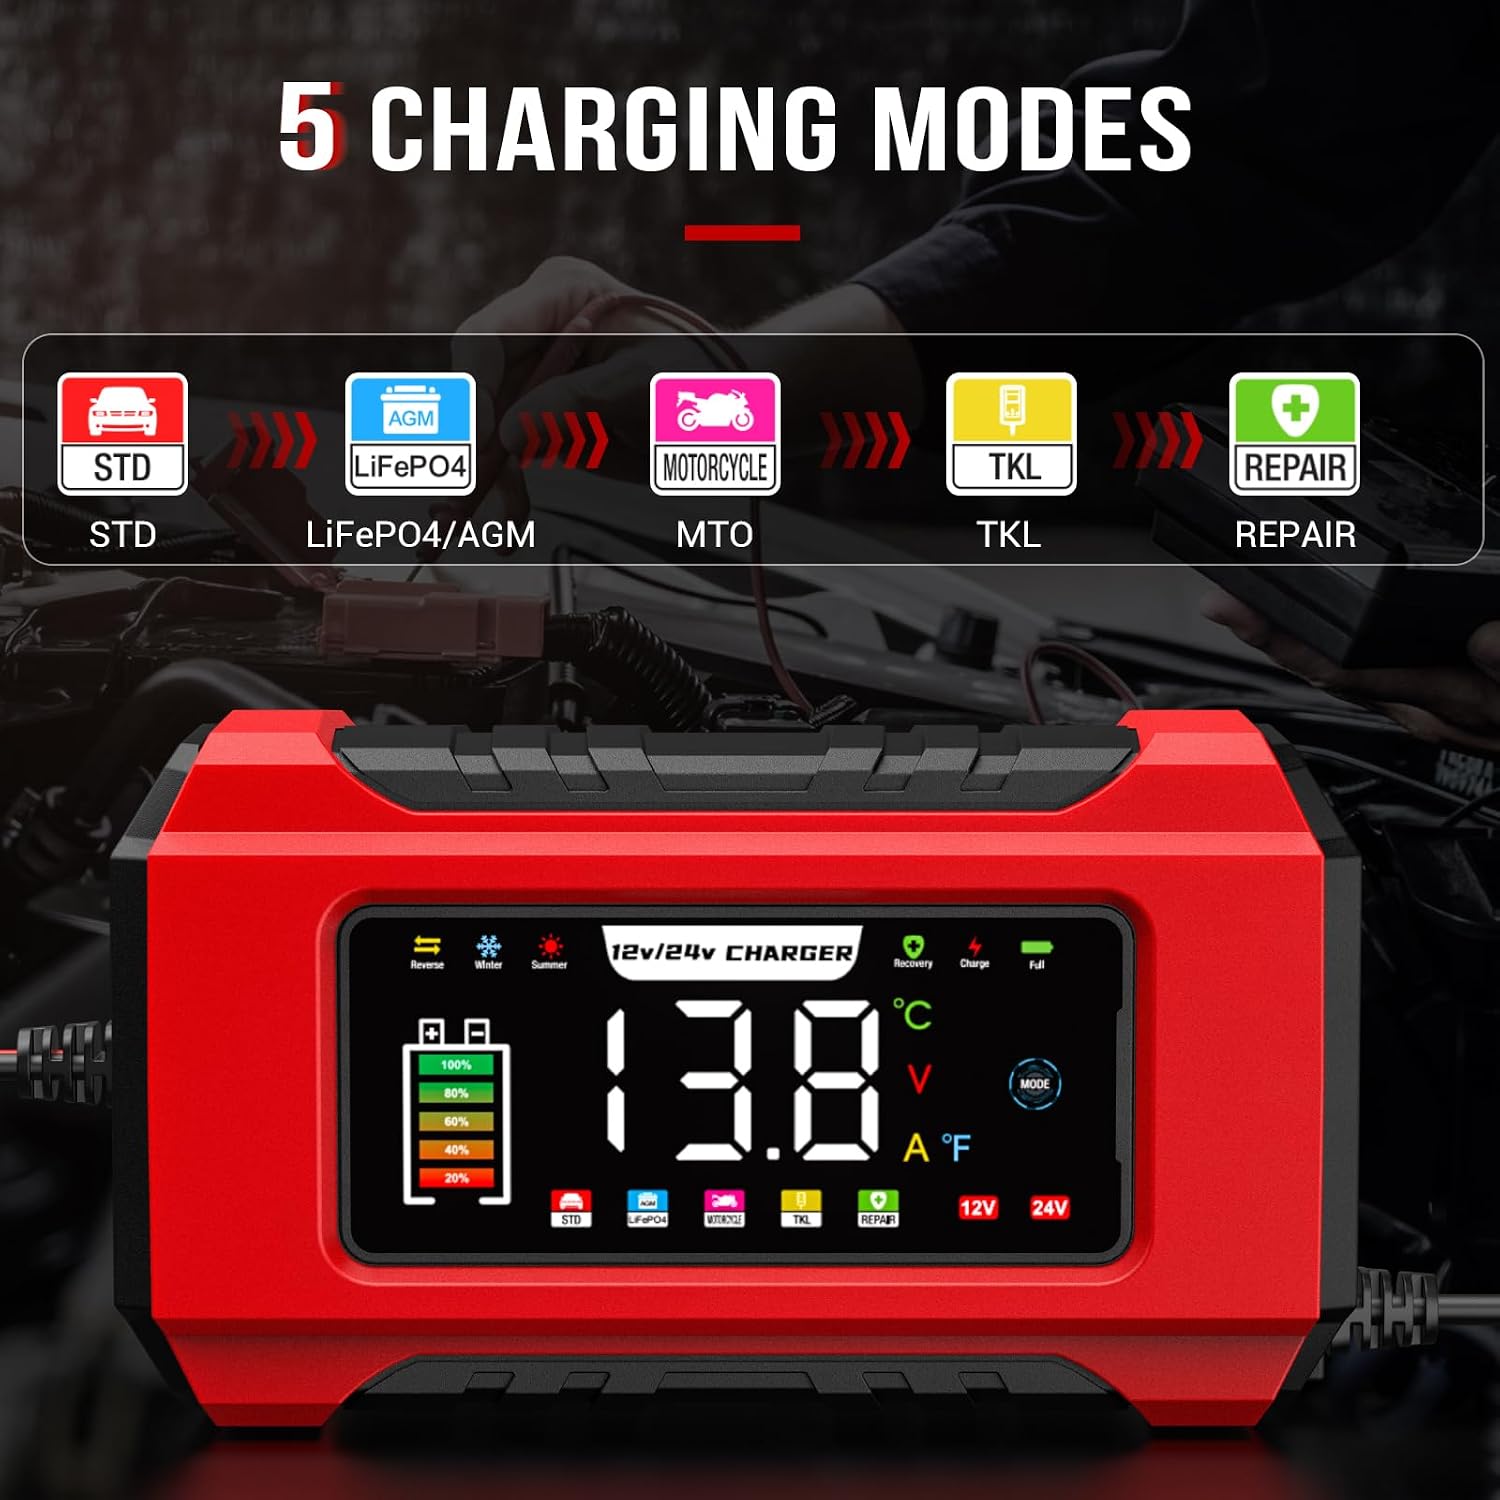
Image 5.1: The charger's display illustrating the five selectable charging modes: STD, LiFePO4/AGM, Motorcycle, TKL, and Repair.
5.2. 9-Stage Charging Process
The Husgw charger employs an advanced 9-stage charging process to ensure thorough and safe battery charging, extending battery life:
- Battery Testing: Initial assessment of battery condition.
- Desulfation: Applies high-frequency pulse charges to break down lead sulfate crystals in sulfated batteries.
- Soft Start (Constant Current - Medium Power): Gradually introduces current to prevent damage to deeply discharged batteries.
- Bulk Charge (Constant Current - Full Power): Charges the battery at maximum current until it reaches approximately 80% capacity.
- Absorption Charge (Constant Voltage): Charges at a constant voltage, with current gradually decreasing, bringing the battery to 100% capacity.
- Repair: (If selected or automatically initiated for certain conditions) Further reconditioning.
- Float Charge: Maintains the battery at a constant voltage to prevent self-discharge.
- Battery Maintenance: Monitors the battery and provides small charges as needed.
- Shutdown: Charger automatically stops when the battery is fully charged and maintained.
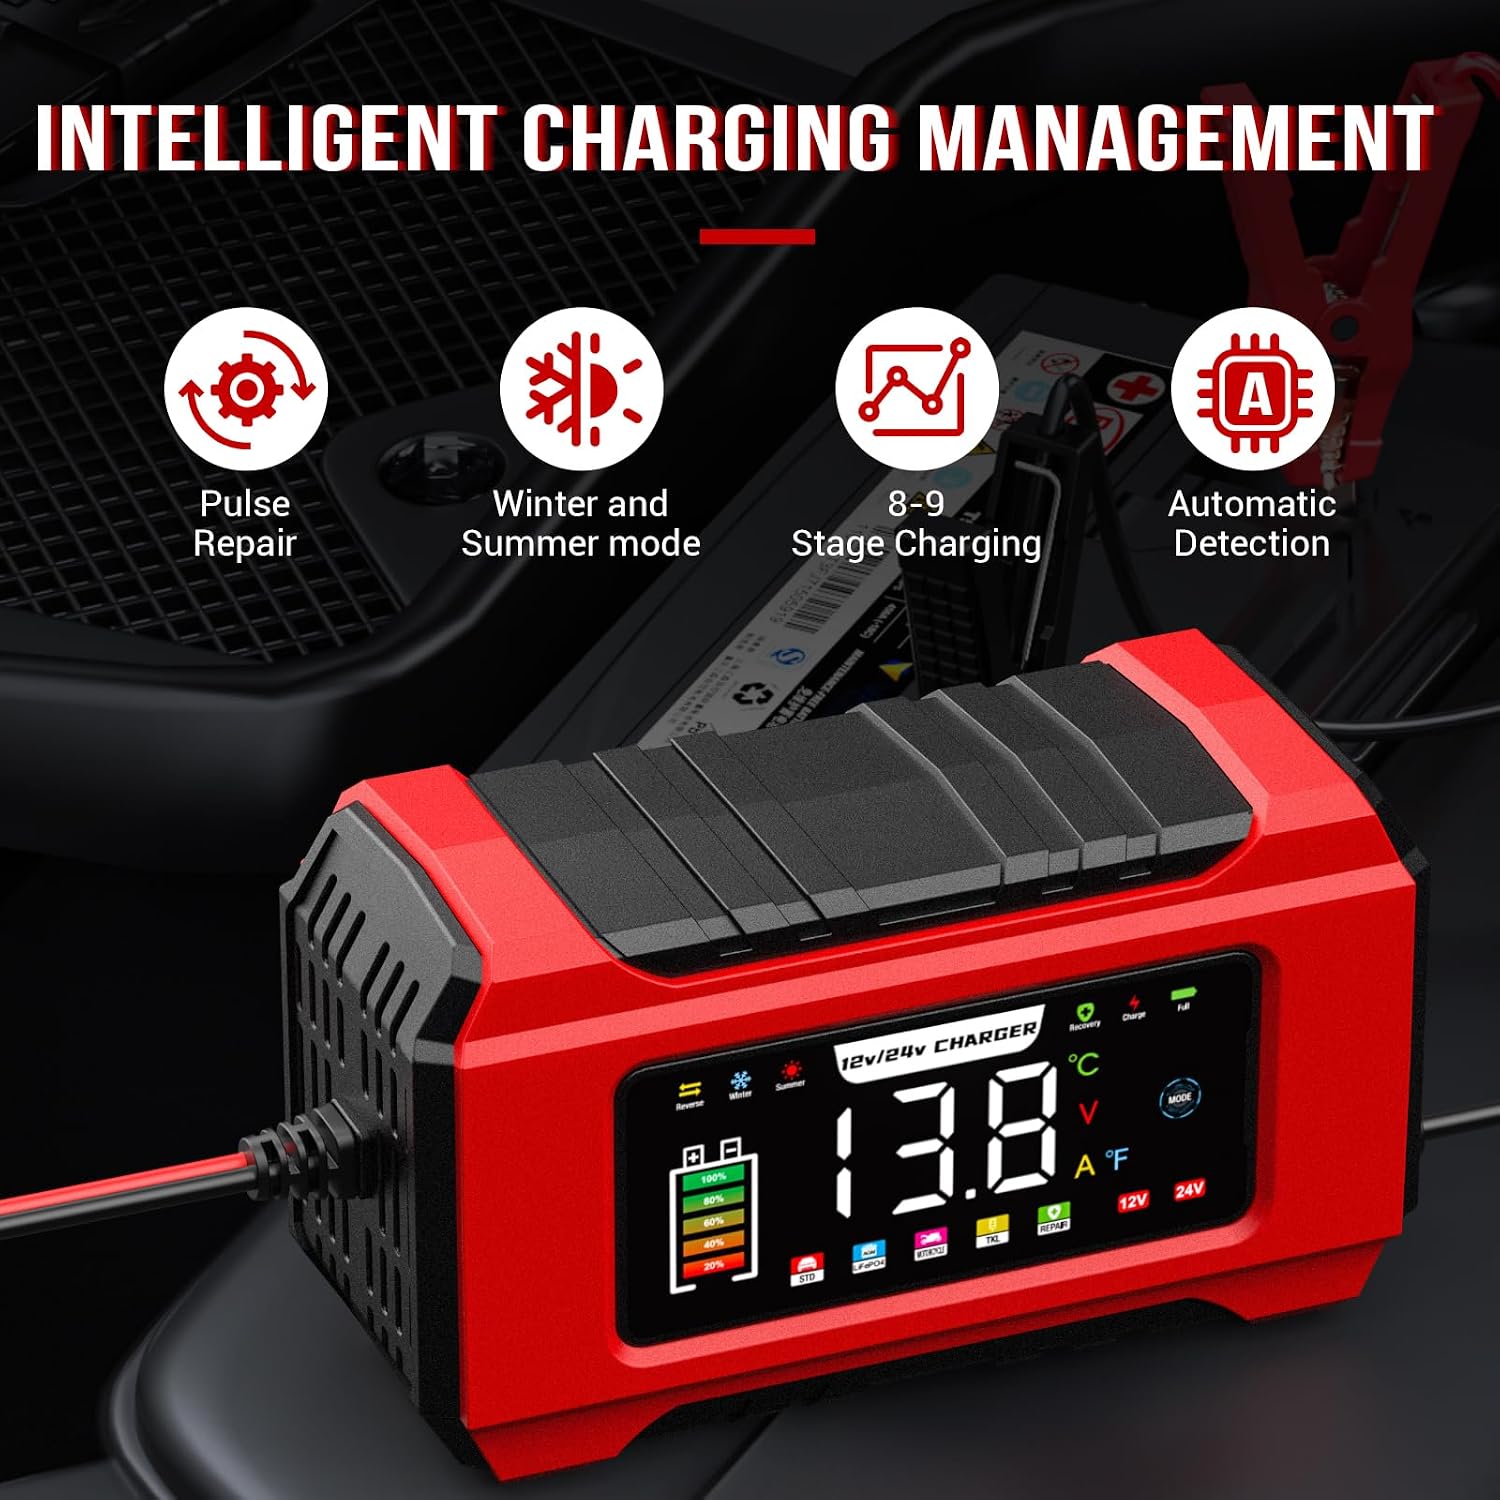
Image 5.2: Overview of the intelligent charging management system, including pulse repair, winter and summer modes, and the 8-9 stage charging process.
5.3. Pulse Repair Function
The Pulse Repair function (REPAIR mode) is designed to help restore deeply discharged, sulfated, or idle batteries. This process uses high-frequency pulse technology to break down sulfate crystals that can build up on battery plates, improving battery performance and extending its lifespan. Select this mode for batteries that are not holding a charge well or have been idle for extended periods.

Image 5.3: Visual guide illustrating how the intelligent pulse repair function can revive old batteries suffering from poor starting force, reduced endurance, or long idle times.
6. Maintenance
6.1. Charger Care
- Keep the charger clean and dry. Wipe with a soft, damp cloth. Do not use solvents.
- Store the charger in a cool, dry place when not in use.
- Inspect the power cord and alligator clips for any damage before each use.
6.2. Battery Maintenance
- Regularly check battery terminals for corrosion and clean them as needed.
- For wet-cell batteries, check electrolyte levels periodically and top up with distilled water if necessary (only after charging).
- Use the charger's maintenance mode for batteries stored for extended periods to ensure they remain fully charged.
7. Troubleshooting
| Problem | Possible Cause | Solution |
|---|---|---|
| Charger does not turn on. | No power from outlet; faulty connection; charger malfunction. | Check AC power connection and outlet. Ensure clips are correctly connected to battery. If problem persists, contact support. |
| Charger displays an error (e.g., "ERO" or similar). | Reverse polarity connection; short circuit; battery fault. | Disconnect immediately. Check clip connections for correct polarity. Inspect battery and cables for short circuits. If battery is severely damaged, it may not be chargeable. |
| Battery not charging or charging slowly. | Incorrect mode selected; battery deeply discharged/sulfated; battery capacity too large for charger; faulty battery. | Ensure correct charging mode is selected. Try REPAIR mode for sulfated batteries. Verify battery capacity is within charger's range. Test battery condition. |
| Charger gets hot during operation. | Normal operation; poor ventilation; overcurrent. | Some heat is normal. Ensure adequate ventilation around the charger. If excessively hot, disconnect and check for short circuits or battery issues. |
8. Specifications
| Feature | Detail |
|---|---|
| Brand | Husgw |
| Model | RJ-C121501A |
| Input Voltage | 230V AC |
| Output Voltage | 12V / 24V DC (Automatic Detection) |
| Rated Current | 12V: 15A, 24V: 8A |
| Battery Capacity Range | 12V: 2Ah-200Ah, 24V: 2Ah-100Ah |
| Compatible Battery Types | Lead-Acid (Wet, MF, Ca/Ca), AGM, Gel, SLA, LiFePO4, Ternary Lithium |
| Charging Stages | 9-Stage Smart Charging |
| Protections | Reverse Polarity, Short Circuit, Overcharge, Overcurrent, Overtemperature, Low Voltage |
| Dimensions (L x W x H) | 22.7 x 7.5 x 11.6 cm |
| Weight | 680 g |
| UPC | 750834131035 |
9. Warranty and Support
For warranty information and technical support, please refer to the documentation included with your purchase or contact the retailer where the product was acquired. Keep your purchase receipt as proof of purchase.
For further assistance, you may visit the official Husgw store on Amazon: Husgw Store