
1. Introduction
This manual provides essential information for setting up, operating, and maintaining your Acer Nitro V 15 ANV15-52 Gaming Laptop. Please read this guide thoroughly to ensure proper use and to maximize the performance and longevity of your device.
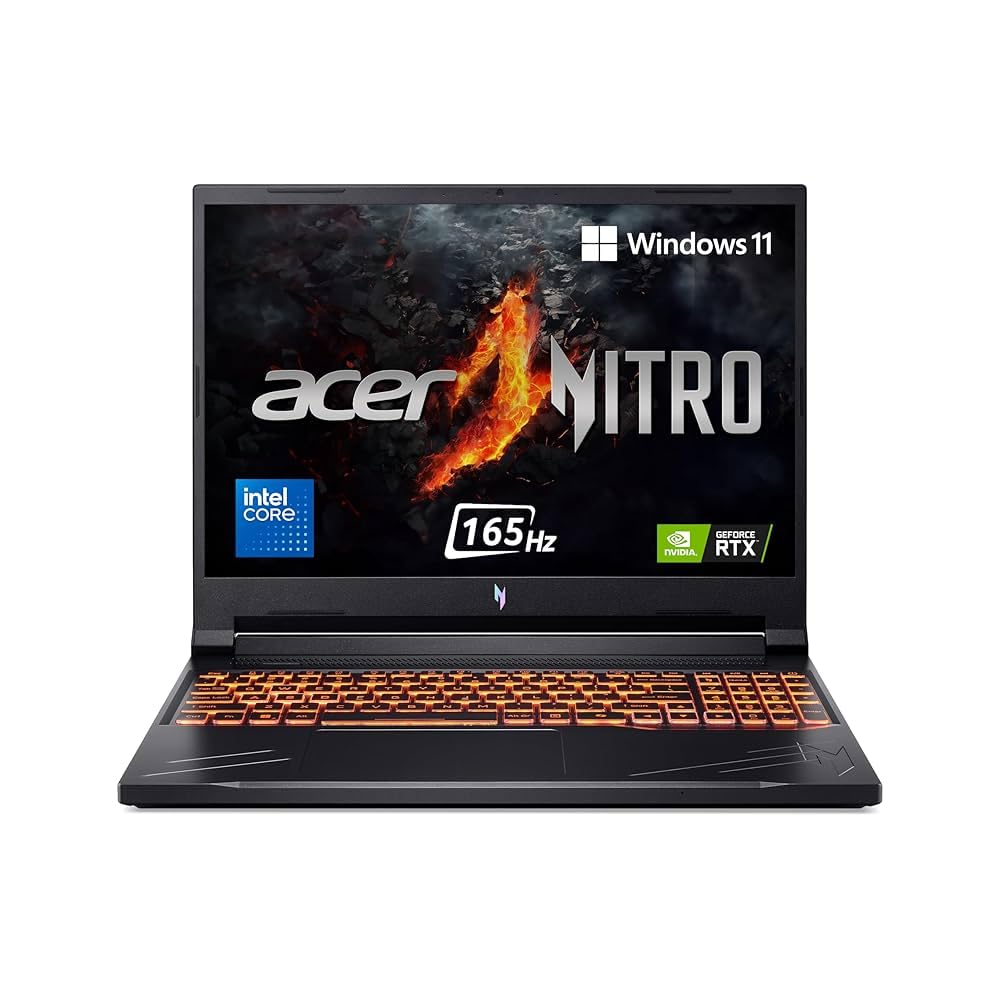
Image: Acer Nitro V 15 ANV15-52 Gaming Laptop, showcasing its design.
2. Package Contents
Verify that all items listed below are present in your product package:
- Acer Nitro V 15 ANV15-52 Gaming Laptop
- Power Adapter and Power Cord
- Quick Start Guide (if included)
- Warranty Card (if included)
Note: The product specifications indicate "Monitor" as part of box contents. This typically refers to the laptop itself, as it contains an integrated display.
3. Product Overview
Familiarize yourself with the main components and ports of your Acer Nitro V 15 laptop.
3.1. Front View
The front of the laptop features the 15.6-inch Full HD IPS display and the integrated webcam at the top center of the display bezel.
Image: Front view of the Acer Nitro V 15 laptop, showing the display and webcam. (Image not available in provided data)
3.2. Left Side View
The left side typically houses various ports for connectivity:
- USB Type-A ports
- USB Type-C port
- Ethernet (RJ-45) port for wired network connection
- Audio jack (headphone/microphone combo)
Image: Left side view of the Acer Nitro V 15 laptop, highlighting the ports. (Image not available in provided data)
3.3. Right Side View
The right side may include additional ports:
- Additional USB Type-A ports
- Kensington lock slot for security
Image: Right side view of the Acer Nitro V 15 laptop, highlighting the ports. (Image not available in provided data)
3.4. Rear View
The rear of the laptop often features the power input and potentially an HDMI port for external displays, along with ventilation grilles.
Image: Rear view of the Acer Nitro V 15 laptop, showing power input and ventilation. (Image not available in provided data)
3.5. Keyboard and Touchpad
The laptop features a gaming keyboard and a precision touchpad. Specific keyboard features like backlighting and dedicated gaming keys may be present.
Image: Close-up of the Acer Nitro V 15 keyboard and touchpad. (Image not available in provided data)
4. Setup
4.1. Initial Power On
- Connect Power: Plug the power adapter into the laptop's power input port, then connect the power cord to an electrical outlet.
- Open Lid: Carefully open the laptop lid.
- Power On: Press the power button, usually located above the keyboard or on the side.
- Initial Setup: Follow the on-screen instructions to complete the Windows 11 Home setup, including language, region, network connection, and user account creation.
4.2. Connecting Peripherals
You can connect external devices such as a mouse, keyboard, or external monitor to the available USB and HDMI ports.
- USB Devices: Insert USB devices into any available USB Type-A or Type-C ports.
- External Display: Connect an HDMI cable from your external monitor to the laptop's HDMI port (if available). Press Windows key + P to configure display settings.
- Audio Devices: Plug headphones or external speakers into the audio jack.
5. Operating the Laptop
5.1. Using the Keyboard and Touchpad
- Keyboard: The integrated keyboard is designed for gaming and general use. Familiarize yourself with function keys (Fn) combined with F-keys for brightness, volume, and other controls.
- Touchpad: Use the touchpad for cursor control. It supports multi-touch gestures for scrolling, zooming, and switching applications. Refer to Windows settings for touchpad customization.
5.2. Network Connectivity
- Wi-Fi: To connect to a wireless network, click the Wi-Fi icon in the taskbar, select your desired network, and enter the password if required.
- Ethernet: For a wired connection, plug an Ethernet cable into the RJ-45 port.
- Bluetooth: Enable Bluetooth in Windows settings to pair with Bluetooth devices like headphones or game controllers.
5.3. Gaming Performance
Your Acer Nitro V 15 is equipped with an Intel Core 5 210H processor and NVIDIA GeForce RTX 4050 graphics for optimal gaming performance.
- Graphics Settings: Ensure your graphics drivers are up to date for the best gaming experience. Adjust in-game settings to balance visual quality and frame rate.
- Cooling: The laptop features an advanced cooling system. Ensure ventilation grilles are not obstructed during intensive gaming sessions.
- Power Modes: Utilize Windows power settings or Acer's proprietary software (if installed) to switch between performance and power-saving modes.
6. Maintenance
6.1. Cleaning
- Screen: Use a soft, lint-free cloth lightly dampened with water or a screen cleaner. Do not spray liquid directly onto the screen.
- Keyboard and Chassis: Use a soft cloth to wipe surfaces. A can of compressed air can remove dust from between keys and ventilation grilles.
- Ports: Ensure ports are free of dust and debris.
6.2. Battery Care
- Charging: For optimal battery life, avoid constantly keeping the laptop at 100% charge or letting it fully discharge frequently.
- Storage: If storing the laptop for an extended period, charge the battery to approximately 50-60% before turning it off.
- Temperature: Avoid exposing the laptop to extreme temperatures, which can degrade battery performance.
6.3. Software Updates
Regularly update your operating system, drivers (especially graphics drivers), and applications to ensure security, stability, and optimal performance.
7. Troubleshooting
7.1. No Power / Won't Turn On
- Ensure the power adapter is securely connected to both the laptop and a working electrical outlet.
- Try a different power outlet.
- If the battery is completely drained, it may take a few minutes of charging before the laptop can power on.
7.2. Display Issues
- Blank Screen: Ensure the laptop is powered on. Try adjusting screen brightness using function keys. If an external monitor is connected, disconnect it.
- External Monitor Not Detected: Check the HDMI cable connection. Press Windows key + P to cycle through display modes.
7.3. Wi-Fi / Network Problems
- Ensure Wi-Fi is enabled in Windows settings.
- Restart your router and modem.
- Forget the network and reconnect.
- Update network drivers.
7.4. Overheating
- Ensure ventilation grilles are clear and unobstructed.
- Use the laptop on a hard, flat surface, not on soft furnishings that can block airflow.
- Consider using a laptop cooling pad during intensive tasks.
8. Specifications
The following table outlines the key technical specifications of the Acer Nitro V 15 ANV15-52 Gaming Laptop:
| Feature | Specification |
|---|---|
| Brand | Acer |
| Model Name | Nitro V 15 |
| Model Number | ANV15-52 |
| Screen Size | 15.6 Inches |
| Display Type | IPS, Full HD (1920 x 1080), LED-backlit TFT LCD |
| Refresh Rate | 165 Hz |
| Processor | Intel Core 5 210H (14th Gen), 2.2 GHz |
| Graphics Card | NVIDIA GeForce RTX 4050 with 8 GB GDDR7 Dedicated Graphics RAM |
| RAM Memory | 16 GB DDR4 (Upgradable to 32 GB) |
| Storage | 512 GB SSD, PCIe Gen4 NVMe (Upgradable Upto 1*1 TB SSD) |
| Operating System | Windows 11 Home |
| Connectivity | Wi-Fi, Bluetooth |
| Item Weight | 2.1 KG (2100 Grams) |
| Battery Type | Lithium Ion, 57 Watt Hours |
| Color | Obsidian Black |
9. Warranty and Support
9.1. Warranty Information
Your Acer Nitro V 15 ANV15-52 Gaming Laptop comes with a 1 Year Manufacturer Warranty. Please refer to the warranty card included in your package for detailed terms and conditions. Keep your proof of purchase for warranty claims.
9.2. Customer Support
For technical assistance, service, or further inquiries, please contact Acer customer support. You can find contact information on the official Acer website or in the documentation provided with your laptop.
Manufacturer Contact Information: Compal Electronics Pvt Ltd, No.D01, Zone D, Air Port Section of LiangLu CunTan Free Trade Port Area, YuBei District, Chongqing, China
Importer Contact Information: ACER INDIA PRIVATE LIMITED Embassy Heights, 6th Floor, No. 13 Magrath Road, Next to HOSMAT Hospital, Bangalore, INDIA – 560025
10. Product Videos
No official product videos from the seller were available in the provided data to embed in this manual.


