
1. Introduction
Thank you for choosing the VINGLI Queen Loft Bed with Flat Rungs. This manual provides essential information for the safe assembly, operation, and maintenance of your new loft bed. Please read all instructions carefully before beginning assembly and retain this manual for future reference.

Image 1.1: VINGLI Queen Loft Bed with Flat Rungs, illustrating its design and space-saving potential.
2. Safety Information
Your safety is paramount. Please adhere to the following guidelines:
- Always follow the assembly instructions carefully.
- Do not let children jump on or off the bed.
- The maximum weight limit for this loft bed is 550 lbs. Do not exceed this limit.
- Ensure the surface of the mattress is at least 5 inches below the upper edge of the guardrails.
- Do not use a box spring with this bed.
- Regularly check all bolts and connections to ensure they remain tight.
- Use only the mattress size specified for this bed.
- Consider anchoring the bed to the wall for enhanced stability, especially if wobbling is observed.

Image 2.1: Illustration of safety features including anti-collision rounded corners, triangular support structure, and anti-slip flat ladder.
3. Package Contents
Before assembly, verify that all components are present and undamaged. If any parts are missing or damaged, please contact VINGLI customer support.
- Bed Frame Components (Metal beams, posts, guardrails)
- Metal Slats
- Ladder with Flat Rungs
- Assembly Hardware (Bolts, nuts, washers, Allen key)
- Installation Manual
4. Setup and Assembly
Assembly of the VINGLI Queen Loft Bed is designed to be straightforward. Detailed, step-by-step instructions and an assembly video are provided to guide you. It is recommended to have two people for assembly to ensure ease and safety.
4.1 Preparation
- Clear a spacious area for assembly.
- Unpack all components and lay them out, comparing them with the parts list in the separate assembly guide.
- Ensure you have the included Allen key and any other necessary tools.
4.2 Assembly Steps
- Begin by assembling the main frame components as per the visual instructions in your separate assembly guide.
- Attach the reinforced center beams for structural integrity.
- Install the metal slats onto the bed frame. The noise-free design includes a non-woven strip to reduce sound.
- Secure the full-length guardrails to the top bunk.
- Attach the ladder. The ladder is removable and can be attached to either side of the bed for flexibility.
- Ensure all bolts are securely tightened. Do not overtighten.

Image 4.1: Details on the sturdy construction, including two center beams and easy-to-install metal slats.

Image 4.2: The removable ladder can be positioned on either side of the bed.
5. Operating Instructions
The VINGLI Queen Loft Bed is designed to maximize space in your room while providing a comfortable sleeping area.
5.1 Space Utilization
With 55 inches of clearance underneath, this loft bed offers ample space for various uses:
- Work/Study Area: Place a desk and chair for a dedicated workspace.
- Seating Area: Add a sofa or bean bags to create a cozy lounge spot.
- Storage: Utilize the area for shelves, drawers, or other storage solutions.
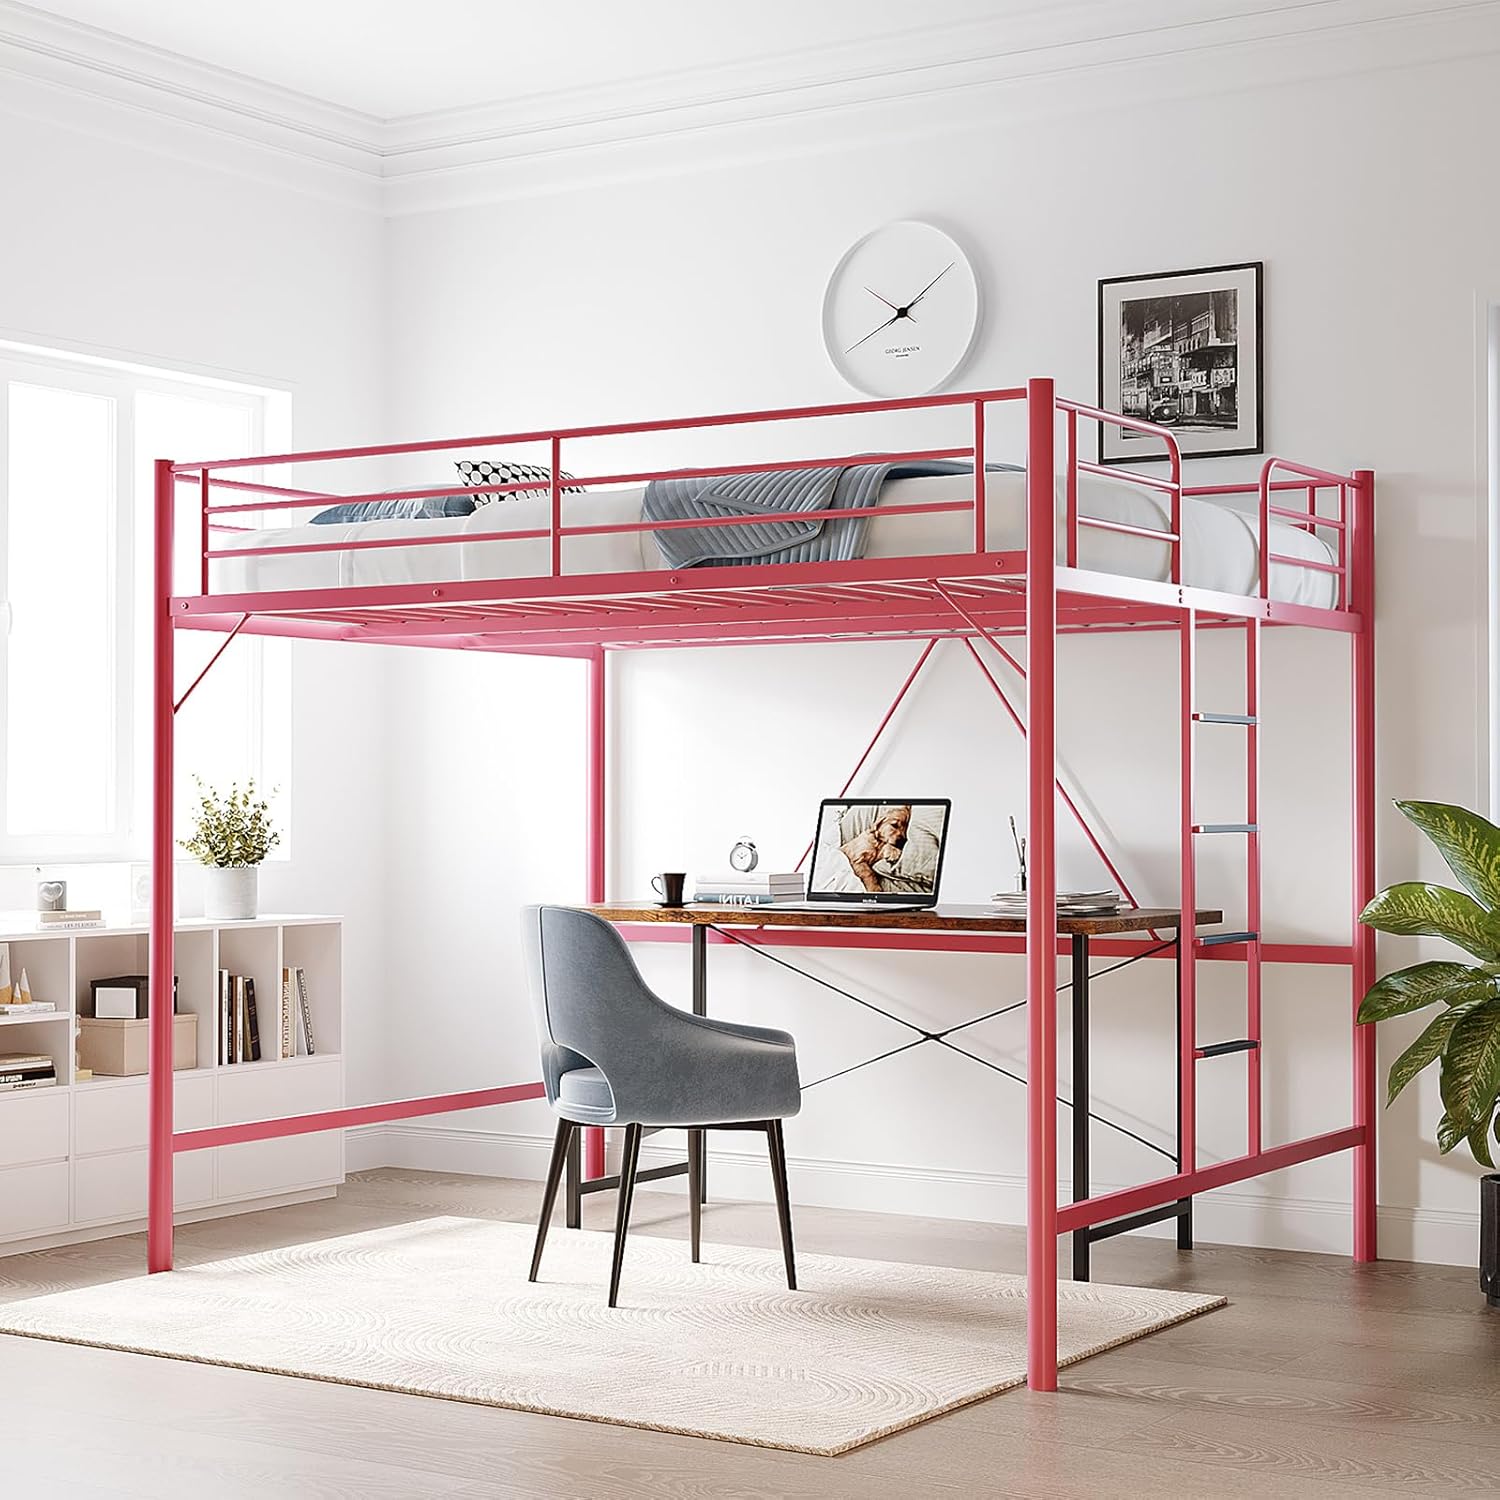
Image 5.1: Loft bed with a desk setup underneath, showcasing efficient space use.

Image 5.2: Loft bed with a sofa underneath, creating a lounge space.

Image 5.3: Various configurations demonstrating the versatility of the under-bed space.
5.2 Ladder Usage
The ladder features flat rungs with rubber covers for maximum comfort and anti-slip safety. Always use the ladder to access and exit the bed. Do not jump on or off the bed.

Image 5.4: Detail of the flat rungs design for comfortable climbing.
6. Maintenance
Proper maintenance will extend the life of your VINGLI Loft Bed.
- Cleaning: Wipe down the metal frame with a soft, damp cloth. Avoid abrasive cleaners or harsh chemicals that could damage the painted finish.
- Hardware Check: Periodically (e.g., every 3-6 months) inspect all bolts, screws, and connections. Tighten any loose hardware to maintain stability and prevent wobbling.
- Guardrails: Ensure guardrails are always securely attached and free from damage.
7. Troubleshooting
If you encounter any issues with your loft bed, refer to the following common solutions:
7.1 Bed Wobbles or Squeaks
- Loose Hardware: Check all bolts and screws. Tighten them firmly, but do not overtighten.
- Uneven Floor: Ensure the bed is placed on a level surface. Adjustments can sometimes be made by placing shims under the bed legs if the floor is uneven.
- Wall Anchoring: For maximum stability, especially if persistent wobbling occurs, consider anchoring the bed to a wall using appropriate hardware (not included).
7.2 Missing or Damaged Parts
If you find any parts missing or damaged upon unboxing, please do not proceed with assembly. Contact VINGLI customer support immediately for assistance and replacement parts.
8. Specifications
| Feature | Detail |
|---|---|
| Size | Queen with Flat Rungs |
| Product Dimensions | 81.89"L x 62.2"W x 67.52"H |
| Ground To Item Distance | 55 Inches |
| Weight Limit | 550 Pounds |
| Item Weight | 73.2 Pounds |
| Material | Metal |
| Color | Pink |
| Special Feature | Adjustable, Flat Rungs with Rubber Cover, No Box Spring Needed |
| Included Components | Guardrails, Installation Manual, Slats |
| Assembly Required | Yes |
| Age Range (Description) | Teen & Child |
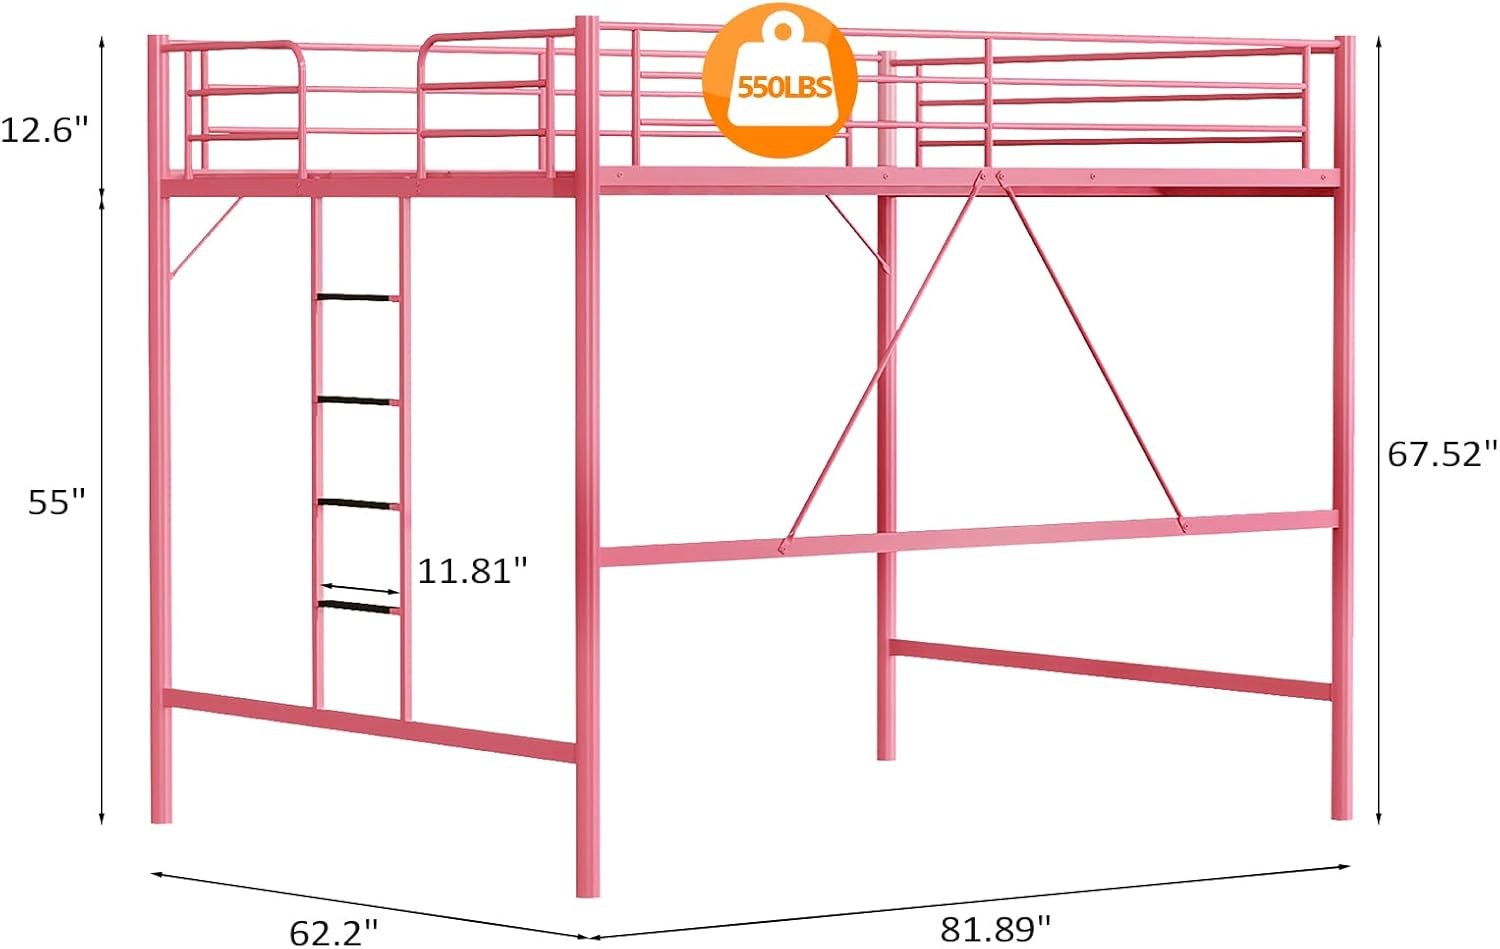
Image 8.1: Key dimensions and weight capacity of the VINGLI Queen Loft Bed.
9. Warranty and Support
The VINGLI Queen Loft Bed comes with a Limited Warranty. For specific details regarding warranty coverage, please refer to the documentation included with your purchase or contact VINGLI customer support.
For any questions, concerns, or assistance with assembly or parts, please contact VINGLI customer support through the retailer where the product was purchased or visit the official VINGLI website.