
1. Introduction
Thank you for choosing the UUQ Prism 4x32 Rifle Scope. This manual provides detailed instructions for the proper setup, operation, and maintenance of your new scope. Please read this manual thoroughly before using the product to ensure optimal performance and safety.
The UUQ Prism 4x32 Rifle Scope features a 4x fixed magnification and a 32mm objective lens, designed for clear target acquisition. It includes a triple-illuminated rapid range reticle (Red/Green/Blue) and a top fiber optic sight for versatile aiming options. The scope is built with a durable all-metal housing, multi-coated prism lenses, and is shockproof, fogproof, and rainproof.
2. What's in the Box
Upon opening the package, please verify that all the following items are included:
- UUQ Prism 4x32 Rifle Scope (BDC Reticle)
- CR2032 Battery (pre-installed or included separately)
- Allen Wrenches (for adjustments)
- Cleaning Cloth
- Extra Green Fiber Optic (for front sight interchangeability)
3. Setup
3.1 Mounting the Scope
The scope features an integrated base mount designed for quick attachment to most Weaver and Picatinny 1913 rails.
- Align the scope's base mount with your firearm's Weaver or Picatinny rail.
- Hand-tighten the thumb screws on the base mount until snug.
- For final tightening, use a coin or a flathead screwdriver to secure the thumb screws firmly. Avoid over-tightening to prevent damage to the rail.

Image: Integrated Mount System. The scope mounts quickly to Weaver/Picatinny 1913 rails using easy-to-use thumb screws.
Video: Demonstrates the integrated mount system for quick attachment to Weaver/Picatinny rails using thumb screws. This video is provided by the seller.
3.2 Battery Installation (CR2032)
The scope uses a CR2032 battery to power the illuminated reticle.
- Locate the battery cap on the top of the scope, typically near the illumination rheostat.
- Use a coin or a flathead screwdriver to carefully unscrew the battery cap.
- Insert the CR2032 battery with the positive (+) side facing upwards.
- Replace the battery cap and tighten it securely to ensure a waterproof seal.
Image: Close-up view of the scope showing the CR2032 battery compartment and elevation/windage adjustments.
Video: Demonstrates how to access and replace the CR2032 battery for the illuminated reticle. This video is provided by the seller.
3.3 Adjusting the Rear Sight
The rear sight is fully adjustable for both position and windage.
- Assembly Position: Use the provided Allen wrench to loosen the screws holding the rear sight assembly. Adjust its position along the scope to fit your needs, then re-tighten the screws to ensure it is centered.
- Windage Adjustment: Use a flathead screwdriver to turn the clearly marked adjustment screws (R for right, L for left) on the rear sight to set the proper windage.
Video: Illustrates how to adjust the rear sight assembly position and windage using the provided tools. This video is provided by the seller.
3.4 Fiber Optic Front Sight
The scope comes with a red fiber optic front sight pre-installed. An extra green fiber optic is included for interchangeability.
Video: Shows the pre-installed red fiber optic front sight and the included green fiber optic for replacement. This video is provided by the seller.
4. Operating Instructions
4.1 Reticle Illumination
The scope features a tri-illuminated reticle (Red, Green, Blue) with adjustable brightness levels.
- To activate illumination, turn the rheostat dial located on the top of the scope.
- Rotate the dial to select between Red, Green, or Blue illumination. Each color typically has 3 brightness settings.
- Adjust the dial to your desired brightness level.
- To turn off the illumination, rotate the dial to an "OFF" position.

Image: Shows the tri-illuminated reticle in Red, Green, and Blue with three brightness levels for each color.
Video: Demonstrates the activation and adjustment of the tri-illuminated reticle with its various color and brightness settings. This video is provided by the seller.
4.2 Windage and Elevation Adjustment
The windage and elevation turrets are protected by caps.
- Remove the protective caps from the windage (side) and elevation (top) turrets.
- Use a coin or a flathead screwdriver to turn the turrets. Each click adjusts the point of impact in 1/4 MOA increments.
- Adjust as necessary to zero your scope.
- Replace the protective caps after adjustment.
Image: Close-up of the scope showing the windage and elevation adjustment turrets, protected by caps.
Video: Explains how to adjust windage and elevation using the turrets, noting they are protected by caps and adjust in 1/4 MOA increments. This video is provided by the seller.
4.3 Using Accessory Rails
The scope features dual accessory rails, allowing for the attachment of various accessories such as flashlights or lasers.
- Align your accessory with the accessory rail on the side of the scope.
- Secure the accessory by tightening its mounting screws or clamps.
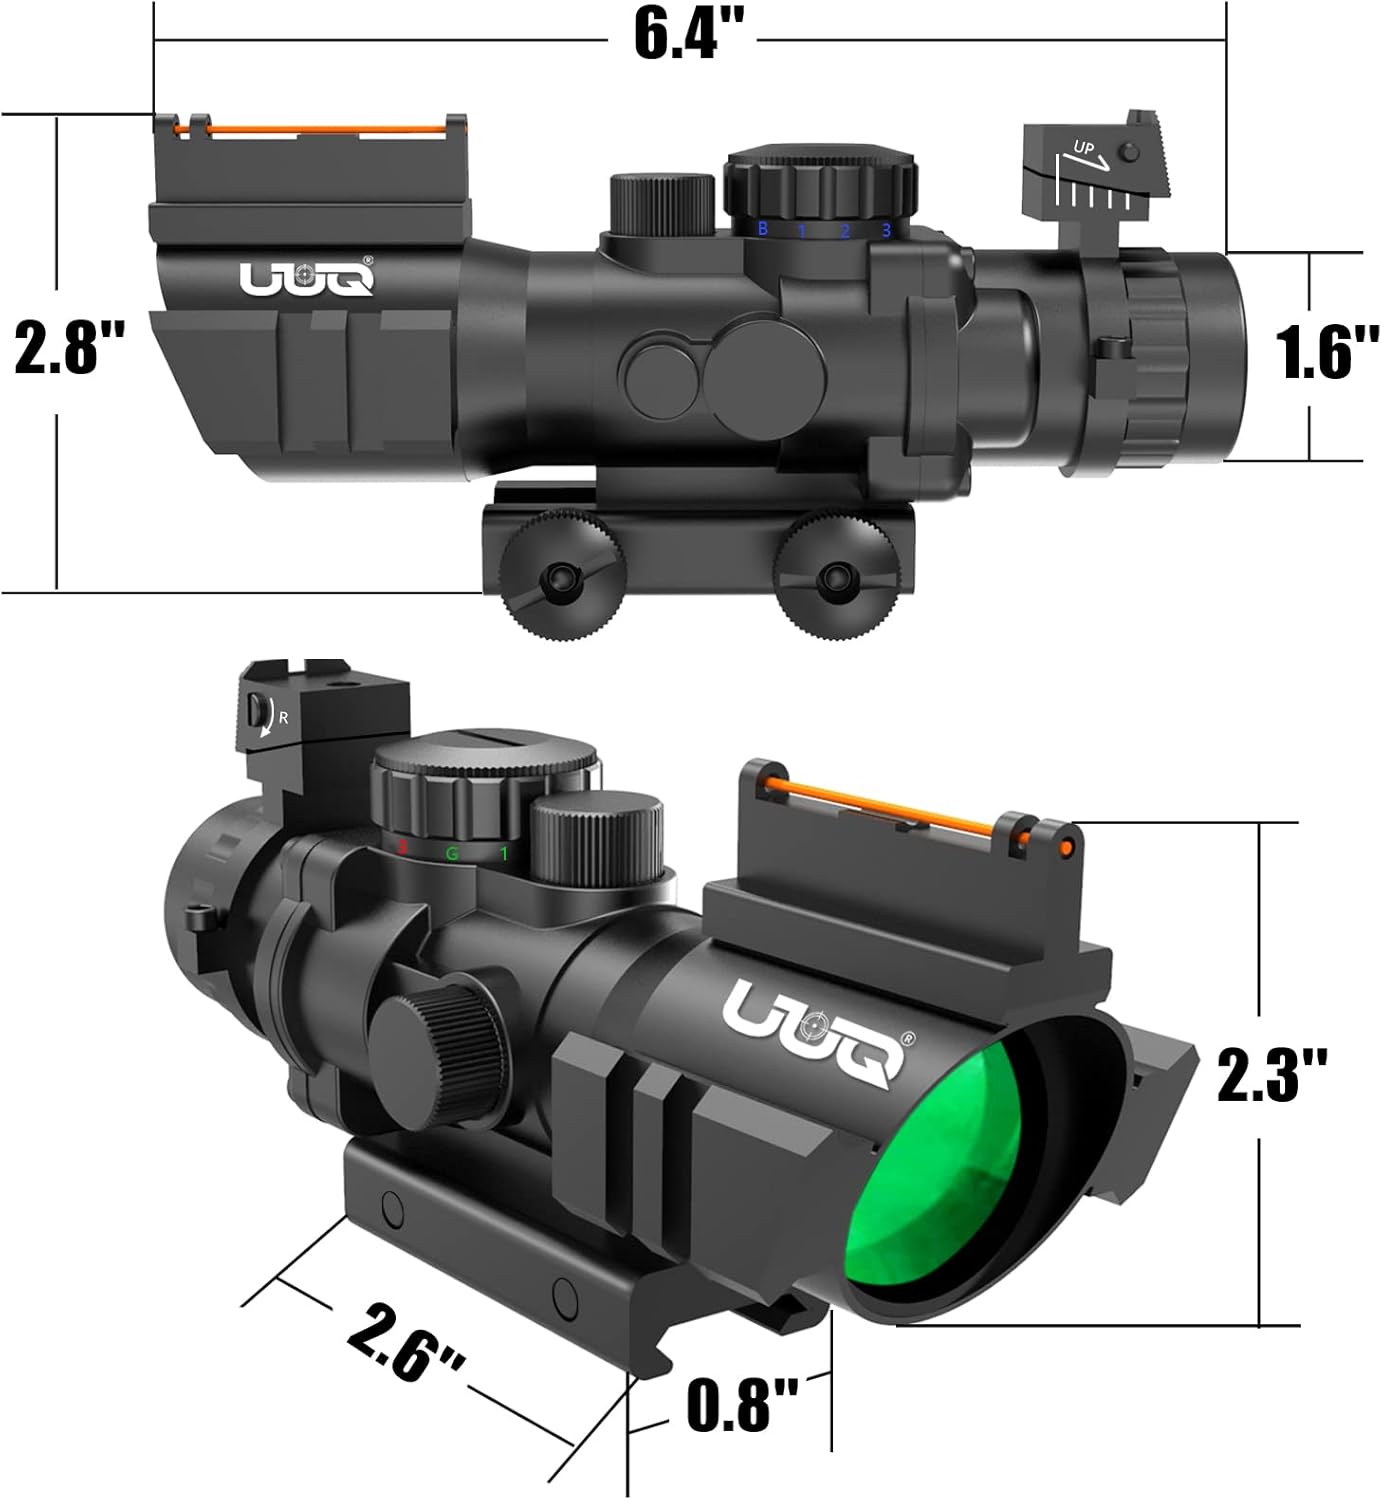
Image: The scope features dual accessory rails for mounting additional equipment like flashlights or lasers.
Video: Demonstrates mounting an accessory, such as a flashlight, onto the dual accessory rails of the scope. This video is provided by the seller.
5. Maintenance
- Cleaning Lenses: Use the provided cleaning cloth or a soft, lint-free cloth to gently wipe the lenses. For stubborn smudges, use a lens cleaning solution specifically designed for optics. Avoid using abrasive materials or harsh chemicals.
- Body Cleaning: Wipe the scope's body with a soft, damp cloth. Do not use solvents or strong detergents.
- Storage: Store the scope in a cool, dry place, away from direct sunlight and extreme temperatures. Ensure all caps are securely in place to protect the lenses.
- Battery Replacement: Replace the CR2032 battery when the reticle illumination dims or fails to light up. Refer to section 3.2 for battery installation instructions.

Image: Illustration of the multi-coated green lens, highlighting its anti-reflection properties and high light transmission for clear viewing.

Image: Icons representing weather resistance, indicating the scope is designed to withstand various environmental conditions like rain, snow, ice, and sun.
6. Troubleshooting
| Problem | Possible Cause | Solution |
|---|---|---|
| Reticle does not illuminate. | Battery is dead or incorrectly installed. | Check battery orientation (+ side up) or replace with a new CR2032 battery. |
| Reticle illumination is dim. | Low battery or rheostat setting is too low. | Increase brightness using the rheostat dial or replace the battery. |
| Scope loses zero. | Mounting screws are loose. | Ensure thumb screws on the base mount are securely tightened. |
| Image is blurry. | Lenses are dirty. | Clean lenses with the provided cleaning cloth. |
7. Specifications
| Feature | Detail |
|---|---|
| Brand | UUQ |
| Model Name | 4X32 Prism Scope |
| Model Number | 4*32-8003 |
| Magnification | 4x Fixed |
| Objective Lens Diameter | 32 mm |
| Reticle Type | BDC (Ballistic Drop Compensator) |
| Illumination | Red/Green/Blue, 3 levels brightness each |
| Front Sight | Fiber Optic (Red, interchangeable with Green) |
| Rear Sight | Fully adjustable |
| Windage/Elevation Click Value | 1/4 MOA |
| Mounting Type | Weaver Mount / Picatinny 1913 Rails |
| Material | Alloy Steel |
| Weight | 450 Grams |
| Dimensions (LxWxH) | 6.4 x 2.8 x 2.8 inches |
| Battery Type | CR2032 (Included) |
| Environmental Features | Shockproof, Fogproof, Rainproof |
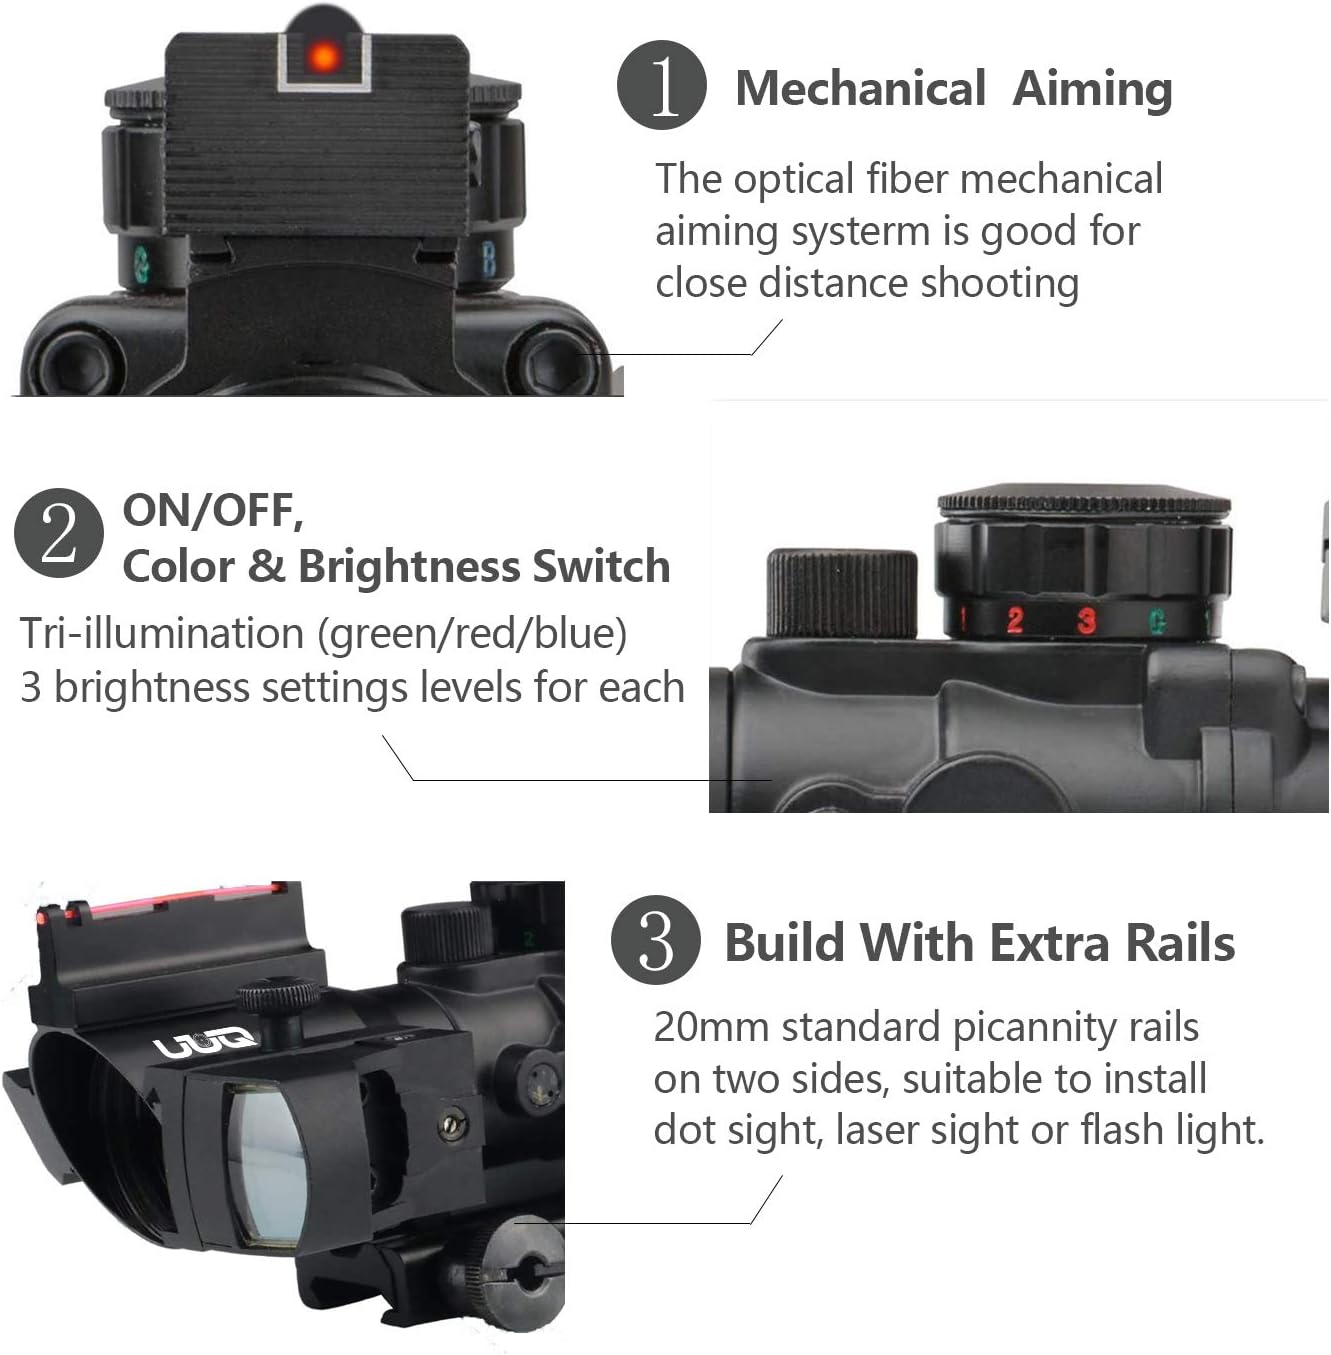
Image: Diagram showing the key dimensions of the UUQ Prism 4x32 Rifle Scope.
8. Warranty & Support
The UUQ Prism 4x32 Rifle Scope comes with a 1-Year Warranty from the date of purchase. This warranty covers manufacturing defects and ensures the product is free from defects in material and workmanship under normal use.
For warranty claims, technical support, or any inquiries regarding your product, please contact UUQ customer service via email. We recommend registering your product to facilitate easier access to related services.
If you encounter any quality issues with the product, please feel free to contact us. Our customer service team is dedicated to providing support and solutions.

Image: Information regarding the 365-day quality assurance and recommendation to register for service plan.

