
1. Important Safety Instructions
Read all instructions carefully before operating the pressure washer. Failure to follow these instructions may result in serious injury or property damage. Keep this manual for future reference.
1.1 General Safety Warnings
- Electrical Safety: Always connect the pressure washer to a properly grounded outlet. Do not use extension cords unless absolutely necessary, and ensure they are rated for outdoor use and the appliance's power requirements. Inspect the power cord for damage before each use.
- Water Connection: Ensure all water connections are secure to prevent leaks. Do not operate the unit without a water supply.
- High Pressure Hazard: The high-pressure spray can cause serious injury. Never direct the spray at people, pets, electrical devices, or the unit itself.
- Personal Protective Equipment (PPE): Always wear appropriate eye protection (safety glasses or goggles), hearing protection, and protective clothing (gloves, long pants, closed-toe shoes) when operating the pressure washer.
- Children and Bystanders: Keep children and bystanders away from the operating area.
- Stability: Operate the pressure washer on a stable, level surface.
- Chemicals: Use only pressure washer safe detergents. Follow detergent manufacturer's instructions for use and disposal.
- Ventilation: Ensure adequate ventilation when operating the unit.
2. Product Overview and Components
The DGIVOVO G1510-BL Pressure Washer is designed for various cleaning tasks. Familiarize yourself with all components before assembly and operation.
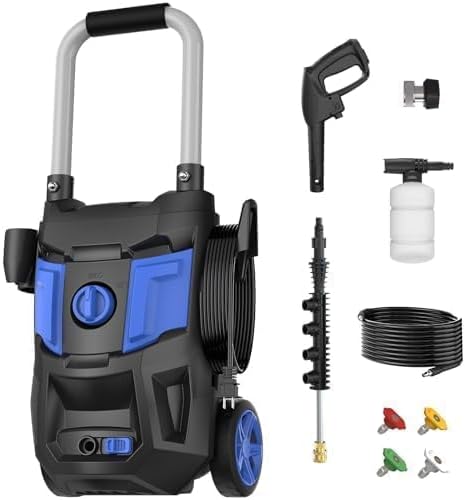
Image 2.1: The DGIVOVO Pressure Washer with its included accessories, including the main unit, spray gun, foam cannon, extension wand, high-pressure hose, and quick-connect nozzles.
2.1 Included Components
- Pressure Washer Unit (Model G1510-BL)
- Spray Gun with Safety Lock
- Extension Wand
- High-Pressure Hose (20 ft)
- Power Cord (35 ft)
- Foam Cannon (450 ml soap bottle)
- 4 Quick-Connect Nozzles (0°, 15°, 25°, 40°)
- Nozzle Holder
- Gun Holder

Image 2.2: Detailed view of key components including the 35 ft power cord, 450 ml soap bottle, 20 ft pressure hose, nozzle holder, safety lock on the spray gun, and gun holder on the unit.
3. Assembly Instructions
Follow these steps to assemble your pressure washer before first use.

Image 3.1: Visual guide for assembling the pressure washer, showing the handle attachment, hose connections, and nozzle insertion.
- Attach the Handle: Insert the handle into the designated slots on the top of the main unit until it clicks into place.
- Connect Water Inlet Adapter: Securely attach the water inlet adapter to the pressure washer's water inlet.
- Connect High-Pressure Hose to Gun: Screw the high-pressure hose firmly onto the spray gun.
- Connect High-Pressure Hose to Unit: Connect the other end of the high-pressure hose to the outlet on the pressure washer unit.
- Attach Extension Wand: Connect the extension wand to the spray gun.
- Insert Nozzle: Select the desired quick-connect nozzle and insert it into the end of the extension wand until it locks.
4. Operating Instructions
Follow these steps for safe and effective operation of your pressure washer.
4.1 Connecting Water and Power
- Connect a garden hose (not included) to the water inlet adapter on the pressure washer. Ensure the connection is tight.
- Connect the other end of the garden hose to a water faucet and turn on the water supply completely.
- Squeeze the trigger on the spray gun to purge air from the system until a steady stream of water flows out.
- Plug the power cord into a properly grounded electrical outlet.
4.2 Nozzle Selection and Application
The pressure washer includes four quick-connect nozzles, each designed for specific cleaning tasks. Always test on an inconspicuous area first.
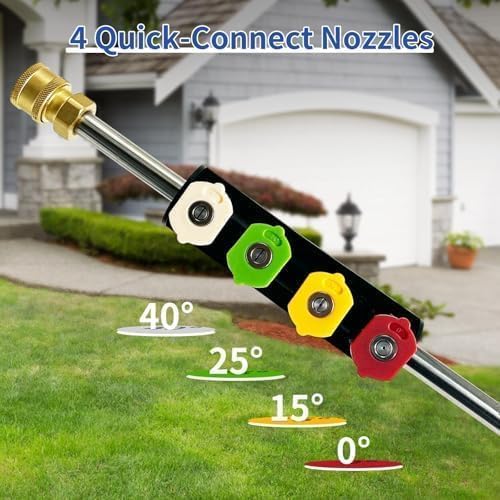
Image 4.1: The four quick-connect nozzles (0°, 15°, 25°, 40°) indicating their spray patterns.
- 0° (Red Nozzle): Produces a concentrated, high-pressure stream for stubborn stains and tough dirt on durable surfaces like concrete. Use with caution.
- 15° (Yellow Nozzle): Provides a powerful, narrow spray for intense cleaning of hard surfaces, removing paint, grease, or rust.
- 25° (Green Nozzle): Offers a versatile, medium-angle spray suitable for general cleaning of driveways, patios, and outdoor furniture.
- 40° (White Nozzle): Delivers a wide, gentle spray for cleaning sensitive surfaces such as car exteriors, windows, and house siding.

Image 4.2: Comparison of 0° nozzle for stubborn stains and 15° nozzle for mud and sand stains.

Image 4.3: Comparison of 25° nozzle for versatile use in courtyards and 40° nozzle for sensitive materials like vehicle washing and house siding.
4.3 Using the Foam Cannon
The foam cannon allows for the application of cleaning detergents.
- Fill the foam cannon bottle with pressure washer safe detergent according to the detergent manufacturer's instructions.
- Attach the foam cannon to the spray gun.
- Turn on the pressure washer and squeeze the trigger to apply foam to the desired surface.
- After applying detergent, remove the foam cannon and reattach a suitable nozzle for rinsing.
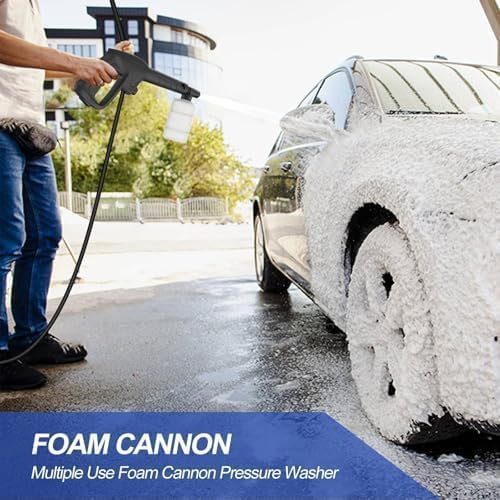
Image 4.4: A person applying cleaning foam to a car using the foam cannon attachment.
4.4 Starting and Stopping the Unit
- To Start: Ensure water supply is on and the unit is plugged in. Turn the power switch to the 'ON' position. Squeeze the spray gun trigger to begin spraying.
- To Stop: Release the spray gun trigger. The motor will stop automatically. For extended breaks or when finished, turn the power switch to 'OFF', unplug the unit, and turn off the water supply. Squeeze the trigger to release any remaining pressure.

Image 4.5: A person using the pressure washer to clean a paved driveway, demonstrating typical operation.
5. Maintenance and Storage
Proper maintenance and storage will extend the life of your pressure washer.
5.1 Cleaning the Unit
- After each use, flush the system with clean water to remove any detergent residue.
- Wipe down the exterior of the unit with a damp cloth.
- Clean the nozzle tips regularly to prevent blockages.
5.2 Storage
- Before storing, ensure all water is drained from the pump, hose, and spray gun to prevent freezing damage.
- Store the pressure washer in a dry, frost-free area.
- Coil the high-pressure hose and power cord neatly. The unit features built-in storage for the hose and accessories.
- Store nozzles in the designated nozzle holder.

Image 5.1: The pressure washer unit highlighting its integrated storage features for the spray gun, foam cannon, and power cord.
6. Troubleshooting Guide
Refer to this section for common issues and their solutions.
| Problem | Possible Cause | Solution |
|---|---|---|
| Unit does not start | No power supply; Power switch off; Thermal overload activated | Check power connection and outlet; Turn power switch on; Allow unit to cool down |
| Low pressure | Insufficient water supply; Clogged nozzle; Air in pump; Leaks in hose connections | Ensure water supply is fully open; Clean or replace nozzle; Purge air from system by squeezing trigger; Tighten all connections |
| Water leaks | Loose connections; Damaged O-rings or seals | Tighten all hose and accessory connections; Inspect and replace damaged O-rings or seals |
| Motor runs continuously when trigger is released | Air in pump; Internal leak | Purge air from system; Contact customer support if issue persists |
7. Technical Specifications
Key technical details for the DGIVOVO G1510-BL Pressure Washer.
| Specification | Value |
|---|---|
| Brand | DGIVOVO |
| Model Number | G1510-BL |
| Power Source | AC |
| Maximum Pressure | 4800 PSI (MAX) |
| Maximum Flow Rate | 3.0 Gallons Per Minute (GPM) |
| Hose Length | 20 Feet |
| Power Cord Length | 35 Feet |
| Product Dimensions | 8"L x 9"W x 7"H |
| Item Weight | 18.17 pounds |
| UPC | 717373086073 |
8. Warranty and Customer Support
For warranty information or customer support, please refer to the product packaging or contact DGIVOVO directly through their official channels. Details regarding specific warranty periods and terms are typically provided at the point of purchase or on the manufacturer's website.