
PWAY PW-DT243 RX
PWAY HDMI Extender PW-DT243 RX Unit Instruction Manual
Model: PW-DT243 RX | Brand: PWAY
Introduction
This manual provides detailed instructions for the installation, operation, and troubleshooting of your PWAY HDMI Extender RX (Receiver) unit. This receiver is designed to work with the PWAY PW-DT243 HDMI Extender system, allowing for the extension of HDMI signals over Cat5e/6/7 cables up to 500 feet (150 meters) in one-to-one configurations, or one-to-many configurations using a dedicated Gigabit Ethernet switch. Please read this manual thoroughly before use to ensure proper setup and performance.
Important Safety Information
- Ensure all cables are securely connected before powering on the device.
- Use only the provided power adapter. Using an incorrect power adapter may damage the device and void the warranty.
- Do not expose the device to water, moisture, or extreme temperatures.
- Do not attempt to open or repair the device. Refer all servicing to qualified personnel.
- Keep the device away from sources of heat and direct sunlight.
- For optimal performance, use high-quality Cat5e/6/7 cables.
Package Contents
The PWAY HDMI Extender RX Only package includes the following items:
- 1 x PWAY HDMI Extender Receiver (RX) Unit
- 1 x Power Adapter

Image 1: Contents of the PWAY HDMI Extender RX Only package, showing the receiver unit and its power adapter.
Product Overview
The PWAY HDMI Extender RX unit is a compact device designed to receive HDMI signals transmitted over a network cable. It features essential ports for connectivity and status indicators.
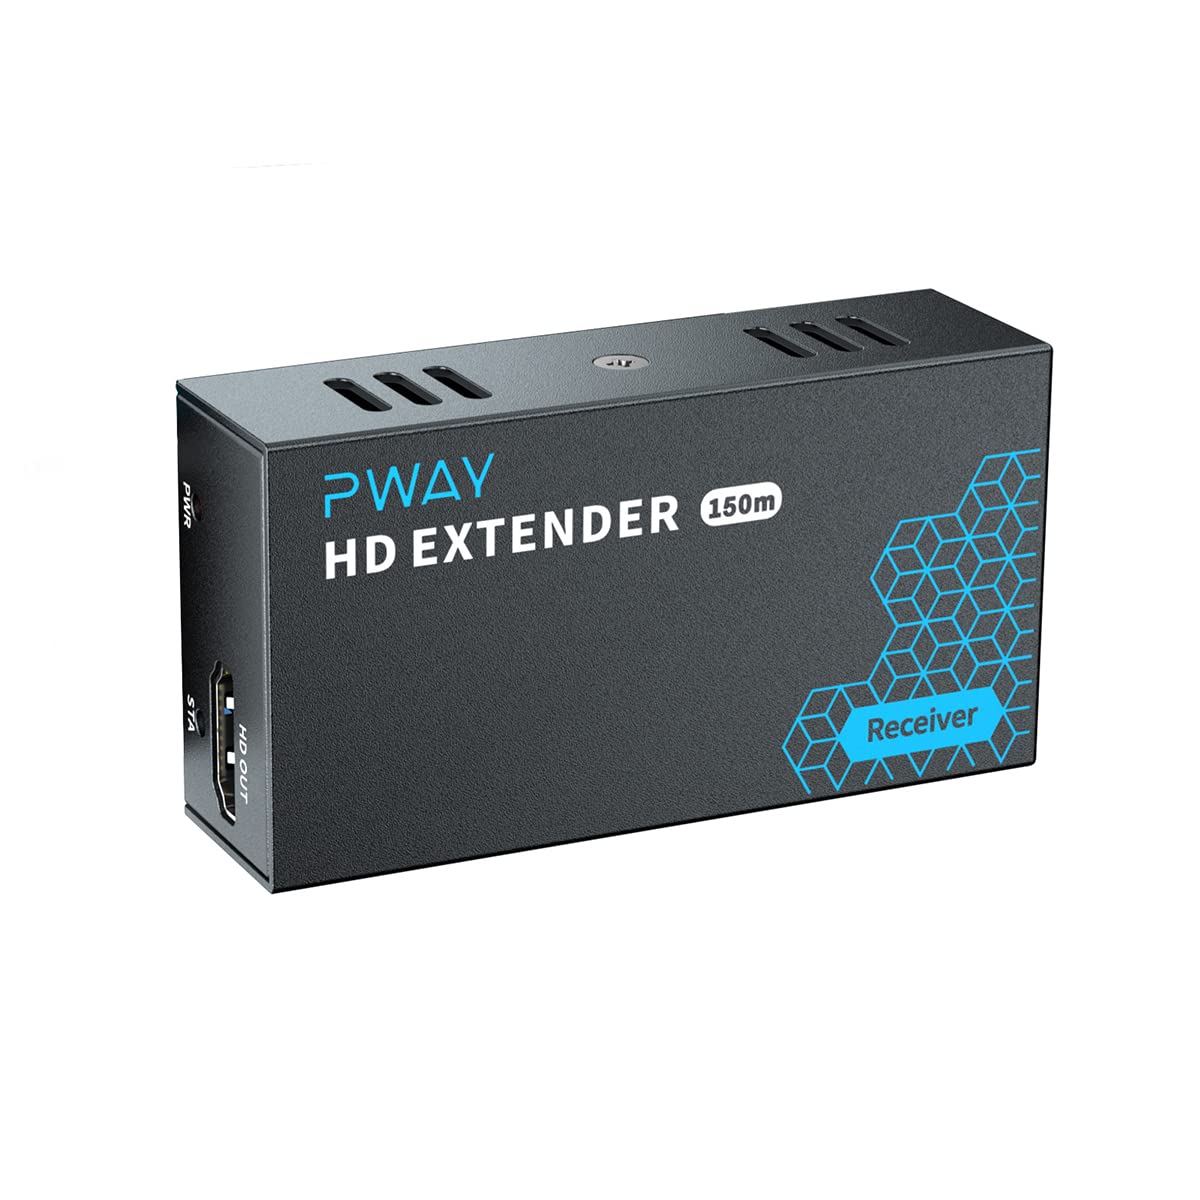
Image 2: Front view of the PWAY HDMI Extender RX unit, highlighting its compact design.
Port and Indicator Descriptions

Image 3: Detailed view of the PWAY HDMI Extender RX unit's ports and indicators.
- UTP Port: Connects to the Cat5e/6/7 network cable from the Transmitter (TX) unit or Gigabit switch.
- DC5-12V: Power input port for the included power adapter.
- HD OUT: HDMI output port to connect to your display device (monitor, TV).
- PWR LED: Power indicator light. Illuminates when the device is powered on.
- STA LED: Status indicator light. Indicates signal status (e.g., solid for active connection, blinking for signal detection).
Setup Instructions
The PWAY HDMI Extender system supports both one-to-one direct connections and one-to-many connections via a Gigabit Ethernet switch. This section details the setup for the RX unit in both scenarios.
1. One-to-One Direct Connection
- Connect an HDMI cable from your source device (e.g., PC, media player) to the HDMI IN port of the PWAY HDMI Extender Transmitter (TX) unit (sold separately).
- Connect a Cat5e/6/7 network cable from the UTP OUT port of the TX unit to the UTP port of the PWAY HDMI Extender Receiver (RX) unit. Ensure the cable length does not exceed 500 feet (150 meters) for optimal performance.
- Connect an HDMI cable from the HD OUT port of the RX unit to the HDMI input of your display device (e.g., monitor, TV).
- Connect the provided power adapter to the DC5-12V port of the RX unit and plug it into a power outlet.
- Connect the power adapter to the TX unit (if applicable) and plug it into a power outlet.
- Power on all connected devices. The PWR and STA LEDs on both units should illuminate, indicating a successful connection.

Image 4: Diagram illustrating a direct one-to-one connection between a PWAY HDMI Extender Transmitter and Receiver unit over a Cat5e/6 cable.
2. One-to-Many Connection via Gigabit Switch
This configuration allows a single TX unit to transmit HDMI signals to multiple RX units using a Gigabit Ethernet switch.
- Connect an HDMI cable from your source device to the HDMI IN port of the PWAY HDMI Extender Transmitter (TX) unit (sold separately).
- Connect a Cat5e/6/7 network cable from the UTP OUT port of the TX unit to an available port on a dedicated Gigabit Ethernet switch.
- For each display, connect a Cat5e/6/7 network cable from an available port on the same Gigabit Ethernet switch to the UTP port of each PWAY HDMI Extender Receiver (RX) unit.
- Connect an HDMI cable from the HD OUT port of each RX unit to its respective display device.
- Connect the provided power adapter to the DC5-12V port of each RX unit and plug them into power outlets.
- Connect the power adapter to the TX unit and plug it into a power outlet.
- Power on all connected devices. The PWR and STA LEDs on all units should illuminate, indicating successful connections.

Image 5: Diagram illustrating a one-to-many connection using a PWAY HDMI Extender Transmitter, a Gigabit Ethernet switch, and multiple PWAY HDMI Extender Receiver units.
Important Network Considerations:
- Dedicated Gigabit Switch: For optimal performance and to avoid signal interference, it is highly recommended to use a dedicated, unmanaged Gigabit Ethernet switch for the HDMI extender system.
- Avoid Home Routers: Do not connect the HDMI extender system to your home internet router or a switch shared with general network traffic. This can lead to signal degradation, delays, or complete loss of video.
- VLAN Isolation: If using a smart Gigabit switch, configure VLANs to isolate video traffic from other network traffic.
Operating Instructions
Once the PWAY HDMI Extender RX unit is properly set up and connected according to the instructions above, operation is straightforward:
- Ensure all devices (source, TX unit, RX unit, display) are powered on.
- The PWR LED on the RX unit should be solid, indicating it is receiving power.
- The STA LED on the RX unit should be solid or blinking steadily, indicating a stable HDMI signal connection from the TX unit.
- The HDMI signal from your source device should now be displayed on the connected monitor or TV.
- No additional configuration or software is required for basic operation.
Troubleshooting
If you encounter issues with your PWAY HDMI Extender RX unit, please refer to the following common problems and solutions:
- No Picture on Display:
- Check if the PWR LED on the RX unit is illuminated. If not, verify the power adapter is correctly connected and plugged into a working outlet.
- Ensure all HDMI and Cat5e/6/7 cables are securely connected to both the TX and RX units, and to the source and display devices.
- Verify the STA LED on the RX unit is illuminated or blinking, indicating a signal. If not, check the TX unit's status and connections.
- Try a different HDMI cable between the RX unit and the display.
- Ensure the display is set to the correct HDMI input.
- If using a Gigabit switch, ensure it is a dedicated switch and not a home router or shared network switch.
- Test the Cat5e/6/7 cable for continuity or try a shorter, known-good cable.
- Poor Picture Quality (Flickering, Garbled, Green Screen):
- This often indicates a problem with the Cat5e/6/7 cable. Ensure you are using high-quality cables and that they are properly terminated.
- Reduce the cable length if possible, especially if approaching the maximum 500ft limit.
- Ensure the Cat5e/6/7 cable is not running parallel to power lines or other sources of electromagnetic interference.
- Verify the Gigabit switch is functioning correctly and is not overloaded with other network traffic.
- Audio but No Video, or Video but No Audio:
- Check HDMI cable connections at both the RX unit and the display.
- Ensure your source device's audio/video output settings are correct.
- Intermittent Signal Loss:
- Check for loose cable connections.
- Ensure the power supply is stable and not fluctuating.
- If using a Gigabit switch, ensure it is not experiencing network congestion.
Specifications
| Model | PW-DT243 RX (Receiver Only) |
| Brand | PWAY |
| Input | 1 x UTP (RJ45) |
| Output | 1 x HDMI |
| Transmission Distance | Up to 500ft (150m) over Cat5e/6/7 cable |
| Supported Network | Dedicated Gigabit Ethernet Switch (unmanaged recommended) |
| Power Supply | DC 5-12V (Power Adapter included) |
| Compatible Devices | Monitor, Television |
| Color | Black |
| Dimensions | Approximately 7.09 x 4.72 x 1.73 inches |
| Weight | Approximately 8.15 ounces |
Warranty and Support
PWAY products are designed for reliability and performance. For warranty information and technical support, please refer to the warranty card included with your product or visit the official PWAY website. If you experience any issues that cannot be resolved using the troubleshooting guide, please contact PWAY customer support for assistance.
For further assistance, you may also contact your retailer.
Ask a question about this manual
Ask about setup, troubleshooting, compatibility, parts, safety, or missing instructions. Manuals+ will review the question and use this page’s manual context to help answer it.