
1. Introduction
This manual provides detailed instructions for the installation, operation, and maintenance of your Loniko G7 Max Smart Toilet. Please read this manual thoroughly before installation and use to ensure proper function and safety. Keep this manual for future reference.
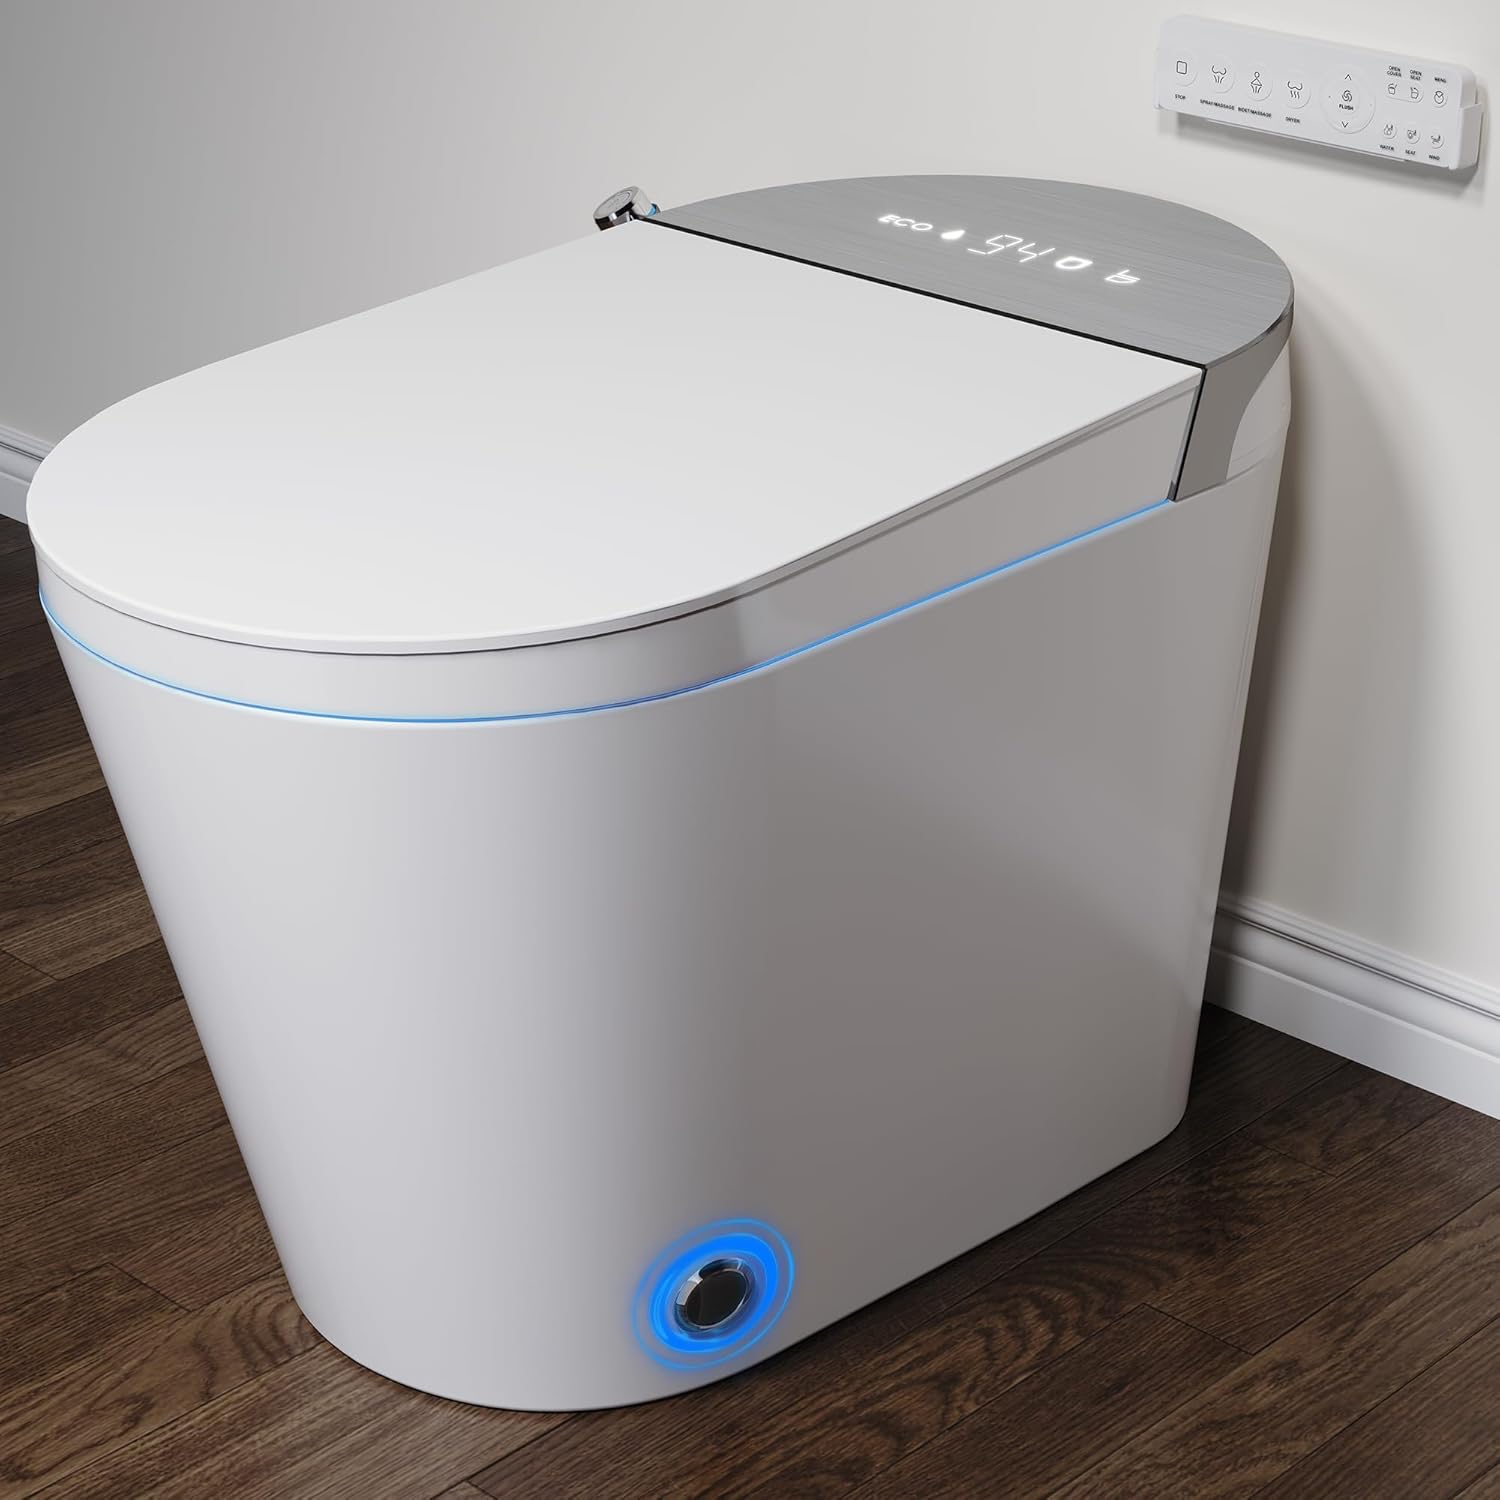
Image 1.1: The Loniko G7 Max Smart Toilet, showcasing its sleek design and accompanying remote control.
2. Safety Information
Observe the following safety precautions to prevent injury or damage to the product:
- Ensure the toilet is installed by a qualified professional or according to local plumbing codes.
- Do not expose the product to excessive moisture or direct water spray, except for intended cleaning.
- Unplug the unit from the power outlet before performing any maintenance or cleaning.
- Do not attempt to repair or modify the product yourself. Contact customer support for assistance.
- Keep children and pets away from the toilet's moving parts, such as the automatic lid.
3. Product Features
The Loniko G7 Max Smart Toilet offers a range of advanced features for enhanced comfort and hygiene:
- Powerful 360° Auto Flush: Siphonic flushing system with dual flush options (0.6 GPF for short use, 1.18 GPF for standard use).
- Heated Seat, Warm Water & Dryer: Adjustable temperature settings for personalized comfort.
- Automatic Lid & Hands-Free Flush: Radar-sensing lid opens and closes automatically. Foot sensor enables touch-free flushing.
- Multiple Cleaning Modes: Includes posterior, feminine, and massage cleaning with filtered water.
- Foam Shield: Reduces splashes and odors, contributing to a cleaner bowl.
- LCD Display & LED Night Light: Digital display shows temperature settings. Soft LED light provides visibility in low light conditions.
- Remote Control & Rotary Knob: Wireless remote and integrated rotary knob for easy function adjustment.
- Soft Close Lid: Ensures quiet operation.
- Dual Aromatherapy System: Helps maintain a fresh bathroom environment.

Image 3.1: Overview of the Loniko G7 Max Smart Toilet highlighting adjustable temperature, night light, auto open, powerful flushing, multi-mode cleaning, and warm air dryer.

Image 3.2: The dual aromatherapy system, designed to refresh the air.
4. Components and Package Contents
The Loniko G7 Max Smart Toilet package includes the following items:

Image 4.1: Diagram showing included components: Remote control, Wax Ring, Angle valves, Flange, Widen Baby Seating, Screws, Aroma tablet, Manual, and Battery.
- Loniko G7 Max Smart Toilet Unit
- Wireless Remote Control
- Wax Ring
- Angle Valves
- Flange Kit
- Widen Baby Seating (for child use)
- Installation Screws and Hardware
- Aroma Tablets
- User Manual (this document)
- Battery for Remote Control
5. Specifications
| Feature | Specification |
|---|---|
| Model Number | G7-1-WP |
| Product Dimensions | 27.56"D x 16.93"W x 18.31"H |
| Material | Ceramic, Polypropylene (PP) |
| Item Weight | 104 Pounds |
| Installation Type | Floor Mounted |
| Flush Type | Siphonic, Dual Flush (0.6 GPF / 1.18 GPF) |
| UPC | 701915159073 |
| Certifications | UPC, ETL Listed |
| Waterproof Rating | IPX4 |

Image 5.1: Dimensional diagram of the Loniko G7 Max Smart Toilet, showing measurements for depth, width, and height, including the distance from the wall to the sewage outlet.

Image 5.2: Display of UPC and ETL certification marks, indicating compliance with safety and quality standards.

Image 5.3: Illustration demonstrating the IPX4 waterproof rating, indicating protection against splashing water.
6. Installation Guide
The Loniko G7 Max Smart Toilet is designed for straightforward DIY installation. A video guide is typically available to assist with the process. It is recommended that two people perform the installation due to the unit's weight.
6.1 Pre-Installation Checklist
- Ensure the water supply is turned off.
- Verify that the floor flange is properly installed and in good condition.
- Confirm that a grounded electrical outlet is available near the installation area.
- Gather all included components and necessary tools.
6.2 Installation Steps (General Overview)
- Position the toilet over the floor flange, ensuring proper alignment.
- Secure the toilet to the floor using the provided screws and hardware.
- Connect the water supply line to the toilet's inlet valve.
- Plug the toilet into a grounded electrical outlet.
- Turn on the water supply and check for leaks.
- Perform a test flush to ensure proper operation.
For detailed step-by-step instructions, refer to the included installation video guide or contact customer support.
7. Operating Instructions
Familiarize yourself with the various functions of your Loniko G7 Max Smart Toilet for optimal use.
7.1 Automatic Lid & Flushing
- Auto Open/Close: The radar sensor detects approach and automatically opens the lid. The lid closes automatically after a set period of inactivity or when you move away.
- Foot Sensor Flush: A foot sensor located at the base allows for touch-free flushing.
- Dual Flush System: A half flush (0.6 GPF) activates when seated for less than 30 seconds or via the foot sensor. A full flush (1.18 GPF) activates when seated for over 30 seconds.

Image 7.1: Visual representation of the automatic lid opening on approach, automatic closing and flushing upon leaving, foot sensor activation, and automatic toilet flushing.

Image 7.2: Diagrams illustrating automatic lid and seat opening for male urination and full use, along with automatic flushing features.

Image 7.3: Illustration of the powerful siphonic flushing system, showing 360-degree super vortex siphoning and jet flush for efficient cleaning.
7.2 Bidet Functions (Posterior, Feminine, Massage)
- Use the remote control or rotary knob to select desired cleaning mode.
- Adjust water pressure and nozzle position as needed.
- The self-cleaning nozzle ensures hygiene before and after each use.
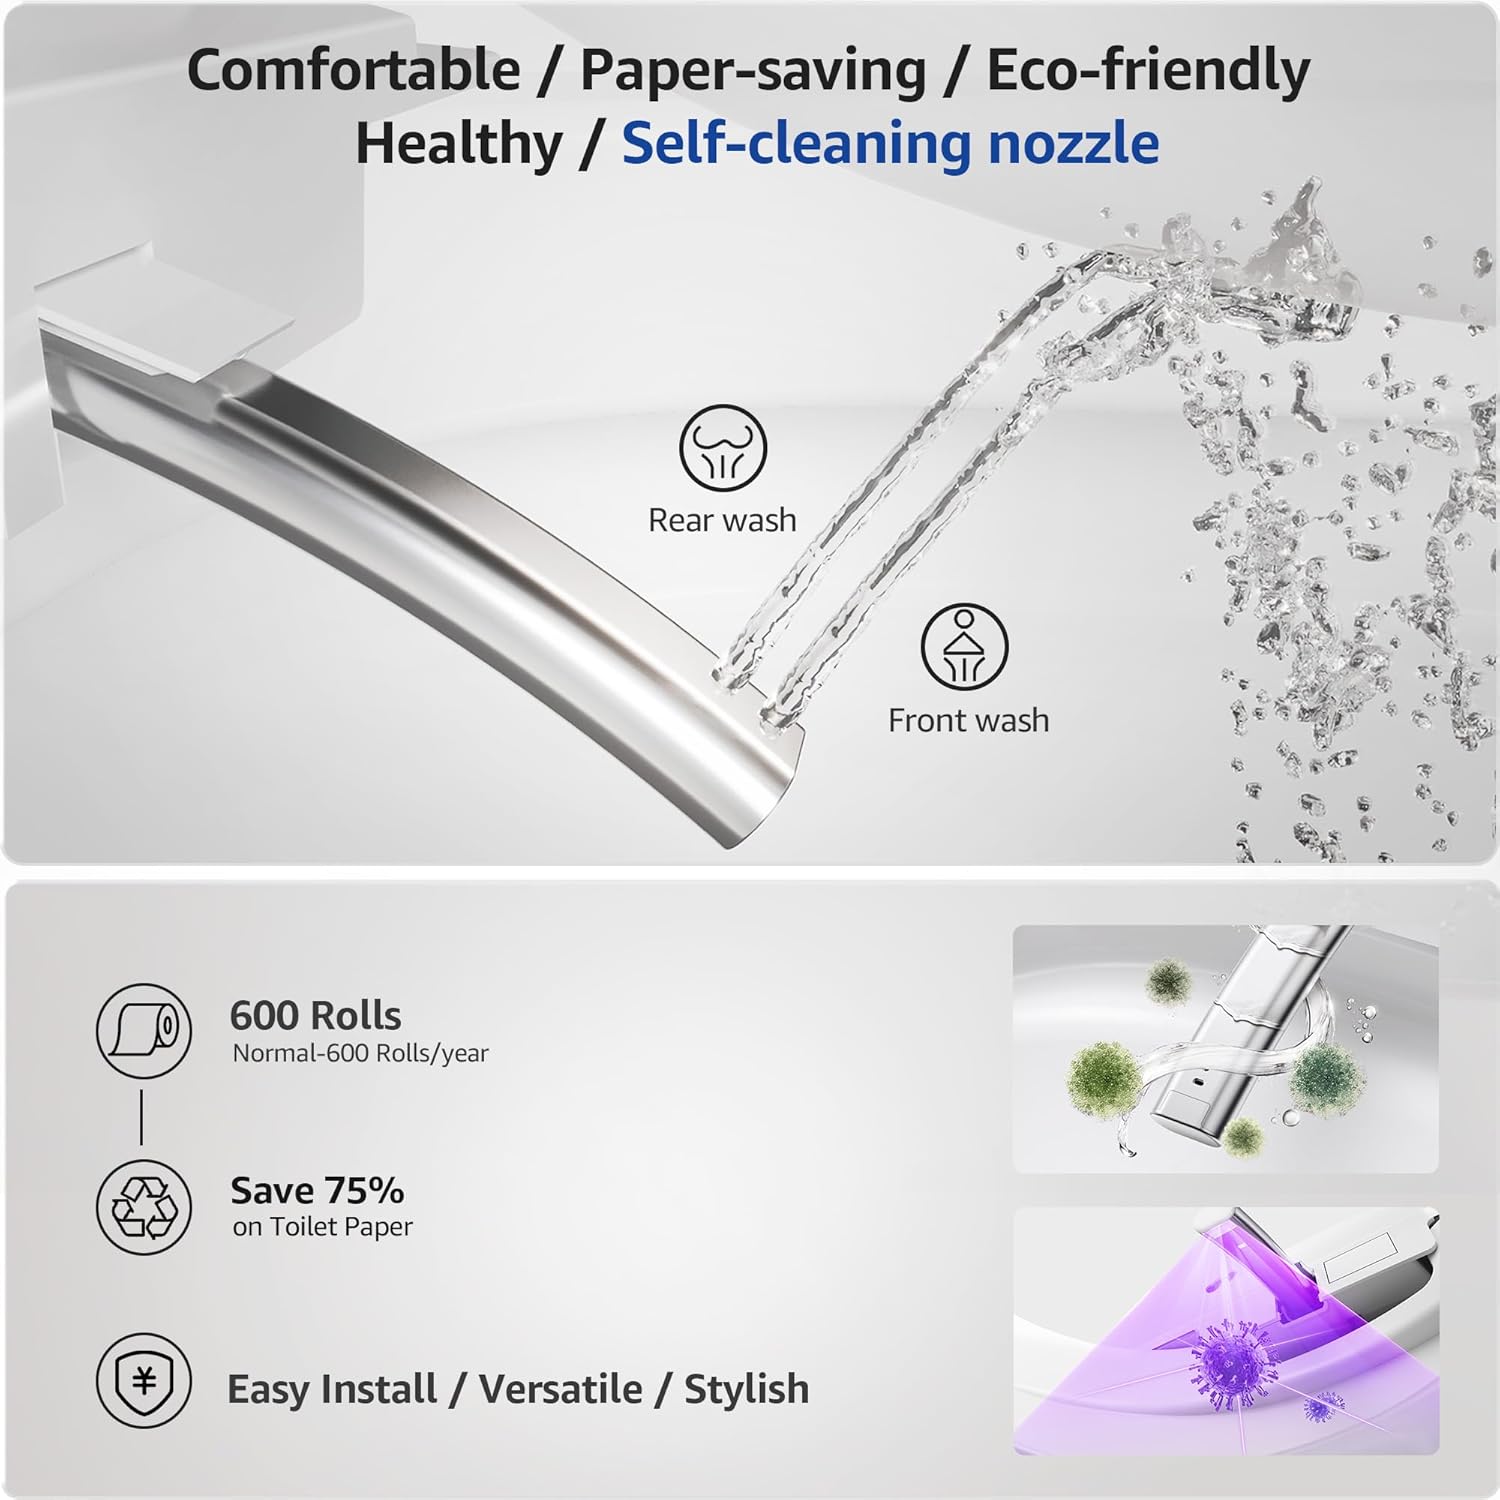
Image 7.4: Depiction of rear wash and front wash bidet functions, highlighting comfort, paper-saving, eco-friendly, and healthy aspects, along with the self-cleaning nozzle.

Image 7.5: Illustration of the 2-second instant warm water feature, showing adjustable temperature levels from normal to intense (94°F to 104°F).
7.3 Heated Seat & Warm Air Dryer
- Adjust the seat temperature to one of four available settings using the remote or knob.
- Activate the warm air dryer after bidet use for a comfortable drying experience. Dryer temperature is also adjustable.

Image 7.6: Overhead view of the toilet seat illustrating the heated seat, warm air drying, buttock sensing area, and night light, with temperature ranges for seat and dryer.

Image 7.7: Diagram showing adjustable seat and drying temperature settings for a personalized smart toilet experience.
7.4 Foam Shield
The integrated foam shield function helps to reduce splashing and contains odors within the bowl, contributing to a cleaner and more hygienic environment.
7.5 Night Light & LCD Display
- The soft LED night light illuminates the bowl, providing visibility during nighttime use without harsh brightness.
- The LCD display shows current settings for seat, water, and dryer temperatures.

Image 7.8: The LCD digital display on the toilet, showing current settings such as 'eco' mode and temperature.
7.6 Remote Control & Rotary Knob
All functions can be controlled via the wireless remote control or the intuitive rotary knob located on the side of the toilet.
- Remote Control: Provides access to all settings and functions from a distance.
- Rotary Knob: Allows quick adjustments for common functions like cleaning modes and temperature.

Image 7.9: Close-up of the rotary knob and remote control, demonstrating easy operation and the ability to switch between female cleaning, hip cleaning, and other functions.
8. Maintenance
Regular cleaning and maintenance will ensure the longevity and optimal performance of your smart toilet.
- Exterior Cleaning: Wipe the exterior surfaces with a soft, damp cloth and mild, non-abrasive cleaner. Avoid harsh chemicals that may damage the finish.
- Nozzle Cleaning: The bidet nozzle features a self-cleaning function. For additional cleaning, gently pull out the nozzle and wipe it with a soft cloth. Do not use excessive force.
- Foam Shield Maintenance: Ensure the foam shield dispenser is clear of obstructions. Replace aroma tablets as needed.
- Filter Cleaning: Periodically check and clean the water filter to prevent blockages and maintain water pressure.
- Power Disconnection: Always unplug the toilet from the power outlet before performing any deep cleaning or maintenance.
9. Troubleshooting
If you encounter issues with your Loniko G7 Max Smart Toilet, refer to the following common problems and solutions:
| Problem | Possible Cause | Solution |
|---|---|---|
| Toilet not flushing | No power, water supply off, sensor obstruction. | Check power connection. Ensure water supply valve is open. Clear any obstructions from sensors. |
| Bidet not spraying water | Water supply off, nozzle clogged, filter dirty. | Check water supply. Clean the bidet nozzle. Clean or replace the water filter. |
| Heated seat not warming | Temperature setting too low, power issue. | Adjust seat temperature setting. Verify power connection. |
| Automatic lid not opening/closing | Sensor obstructed, sensor malfunction. | Ensure the radar sensor is clean and unobstructed. If issue persists, contact support. |
| Foot sensor not working | Sensor obstructed, sensor malfunction. | Ensure the foot sensor area is clear. If issue persists, contact support. |
| Remote control not working | Dead battery, remote out of range. | Replace remote control battery. Ensure remote is within operating range of the toilet. |
If the problem persists after attempting these solutions, please contact customer support.
10. Warranty Information
For specific warranty terms and conditions, please refer to the warranty card included with your product or visit the official Loniko website. Keep your proof of purchase for warranty claims.
11. Customer Support
If you require further assistance, have questions, or need to report an issue, please contact Loniko customer support through the following channels:
- Website: Visit the official Loniko website for support resources and contact information.
- Email: Refer to your product packaging or warranty card for customer service email addresses.
- Phone: Check the Loniko website or product documentation for customer service phone numbers.
When contacting support, please have your product model (G7 Max) and serial number (if applicable) ready.

