
1. Introduction
This manual provides detailed instructions for the setup, operation, and maintenance of your Play Mac Pro Smart Projector. Please read this manual thoroughly before using the projector to ensure proper functionality and to maximize your viewing experience. Keep this manual for future reference.
2. Product Overview
2.1 Key Features
- Built-in Official Google TV: Access popular streaming apps directly.
- Google Voice Assistant: Control the projector and search content using voice commands.
- High Brightness: 2500 ANSI Lumens for clear images in various lighting conditions.
- Native 1080P Resolution: Supports 4K video input for detailed visuals.
- Automatic Adjustments: Auto Focus and Auto Keystone correction for a clear, rectangular image.
- Advanced Connectivity: WiFi 6 and Bluetooth 5.2 for seamless wireless connections.
- Versatile Installation: Supports ceiling, tabletop, tripod, and wall mounting.
- Multiple Ports: HDMI ARC, USB, and 3.5mm audio for external devices.
2.2 Package Contents
Ensure all items are present in the package:
- Play Mac Pro Smart Projector
- Remote Control
- Power Cable
- User Manual (this document)
2.3 Projector Components
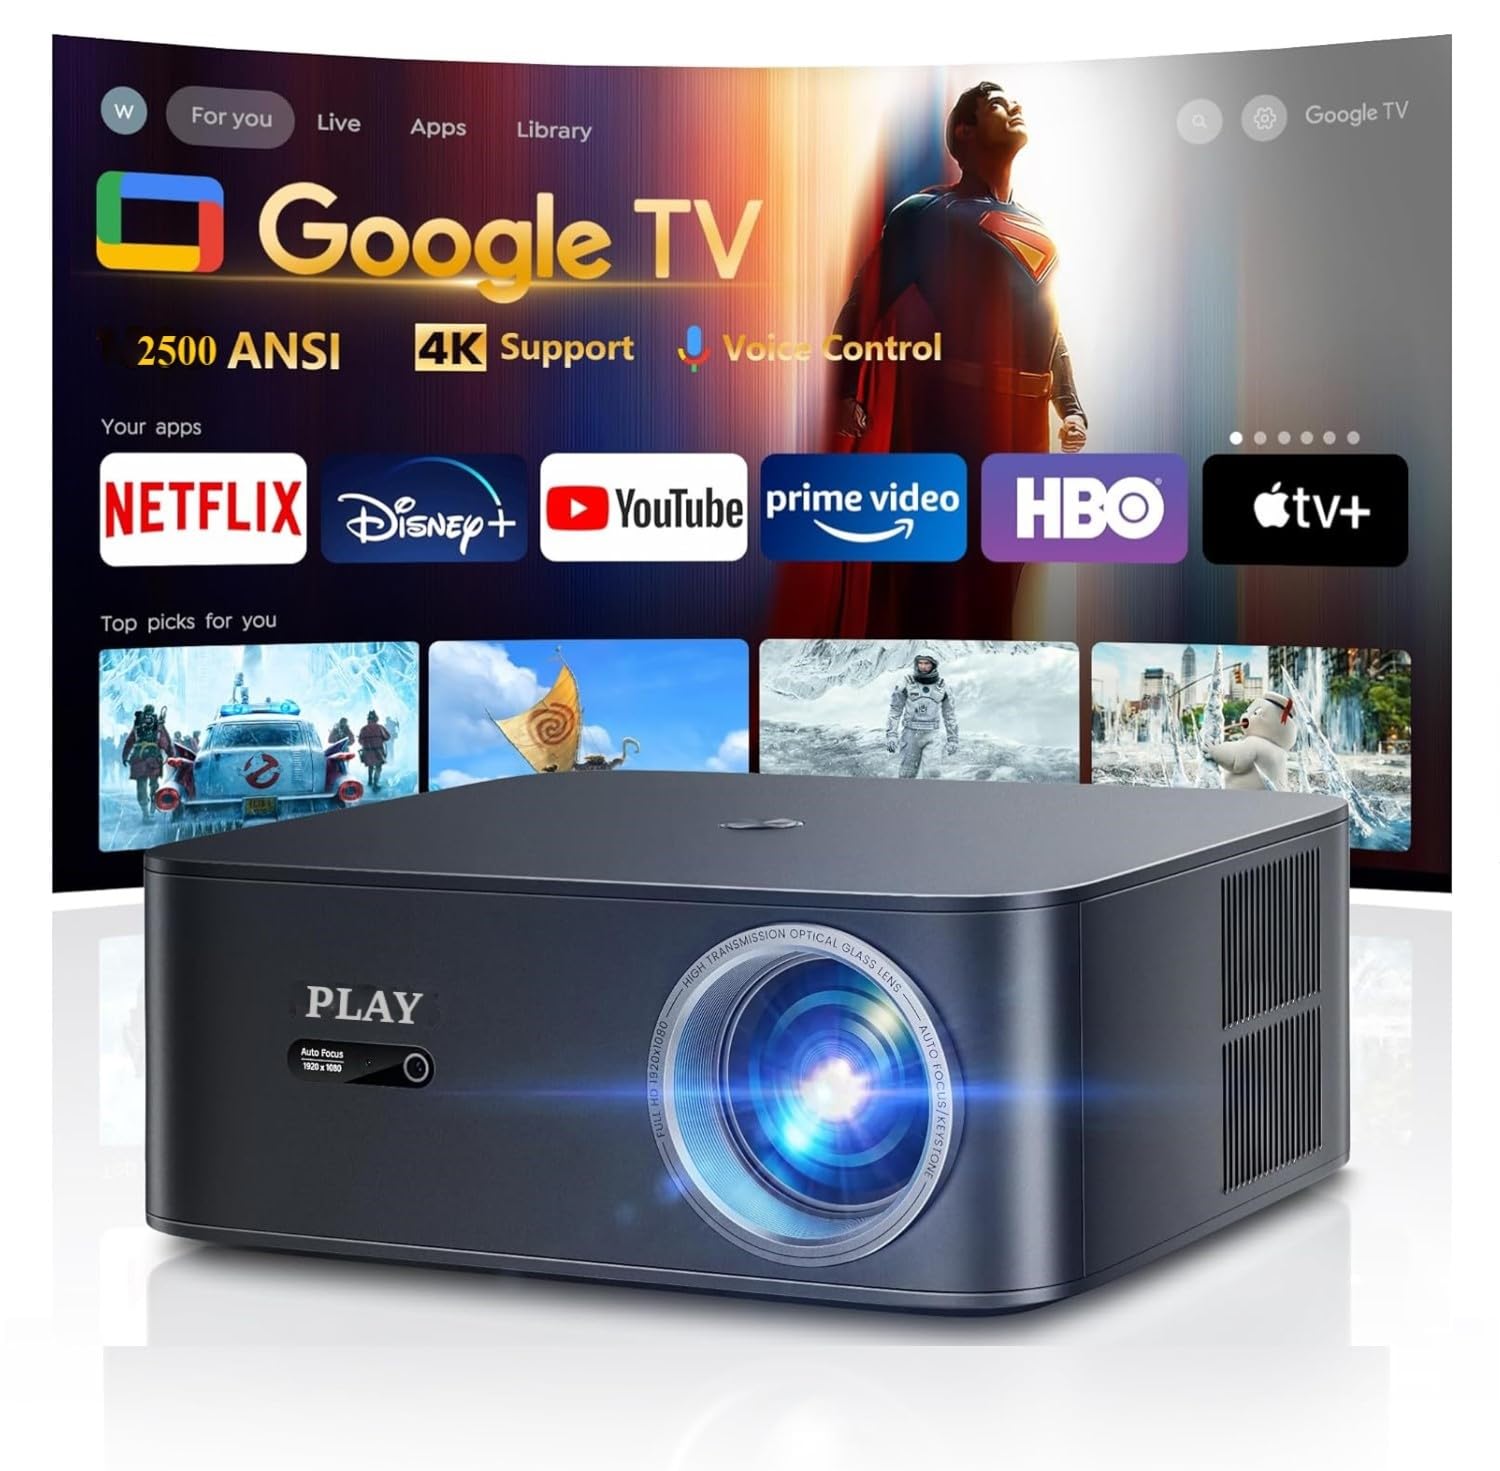
Figure 2.3.1: Front view of the Play Mac Pro Smart Projector displaying the Google TV interface with various streaming app icons. The projector features a lens on the front and ventilation on the sides.

Figure 2.3.2: Rear view of the Play Mac Pro Smart Projector, highlighting the HDMI, USB, and power input ports for connecting external devices and power supply.
3. Setup
3.1 Placement Options
The Play Mac Pro projector offers flexible placement options:
- Tabletop Mount: Place the projector on a flat surface.
- Ceiling Mount: Securely attach the projector to the ceiling using compatible mounting hardware (not included). The projector has four M5 screw holes at the bottom for this purpose.
- Tripod Mount: Use a standard tripod for portable setup.
- Wall Mount: Attach to a wall using appropriate brackets (not included).

Figure 3.1.1: Illustration of versatile installation methods, including tray bracket, desktop setup, and ceiling mount, demonstrating the projector's adaptability to different environments.
3.2 Power Connection
- Connect the power cable to the projector's power input port.
- Plug the other end of the power cable into a suitable electrical outlet.
- Press the power button on the projector or remote control to turn it on.
4. Operating Instructions
4.1 Google TV Interface
The Play Mac Pro projector features an officially licensed Google TV operating system, providing access to a wide range of streaming applications and content.
- Upon startup, the Google TV home screen will display, offering personalized content recommendations and quick access to installed apps like Netflix, Disney+, YouTube, and Prime Video.
- Navigate the interface using the provided remote control.

Figure 4.1.1: The Google TV home screen, illustrating the unified platform for streaming, live TV, sports, and music, with numerous app icons visible.
4.2 Google Voice Assistant
Utilize the built-in Google Voice Assistant for hands-free control:
- Press and hold the dedicated voice control button on your remote.
- Speak your command clearly, such as "Open Netflix," "Play Inside Out 2," "What's the weather?" or "Turn up the volume."
- Release the button after speaking. The projector will process your command.

Figure 4.2.1: A hand holding the projector's remote control, demonstrating the use of Google Voice Assistant with example commands displayed on the projected screen.
5. Connectivity
5.1 Wireless Connectivity (WiFi 6 & Bluetooth 5.2)
- WiFi 6: Connect to your home network for internet access and streaming. Supports Airplay (iOS devices) and Miracast (Android & Windows devices) for screen mirroring.
- Bluetooth 5.2: Pair with external Bluetooth speakers, headphones, or sound systems for enhanced audio.

Figure 5.1.1: A smartphone wirelessly casting content to the projector, illustrating the WiFi 6 and Bluetooth 5.2 connectivity features for seamless media sharing.
5.2 Wired Connections
The projector is equipped with the following ports for wired connections:
- HDMI ARC: Connect to laptops, gaming consoles (PS5, Nintendo Switch), or soundbars. HDMI ARC simplifies audio connection to compatible sound systems.
- USB: Connect USB drives for media playback.
- 3.5mm Audio Port: Connect external speakers or headphones.

Figure 5.2.1: An illustration detailing the projector's connectivity options, showing how it seamlessly connects to various external devices such as phones, laptops, game consoles, and USB drives via its HDMI, USB, and audio ports.
6. Image and Audio Adjustments
6.1 Automatic Adjustments
The projector features intelligent automatic adjustments for optimal image quality:
- Auto Focus: The projector automatically adjusts the lens to achieve a sharp image.
- Auto Keystone: The projector automatically corrects trapezoidal distortion to ensure a rectangular image, even when projected at an angle.

Figure 6.1.1: A visual representation of the projector's Auto Focus and Auto Keystone features, demonstrating real-time screen adjustments for a perfectly sharp and rectangular image.
6.2 Manual Adjustments
- Zoom: Adjust the image size from 50% to 100% without moving the projector.
- Aspect Ratio: Select between 4:3 and 16:9 aspect ratios to match your content.
- Brightness & Contrast: Customize image brightness and contrast settings via the Google TV menu.
- Sleep Timer: Set a timer for the projector to automatically turn off.
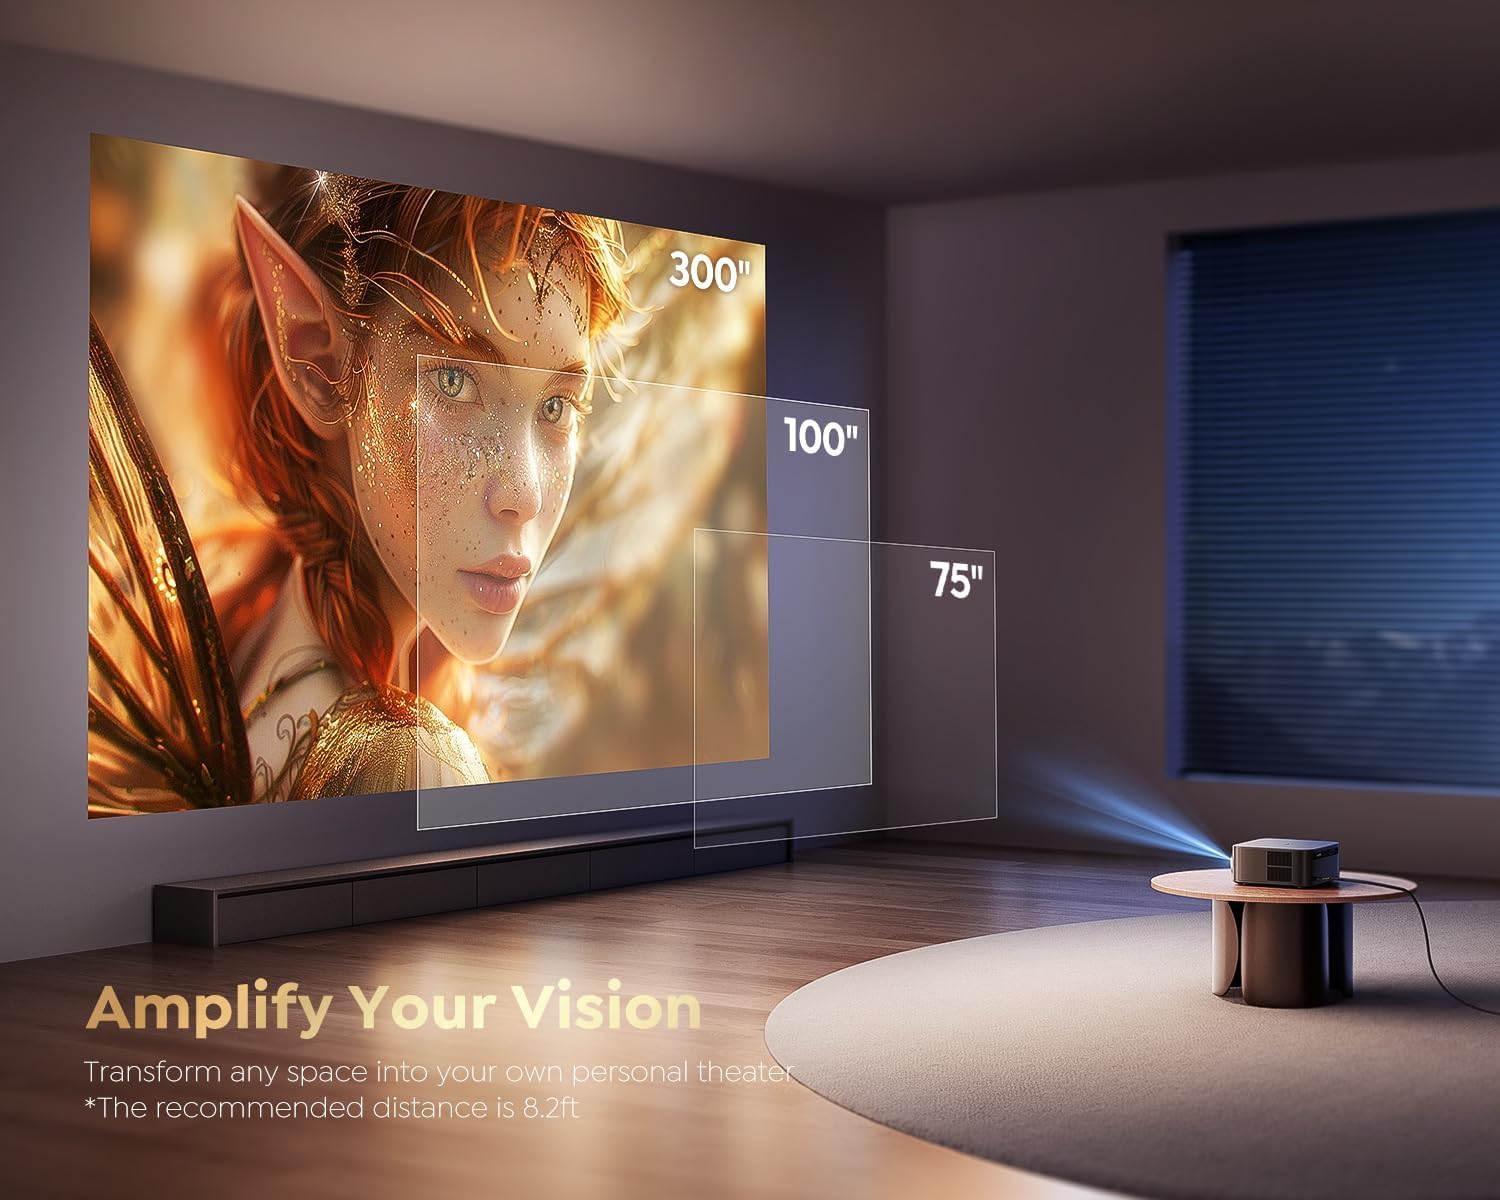
Figure 6.2.1: An image illustrating the projector's ability to display various screen sizes, from 75 inches to 300 inches, transforming any space into a personal theater.
6.3 Audio
The projector includes powerful built-in speakers. For external audio, use Bluetooth 5.2 or the HDMI ARC port to connect a soundbar, or the 3.5mm audio port for other audio devices.
7. Maintenance
To ensure the longevity and optimal performance of your projector, follow these maintenance guidelines:
- Cleaning the Lens: Use a soft, lint-free cloth specifically designed for optical lenses. Do not use abrasive cleaners or solvents.
- Cleaning the Exterior: Wipe the projector's exterior with a soft, dry cloth. Avoid using liquid cleaners directly on the device.
- Ventilation: Ensure the projector's ventilation openings are not blocked to prevent overheating.
- Storage: When not in use for extended periods, store the projector in a cool, dry place, away from direct sunlight and extreme temperatures.
8. Troubleshooting
If you encounter issues with your Play Mac Pro Smart Projector, refer to the following common troubleshooting steps:
- No Power: Check if the power cable is securely connected to both the projector and the power outlet. Ensure the outlet is functional.
- No Image: Verify that the input source is correctly selected (e.g., HDMI, Google TV). Check all cable connections. If using wireless casting, ensure both devices are on the same network.
- Blurred Image: Allow the Auto Focus feature to operate. If the issue persists, check for obstructions in front of the lens or ensure the projector is placed within the recommended projection distance.
- No Sound: Check the volume settings on both the projector and any connected external audio devices. Ensure the correct audio output is selected in the projector's settings. If using HDMI ARC, confirm compatibility and proper setup.
- Remote Control Not Responding: Replace the batteries in the remote control. Ensure there are no obstructions between the remote and the projector.
- Wi-Fi/Bluetooth Connectivity Issues: Restart the projector and your router/Bluetooth device. Ensure the projector is within range of the Wi-Fi network or Bluetooth device.
For further assistance, please contact customer support as detailed in the Warranty and Support section.
9. Specifications
| Feature | Specification |
|---|---|
| Brand | Play |
| Model | MacPro-PLAY |
| Display Technology | LCD |
| Display Type | LED |
| Brightness | 2500 ANSI Lumens |
| Native Resolution | 1920 x 1080 (1080P) |
| Supported Resolution | Up to 3840 x 2160 (4K) |
| Image Contrast Ratio | 20000:1 |
| Aspect Ratio | 16:9 (Supports 4:3) |
| Refresh Rate | 60 Hz |
| Operating System | Certified Google TV |
| Voice Control | Google Voice Assistant |
| Wireless Connectivity | WiFi 6, Bluetooth 5.2 |
| Hardware Interface | HDMI ARC, USB, 3.5mm Audio |
| Special Features | Auto Focus, Auto Keystone, 50%-100% Zoom, Built-in Speaker, Auto Obstacle Avoidance, Auto Screen Alignment |
| Compatible Devices | Phone, Laptop, PS5, Nintendo Switch |
| Mounting Type | Ceiling Mount, Table Mount, Tripod Mount, Wall Mount |
| Product Dimensions | 14 x 12.5 x 12 cm |
| Item Weight | 1.5 kg |
| Voltage | 110 Volts |
10. Warranty and Support
Play provides comprehensive support for your Mac Pro Smart Projector:
- Warranty: Enjoy 1-YEAR repair coverage from the date of purchase.
- Technical Support: Lifetime technical support is available to assist you with any questions or issues you may encounter.
For technical assistance or warranty claims, please refer to the contact information provided with your product packaging or visit the official Play website.


