Part Contents
Please verify that all components are present before beginning installation.
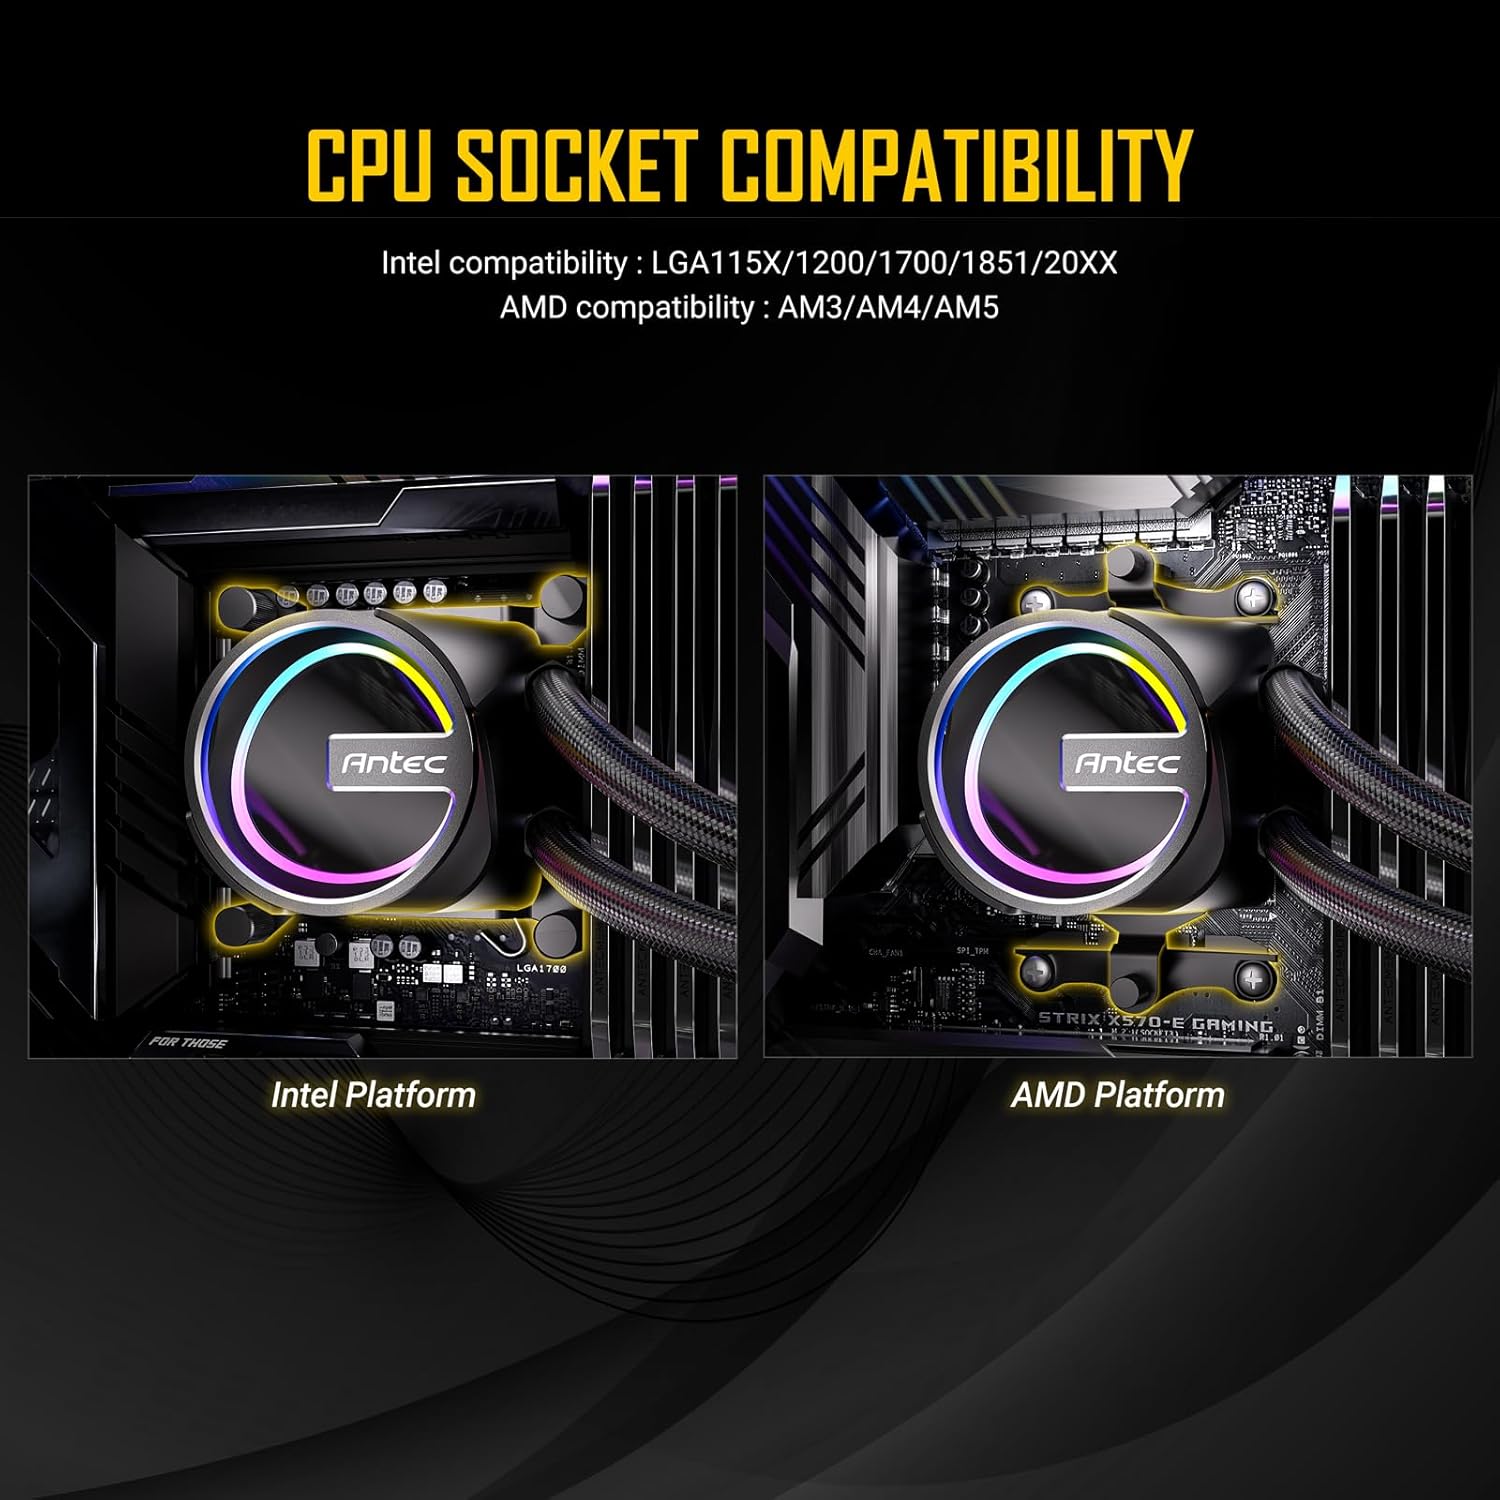
Image: All components included in the Antec Skeleton 240 ARGB Liquid CPU Cooler package, including the radiator, pump, fans, various mounting brackets, screws, thermal paste, and cables.
- 240mm Radiator with attached tubing and pump/cold plate
- 2 x 120mm PWM ARGB Fans
- Intel Mounting Bracket Set (LGA 115X/1200/1700/20XX)
- AMD Mounting Bracket Set (AM4/AM5)
- Universal Backplate
- Mounting Screws and Standoffs
- Thermal Paste Syringe
- ARGB Controller Cable (if not using motherboard sync)
- Fan Splitter Cable
Setup and Installation
Follow these steps carefully to install your Antec Skeleton 240 ARGB Liquid CPU Cooler.
1. Prepare the CPU and Motherboard
- Ensure your system is powered off and unplugged.
- Clean the CPU surface with isopropyl alcohol to remove any old thermal paste.
- Apply a pea-sized amount of the provided thermal paste to the center of the CPU's integrated heat spreader (IHS).
2. Install Radiator Fans
- Attach the two 120mm ARGB fans to the radiator using the long fan screws. Ensure the fan orientation is correct for your desired airflow (intake or exhaust).

Image: A single Antec PWM ARGB fan, showcasing its design and lighting capabilities. These fans are mounted onto the radiator.
3. Install Backplate and Standoffs
For Intel Sockets (LGA 115X/1200/1700/20XX):
- Position the universal backplate behind the motherboard, aligning the holes with the CPU socket mounting holes.
- Secure the appropriate Intel standoffs through the motherboard from the front, screwing them into the backplate.
For AMD Sockets (AM4/AM5):
- Remove the existing plastic retention clips from the motherboard, but retain the original AMD backplate.
- Screw the appropriate AMD standoffs directly into the original AMD backplate.

Image: Depicts the Antec Skeleton 240 ARGB pump head mounted on both an Intel platform (left) and an AMD platform (right), highlighting the different mounting mechanisms for each CPU socket type.
4. Install Pump/Cold Plate
- Attach the correct mounting brackets for your CPU socket to the pump head.
- Carefully place the pump/cold plate assembly onto the CPU, aligning the holes in the brackets with the standoffs.
- Secure the pump by tightening the four thumb nuts onto the standoffs in a diagonal pattern until snug. Do not overtighten.

Image: Close-up of the Antec Skeleton 240 ARGB pump head, featuring its unique skeleton-frame design and vibrant ARGB lighting effects.

Image: Underside view of the Antec Skeleton 240 ARGB pump, showing the large copper base plate designed for efficient heat transfer from the CPU.
5. Mount Radiator and Connect Cables
- Mount the radiator assembly to an available fan mounting location in your PC case (e.g., top, front).
- Connect the 4-pin PWM fan cables from the fans to the fan splitter cable, then connect the splitter to a CPU_FAN or SYS_FAN header on your motherboard.
- Connect the 3-pin ARGB cables from the fans and pump to the included ARGB controller or directly to a 5V 3-pin ARGB header on your motherboard.
- Connect the 3-pin pump power cable to a AIO_PUMP or SYS_FAN header on your motherboard. Ensure it is set to run at full speed in BIOS for optimal pump performance.

Image: The Antec Skeleton 240 ARGB liquid cooler installed inside a computer case, showing the radiator with two ARGB fans mounted at the top, and the illuminated pump head on the CPU.
Maintenance
Regular maintenance ensures optimal performance and longevity of your liquid CPU cooler.
- Dust Cleaning: Periodically clean the radiator fins and fan blades with compressed air to prevent dust buildup, which can impede airflow and cooling efficiency.
- Visual Inspection: Regularly check the tubing and connections for any signs of leaks or damage.
- Thermal Paste: While not frequently required, replacing thermal paste every few years can help maintain optimal thermal transfer.
