
1. Introduction
This manual provides detailed instructions for the assembly, safe use, and maintenance of your Polibi Full Over Twin Bunk Bed Frame, Model S00212. Please read all instructions carefully before beginning assembly and retain this manual for future reference.
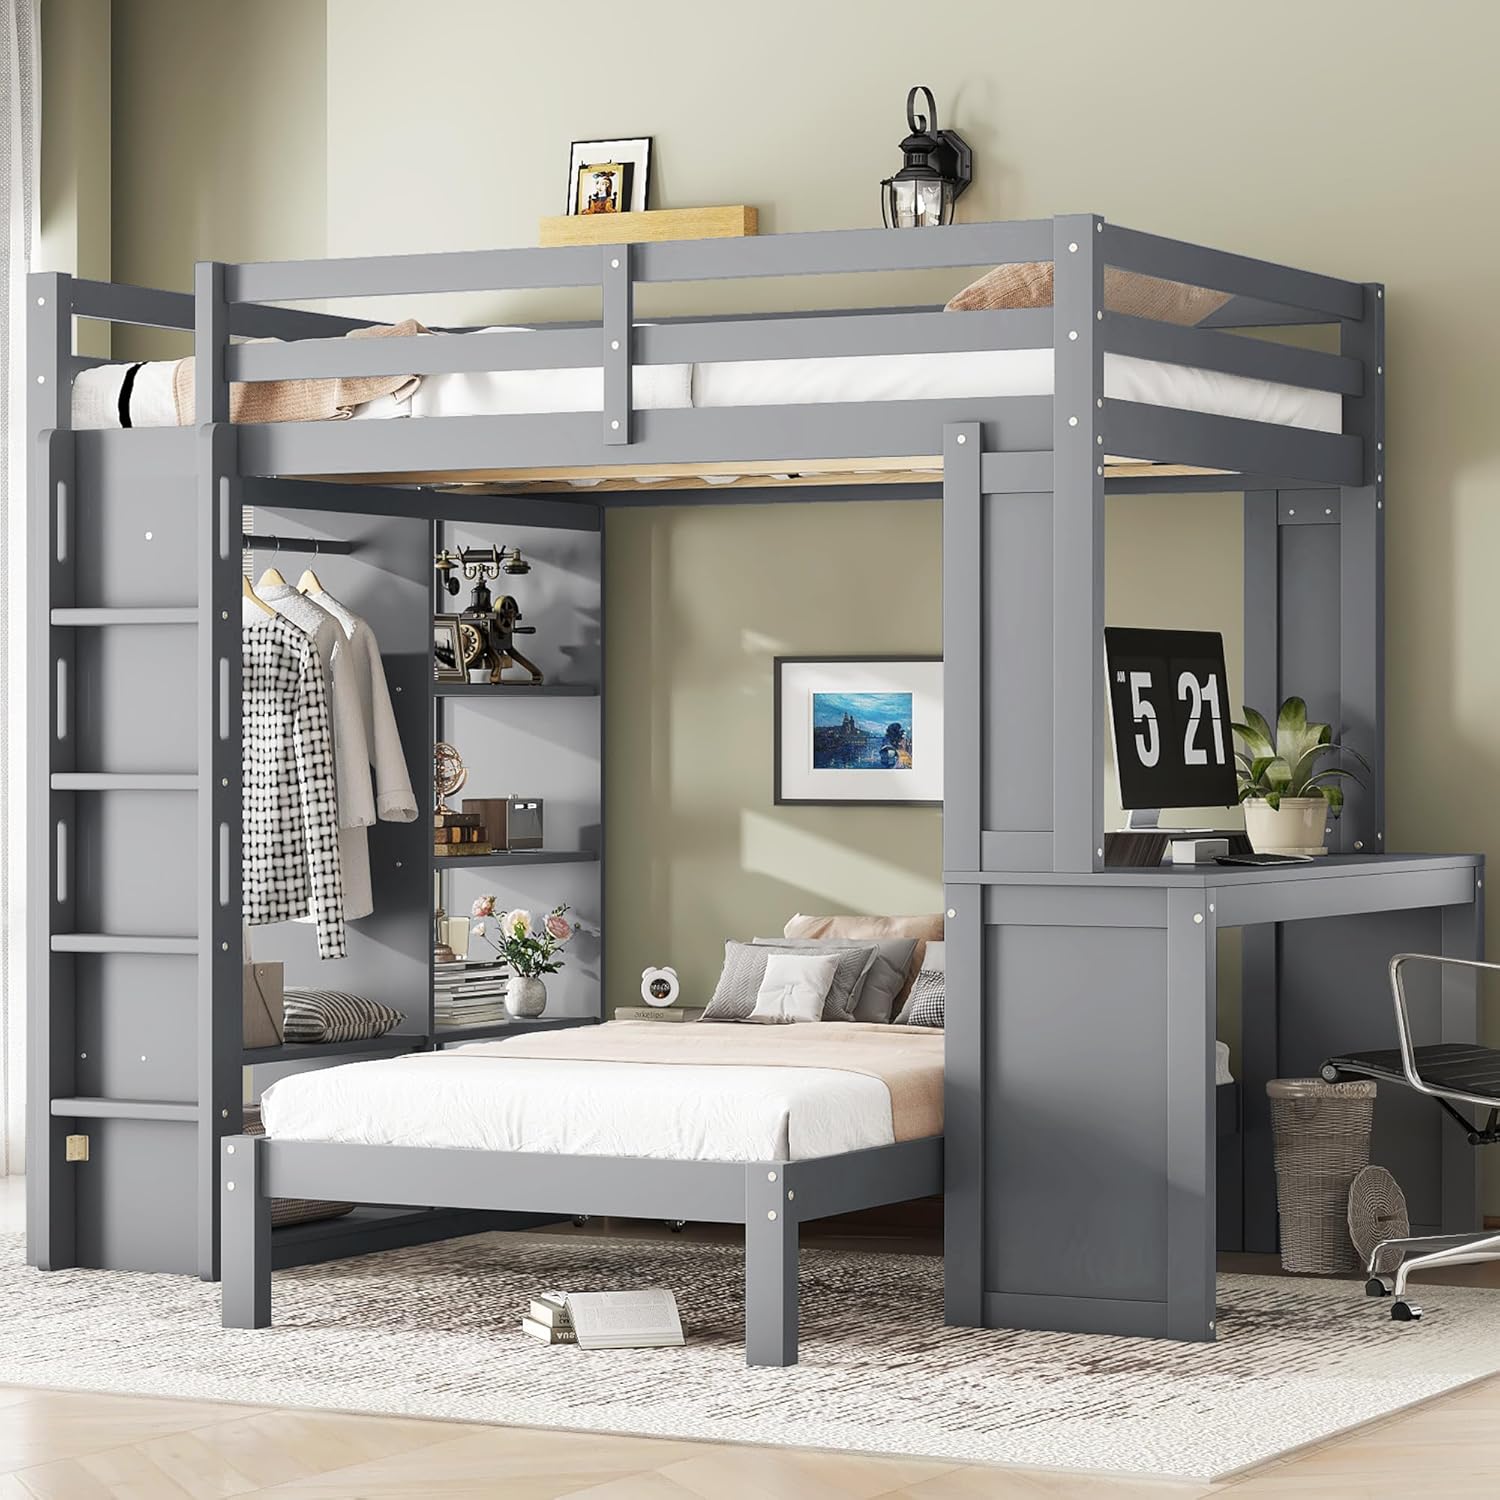
Image 1.1: The Polibi Full Over Twin Bunk Bed Frame, Model S00212, featuring a grey finish, integrated desk, wardrobe, and shelving units. The lower bed is shown in place beneath the loft bed structure.
2. Product Features
The Polibi Full Over Twin Bunk Bed Frame is designed with multiple functionalities to optimize space and utility:
- Spacious All-in-One Storage: Maximizes bedroom potential with built-in shelves and a full wardrobe for organizing clothes, books, and daily essentials.
- Built-In Study or Work Desk: Features an integrated desk under the loft bed, providing a surface for studying, working, or gaming.
- Convertible & Detachable Lower Bed: The lower twin bed can be detached and used independently, offering flexibility for various room configurations.
- Sturdy & Safe Solid Wood Construction: Constructed from durable solid pine wood for stability and safety, including full-length guardrails. The top bunk supports up to 400 lbs, and the lower bunk supports up to 250 lbs.
- Easy Assembly: Designed for straightforward setup with all necessary tools, hardware, and an illustrated manual included.

Image 2.1: Detail of the integrated shelving and wardrobe area, providing organized storage for various items.

Image 2.2: Detail of the built-in desk, offering a dedicated workspace beneath the loft bed.
3. Safety Information
Adherence to these safety guidelines is crucial to prevent injury and ensure the longevity of your bunk bed.
- Weight Capacity: Do not exceed the maximum weight capacity of 400 lbs for the top bunk and 250 lbs for the lower bunk.
- Top Bunk Age Restriction: The top bunk is not suitable for children under 6 years of age.
- Guardrails: Always use the guardrails on the top bunk. Ensure they are properly installed and maintained.
- Ladder Safety: Use the ladder for entering and exiting the top bunk. Do not use the bed as a climbing frame.
- Mattress Size: Use only mattresses of the specified size to ensure proper fit and guardrail effectiveness. For the top bunk, the mattress thickness should not exceed 6 inches to maintain adequate guardrail height.
- Assembly: Ensure all connections are tight before use. Periodically check and tighten hardware.
- Ventilation: Ensure adequate ventilation around the bed.
- No Horseplay: Prohibit horseplay on or under the bed.

Image 3.1: Detail of the top bunk showing the full-length guardrails and the wooden slat support system, emphasizing structural integrity and safety features.
4. Package Contents
Before assembly, verify that all components listed below are present and undamaged. If any parts are missing or damaged, do not proceed with assembly. Contact customer support for assistance.
- Bed Frame Components (Headboards, Footboards, Side Rails, Slats)
- Ladder
- Desk Unit
- Wardrobe Unit
- Shelving Units
- Hardware Pack (Screws, Bolts, Washers, Allen Wrench)
- Assembly Instructions Manual
5. Setup and Assembly Instructions
Assembly typically requires two adults. Follow the included illustrated manual step-by-step. Do not use power tools for assembly as this may overtighten and damage the wood.
- Prepare Workspace: Clear a spacious area for assembly. Lay out all components on a soft, clean surface to prevent scratches.
- Identify Parts: Match all parts with the component list and diagrams in the separate assembly manual.
- Assemble Base Units: Begin by assembling the wardrobe, shelving, and desk units as per the instructions.
- Construct Loft Bed Frame: Attach the side rails to the headboards/footboards of the upper bunk. Secure the ladder.
- Integrate Storage/Desk: Connect the assembled storage and desk units to the loft bed frame.
- Install Slats: Place and secure the wooden slats for both the upper and lower beds.
- Assemble Lower Bed: Assemble the lower twin bed frame.
- Position Lower Bed: Place the lower bed beneath the loft structure. It can be positioned centrally or detached for independent use.
- Final Check: Ensure all bolts and screws are securely tightened. Do not overtighten.

Image 5.1: An angled view of the fully assembled Polibi bunk bed frame, showcasing its integrated design with the upper loft bed, lower bed, and attached storage/desk components.
6. Operating Instructions
- Using the Bunk Beds: The top bunk is accessed via the integrated ladder. The lower bed can be used as a standard twin bed.
- Utilizing the Desk: The built-in desk provides a stable surface for study or work. Ensure items placed on the desk do not obstruct movement or pose a falling hazard.
- Wardrobe and Shelves: Use the wardrobe for hanging clothes and the shelves for organizing books, decor, or other personal items. Distribute weight evenly across shelves.
- Detaching the Lower Bed: To use the lower bed independently, carefully unfasten any connecting hardware (if applicable, refer to assembly manual for specific steps) and slide it out from under the loft bed. Ensure the detached bed is stable before use.
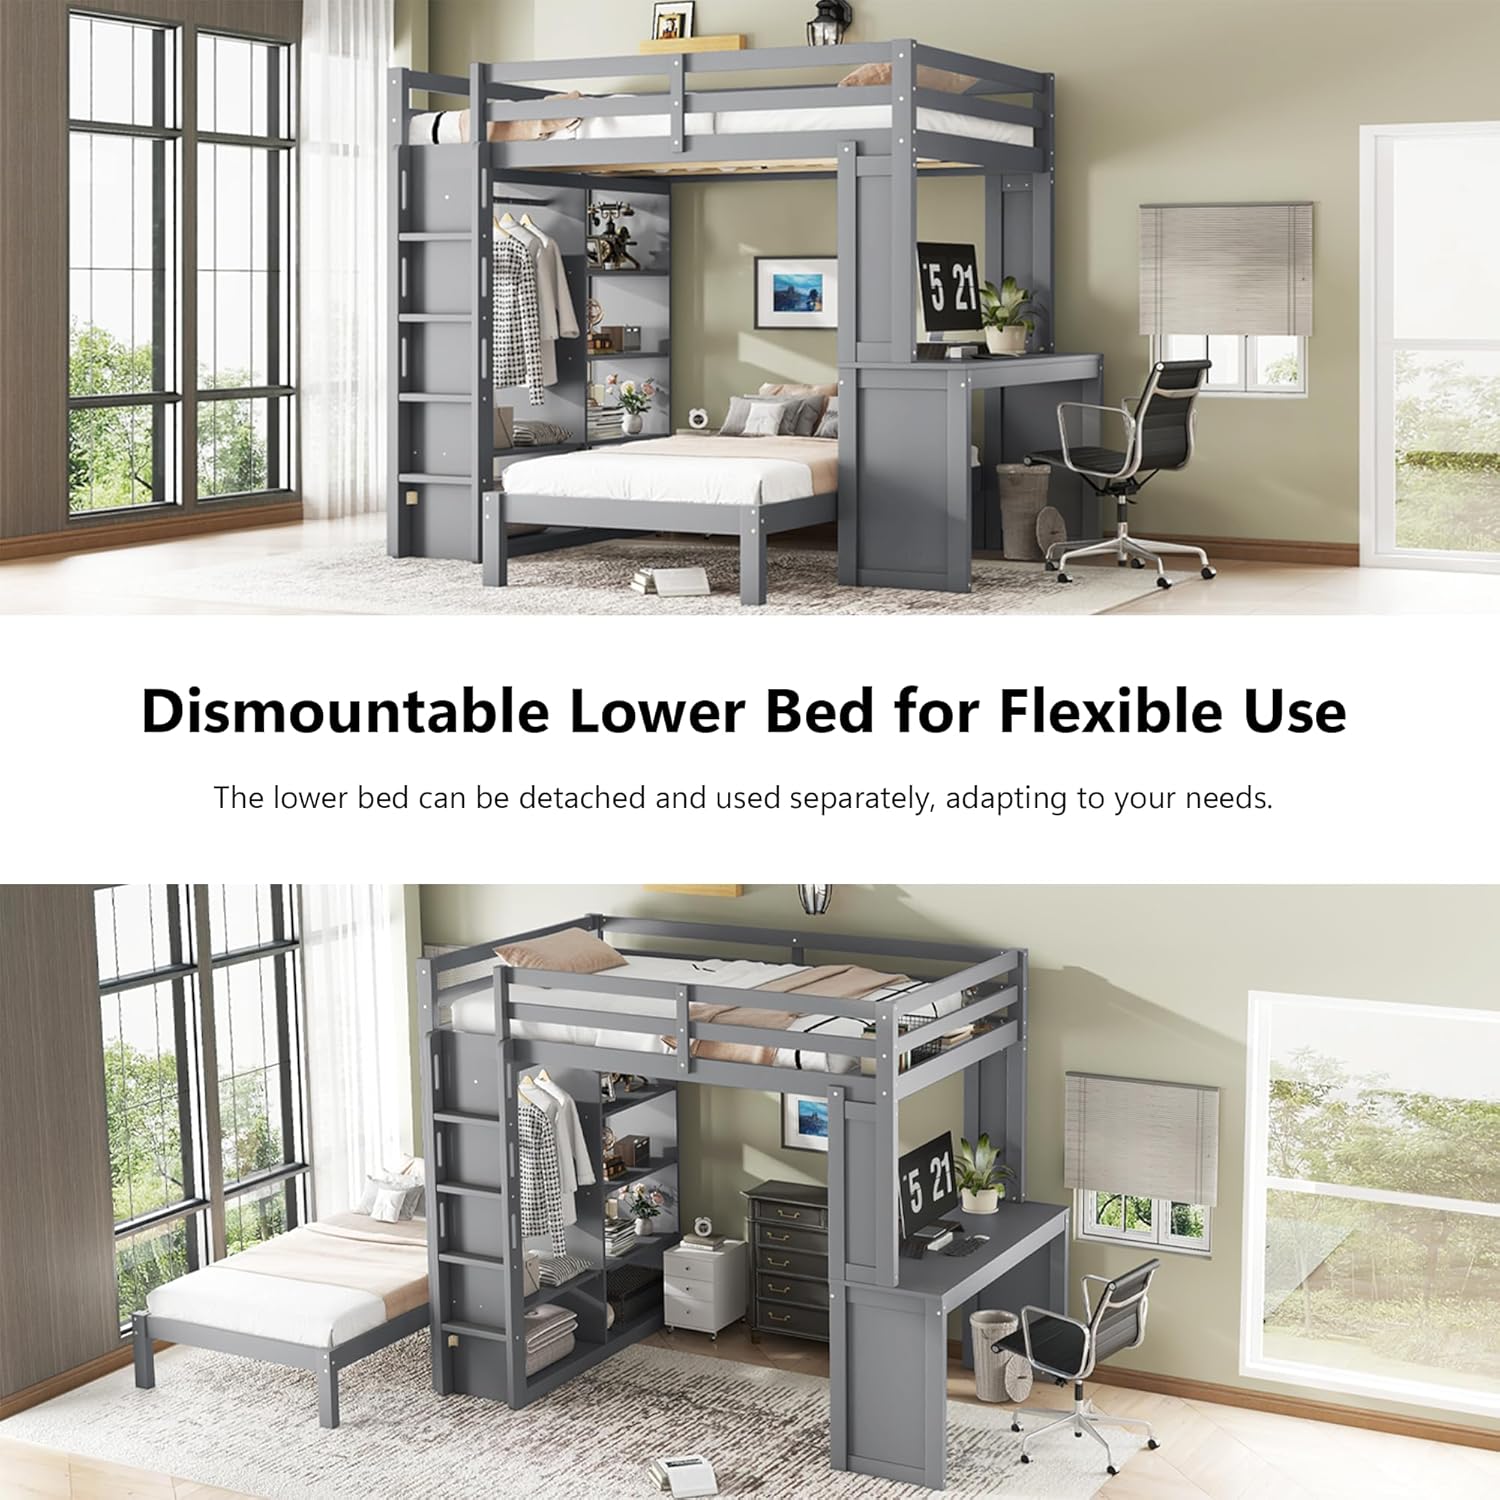
Image 6.1: The Polibi bunk bed demonstrating the detachable lower bed, which can be moved and used separately from the main loft structure, offering flexible room arrangements.
7. Maintenance
- Cleaning: Wipe surfaces with a soft, damp cloth. Avoid harsh chemicals or abrasive cleaners that may damage the finish.
- Hardware Check: Periodically (e.g., every 3 months) inspect all bolts, screws, and connections. Tighten any loose hardware to ensure stability and safety. Do not overtighten.
- Structural Integrity: Regularly check for any signs of wear, damage, or structural weakness. Address any issues promptly.
- Wood Care: Protect the wood from extreme temperature changes and direct sunlight to prevent warping or fading.
8. Troubleshooting
| Problem | Possible Cause | Solution |
|---|---|---|
| Bed feels wobbly or unstable. | Loose hardware connections. | Inspect all bolts and screws. Tighten any loose connections using the provided Allen wrench. |
| Squeaking noises during use. | Loose hardware or friction between wood components. | Tighten all hardware. If squeaking persists, apply a small amount of paraffin wax or silicone spray to contact points between wood pieces. |
| Difficulty detaching/reattaching lower bed. | Obstruction or incorrect alignment. | Ensure the area is clear. Refer to the assembly manual for specific instructions on detaching/reattaching the lower bed. Check for any misaligned pins or holes. |
9. Specifications
| Attribute | Detail |
|---|---|
| Model Number | S00212 |
| Brand | Polibi |
| Bed Type | Full XL/Full over Twin Bunk Bed (Convertible Loft Bed) |
| Color | Grey |
| Product Dimensions (L x W x H) | 83.9" x 77.95" x 72.83" |
| Top Bunk Weight Capacity | 400 lbs |
| Lower Bunk Weight Capacity | 250 lbs |
| Material | Solid Pine Wood |
| Special Features | Dismountable Lower Bed, Built-in Desk, Built-in Wardrobe, Built-in Shelves |
| Assembly Required | Yes |

Image 9.1: Technical diagram illustrating the key dimensions of the Polibi Full Over Twin Bunk Bed Frame in inches, including length, width, and height of various components.
10. Warranty and Support
For warranty information, missing parts, or technical support, please refer to the contact details provided with your purchase documentation or visit the official Polibi website. Please have your model number (S00212) and purchase date available when contacting support.


