
1. Safety Information
Always exercise extreme caution when working with electricity. This device is designed to assist in detecting voltage, but it should not be the sole method for confirming a circuit is de-energized. Always follow local electrical safety codes and practices.
- Verify Operation: Before and after each use, test the device on a known live circuit to ensure it is functioning correctly.
- Personal Protective Equipment (PPE): Always wear appropriate PPE, such as insulated gloves and safety glasses, when working with electrical systems.
- Inspect Device: Do not use the voltage tester if it appears damaged or if any part is broken.
- Environmental Conditions: Use the device in dry conditions. Avoid use in rain or wet environments.
- Children: Keep this device out of reach of children.
2. Product Overview
The Kalttoy Non-Contact Voltage Tester is a versatile tool designed for detecting AC voltage without direct contact, enhancing safety and convenience. It also functions as a screwdriver for light tasks.
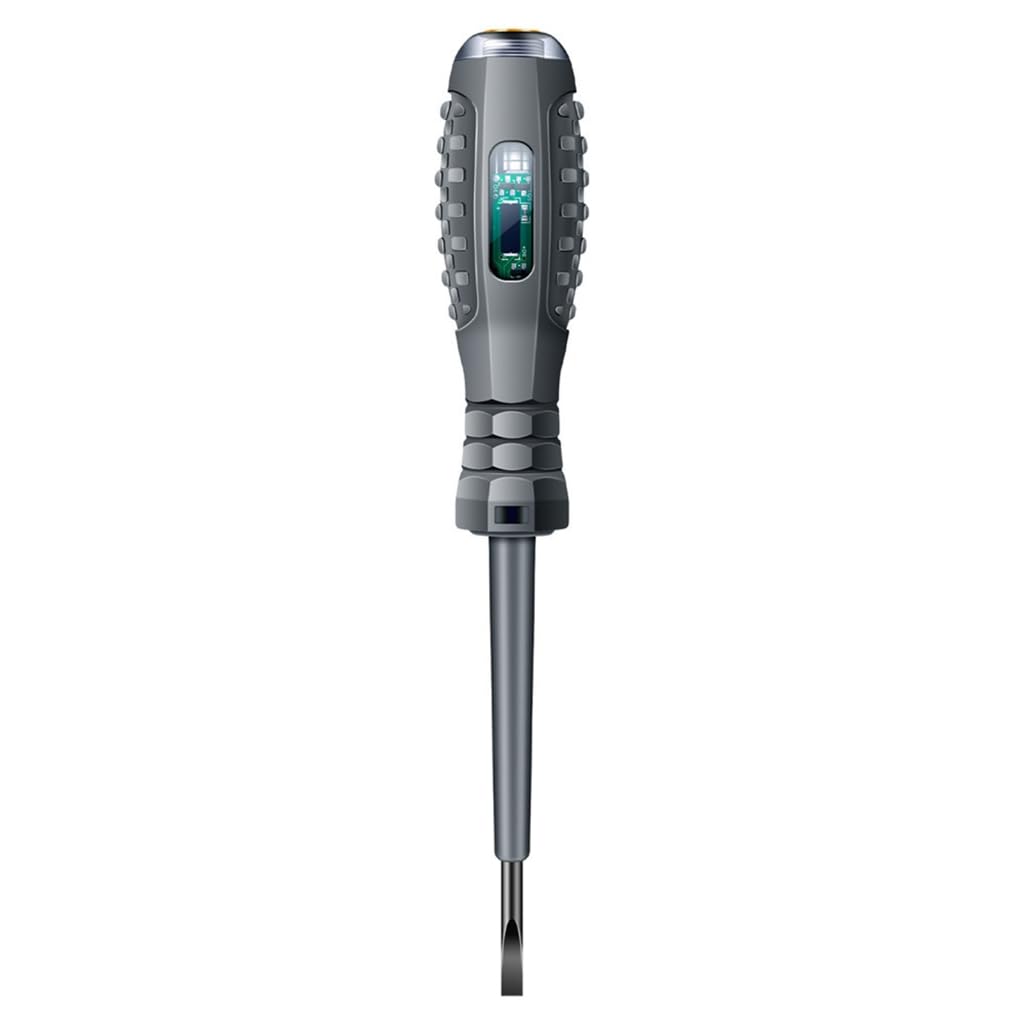
Image 2.1: Kalttoy Non-Contact Voltage Tester, front view.
Key Features:
- Non-Contact Voltage Detection: Safely identifies live wires without physical contact.
- Multi-function Design: Combines voltage testing with screwdriver functionality.
- Non-Slip Handle: Ergonomically designed for a secure grip.
- High Hardness Batch: Durable chromium vanadium steel screwdriver tip.
- LED Indicator: Visual indication of voltage presence (colored lights).
- Magnetic Tip: Assists in holding screws.
- Smart Chip: Ensures stable and sensitive detection performance.
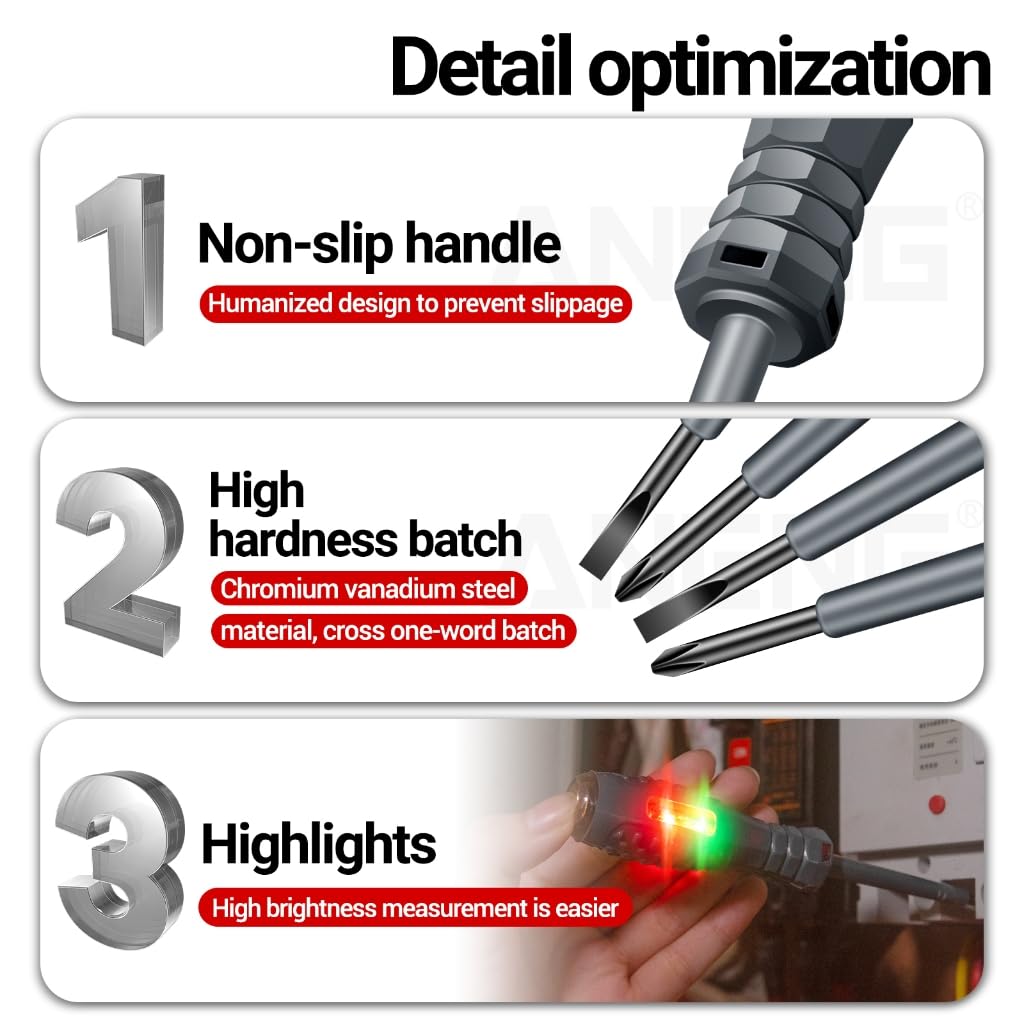
Image 2.2: Detailed features highlighting the non-slip handle, high hardness screwdriver tip, and bright LED indicators.
Components:
The device consists of several key components working together for accurate and safe operation.

Image 2.3: Exploded view illustrating internal components such as the touch metal, tension spring, button battery compartment, LED circuit board, smart chip, and alloy steel screwdriver tip.
- Touch Metal: Located at the top, used for sensing contact during operation.
- Tension Spring: Provides good elasticity and precise contact for internal components.
- Button Battery Compartment: Holds three LR41 button batteries.
- LED Red/Green Color Light: Illuminates to indicate voltage presence (green for neutral, red and green for live).
- Smart Chip: Integrated circuit board for sensitive and stable performance.
- Alloy Steel Batch: Cross/one-word screwdriver tip.
3. Setup and Battery Installation
The Kalttoy Voltage Tester requires three LR41 button batteries for operation. Follow these steps to install or replace the batteries:
- Rotate and Open: Rotate and open the top metal cap of the tester.
- Remove Old Batteries: Carefully take out any existing batteries and the spring in sequence.
- Insert New Batteries: Load three new LR41 button batteries, ensuring correct polarity.
- Replace Spring and Cap: Place the spring back into position and then tighten the top metal cap securely.
- Self-Test: Contact the pen tip and cap to conduct a self-test. A green light indicates normal operation.

Image 3.1: Visual guide for battery replacement, showing the five steps from opening the cap to self-testing.
4. Operation
This device offers non-contact voltage detection and can also be used as a screwdriver.
Non-Contact Voltage Detection:
- Hold Correctly: When using the voltage detection function, ensure your hand is in contact with the top metal cap of the tester. This completes the circuit for detection.
- Approach Conductor: Bring the tip of the tester close to the wire or outlet you wish to test.
- Observe Indicator:
- If the light is green, it indicates a zero line (neutral).
- If the light is red and green, it indicates a firewire (live).

Image 4.1: Demonstrates zero live detection, with the tester indicating a green light for a neutral line and red/green lights for a live wire.

Image 4.2: Close-up view of the magnetic tip, illustrating its ability to identify zero and live wires, and its compatibility with cross and one-word screw types.
Screwdriver Function:
The alloy steel batch can be used for tightening or loosening screws. The magnetic tip helps in holding small screws in place.

Image 4.3: The voltage tester in use, checking an electrical outlet strip.
5. Maintenance
Proper maintenance ensures the longevity and accuracy of your Kalttoy Voltage Tester.
- Cleaning: Wipe the device with a dry, soft cloth. Do not use abrasive cleaners or solvents.
- Storage: Store the tester in a cool, dry place, away from direct sunlight and extreme temperatures.
- Battery Replacement: Replace batteries promptly when the indicator lights dim or the device fails to operate, as described in Section 3.
- Avoid Impact: Protect the device from drops or strong impacts, which could damage internal components.
6. Troubleshooting
If you encounter issues with your Kalttoy Voltage Tester, refer to the following common troubleshooting steps:
- Device Not Turning On / No Indication:
- Check if the batteries are installed correctly with the right polarity.
- Replace the LR41 button batteries with new ones.
- Ensure the top metal cap is securely tightened.
- Inaccurate or Intermittent Readings:
- Ensure your hand is firmly in contact with the top metal cap during testing.
- Verify the device on a known live circuit to confirm proper function.
- Replace batteries if they are low.
- Screwdriver Tip Damage:
- Avoid using excessive force when using the screwdriver function to prevent damage to the tip.
7. Specifications
Technical specifications for the Kalttoy Non-Contact Voltage Tester, model 10SC400938-1-C_XXC7.
| Model Number | 10SC400938-1-C_XXC7 |
| Brand | Kalttoy |
| Material | Plastic |
| Indicator Type | Colored LED (Red/Green) |
| Dimensions (Approx.) | 168 x 26 x 4 mm (6.61 x 1.02 x 0.16 inches) |
| Weight (Approx.) | 43g |
| Screwdriver Tip Type | Word/Cross, Magnetic |
| Screwdriver Tip Length | 25mm (0.98 inch) |
| Battery Type | 3 x LR41 Button Batteries |
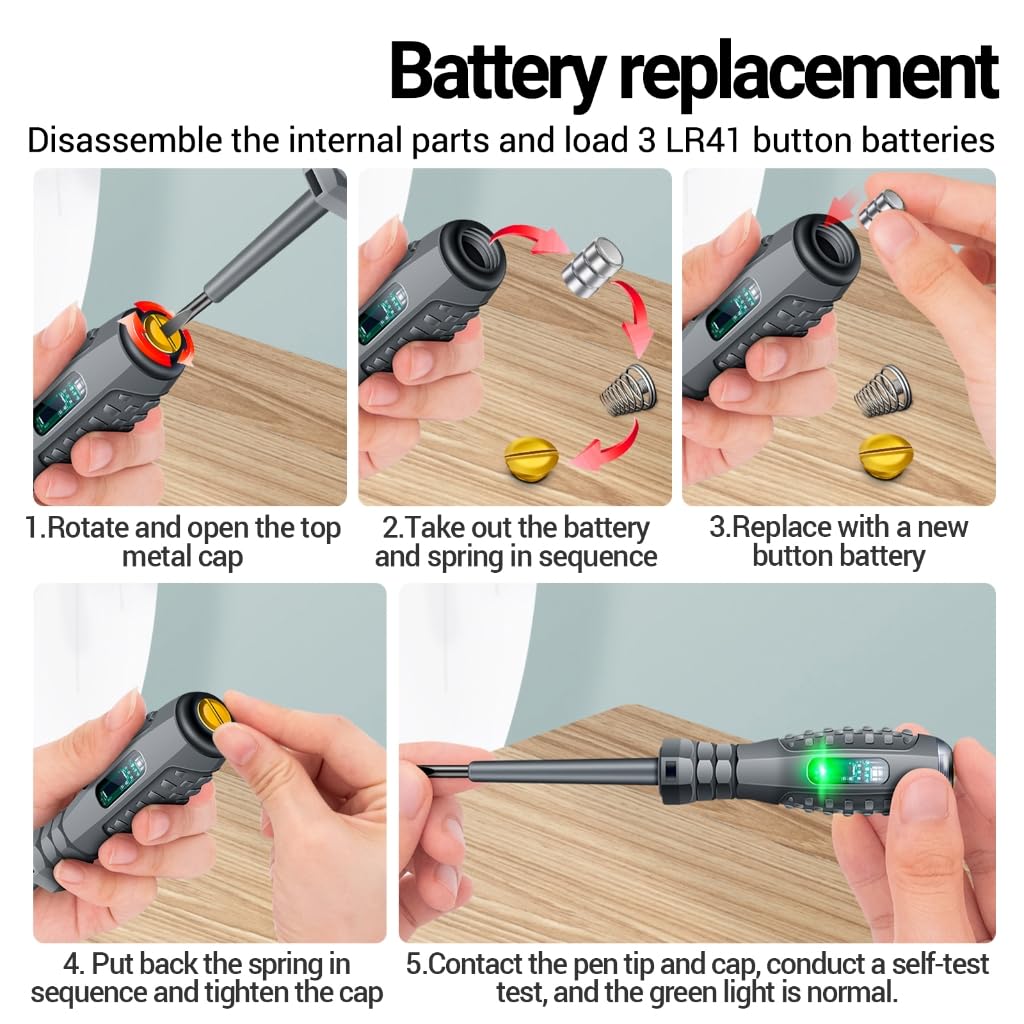
Image 7.1: Product dimensions, including overall length, width, and screwdriver tip length and diameter.
8. Warranty and Support
Information regarding product warranty and customer support is not available in the provided data. Please refer to the product packaging or contact the retailer for details on warranty coverage and support options.