
Important Safety Information
Please read all instructions carefully before using this appliance. Keep this manual for future reference.
- Avoid use on infants.
- Keep away from water sources except for cleaning as specified in this manual.
- Follow recommended cleaning and maintenance procedures to prevent electrical hazards or skin irritation.
- Do not disassemble the device. Refer all servicing to qualified personnel.
- Ensure the charging cable and adapter are undamaged before use.
Product Overview
The Hatteker HT-595 is a versatile 4-in-1 grooming kit designed for full-body hair removal. It features a dual-head design and multiple interchangeable attachments to meet various grooming needs.

Figure 1: Overview of the 4-in-1 multifunctional trimmer and its intended use areas.
Package Contents
The Hatteker HT-595 grooming kit includes the following items:
- Main Trimmer Unit
- Body Hair Trimmer Head
- Floating Cutting Net Head (Body Shaver)
- Nose Trimmer Head
- Rotary Shave Head (Facial Trimmer)
- Guide Combs (3/6mm, 9/12mm)
- Storage Bag
- Cleaning Brush
- Type-C USB Charging Cable
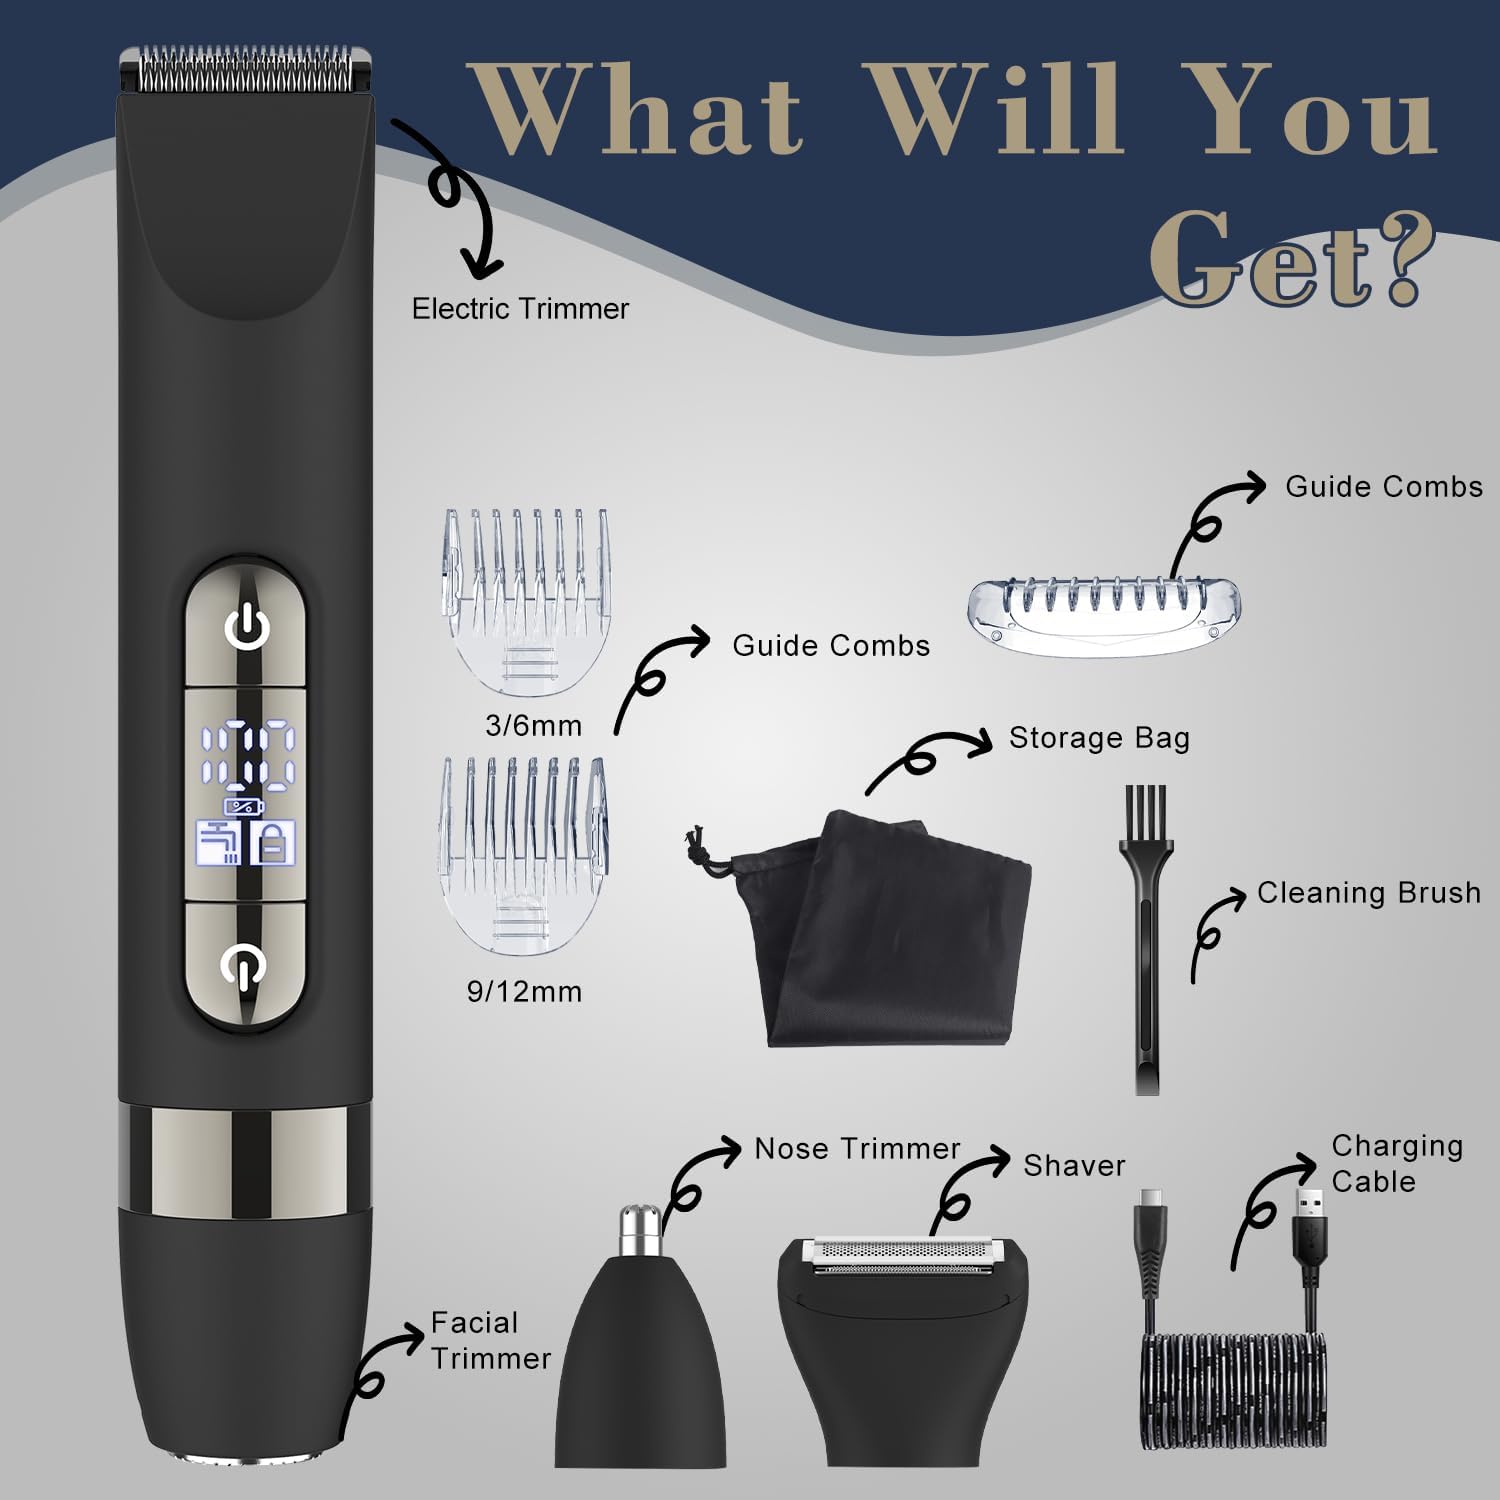
Figure 2: All components included in the Hatteker HT-595 grooming kit.
Setup and Charging
Initial Charge
Before first use, fully charge the device. The trimmer uses a Type-C USB charging port for convenience.
- Connect the Type-C USB charging cable to the trimmer.
- Plug the other end of the cable into a compatible USB power source (e.g., laptop, wall charger, power bank, car charger).
- The display will indicate charging status. A full charge takes approximately 90 minutes and provides up to 60 minutes of working time.

Figure 3: Charging the device using the Type-C USB cable.
Attaching and Changing Trimmer Heads
The trimmer features interchangeable heads for different grooming tasks.
- To remove a head: Gently push the head upwards from the main unit until it detaches.
- To attach a head: Align the head with the main unit and press down firmly until it clicks into place. Ensure it is securely fastened before use.

Figure 4: Instructions for attaching and detaching trimmer heads.
Operating Instructions
Power On/Off and Travel Lock
- To power on: Press the power button.
- To power off: Press the power button again.
- To activate travel lock: Press and hold any one of the two power buttons for a few seconds until the lock symbol appears on the display. This prevents accidental activation during travel.
- To deactivate travel lock: Press and hold any one of the two power buttons for a few seconds until the lock symbol disappears.
Wet and Dry Use
The Hatteker HT-595 is IPX7 waterproof, allowing for both wet and dry grooming.
- Dry Use: For quick trims and touch-ups on dry skin.
- Wet Use: Can be used in the shower with shaving cream or gel for a smoother, more comfortable shave.

Figure 5: The trimmer is suitable for both wet and dry grooming.
Using the Body Trimmer Head
This head is designed for efficiently trimming larger areas of body hair.
- Attach the Body Trimmer Head to the main unit.
- Select the desired guide comb (3/6mm or 9/12mm) and attach it to the trimmer head for specific hair lengths.
- Turn on the device and move it against the direction of hair growth for optimal results.

Figure 6: Using the Body Trimmer Head for various body areas.
Using the Floating Cutting Net Head (Body Shaver)
This head provides a precise shave without leaving stubble, ideal for a smooth finish.
- Attach the Floating Cutting Net Head.
- For best results, first trim longer hair with the Body Trimmer Head.
- Gently press the shaver against the skin and move it in circular or straight motions.

Figure 7: Achieving a smooth finish with the Body Shaver Head.
Using the Nose Trimmer Head
For gentle and precise grooming of nose and ear hair.
- Attach the Nose Trimmer Head.
- Carefully insert the trimmer tip into the nostril or ear canal.
- Move the trimmer gently to cut unwanted hair. Do not insert too deeply.

Figure 8: Using the Nose Trimmer Head.
Using the Rotary Shave Head (Facial Trimmer)
This head is suitable for precision trimming of stubble and fine facial hair.
- Attach the Rotary Shave Head.
- Move the shaver in small, circular motions over the desired area.

Figure 9: Using the Rotary Shave Head for facial grooming.
Maintenance and Cleaning
Regular cleaning ensures optimal performance and extends the lifespan of your trimmer.
Cleaning the Trimmer Heads
- After each use, turn off the trimmer and detach the head.
- Use the provided cleaning brush to remove any loose hairs from the blades and inside the head.
- Rinse the detached head under running water. The entire device is IPX7 waterproof, allowing for easy cleaning under running water.
- Allow all parts to air dry completely before reattaching or storing.

Figure 10: The trimmer is fully washable for easy cleaning.
Lubrication (Optional)
Periodically, a drop of light machine oil (not included) on the blades can help maintain smooth operation and prolong blade life.
Troubleshooting
If you encounter issues with your Hatteker HT-595, refer to the following common problems and solutions:
| Problem | Possible Cause | Solution |
|---|---|---|
| Trimmer does not turn on. | Battery is depleted; Travel lock is active. | Charge the device fully; Deactivate the travel lock by pressing and holding the power button. |
| Poor trimming performance or pulling hair. | Blades are dull or clogged with hair; Head is not properly attached; Hair is too long. | Clean the blades and head thoroughly; Ensure the head is securely attached; For very long hair, pre-trim with scissors or a longer guide comb before using the shaver head. |
| Device not charging. | Charging cable or adapter is faulty; Poor connection. | Check the charging cable and adapter for damage; Ensure the cable is securely plugged into both the trimmer and the power source. Try a different USB port or adapter. |
| Excessive noise during operation. | Blades require lubrication; Foreign object in the head. | Apply a drop of light machine oil to the blades; Clean the head thoroughly to remove any debris. |
Product Specifications
| Feature | Specification |
|---|---|
| Model Number | HT-595 |
| Power Source | Battery Powered (Rechargeable) |
| Battery Type | 1 A battery (included) |
| Charging Time | Approx. 90 minutes |
| Working Time | Up to 60 minutes |
| Waterproof Rating | IPX7 (Fully washable) |
| Color | Black |
| Special Features | Dual-Head Design, Detachable Heads |
| Package Dimensions | 8.58 x 5.43 x 2.01 inches |
| Item Weight | 12.31 ounces |
Legal Disclaimer
Statements regarding dietary supplements have not been evaluated by the FDA and are not intended to diagnose, treat, cure, or prevent any disease or health condition.