
Geek AiroCook Torix
Geek AiroCook Torix 25 Litre Smart Air Fryer Oven Instruction Manual
Model: AiroCook Torix
Introduction
Thank you for choosing the Geek AiroCook Torix 25 Litre Smart Air Fryer Oven. This appliance combines the functions of an air fryer and an OTG (Oven Toaster Griller), allowing you to air fry, grill, bake, roast, and toast with ease. This manual provides essential information for safe operation, proper use, and maintenance of your new appliance. Please read it thoroughly before first use and keep it for future reference.
Important Safety Instructions
When using electrical appliances, basic safety precautions should always be followed to reduce the risk of fire, electric shock, and injury to persons.
- Read all instructions before using the appliance.
- Do not touch hot surfaces. Use handles or knobs. Always use oven mitts or gloves when handling hot materials.
- To protect against electric shock, do not immerse the cord, plugs, or the appliance body in water or other liquid.
- Close supervision is necessary when any appliance is used by or near children.
- Unplug from outlet when not in use and before cleaning. Allow to cool before putting on or taking off parts.
- Do not operate any appliance with a damaged cord or plug, or after the appliance malfunctions or has been damaged in any manner. Contact customer support for assistance.
- The use of accessory attachments not recommended by the appliance manufacturer may cause injuries.
- Do not use outdoors.
- Do not let the cord hang over the edge of a table or counter, or touch hot surfaces.
- Do not place on or near a hot gas or electric burner, or in a heated oven.
- Extreme caution must be used when moving an appliance containing hot oil or other hot liquids.
- Always attach plug to appliance first, then plug cord into the wall outlet. To disconnect, turn any control to "off", then remove plug from wall outlet.
- Do not use the appliance for other than intended use.
- Oversized foods or metal utensils must not be inserted in a toaster oven as they may create a fire or risk of electric shock.
- A fire may occur if the oven is covered or touching flammable material, including curtains, drapes, walls, and the like, when in operation.
- Do not place any materials other than manufacturer's recommended accessories in the oven.
- Do not place cardboard, plastic, paper, or similar materials in the oven.
- Do not store any materials, other than manufacturer's recommended accessories, in this oven when not in use.
- Do not clean with metal scouring pads. Pieces can break off the pad and touch electrical parts, creating a risk of electric shock.
- Do not attempt to dislodge food when the appliance is plugged into an electrical outlet.
- Always ensure the appliance is placed on a stable, heat-resistant surface with adequate ventilation around it.
Package Contents
Carefully unpack your Geek AiroCook Torix and check that all items are present and in good condition.
- 1x Geek AiroCook Torix 25 Litre Smart Air Fryer Oven
- Crumb Tray
- Rotating Basket
- Oven Rack
- Heat-Resistant Glove
- Recipe Book
- Rotisserie Rod
- Fetch Tool (for rotisserie and hot trays)
- Baking Tray
- Airfryer Basket

Figure 1: Included Accessories. This image displays the nine smart accessories that come with the Geek AiroCook Torix oven: a crumb tray, rotating basket, oven rack, heat-resistant glove, recipe book, rotisserie rod, fetch tool, baking tray, and airfryer basket.
Product Overview
Familiarize yourself with the components and control panel of your Geek AiroCook Torix oven.
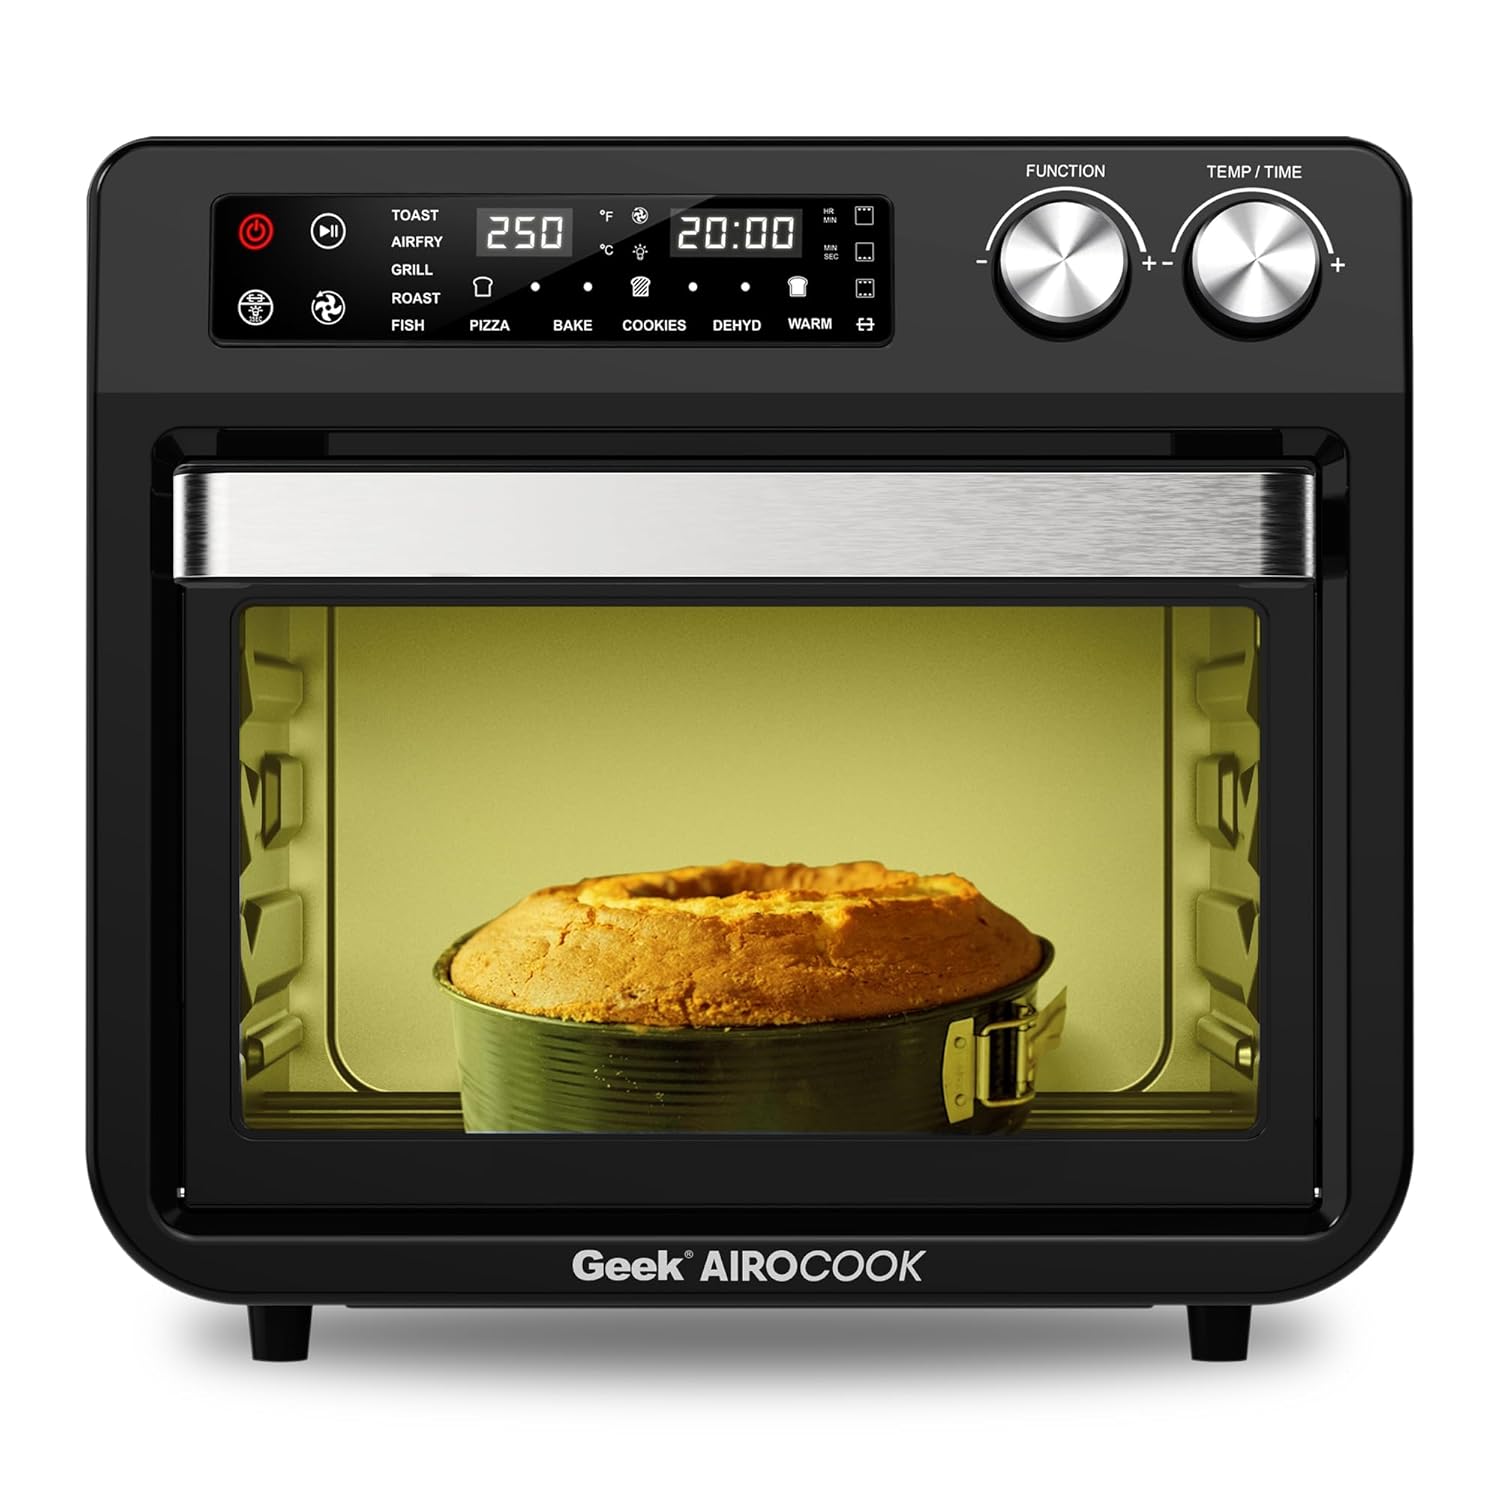
Figure 2: Front View of the Geek AiroCook Torix. This image shows the overall design of the air fryer oven, featuring the digital display, control knobs, and the transparent glass door with an internal light.
Control Panel

Figure 3: Digital Control Panel. This image highlights the "Smart Touch" control panel with its various buttons and digital display.
- Power Button: Turns the appliance on/off.
- Start/Pause Button: Initiates or pauses the cooking cycle.
- Light Button: Controls the internal oven light.
- Rotisserie Button: Activates/deactivates the rotisserie function.
- Fan Button: Controls the convection fan.
- Menu Button: Cycles through preset cooking functions.
- Time/Temperature Knobs: Adjusts cooking time and temperature.
- Digital LCD Display: Shows current settings, time, and temperature.
Setup
- Unpacking: Remove all packaging materials, stickers, and labels from the appliance and accessories.
- Initial Cleaning: Wipe the exterior of the oven with a damp cloth. Wash all removable accessories (baking tray, airfryer basket, rotating basket, rotisserie kit, oven rack, crumb tray) with warm soapy water, rinse thoroughly, and dry completely.
- Placement: Place the oven on a stable, level, heat-resistant surface. Ensure there is at least 10-15 cm (4-6 inches) of clear space on all sides and above the oven for proper ventilation. Do not place it near flammable materials.
- First Use (Burn-in): Before cooking food, it is recommended to run the oven empty for about 15-20 minutes at 200°C (390°F) to burn off any manufacturing residues. A slight odor or smoke may be present during this process; this is normal. Ensure the area is well-ventilated.
Operating Instructions
Basic Operation
- Power On: Plug the appliance into a grounded electrical outlet. Press the Power Button to turn on the oven. The digital display will illuminate.
- Select Function: Use the Menu Button to cycle through the available cooking functions (e.g., Toast, Air Fry, Grill, Roast, Fish, Pizza, Bake, Cookies, Dehydrate, Warm).
- Adjust Time and Temperature: Once a function is selected, use the Time/Temperature knobs to adjust the desired cooking time and temperature. The display will show the current settings.
- Start Cooking: Press the Start/Pause Button to begin the cooking process. The oven light may turn on, and the fan will activate depending on the selected function.
- Pause/Stop: Press the Start/Pause Button again to pause cooking. Press the Power Button to stop the cooking cycle and turn off the oven.
Using Preset Menus
The Geek AiroCook Torix features 10 precise preset menus for common dishes.

Figure 4: 10 Preset Menu Options. This image illustrates the various preset cooking functions available, including Toast, Air Fry, Roast, Pizza, Cookies, Fish, Grill, Cake, Dehydrate, and Warm, along with their default temperature and time settings.
- Toast: 250°C / 5 min
- Air Fry: 204°C / 25 min
- Roast: 204°C / 1 hr
- Pizza: 232°C / 15 min
- Cookies: 170°C / 12 min
- Fish: 210°C / 16 min
- Grill: 230°C / 18 min
- Cake: 177°C / 30 min
- Dehydrate: 66°C / 5 min
- Warm: 82°C / 1 hr
To use a preset, simply select it using the Menu Button. The oven will automatically set the recommended time and temperature. You can then adjust these settings manually if desired before pressing Start/Pause.
Rotisserie Function
The rotisserie function is ideal for roasting whole chickens or other large cuts of meat.
- Prepare your food and secure it onto the rotisserie rod using the forks. Ensure the food is centered and balanced.
- Insert the rotisserie rod into the designated slots inside the oven.
- Select a cooking function (e.g., Roast, Grill) and set the desired time and temperature.
- Press the Rotisserie Button to activate the rotation.
- Press Start/Pause to begin cooking.
- Once cooking is complete, use the Fetch Tool to safely remove the hot rotisserie rod and food from the oven.
Maintenance and Cleaning
Regular cleaning ensures optimal performance and extends the lifespan of your appliance.
- Always Unplug: Before cleaning, always unplug the oven from the power outlet and allow it to cool completely.
- Exterior: Wipe the exterior with a damp cloth and mild detergent. Do not use abrasive cleaners or metal scouring pads.
- Interior: Wipe the interior walls with a damp cloth. For stubborn food residue, use a non-abrasive sponge with mild soap. Ensure the interior is dry before next use.
- Accessories: Wash the baking tray, airfryer basket, rotating basket, rotisserie kit, oven rack, and crumb tray with warm soapy water. Rinse thoroughly and dry completely. Note: These accessories are not dishwasher safe.
- Crumb Tray: Regularly remove and empty the crumb tray located at the bottom of the oven to prevent grease buildup and potential fire hazards.
- Do Not Immerse: Never immerse the main unit, cord, or plug in water or any other liquid.
Troubleshooting
| Problem | Possible Cause | Solution |
|---|---|---|
| Appliance does not turn on. | Not plugged in; power outlet issue; power button not pressed. | Ensure the power cord is securely plugged into a working outlet. Press the Power Button. |
| Food is not cooking evenly. | Overcrowding; incorrect temperature/time; food not rotated. | Do not overcrowd the basket/tray. Adjust temperature/time. For best results, flip or shake food halfway through cooking. |
| White smoke coming from the oven. | Grease/oil residue; fatty food cooking. | Clean the oven and accessories thoroughly. For fatty foods, ensure the crumb tray is clean and consider using less oil. |
| Rotisserie function not working. | Rotisserie rod not properly installed; Rotisserie button not pressed. | Ensure the rotisserie rod is correctly seated in its slots. Press the Rotisserie Button to activate. |
Specifications
| Model Name | AiroCook Torix |
| Capacity | 25 Litres |
| Power Output | 1800 Watts |
| Voltage | 220 Volts |
| Product Dimensions (D x W x H) | 39.5D x 37.5W x 43.5H Centimeters |
| Item Weight | 10 Kilograms |
| Material | Stainless Steel |
| Special Feature | Air Fryer oven + OTG |
Warranty and Support
Your Geek AiroCook Torix 25 Litre Smart Air Fryer Oven comes with a 1-year warranty from the date of purchase. This warranty covers manufacturing defects under normal use. Please retain your purchase receipt as proof of purchase.
For warranty claims, technical support, or any other inquiries, please contact Geek Customer Care:
- Customer Care Number: 1800 121 922922
You can also refer to the included recipe book and access the Geek Recipe App for additional cooking inspiration and tips.
Ask a question about this manual
Ask about setup, troubleshooting, compatibility, parts, safety, or missing instructions. Manuals+ will review the question and use this page’s manual context to help answer it.