
1. Introduction
This manual provides essential information for the safe and efficient operation of your FOHERE Commercial Ice Maker Machine, Model ZB300. Please read all instructions carefully before installation and use. Retain this manual for future reference.

Image 1.1: FOHERE Commercial Ice Maker Machine (Model ZB300) with its various components and accessories.
2. Safety Instructions
- Ensure the machine is connected to a grounded power outlet with the correct voltage.
- Do not operate the machine with a damaged power cord or plug.
- Keep the machine away from heat sources and direct sunlight.
- Do not block ventilation openings. Ensure adequate airflow around the unit.
- Only use potable water for ice production.
- Do not allow children to operate or play near the ice maker.
- Disconnect power before cleaning or performing any maintenance.
- Refer all servicing to qualified personnel.
3. Package Contents
Upon unpacking, verify that all items listed below are present:
- Ice Maker Unit
- Ice Storage Bin
- Ice Scoop
- Water Filter
- Inlet Hose
- Draining Hoses
- Adjustable Feet (4)
- Operation Guide (this manual)
- Maintenance Guide

Image 3.1: Illustration of the ice maker components and accessories, indicating they may arrive in two separate packages.
4. Specifications
| Feature | Specification |
|---|---|
| Model Number | ZB300 |
| Ice Production Capacity | 500 lbs / 24 hours |
| Ice Storage Capacity | 350 lbs |
| Ice Cube Production Time | 10-15 minutes (182 cubes per cycle) |
| Product Dimensions (D x W x H) | 33.5" x 22.3" x 65" |
| Wattage | 1200 watts |
| Cooling Type | Air Cooled |
| Insulation Duration | 8-11 hours |
5. Setup & Installation
Follow these steps for proper installation of your ice maker:
5.1. Water Filter Assembly
- Unscrew the filter cover and remove the filter element.
- Remove the outer plastic wrap from the filter element.
- Insert the unwrapped filter element back into the filter cover.
- Screw the filter cover back on securely.
- Connect the inlet hose to the filter, ensuring the flow direction arrows on the filter are correctly oriented.
Video 5.1: This video demonstrates the correct procedure for assembling the water filter for the FOHERE Commercial Ice Maker Machine.
5.2. Machine Connection
- Connect the Ice Maker to the Storage Bin: Carefully place the ice maker unit on top of the ice storage bin, ensuring it is securely seated.
- Connect Water Source: Connect the assembled water filter to your tap water supply. Then, connect the outlet of the filter to the water inlet of the ice maker using the provided hoses. Ensure all connections are tight to prevent leaks.
- Connect Drain Hose: Insert the draining hose from the ice maker into a floor drain or suitable wastewater receptacle. Ensure proper slope for drainage.
- Power Connection: Plug the ice maker into a grounded electrical outlet.

Image 5.2: Visual guide for the three main installation steps of the ice maker.

Image 5.3: Illustration of the upgraded water filter, highlighting its function in providing clean water for ice production.
6. Operating Instructions
Your FOHERE ice maker features an intuitive LCD control panel for easy operation.
6.1. Initial Startup
- After installation, turn on the main power switch.
- The LCD panel will illuminate, displaying the current status.
- The machine will typically perform an initial self-check and fill with water.
6.2. Ice Production
- Start/Stop: Press the power button on the LCD panel to start or stop ice production.
- Adjust Ice Thickness: Use the controls on the LCD panel to select desired ice cube thickness (thin, medium, or thick). This affects the ice-making cycle time.
- 24H Intelligent Reservation: Utilize the timing function to schedule ice production for specific hours, such as before opening or during peak times.
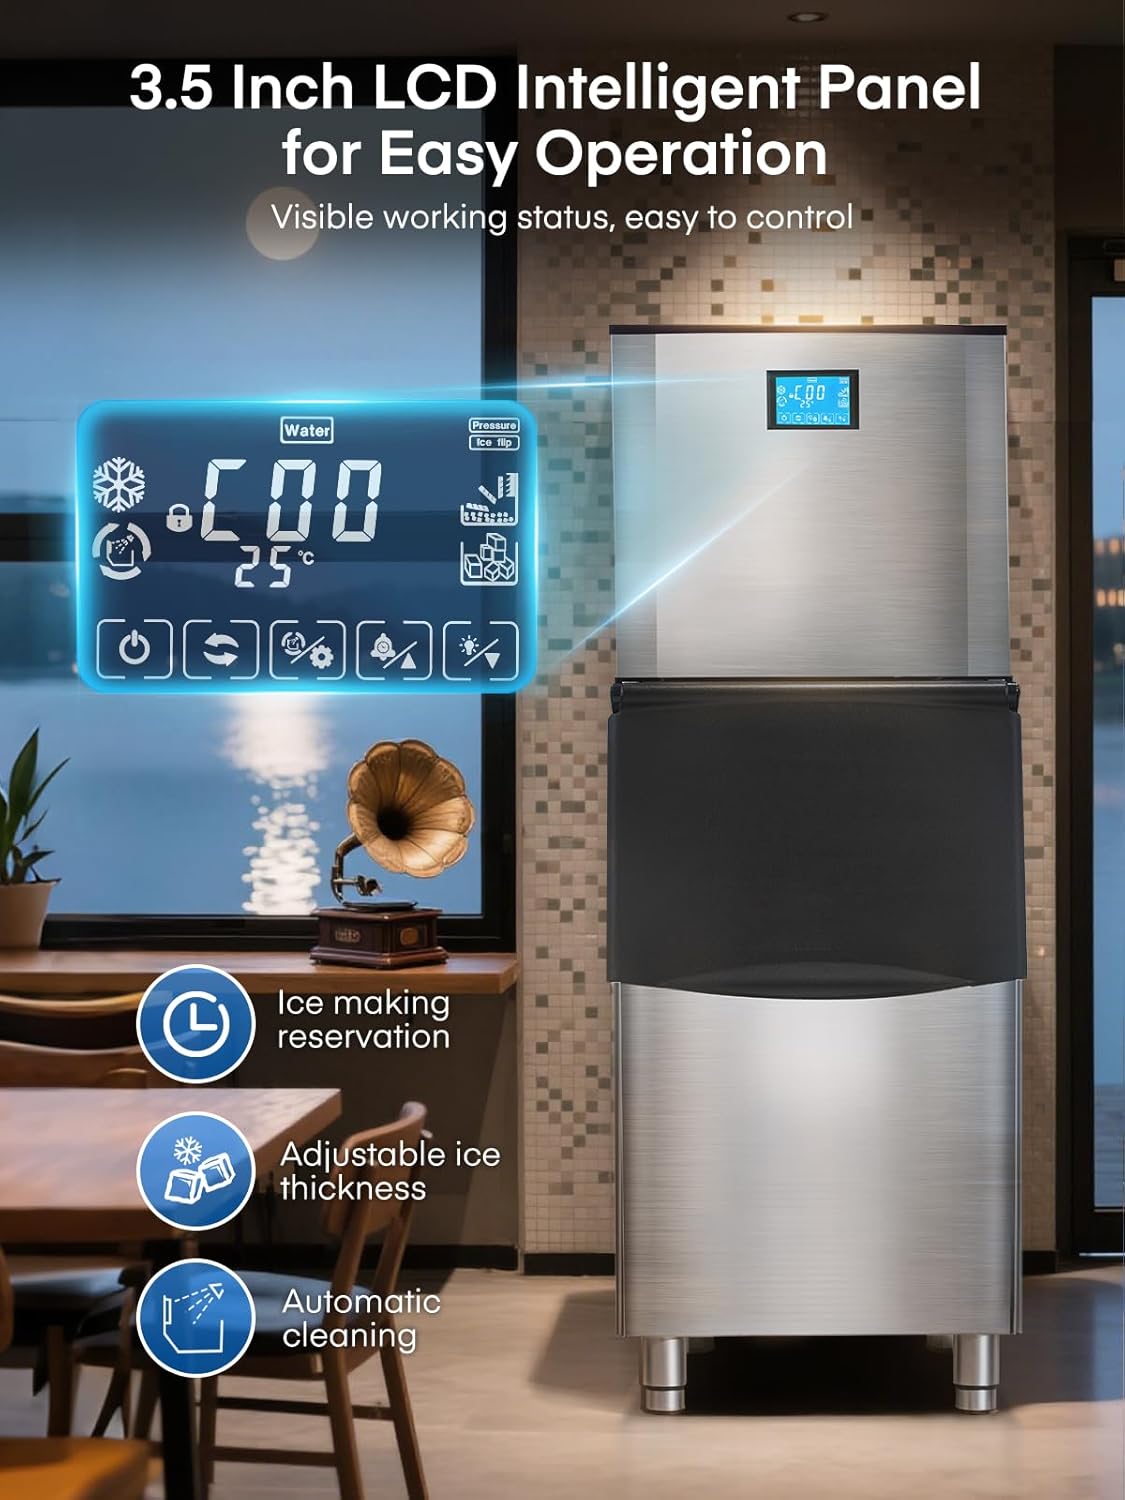
Image 6.1: The 3.5-inch LCD intelligent control panel, providing clear operational status and control options.

Image 6.2: Examples of adjustable ice cube thickness and their typical production times.

Image 6.3: The 24-hour intelligent reservation feature on the LCD panel.
7. Maintenance & Cleaning
Regular maintenance ensures optimal performance and longevity of your ice maker.
7.1. Automatic Cleaning
- The machine features an auto-clean function. Refer to the LCD panel for the specific button or menu option to initiate a cleaning cycle.
- This cycle typically takes 3 minutes and helps maintain hygiene.

Image 7.1: Activating the one-touch automatic cleaning function on the LCD panel.
7.2. General Cleaning
- Regularly wipe down the exterior of the machine with a soft, damp cloth.
- Clean the ice storage bin periodically with a mild detergent and rinse thoroughly.
- Inspect and clean the air filter (if applicable) to ensure proper airflow and cooling efficiency.
- Replace the water filter element as recommended by the manufacturer or if ice quality deteriorates.
8. Troubleshooting
This section addresses common issues you might encounter. For problems not listed here, contact customer support.
| Problem | Possible Cause | Solution |
|---|---|---|
| No ice production | No power; Water supply off; Water filter clogged; Low water pressure; Machine in standby mode. | Check power connection; Ensure water supply is on; Replace water filter; Check water pressure; Press start button on LCD. |
| Ice cubes are too small or soft | Water temperature too high; Ambient temperature too high; Incorrect ice thickness setting. | Ensure cold water supply; Improve ventilation around machine; Adjust ice thickness setting on LCD. |
| Machine is noisy | Loose components; Uneven surface; Compressor noise (normal). | Check for loose parts; Ensure machine is on a level surface; Some compressor noise is normal during operation. |
| Water leakage | Loose hose connections; Clogged drain hose. | Tighten all water inlet and drain hose connections; Clear any obstructions in the drain hose. |
9. Warranty & Support
Your FOHERE Commercial Ice Maker Machine is designed for durability and comes with:
- A 3-Year Protection Plan.
- 7*24 Hours After-Sales Service for any inquiries or assistance.
For warranty claims or technical support, please refer to the contact information provided with your purchase documentation or visit the official FOHERE website.

Image 9.1: Overview of product quality assurance and customer support.