
1. Introduction
This manual provides detailed instructions for the installation, operation, and maintenance of your RAINPOINT Smart Automatic Watering System. Please read this manual thoroughly before using the product to ensure proper function and longevity.
1.1 Product Overview
The RAINPOINT Smart Automatic Watering System is designed to provide automated and precise watering for up to 15 potted plants. It features dual control options (local and app-based), dual power sources (solar and USB), and smart integration capabilities.
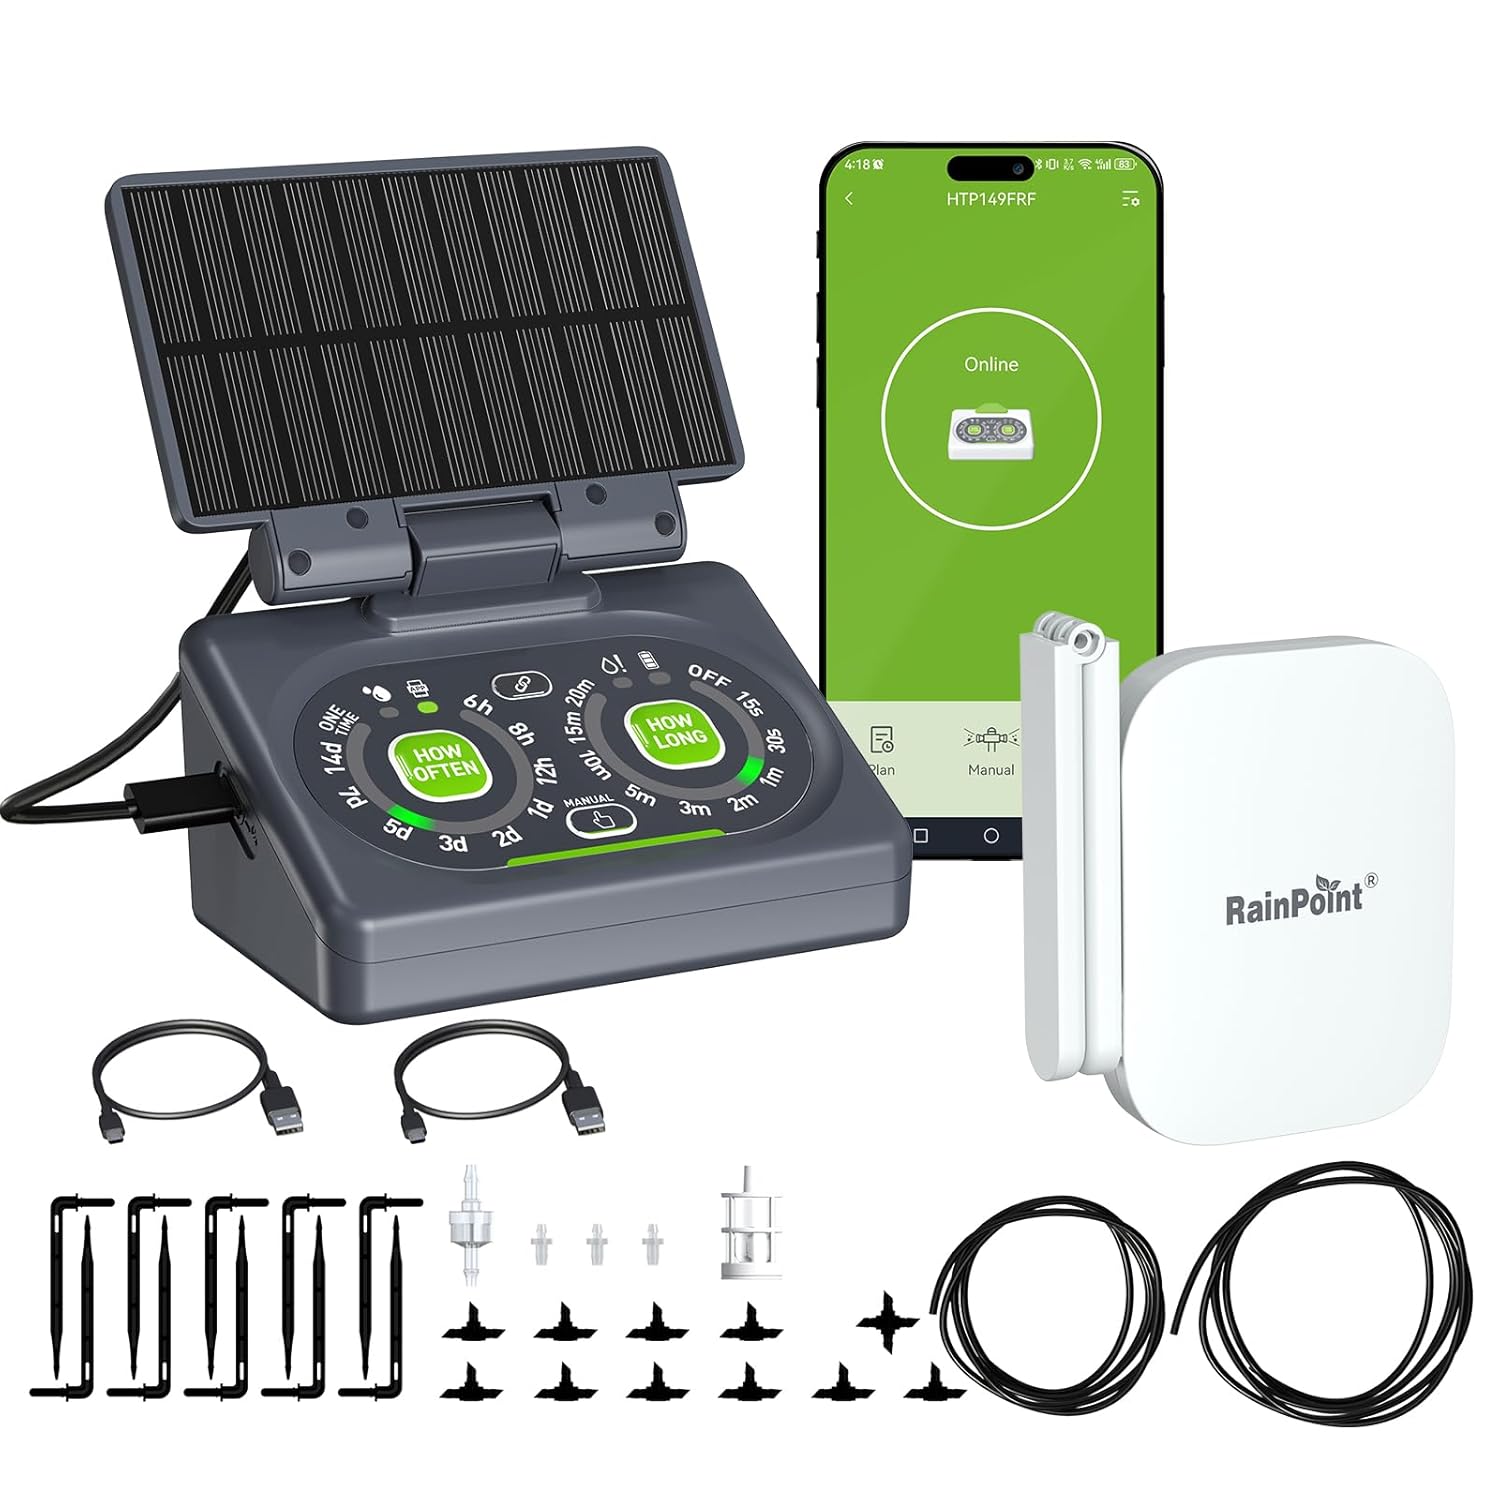
Figure 1: RAINPOINT Smart Automatic Watering System components.
1.2 What's in the Box
Verify that all components are present before proceeding with installation:
- 1 x Compact Smart Solar Watering Pump
- 1 x Detachable Solar Panel
- 1 x WiFi Hub (2.4 GHz ONLY)
- 1 x Detachable Back Mounting Hook
- 1 x Accessories Pack (includes tubing, emitters, T-connectors, anti-siphon valve, filter, etc. for up to 10 plants. Additional accessories for up to 15 plants sold separately.)
- 1 x USB Charging Cable
- 1 x User Manual (this document)

Figure 2: Included components and accessories.
2. Safety Information
Please observe the following safety precautions to prevent damage to the product or injury to yourself:
- Do not immerse the main pump unit or WiFi Hub in water. The solar panel is weather-resistant but the main unit is not designed for direct water exposure beyond its intended function.
- Ensure the water source is clean and free of debris to prevent clogging of the filter and emitters.
- Keep the device out of reach of children and pets.
- Use only the provided USB charging cable or a compatible 5V/1A adapter for charging.
- Do not attempt to disassemble or repair the device yourself. Contact customer support for assistance.
- Ensure the solar panel is placed in an area that receives adequate sunlight for optimal charging.
3. Product Features
The RAINPOINT Smart Automatic Watering System incorporates several features designed for efficient and convenient plant care:
3.1 Dual Control Technology
The system offers both local manual control via the device's buttons and remote control through the RainPoint Home App and WiFi Hub. This provides flexibility, allowing operation even without an internet connection.
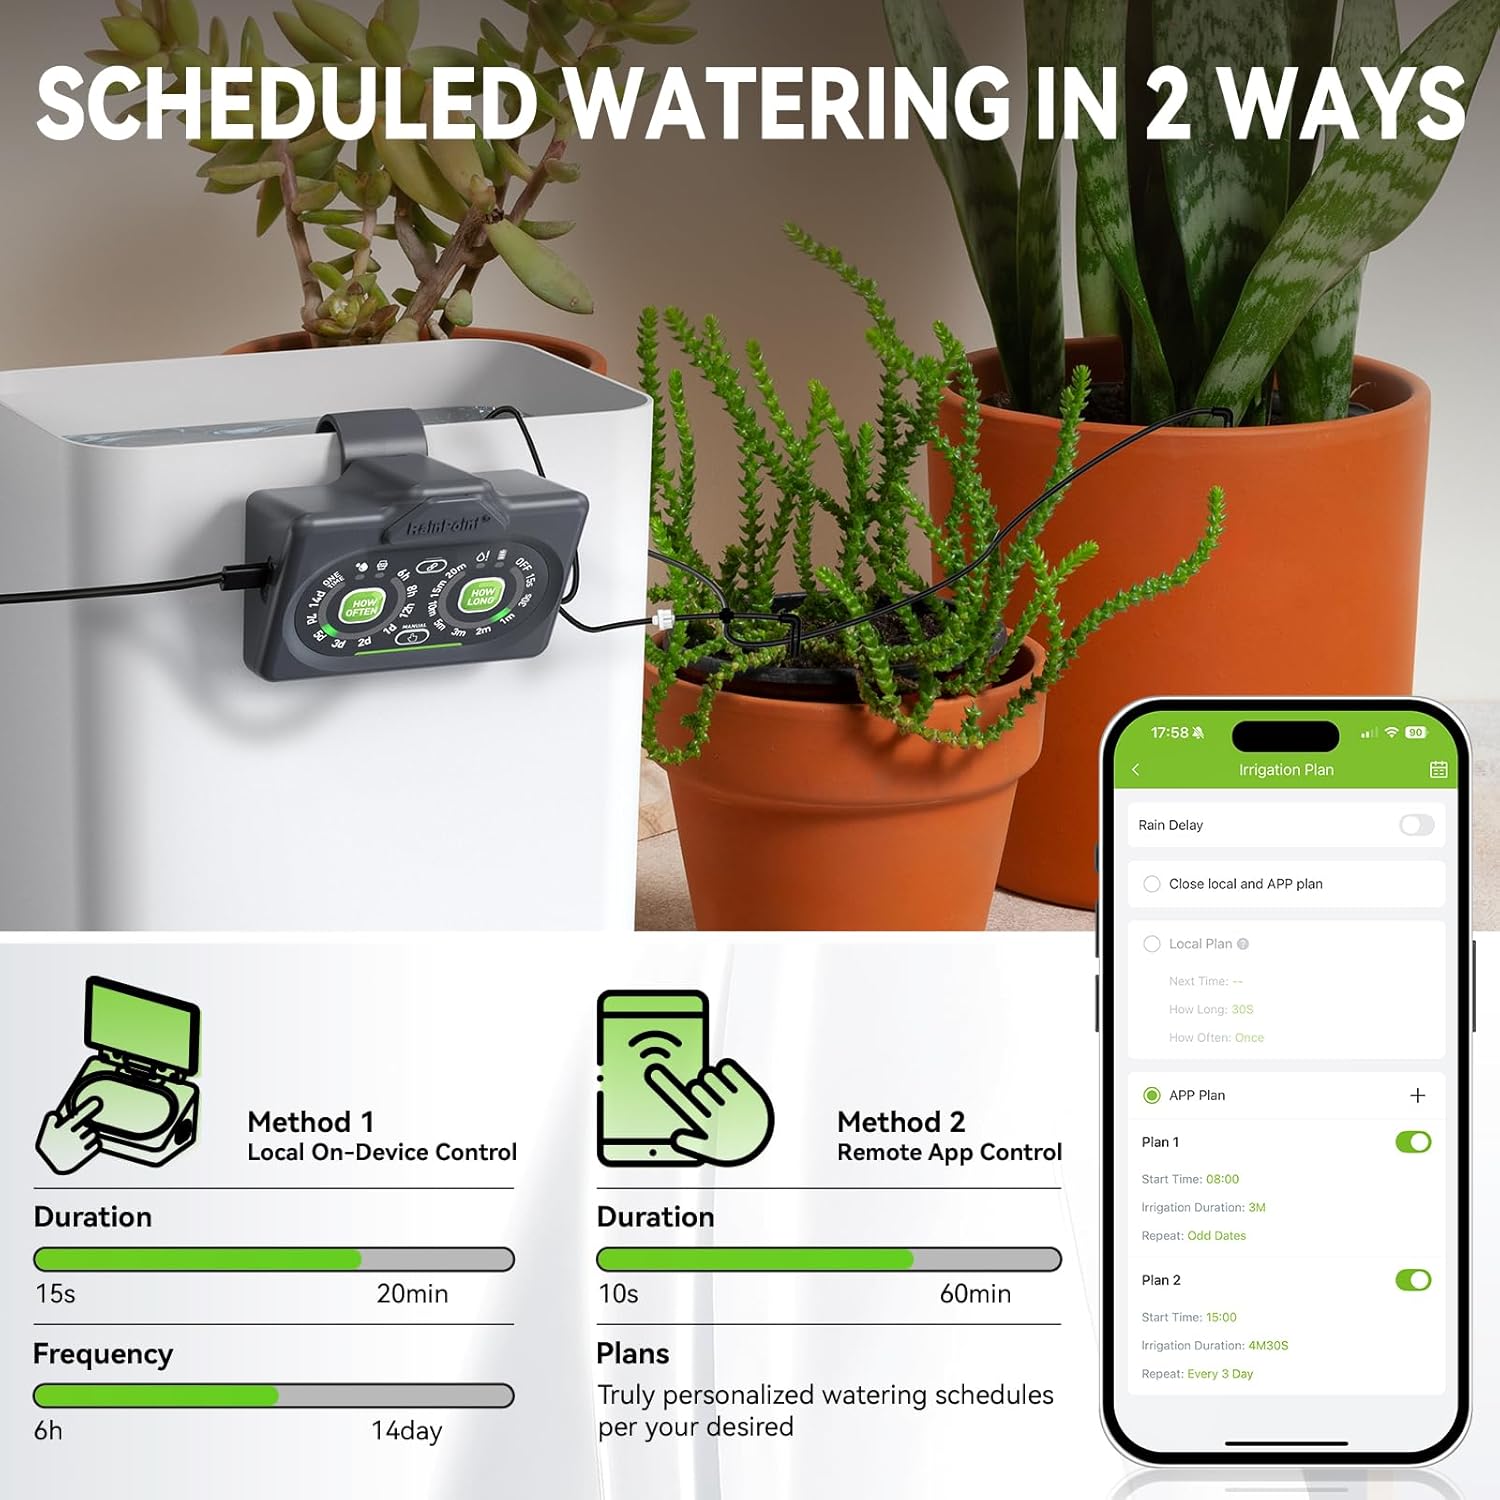
Figure 3: Local and App-based control options.
3.2 Dual Power Sources
The device can be powered by its detachable solar panel, which charges an internal battery, or via USB charging for continuous power supply, especially in low-light conditions.
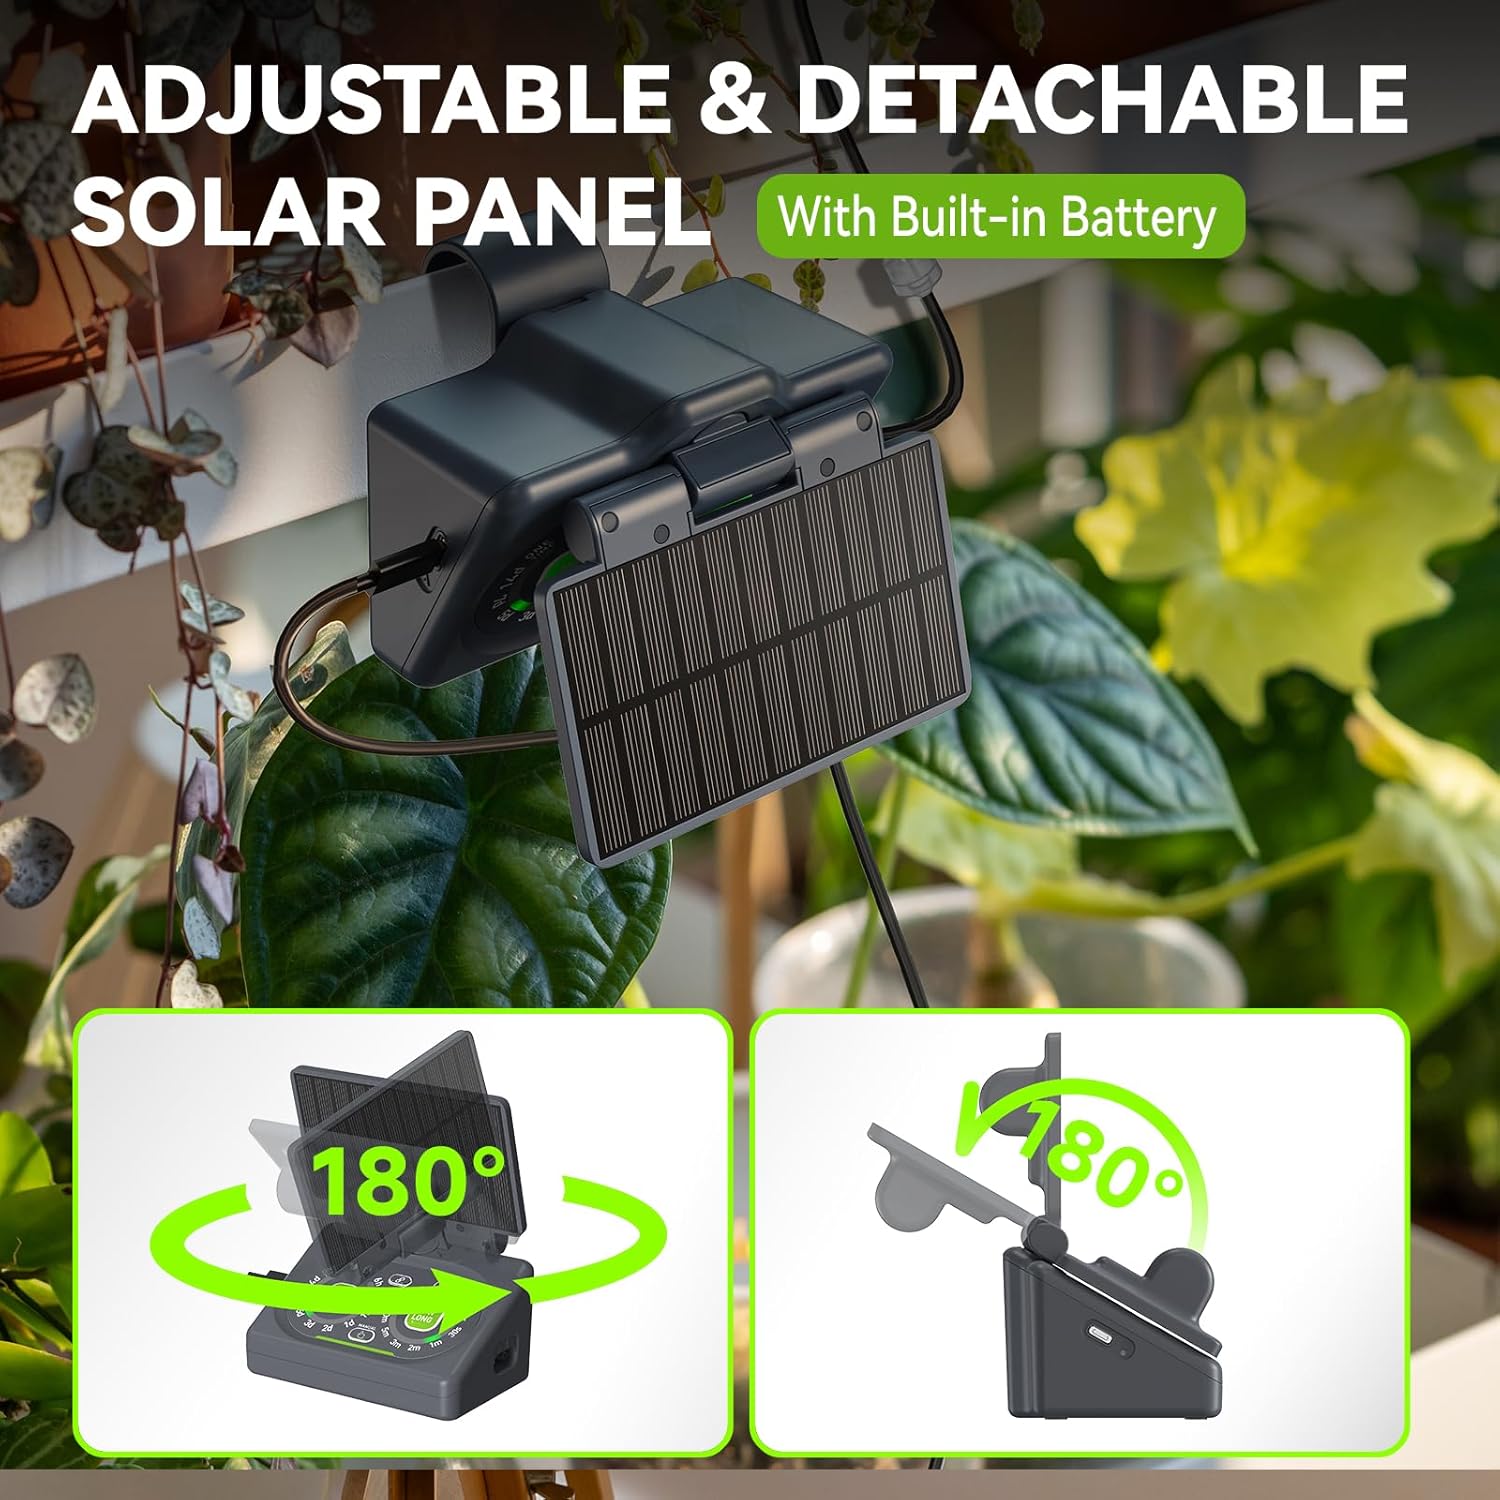
Figure 4: Detachable solar panel for power.
3.3 Even Water Distribution
The system is engineered to provide consistent water distribution across all connected plants, preventing overwatering near the source and underwatering for distant plants. An anti-backflow valve prevents siphon effects, ensuring accurate water delivery.
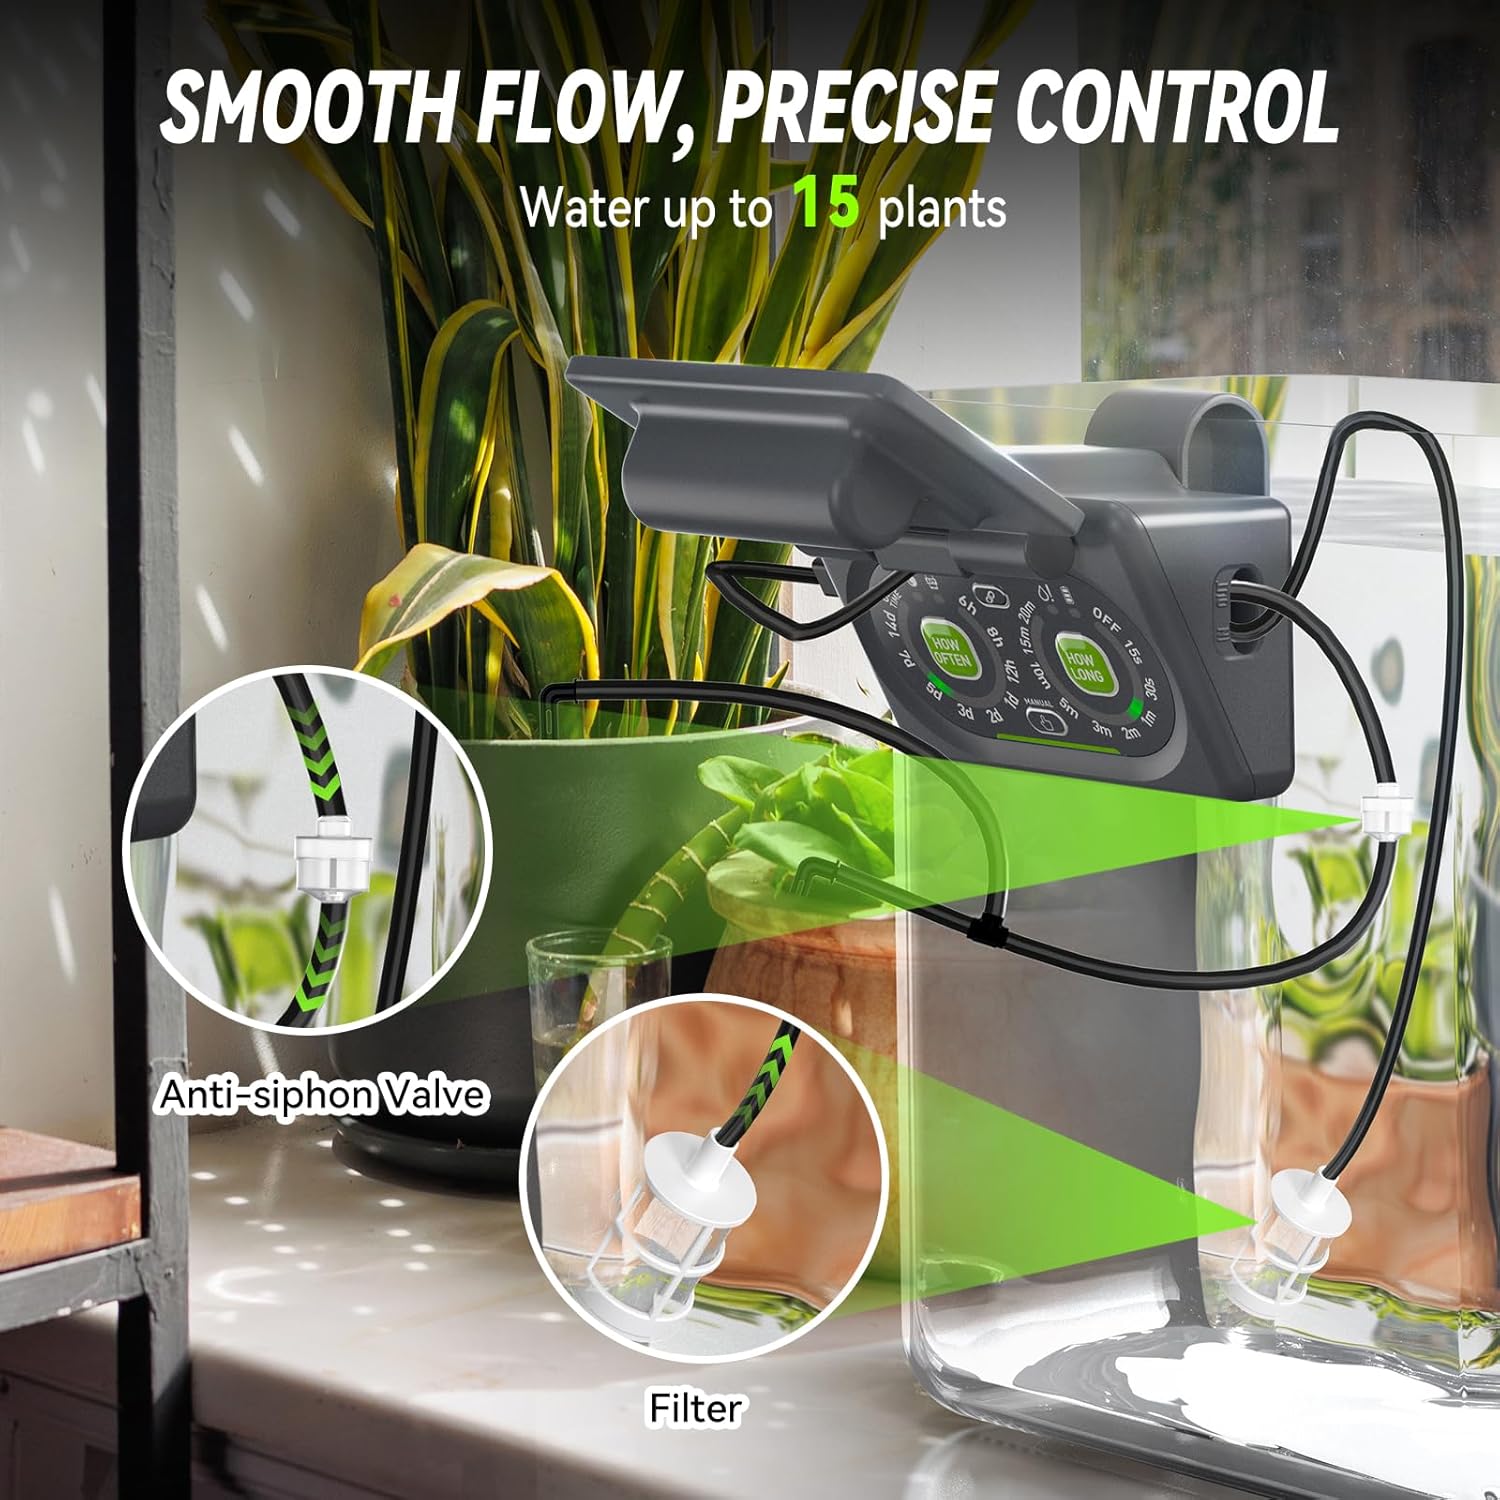
Figure 5: Anti-siphon valve and filter for even water distribution.
3.4 Smart Gardening Integration
When paired with other RainPoint smart devices, such as a smart soil meter or thermo-hygrometer, the system can automatically adjust watering schedules based on real-time soil moisture and environmental conditions.

Figure 6: Smart Scene Watering feature with app integration.
3.5 Remote Control & Monitoring
The RainPoint Home App allows remote monitoring of local watering plans and control of app-based watering schedules from any location. It provides device operation logs and custom alerts.

Figure 7: Remote control via RainPoint Home App.
3.6 Voice Control
The system is compatible with Amazon Alexa and Google Assistant, enabling voice commands for convenient operation.
Figure 8: Voice control compatibility with smart assistants.
4. Setup Guide
4.1 Component Identification
Familiarize yourself with the main components:
- Pump Unit: Main control unit with buttons and water inlet/outlet.
- Solar Panel: Detachable panel for charging.
- WiFi Hub: Connects the pump unit to your home WiFi network for app control.
- Tubing: Main line (1/4") and branch lines (1/8") for water delivery.
- Emitters: Deliver water directly to plants.
- T-Connectors: Used to split tubing to multiple plants.
- Anti-siphon Valve: Prevents water backflow.
- Filter: Prevents debris from entering the pump.
4.2 Assembly Instructions
- Prepare Tubing: Cut the main 1/4" tubing to the desired lengths to reach your plants from the pump unit. Cut 1/8" branch lines to connect emitters to the main line. For easier insertion of connectors, dip the ends of the tubing in hot water for a few seconds.
- Install Filter: Attach the filter to the water inlet of the pump unit. Place the filter end into your water reservoir (e.g., a bucket or bottle).
- Connect Main Line: Connect the main 1/4" tubing to the water outlet of the pump unit.
- Distribute Water:
- Insert T-connectors into the main 1/4" tubing at points where you want to branch off to individual plants.
- Connect 1/8" branch lines to the T-connectors.
- Attach an emitter to the end of each 1/8" branch line and place it into the soil of each plant.
- Install Anti-siphon Valve: Position the anti-siphon valve in the main tubing line, ensuring it is above the water level of your reservoir to prevent backflow.
- Mount Pump Unit: Use the detachable back mounting hook to secure the pump unit to the edge of your water reservoir or a stable surface.
- Attach Solar Panel: Connect the solar panel to the pump unit. Position the solar panel to receive maximum direct sunlight. It can be adjusted up to 180 degrees.
- Power On: Ensure the pump unit has sufficient power (either via solar charging or USB).
4.3 WiFi Hub Setup and App Pairing
- Plug in WiFi Hub: Connect the WiFi Hub to a power source using the provided USB cable and adapter (not always included, use a standard 5V/1A USB adapter).
- Download App: Download the "RainPoint Home" app from your smartphone's app store (iOS or Android).
- Register/Login: Open the app and create an account or log in.
- Add Device: Follow the in-app instructions to add a new device. Select the "Smart Watering System" or similar option.
- Connect to WiFi: Ensure your phone is connected to a 2.4 GHz WiFi network. The hub does not support 5.0 GHz networks. Follow the app's prompts to connect the WiFi Hub to your home network.
- Pair Pump Unit: Once the WiFi Hub is connected, the app will guide you to pair the pump unit with the hub. This typically involves pressing a button on the pump unit to enter pairing mode.
5. Operating Instructions
5.1 Local Control (Manual Operation)
The pump unit features physical buttons for setting watering duration and frequency:
- "HOW OFTEN" Button: Press to select the watering frequency (e.g., every 6 hours, 12 hours, 1-7 days).
- "HOW LONG" Button: Press to select the watering duration (e.g., 15 seconds, 30 seconds, 1-20 minutes).
- "MANUAL" Button: Press to initiate immediate watering for a short duration (usually a fixed time like 30 seconds) or to stop an ongoing watering cycle.
- "OFF" Button: Turns off the automatic watering schedule.
The selected settings will be indicated by illuminated LEDs on the control panel.
5.2 App Control (Remote Operation)
The RainPoint Home App provides advanced scheduling and monitoring capabilities:
- Access Device: Open the RainPoint Home App and select your watering system device.
- Create Watering Plans:
- Navigate to the "Irrigation Plan" section.
- You can manage both "Local Plan" (settings from the device) and "APP Plan" (app-specific schedules).
- Create new plans by setting start times, irrigation duration, and repeat frequency (e.g., specific days, odd/even days).
- Smart Scene Watering: Utilize the "Smart Scene" feature to create automated watering rules based on:
- Specific Time: Schedule watering at precise times.
- Weather Forecast: Adjust watering based on local weather conditions (e.g., skip watering if rain is predicted).
- Device Status: Integrate with smart soil meters to water only when soil moisture drops below a certain threshold.
- Monitoring: The app displays the device status, next watering time, and allows you to review operation logs. Custom alerts can be set for low water levels or other issues.
- Voice Control: If integrated with Alexa or Google Assistant, use commands like "Alexa, turn on [Device name]" or "Hey Google, water my herbs."
6. Maintenance
Regular maintenance ensures optimal performance and extends the lifespan of your watering system.
- Clean Filter: Periodically check and clean the water inlet filter to prevent blockages. Rinse it under running water to remove any accumulated debris.
- Inspect Tubing and Emitters: Check all tubing and emitters for kinks, blockages, or damage. Ensure emitters are securely placed in the soil.
- Water Reservoir: Keep the water reservoir clean and refill it regularly. Avoid letting the pump run dry, as the low-water auto-shutoff feature is a safeguard, not a regular operating mode.
- Solar Panel: Wipe the solar panel clean periodically to ensure maximum light absorption.
- Winter Storage: If storing the system for an extended period or during freezing temperatures, drain all water from the pump and tubing. Store the unit in a dry, frost-free location.
7. Troubleshooting
If you encounter issues with your RAINPOINT Smart Automatic Watering System, refer to the following common problems and solutions:
| Problem | Possible Cause | Solution |
|---|---|---|
| No water flow |
|
|
| Uneven water distribution |
|
|
| App connectivity issues |
|
|
| Pump not charging via solar panel |
|
|
If the problem persists, please contact RAINPOINT customer support for further assistance.
8. Specifications
| Feature | Detail |
|---|---|
| Model Number | B0FMXHDBHK |
| Brand | RAINPOINT |
| Power Source | Solar Powered (with internal Lithium Ion battery) / USB Charging |
| Battery | 1 Lithium Ion battery (included) |
| Product Dimensions (L x W x H) | 16.2 x 15.5 x 11.5 cm (6.38 x 6.10 x 4.53 inches) |
| Item Weight | 0.87 Kilograms (1.92 lbs) |
| Material | Plastic |
| Special Features | Automatic Watering, Leak Resistant, Programmable, Weather Resistant (Solar Panel) |
| WiFi Compatibility | 2.4 GHz ONLY |
| Max Plants Supported | Up to 15 (with additional accessory kit) |
9. Warranty and Support
RAINPOINT products are designed for reliability and performance. For warranty information, technical support, or customer service inquiries, please refer to the contact information provided with your purchase or visit the official RAINPOINT website.
Please retain your proof of purchase for warranty claims.


