
HOVER HEART DZ09
HOVER HEART Electric Dirt Bike DZ09 User Manual
Model: DZ09
1. Introduction
Thank you for choosing the HOVER HEART Electric Dirt Bike DZ09. This manual provides essential information for the safe assembly, operation, and maintenance of your electric dirt bike. Please read it thoroughly before use and retain it for future reference.
Important Safety Information
- Always wear appropriate safety gear, including a helmet, gloves, and protective clothing, when operating the electric dirt bike.
- Familiarize yourself with local laws and regulations regarding electric dirt bike usage, including age and license requirements, before riding.
- Assembly of this product MUST be conducted by an adult.
- No passengers are permitted on the product under any circumstances.
- Ensure the battery is fully charged before your first ride and regularly check its charge level.
- Regularly inspect the brakes, tires, and all moving parts for proper function and wear.
2. Setup and Assembly
Your HOVER HEART Electric Dirt Bike arrives approximately 85% assembled. Follow these steps carefully for final assembly.
2.1 Unboxing and Component Check
Carefully open the packaging and remove all components. Verify that all included parts are present against the packing list.

Image: All components laid out after unboxing, including tools, charger, and bike parts.
Included components: AOEMOE Electric Bikes (85% assembled), Charger, Other assembly parts (left and right pedals, armrest with LCD display, front fender, front wheel, key), Tool Kit, User Manual.
2.2 Rear Shock Assembly
Attach the rear shock absorber to the frame. Ensure all bolts are securely tightened.

Image: Close-up of a hand tightening a bolt on the rear shock absorber.
2.3 Handlebar Installation
Mount the handlebars onto the fork clamps. Adjust to a comfortable riding position and tighten all bolts securely.

Image: A person installing the handlebars onto the electric dirt bike.
2.4 Front Fender and Headlight Installation
Attach the front fender and the LED headlight to the front fork assembly. Connect any necessary wiring for the headlight.
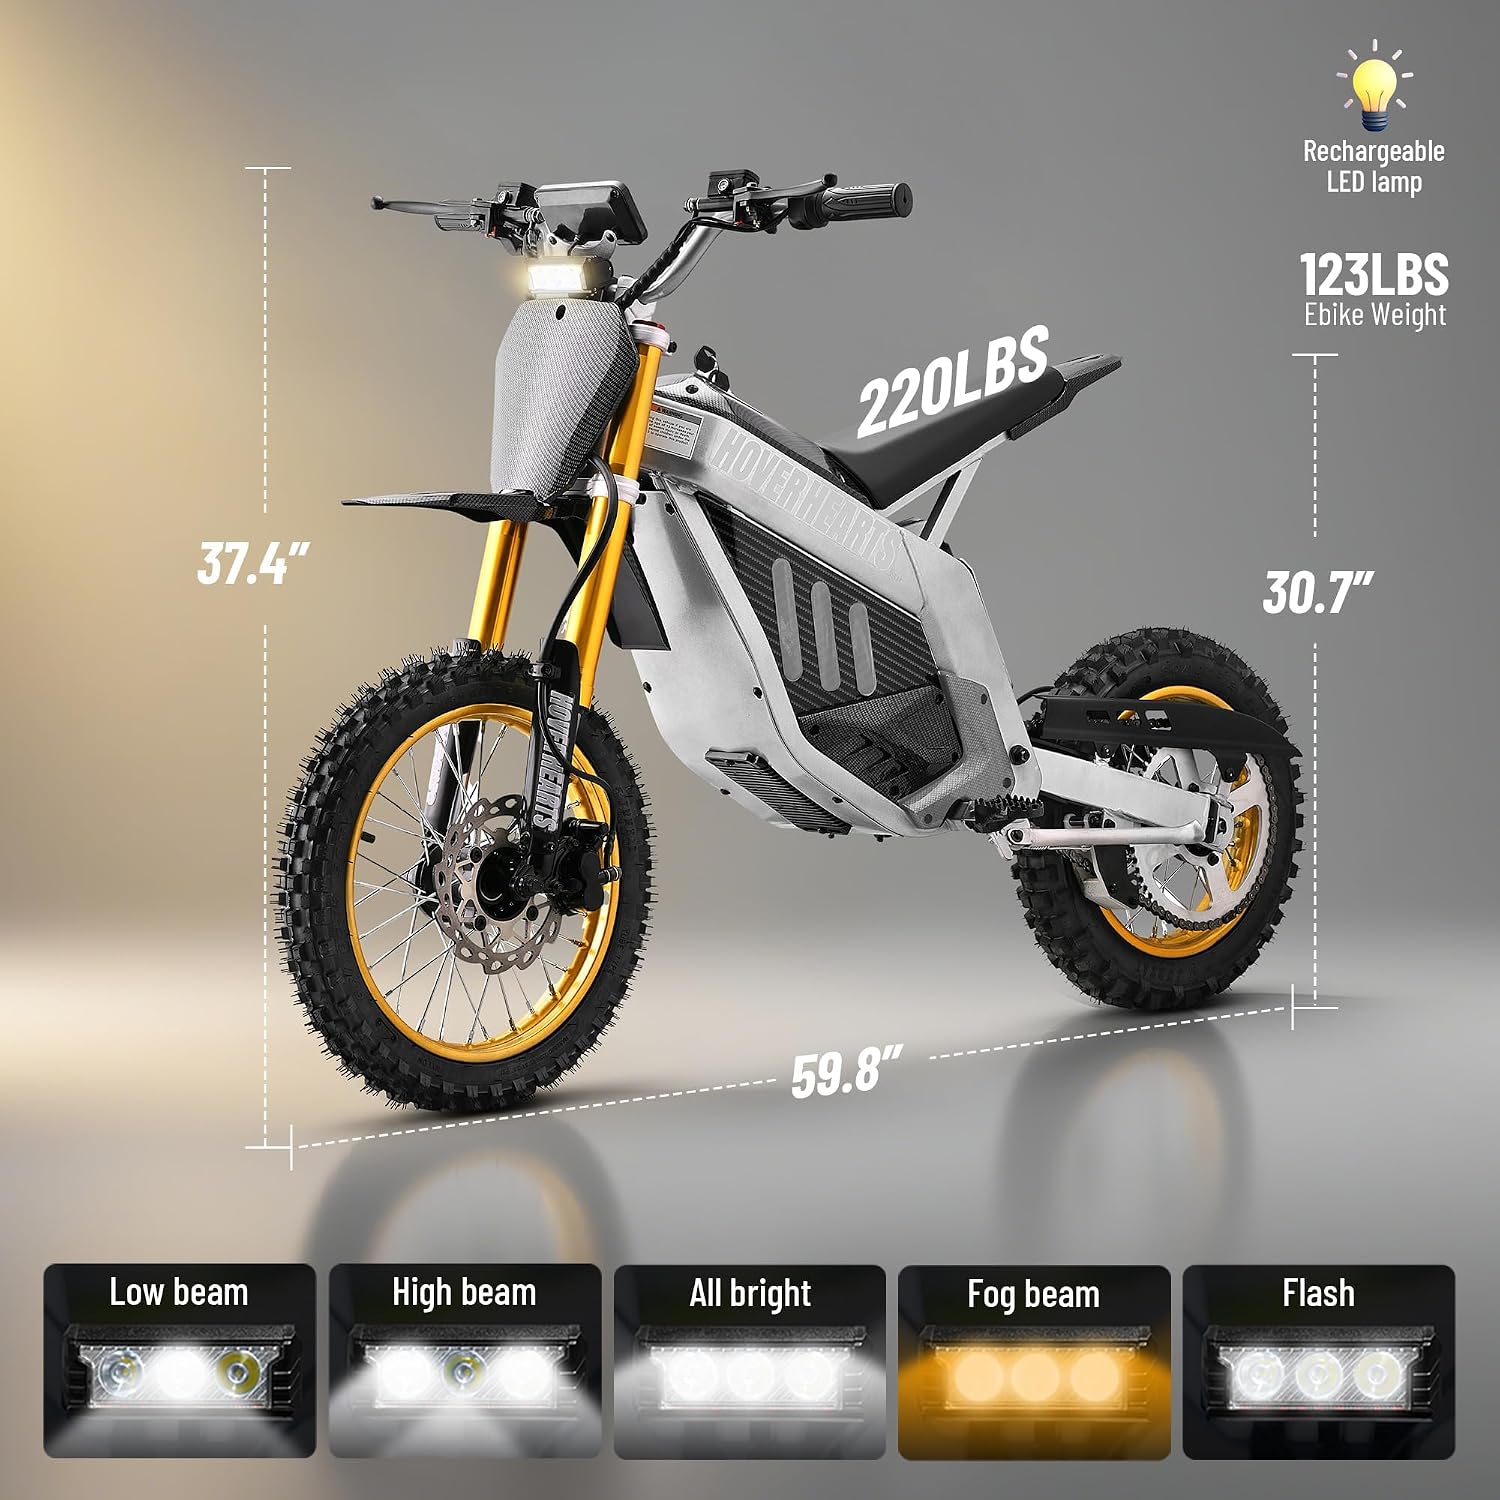
Image: A person attaching the front fender and headlight to the electric dirt bike.
2.5 Front Wheel and Brake Assembly
Install the front wheel. Ensure the disc brake rotor is completely aligned with the brake system and inserted between the two brake pads (after removing any protective spacer). Secure the wheel axle.

Image: A person aligning the front wheel and brake caliper.
2.6 Foot Pegs Installation
Attach the left and right foot pegs to the designated mounting points on the frame.
2.7 Battery Connection and Initial Charge
Connect the battery. Ensure the on/off switch (located on the frame beneath the rear fender) is in the OFF position before charging. The battery will NOT charge if the switch is in the OFF position. Fully charge the battery before first use. A full charge takes approximately 10 hours.

Image: Diagram showing the LFP battery and its advantages.
For a visual guide, please refer to the official installation video:
Video: Detailed installation guide for the HOVER HEART Electric Dirt Bike.
3. Operating Instructions
Learn how to safely and effectively operate your HOVER HEART Electric Dirt Bike.
3.1 Powering On and Off
To power on the bike, ensure the battery switch (under the rear fender) is in the ON position, then use the main power button on the handlebars. To power off, reverse the process.
3.2 Speed Modes
The electric dirt bike features 3 adjustable speed modes:
- 1st Gear: Approximately 18 mph (29 km/h)
- 2nd Gear: Approximately 26 mph (42 km/h)
- 3rd Gear: Approximately 42 mph (67 km/h)
Adjust the speed mode according to terrain and riding experience. Start with lower gears until you are comfortable with the bike's performance.

Image: Graph illustrating the maximum speeds and estimated range for each gear mode.
3.3 Smart LED Display
The clear LED display on the handlebars provides real-time information, including current speed and battery life. Monitor these indicators to ensure safe and informed riding.

Image: A rider on the HOVER HEART Electric Dirt Bike, showcasing its powerful performance.
See the HOVER HEART Electric Dirt Bike in action:
Video: A promotional video showcasing the HOVER HEART Electric Dirt Bike for adults.
Video: Another video highlighting the features and use of the HOVER HEART Electric Dirt Bike.
4. Maintenance
Regular maintenance ensures the longevity and safe operation of your electric dirt bike.
- Tire Pressure: Check tire pressure before each ride. Recommended pressure can be found on the tire sidewall.
- Brakes: Inspect brake levers, cables, and pads regularly. Ensure brakes engage smoothly and effectively. Dual disc brakes provide reliable stopping power.
- Chain: Keep the chain clean and lubricated. Check for proper tension.
- Suspension: The front hydraulic fork suspension and rear hydraulic suspension are designed for optimal off-road control and comfort. Periodically check for leaks or damage.
- Battery Care: Store the bike and battery in a cool, dry place. Avoid fully discharging the battery. Charge regularly, even when not in use, to maintain battery health.
- Cleaning: Clean the bike with a damp cloth. Avoid using high-pressure washers directly on electrical components.
5. Troubleshooting
This section addresses common issues you might encounter with your electric dirt bike.
- Bike does not power on:
- Ensure the battery is charged.
- Check that the on/off switch beneath the rear fender is in the ON position.
- Verify all electrical connections are secure.
- Battery not charging:
- Confirm the on/off switch beneath the rear fender is in the ON position. The battery will NOT charge if it's OFF.
- Check the charger connection to both the bike and the power outlet.
- Ensure the power outlet is functional.
- Brakes feel weak:
- Inspect brake pads for wear and replace if necessary.
- Check brake fluid levels for hydraulic systems.
- Ensure brake cables are properly tensioned (if applicable).
- Unusual noises during operation:
- Check the chain for proper lubrication and tension.
- Inspect wheels and tires for any obstructions or damage.
- If noises persist, discontinue use and contact customer support.
For issues not covered here, please contact HOVER HEART customer support.
6. Specifications
| Feature | Detail |
|---|---|
| Brand | HOVER HEART |
| Model Number | DZ09 |
| Bike Type | Dirt Bike for Adults |
| Age Range (Description) | 13+ |
| Motor | 2000W Brushless (3000W peak power) |
| Max Speed | Approximately 42 mph |
| Battery | 48V 30Ah LFP (1440Wh) |
| Range per Charge | 25-30 miles |
| Charging Time | Approximately 10 hours |
| Frame Material | Alloy Steel |
| Max Load | 220 lbs |
| Front Tire Size | 14" x 2.75" Off-road Pneumatic |
| Rear Tire Size | 12" x 3.0" Off-road Pneumatic |
| Number of Speeds | 3 (18mph, 26mph, 42mph) |
| Brake Style | Dual Disc Brakes |
| Suspension Type | Dual (Front Hydraulic Fork, Rear Hydraulic) |
| Special Features | Digital Display, Multi-Speed |
| Item Weight | 123 Pounds |
| Is Assembly Required | Yes |
7. Warranty Information
The HOVER HEART Electric Dirt Bike DZ09 comes with a 90-day limited warranty. Please retain your proof of purchase for warranty claims. The warranty covers manufacturing defects under normal use conditions. It does not cover damage due to misuse, accidents, unauthorized modifications, or normal wear and tear.
8. Customer Support
If you have any questions, require assistance with assembly, or encounter any issues not covered in this manual, please contact HOVER HEART customer support through the retailer where you purchased the product. Provide your model number (DZ09) and purchase details for faster service.
Ask a question about this manual
Ask about setup, troubleshooting, compatibility, parts, safety, or missing instructions. Manuals+ will review the question and use this page’s manual context to help answer it.