1. Important Safety Information
Read all instructions carefully before using this device. Failure to follow these instructions may result in product malfunction, property damage, or personal injury. Keep this manual for future reference.
- This device detects carbon monoxide (CO) and combustible gases (natural gas, propane, methane). It is not designed to detect smoke or other gases.
- Do not paint the device. Paint can clog the vents and interfere with sensor operation.
- Do not block the ventilation openings on the device.
- Test the alarm regularly as described in the "Operating Instructions" section.
- In case of an alarm, evacuate the premises immediately and contact emergency services.
- The device requires a standard AC power outlet to operate. Ensure the outlet is functioning correctly.
2. Product Overview
The MOES 4-in-1 Gas & Carbon Monoxide Detector is a plug-in device designed to monitor your environment for dangerous levels of carbon monoxide (CO) and combustible gases. It also provides real-time temperature and humidity readings. This device features a clear display and an audible alarm system to alert you to potential hazards.

Image: Overview of the MOES 4-in-1 Gas & Carbon Monoxide Detector highlighting its multiple functions.
Key Features:
- 4-Stage Gas & CO Alerts: Provides precise risk awareness with Green (Safe), Yellow (Caution), Orange (Warning), and Red (Danger) alert levels based on CO and gas concentrations.
- Dynamic Alarm System: Features an 85dB alarm that increases in sound and frequency as hazard levels rise, complemented by bright LED indicators.
- Plug & Play Installation: No wiring or complex setup required; simply plug into a standard electrical outlet.
- Built-In Temperature & Humidity Monitoring: Continuously displays indoor temperature (14℉–122℉) and humidity (0–95% RH).
- Dual Sensor Protection: Combines carbon monoxide and flammable gas (LPG/Natural Gas) sensors for comprehensive monitoring.
- 2-inch HD Color Screen Display: Clearly visible display for all data.
3. Setup and Installation
The MOES 4-in-1 Detector is designed for easy, hassle-free installation.
- Unpack the Device: Carefully remove the detector from its packaging.
- Choose a Location:
- Install in areas where CO or gas leaks are possible, such as kitchens, boiler rooms, near gas appliances, or fireplaces.
- For CO detection, place the detector at a height where it can effectively detect CO, typically at eye level or higher, but not directly above heat sources.
- For gas detection, if detecting natural gas (lighter than air), install near the ceiling. If detecting propane (heavier than air), install closer to the floor. For general protection, a mid-wall position is often suitable.
- Avoid placing near windows, doors, or ventilation fans where drafts might interfere with readings.
- Avoid placing in direct sunlight or areas with extreme temperature fluctuations.
- Plug In: Simply plug the device into a standard 120V AC electrical outlet. The device will power on automatically.
- Initial Warm-up: The device may undergo a brief warm-up period upon first power-up. During this time, the display may show a countdown or initialization sequence.
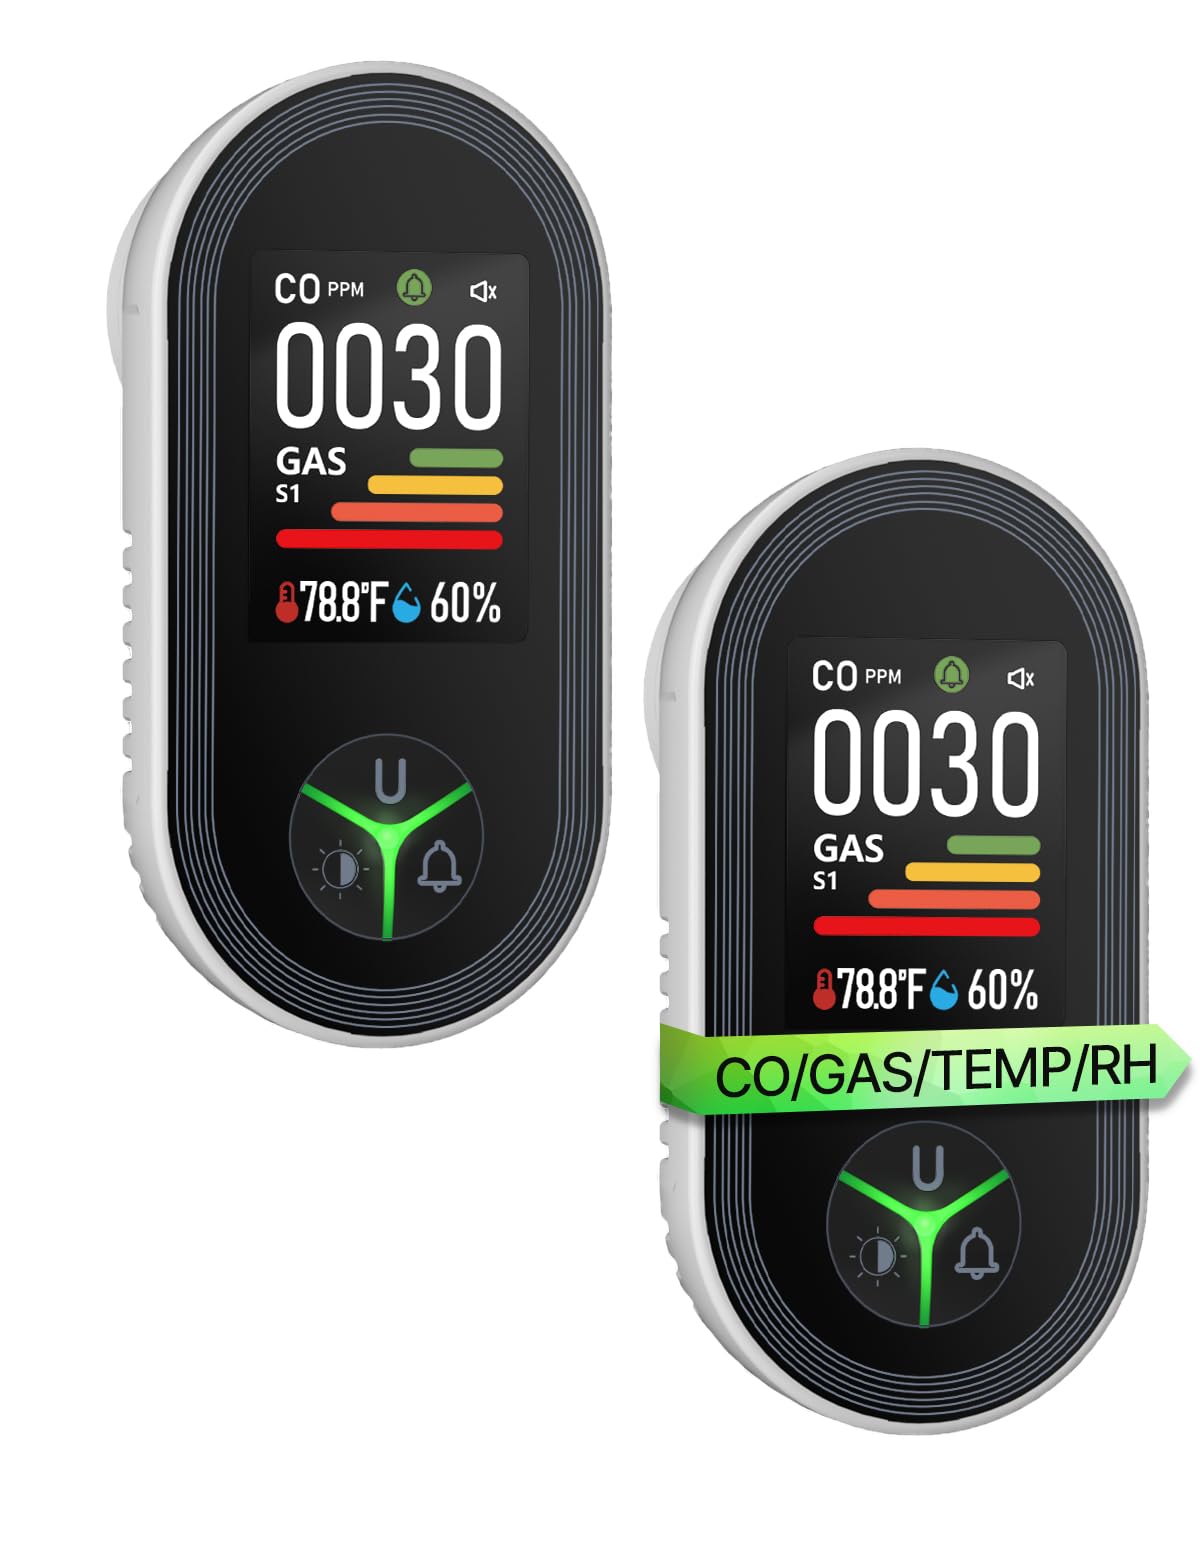
Image: The MOES detector plugged into a wall outlet, demonstrating its plug-and-play design.
Adjusting the Plug (if applicable):
The device features a disassembling button to adjust the plug orientation for different outlets.
- Press the disassembling button located on the side of the device.
- Twist the plug to the right or left to change its orientation.
- Release the button to lock the plug in the desired position.

Image: Detailed diagram of the detector, showing the plug adjustment mechanism and various display indicators.
4. Operating Instructions
Display Information:
The 2-inch HD color screen displays real-time information:
- CO Unit: PPM (Parts Per Million)
- CO Value: Current Carbon Monoxide concentration.
- GAS Sensitivity: Indication of gas detection level (S1, S2, etc.).
- GAS Level: Current combustible gas concentration level.
- Temp Value: Real-time ambient temperature (in Celsius or Fahrenheit).
- Hum Value: Real-time ambient humidity (in % RH).
- Alert Icon: Visual indicator for alarm status.
- Sound Icon: Indicates alarm sound status.
- CO Indicator: Visual bar for CO levels.
- Screen Brightness Keys: Controls screen illumination.

Image: The clear 2-inch HD color screen display of the MOES detector, showing CO, Gas, Temperature, and Humidity readings.
Button Functions:
The device features a central button with multiple functions based on press duration.
- Short Press (U button): Initiates a self-test of the alarm system.
- Long Press (U button): Toggles the temperature unit between Celsius (℃) and Fahrenheit (℉).
- Short Press (Bell icon): Toggles the alarm sound on or off (mute/unmute).
- Long Press (Bell icon): Flips the screen display 180 degrees for flexible viewing orientation.
- Screen Brightness Keys (Light icon):
- First Gear: 100% Brightness.
- Second Gear: 50% Brightness.
- Third Gear: 0% Brightness (Screen is off, breathing light is turned off).

Image: Explanation of button functions, including short and long presses for various settings.

Image: Demonstration of the screen inversion feature, allowing the display to be flipped 180 degrees.
Alert Levels and Alarm Behavior:
The detector provides four distinct alert levels, each with specific CO and gas concentration thresholds, visual indicators, and alarm responses.
| Level | CO Concentration | Gas Concentration | Visual Indicator | Audible Alarm |
|---|---|---|---|---|
| Green (Safe) | < 50ppm | < 5% LEL (Lower Explosive Limit) | Green indicator light | No audible alarm |
| Yellow (Caution) | 51–100ppm | 5–8% LEL | Yellow indicator light flashes | Slowly audible alarm |
| Orange (Warning) | 101–150ppm | 8–15% LEL | Orange indicator light flashes | Fast audible alarm |
| Red (Danger) | 150–999ppm | >15% LEL | Red indicator light flashes | Very fast audible alarm |

Image: Visual representation of the four alert stages for CO and gas detection.

Image: Flowchart detailing the four levels of visual and audible alarms.
5. Usage Scenarios
The MOES 4-in-1 Detector is suitable for various indoor environments where carbon monoxide or combustible gases may be present.
- Fireplace Areas: To detect CO from burning wood or other fuels.
- Kitchens: To detect natural gas or propane leaks from stoves and ovens.
- Garages: To monitor for CO from vehicle exhaust.
- Boiler Rooms/Utility Rooms: Near water heaters, furnaces, or other gas-powered appliances.
- RV/Camping: For portable protection in recreational vehicles (ensure proper power supply).
- Smoking Areas: While the device is not a smoke detector, it can detect some byproducts of combustion.

Image: The detector monitoring for gas near a stove and for CO near a fireplace.
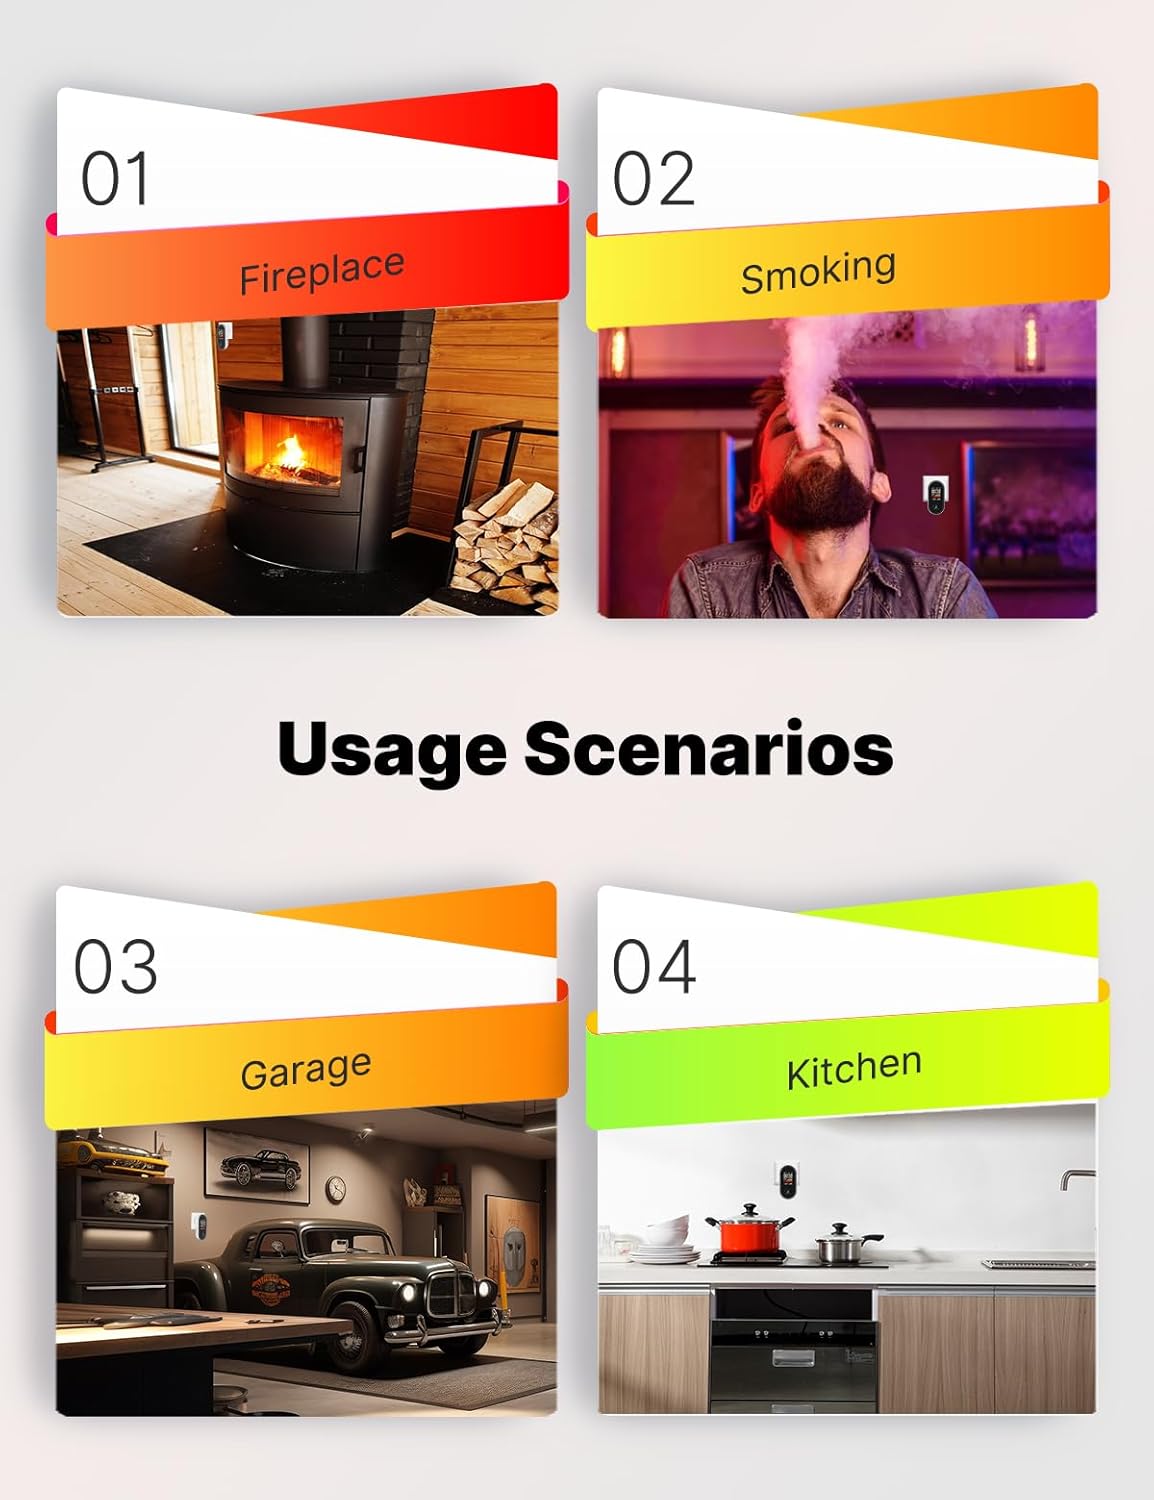
Image: Examples of suitable locations for the detector, including kitchens, fireplaces, and garages.

Image: A broader view of potential installation sites for comprehensive safety.
6. Maintenance
Regular maintenance ensures the optimal performance and longevity of your MOES detector.
- Monthly Test: Perform a self-test at least once a month by short-pressing the 'U' button. The alarm should sound, and indicators should light up.
- Cleaning: Gently wipe the exterior of the detector with a soft, damp cloth. Do not use cleaning agents, solvents, or abrasive materials. Ensure the ventilation openings are free from dust and debris.
- Avoid Obstruction: Ensure that nothing is blocking the sensor openings or the alarm speaker.
- Power Supply: Ensure the device remains continuously plugged into a functioning power outlet.
7. Troubleshooting
If you encounter issues with your MOES detector, refer to the following common troubleshooting steps:
- Alarm Sounds Without Apparent Hazard:
- False Alarm: Ensure there are no temporary sources of CO (e.g., car exhaust from an attached garage, fireplace smoke) or gas (e.g., pilot light issues, strong cleaning fumes) that could trigger the sensor.
- Sensor Contamination: Strong chemicals, paint fumes, or excessive dust can sometimes trigger the alarm. Ventilate the area.
- Relocate: If false alarms persist, try relocating the detector to a different area.
- No Display/Device Not Powering On:
- Check Power Outlet: Ensure the outlet is live and functioning. Test with another appliance.
- Re-plug Device: Unplug and re-plug the detector firmly into the outlet.
- Screen Brightness: Check if the screen brightness is set to 0% (off). Adjust using the brightness keys.
- Inaccurate Temperature/Humidity Readings:
- Environmental Factors: Ensure the detector is not in direct sunlight, near heat sources, or in an area with high airflow that could affect readings.
- Calibration: While the device is factory calibrated, significant discrepancies might indicate a sensor issue.
- Self-Test Fails: If the alarm does not sound during a self-test, the device may be faulty. Do not rely on a faulty detector; replace it immediately.
If issues persist after attempting these steps, contact MOES customer support for further assistance.
8. Specifications
| Feature | Detail |
|---|---|
| Model Number | NA503F |
| Detection Gases | Carbon Monoxide (CO), Combustible Gases (Natural Gas, Propane, Methane) |
| Power Source | AC (Plug-in) |
| Alarm Loudness | 85dB |
| Temperature Range | 14℉–122℉ (-10℃–50℃) |
| Humidity Range | 0–95% RH (non-condensing) |
| Item Weight | 3.42 ounces (97 Grams) |
| Package Dimensions | 4.49 x 4.25 x 2.24 inches |
| Manufacturer | WENZHOU NOVA NEW ENERGY CO.,LTD |
9. Warranty and Support
For warranty information and customer support, please refer to the documentation included with your purchase or visit the official MOES website. Keep your purchase receipt as proof of purchase.
MOES Customer Support: Visit the MOES Store on Amazon


